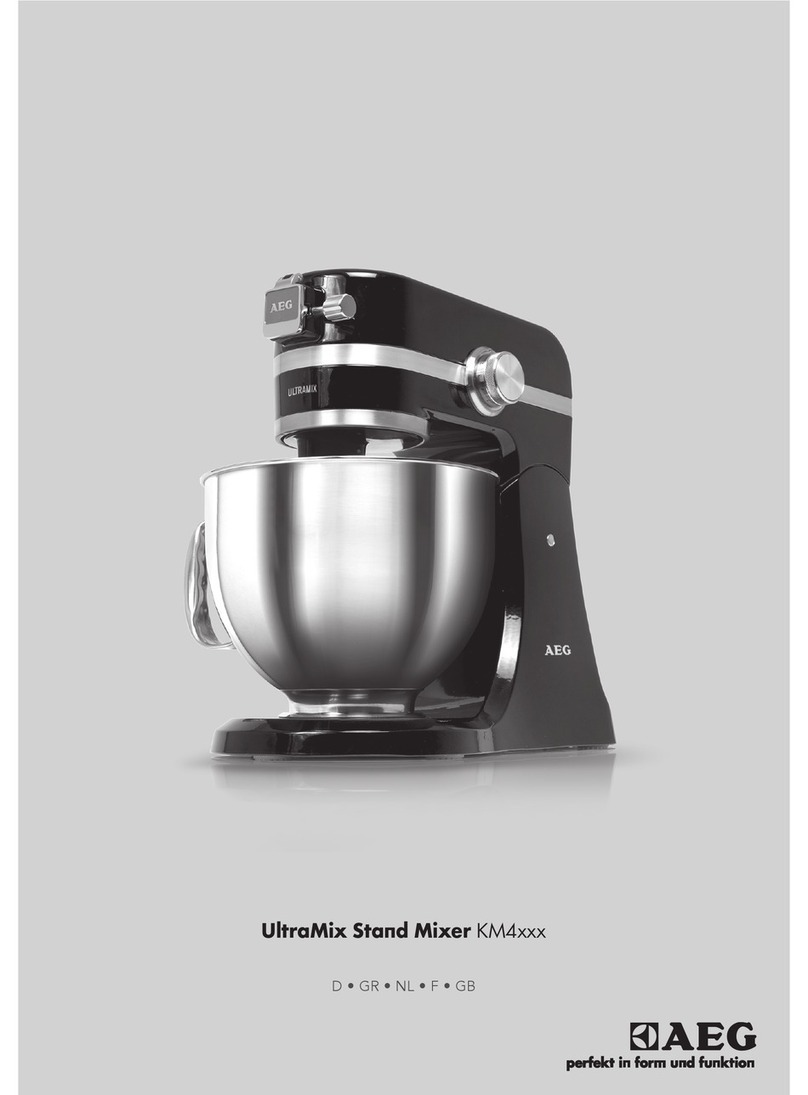
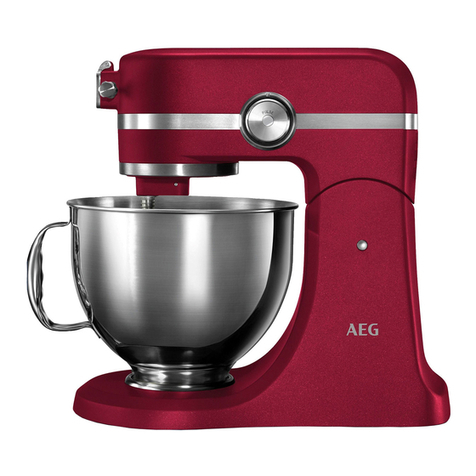
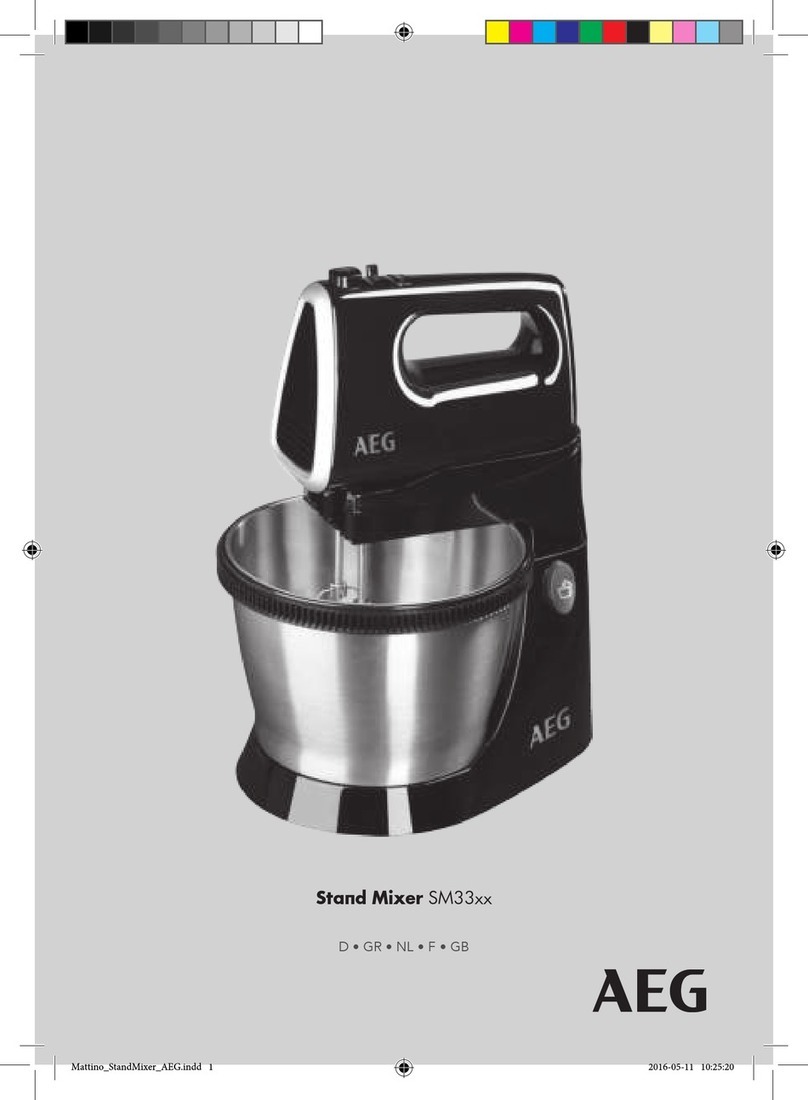
AEG SM33 Series User manual

INSTRUCTION BOOK
GB INSTRUCTION BOOK
DE GEBRAUCHSANWEISUNG
AR
ES LIBRO DE INSTRUCCIONES
FR MODE D’EMPLOI
GR
IT ISTRUZIONI
NL GEBRUIKSAANWIJZING
PT MANUAL DE INSTRUÇÕES
SM33xx
Stand Mixer

2www.aeg.com
K
E
G
D
H
A
C
B
F
J
I
1 2
64 5
3

3www.aeg.com
2.5 l
max
7 8
12
15
10
13
16
11
14
9

4www.aeg.com
Visit our website to:
Get usage advice, brochures, trouble shooter, service information:
www.aeg.com/webselfservice
Register your product for better service:
www.registeraeg.com
Buy accessories and consumables for your appliance:
www.aeg.com/shop
CONTENTS
ENGLISH 6
DEUTSCH 10
15
ESPAÑOL 18
FRANÇAIS 22
26
ITALIANO 30
NEDERLANDS 34
PORTUGUÊS 38
FOR PERFECT RESULTS
Thank you for choosing this AEG product. We have created it to give you impeccable performance for
many years, with innovative technologies that help make life simpler features you might not nd on ordi-
nary appliances. Please spend a few minutes reading to get the very best from it.
CUSTOMER CARE AND SERVICE
When contacting Service, ensure that you have the following data available:
- Model Number
- PNC number
- Serial number
The information can be found on the rating plate.

5www.aeg.com

6www.aeg.com
ENGLISH
Thank you for choosing an AEG product. In order to ensure the best results, always use original AEG accessories and
spare parts. They have been designed especially for your product. This product is designed with the environment in
mind. All plastic parts are marked for recycling purposes.
COMPONENTS
A. Accessory release button
B. Speed range selector switch
C. Turbo button
D. Mixer
E. Raise/lower button
F. Lock release
G. Processor stand
H. Steel mixing bowl
I. Whisks
J. Dough hooks
K. Non-slip feet
Picture page 2-3
BEFORE FIRST USE
1 Before using your appliance, remove all packing material, plastic, labels, stickers or tags that may be attached to the
motor base, bowls or attachments.
Warning! Never immerse the housing, plug, or cord in water or any other uid.
Caution! Switch o the appliance and disconnect from supply before changing accessories or approaching parts that
move in use.
2 Wash all parts, except for the motor base, in warm soapy water. Dry each part thoroughly before use.
Whisks and dough hooks can be cleaned with a brush under running water or in the dishwasher.
3 The housing should only be cleaned with a soft damp cloth, then dried with a cloth.
Note: Do not use abrasive cleansers or scouring pads to clean the surfaces of your appliance.
GETTING STARTED
4 Fitting the mixer to the processor stand. Before tting or removing the mixer, switch o the mixer (by moving the
speed selector all the way to the left) and remove the plug from the mains socket. To t, push the mixer on to the
processor stand and press down to lock.
5 Removing the mixer from the processor stand. To remove, press the lock release and pull the mixer upwards.
6 Raising/lowering the mixer. Ensure that the mixer is switched o before raising/lowering! Press the raise/lower but-
ton and swing the mixer up or down, until it clicks in place.
7 Attaching/removing the mixing bowl. Place the bowl on the plate. Make sure that the bottom of the bowl closes
around the plate. It is easier to attach and remove the bowl or the attachments when the mixer is raised.
8 Push whisks or dough hooks into accessory slots underneath the mixer, until they click into place.
9 Before removing whisks or hooks, unplug the handmixer. Then hold the device rmly with one hand, while pressing
the eject button.
Note: The whisks or hooks can only be removed when the speed selector is positioned all the way to the left.
OPERATING INSTRUCTIONS
10 Processing in the mixing bowl must not exceed 2.5 litres. For mixing a heavy dough (fx. pizza, bread) above 1 kg
up to 1.5 kg, we recommend to process only 1 portion and let the mixer cool down to room temperature before start-
ing the next portion or process. This will protect your product from damages of overheating.
11 Operating the mixer. To start the mixer, move the speed selector from left to right. Both the whisks/dough hooks and
the bowl will rotate. Always start mixing at a low speed, then increase.
Warning! Due to risk of injury, never touch running whisks or hooks with either tools or ngers.
12 When the Turbo button is pressed and held during operation, the mixer operates at its maximum speed. Note: Whisks
are not suitable for processing sti mixtures. For heavy dough, such as pie and bread dough, use the dough hooks.
7www.aeg.com
GB
DE
AR
ES
FR
GR
IT
NL
PT
CLEANING AND CARE
13 Switch the appliance o, remove the plug from the wall socket and wait until the tools have stopped completely.
Warning! Never immerse the housing, plug, or cord in water or any other uid.
14 Wash all parts, except for the motor base, in warm soapy water. Dry each part thoroughly before use.
Whisks and dough hooks can be cleaned with a brush under running water or in the dishwasher.
15 The housing should only be cleaned with a soft damp cloth, then dried with a cloth.
Note: Do not use abrasive cleansers or scouring pads to clean the surfaces of your appliance.
16 Before storage, remove the plug from the power outlet. Ensure the appliance is clean and completely dry.
Store the dough hooks and whisks in the mixing bowl located on the processor base. This will protect them from
damage.
Enjoy your new AEG product!
SAFETY ADVICE
Read the following instruction carefully before using machine for the rst time.
• Appliances can be used by persons with reduced physical, sensory or mental
capabilities or lack of experience and knowledge if they have been given supervision
or instruction concerning use of the appliance in a safe way and if they understand
the hazards involved.
• Children should be supervised to ensure that they do not play with the appliance.
• Never use or pick up the appliance if
– the supply cord is damaged,
– the housing is damaged.
• If the appliance or the supply cord is damaged, it must be replaced by the
manufacturer, its service agent or similarly qualied person, in order to avoid hazard.
• Always disconnect the appliance from the supply if it is left unattended and before
assembling, disassembling or cleaning.
• Care shall be taken when handling the tools, emptying the bowl and during cleaning.
• Switch o the appliance and disconnect from supply before changing accessories or
approaching parts that move in use.
• Do not immerse the appliance in water or any other liquid.
• This appliance is intended for domestic use only. The manufacturer cannot accept
any liability for possible damage caused by improper or incorrect use.

8www.aeg.com
RECIPES
RECIPE LIST OF INGREDIENTS
Yeast dough (Pizza dough)
Max quantities
Wheat our 950 gr
Water 600 ml
Oil 100 ml
Salt 3 tsp
Sugar 2 tsp
Dry Yeast 1 tbs
1. Place yeast, sugar and warm water in the stand mixer bowl of the machine, and let it stand until creamy.
2. Add our, salt and oil to the mixture.
3. Mix at lower speed for 30 sec.
4. When the dough is formed homogeneously, increase speed to speed 5 for 4 min and 30 sec.
5. The dough is ready when it does not stick to the side of the bowl, neither to the tool.
6. Spread the dough with a rolling pin to the desired thickness on a lightly oured surface.
7. Place the dough in a lightly greased pan and spread with toppings.
SETTINGS AND TROUBLESHOOTING
SETTING SPEED
Kneading, Mixing Start with low speed, then increase to high speed.
Folding in Medium speed.
Stirring Start with medium speed, then increase to high speed.
Whisking, Frothing Medium or high speed.
Start processing at low speed to avoid powdery foods and liquids spraying out.
PROBLEM POSSIBLE CAUSE SOLUTION
The motor slows down during
operation.
Amount of dough may exceed
maximum capacity.
Remove half and process in two batches.
Dough may be too wet, it sticks onto
the side of the bowl.
Add more our, 1 tablespoon at a time
until the motor speeds up. Process until
dough cleans the side of the bowl.
The motor does not work. The appliance is not connected to the
mains.
Make sure to plug in the appliance
before operation.
The appliance vibrates/moves
during operation.
The rubber feet are wet. Make sure the rubber feet at the bottom
of the unit are clean and dry.
Too high setting on the speed selector. Lower the speed setting.
It is normal for heavy loads (e.g heavy
dough, cheese).
Remove half and process in two batches.
If the appliance is still not working, contact the customer service.

9www.aeg.com
GB
DE
AR
ES
FR
GR
IT
NL
PT
DISPOSAL
This symbol on the product indicates that this product contains a battery which shall not be disposed with
normal household waste.
This symbol on the product or on its packaging indicates that the product may not be treated as household
waste. To recycle your product, please take it to an oicial collection point or to an AEG service center that
can remove and recycle the battery and electric parts in a safe and professional way. Follow your country’s
rules for the separate collection of electrical products and rechargeable batteries.
AEG reserves the right to change products, information and specications without notice.

10www.aeg.com
DEUTSCH
Vielen Dank, dass Sie sich für dieses AEG-Produkt entschieden haben. Um bestmögliche Ergebnisse zu erzielen, sollten Sie
ausschließlich Originalzubehör und Originalersatzteile von AEG verwenden. Diese wurden speziell für Ihr Produkt entwickelt
wurden. Dieses Produkt wurde mit Rücksicht auf die Umwelt hergestellt. Alle Kunststoteile sind für Recyclingzwecke markiert.
TEILE
A. Auswurftaste
B. Schalter Geschwindigkeitsbereich
C. Taste Turbo
D. Mixer
E. Schwenktaste
F. Entriegelungstaste
G. Rührständer
H. Rührschüssel aus Stahl
I. Schlagbesen
J. Knethaken
K. Rutschfeste Füße
Abbildung Seite 2-3
VOR DER ERSTEN INBETRIEBNAHME
1 Entfernen Sie vor der Verwendung Ihres Geräts das gesamte Verpackungsmaterial, Kunststoe, Schilder, Aufkle-
ber oder Etiketten, die am Motorblock, an den Schalen oder Aufsätzen angebracht sind.
Warnung! Tauchen Sie niemals das Gehäuse, den Netzstecker oder das Netzkabel in Wasser oder andere Flüs-
sigkeiten.
Vorsicht! Schalten Sie das Gerät aus und trennen Sie es von der Stromversorgung, bevor Sie Zubehör wechseln oder
sich Teilen nähern, die sich bei Gebrauch bewegen.
2 Reinigen Sie alle Teile mit Ausnahme des Motorblocks mit warmem Seifenwasser. Trocknen Sie alle Teile vor dem
nächsten Gebrauch sorgfältig.
Schlagbesen und Knethaken lassen sich mit einer Bürste unter ießendem Wasser oder im Geschirrspüler
reinigen.
3 Das Gehäuse sollte nur mit einem weichen feuchten Tuch gereinigt und anschließend mit einem Tuch abget-
rocknet werden. Hinweis: Verwenden Sie zur Reinigung der Geräteoberächen keine Scheuermittel oder Metalls-
chwämme.
ERSTE SCHRITTE
4 Einsetzen des Mixers in das Basisgerät. Schalten Sie den Mixer durch Drehen des Geschwindigkeitsreglers auf den
linken Anschlag aus und ziehen Sie den Stecker aus der Steckdose, bevor Sie die Haken einsetzen oder entfernen.
Zum Aufsetzen den Mixer auf den Rührständer aufsetzen und zum Verriegeln nach unten drücken.
5 Entfernen des Mixers aus dem Basisgerät. Zum Abnehmen die Entriegelungstaste drücken und den Mixer nach
oben abnehmen.
6 Mixer nach oben/nach unten schwenken. Vor dem nach oben Schwenken muss der Mixer auf jeden Fall ausge-
schaltet werden! Schwenktaste drücken und Mixer nach oben bzw. unten Schwenken, bis er einrastet.
7 Rührschüssel aufsetzen/abnehmen. Stellen Sie die Schüssel auf die Ablage. Achten Sie darauf, dass der Schüs-
selboden die Ablage umschließt. Es ist einfacher die Schüssel oder die Haken einzusetzen oder zu entfernen, wenn
der Mixer angehoben ist.
8 Ziehen Sie vor dem Herausnehmen der Schlagbesen oder Haken den Netzstecker des Handmixers. Anschließend
halten Sie das Gerät mit einer Hand fest und drücken gleichzeitig die Auswurftaste.
9 Ziehen Sie vor dem Herausnehmen der Schlagbesen oder Haken den Netzstecker des Handmixers. Anschließend
halten Sie das Gerät mit einer Hand fest und drücken gleichzeitig die Auswurftaste.
Hinweis: Die Rühr- und Knethaken können nur entfernt werden, wenn sich der Geschwindigkeitsregler am linken
Anschlag bendet.
BEDIENUNGSANLEITUNG
10 Die Menge in der Rührschüssel darf 2,5 Liter nicht überschreiten. Für die Zubereitung eines schweren Teigs (z.
B. Pizza- oder Brotteig) über 1 kg bis zu 1,5 kg empfehlen wir die Zubereitung von je nur einer Portion, und vor der
Zubereitung der nächsten Portion, sollte der Mixer auf Raumtemperatur abkühlen. Dieser Vorgang schützt Ihr Gerät
von Beschädigung bzw. Überhitzung.

11www.aeg.com
GB
DE
AR
ES
FR
GR
IT
NL
PT
11 Bedienen des Mixers. Drehen Sie den Geschwindigkeitsregler von links nach rechts, um den Mixer einzuschalten.
Die Rühr-/Knethaken und die Schüssel drehen sich. Beginnen Sie den Mixvorgang immer mit geringer Drehzahl und
erhöhen Sie diese später.
Warnung! Berühren Sie wegen Verletzungsgefahr niemals die drehenden Schlagbesen oder Haken mit Werkzeugen
oder den Fingern.
12 Solange die Turbo im Betrieb gedrückt gehalten wird, arbeitet der Mixer mit seiner maximalen Geschwindigkeit. Die
Schlagbesen sind nicht für die Verabeitung von festen Gemengen geeignet. Verwenden Sie für schwere Teige,
solche wie Kuchenund Brotteig, die Knethaken.
REINIGUNG UND PFLEGE
13 Schalten Sie das Gerät aus, ziehen Sie den Stecker aus der Steckdose und warten Sie, bis die Einsätze zum Stillstand
gekommen sind.
Warnung! Tauchen Sie niemals das Gehäuse, den Netzstecker oder das Netzkabel in Wasser oder andere Flüs-
sigkeiten.
14 Reinigen Sie alle Teile mit Ausnahme des Motorblocks mit warmem Seifenwasser. Trocknen Sie alle Teile vor dem
nächsten Gebrauch sorgfältig.
Schlagbesen und Knethaken lassen sich mit einer Bürste unter ießendem Wasser oder im Geschirrspüler
reinigen.
15 Das Gehäuse sollte nur mit einem weichen feuchten Tuch gereinigt und anschließend mit einem Tuch abgetrock-
net werden.
Hinweis: Verwenden Sie zur Reinigung der Geräteoberächen keine Scheuermittel oder Metallschwämme.
16 Vor Lagerung des Geräts den Netzstecker aus der Steckdose ziehen. Sicherstellen, dass das Gerät sauber und
absolut trocken ist.
Bewahren Sie Knethaken und Schlagbesen in der auf den Rührständer aufgesetzten Rührschüssel auf. So sind sie
vor Beschädigung geschützt.
Wir wünschen Ihnen viel Spaß mit Ihrem neuen Produkt von AEG!
SICHERHEITSHINWEISE
Lesen Sie die nachfolgenden Anweisungen sorgfältig durch, bevor Sie das Gerät zum
ersten Mal in Betrieb nehmen.
• Die Geräte können von Personen mit eingeschränkten physischen, sensorischen oder
geistigen Fähigkeiten oder mit mangelnder Erfahrung und/oder mangelndem Wissen
nur dann verwendet werden, wenn sie durch eine für ihre Sicherheit zuständige
Person beaufsichtigt werden oder in die sichere Verwendung des Geräts eingewiesen
wurden und die mit dem Gerät verbundenen Gefahren verstanden haben.
• Kinder müssen beaufsichtigt werden, um zu gewährleisten, dass diese mit dem Gerät
nicht spielen.
• Das Gerät niemals benutzen oder handhaben, wenn
– das Netzkabel beschädigt ist,
– das Gehäuse beschädigt ist.
• Ein beschädigtes Gerät oder Netzkabel muss vom Hersteller, von seinem Service-
Vertreter oder einer entsprechend qualizierten Person instandgesetzt werden, um
Gefahren zu vermeiden.
• Trennen Sie das Gerät bei Abwesenheit sowie vor dem Zusammensetzen bzw.
Auseinanderbauen oder zum Reinigen immer vom Stromnetz.
• Gehen Sie beim Umgang mit den Zubehörteilen, beim Entleeren des Behälters und

12www.aeg.com
während der Reinigung vorsichtig vor.
• Schalten Sie das Gerät aus und trennen Sie es von der Stromversorgung, bevor Sie
Zubehör wechseln oder sich Teilen nähern, die sich bei Gebrauch bewegen.
• Tauchen Sie das Gerät nicht in Wasser oder andere Flüssigkeiten.
• Das Gerät ist nur für den Gebrauch im Haushalt bestimmt. Der Hersteller übernimmt
keine Haftung für mögliche Schäden, die durch unsachgemäße oder fehlerhafte
Benutzung verursacht wurden.
REZEPTE
REZEPTE ZUTATENLISTE
Hefeteig (Pizzateig)
Höchstmengen
Weizenmehl 950 g
Wasser 600 ml
Öl 100 ml
Salz 3 TL
Zucker 2 TL
Trockenhefe 1 EL
1. Geben Sie Hefe, Zucker und warmes Wasser in die Schüssel des Standmixers, und lassen Sie diese Mischung
stehen, bis sie cremig ist.
2. Geben Sie Mehl, Salz und Öl dazu.
3. 30 Sek. bei niedriger Geschwindigkeit verrühren.
4. Erhöhen Sie die Geschwindigkeit auf Stufe 5 für 4 Min. und 30 Sek., wenn der Teig homogen ist.
5. Der Teig ist fertig, wenn er nicht seitlich an der Schüssel und nicht am Zubehör haftet.
6. Rollen Sie den Teig mit einer Teigrolle auf einer dünn mit Mehl bestreuten Fläche aus, bis er die gewünschte Dicke hat.
7. Legen Sie den Teig auf ein leicht eingefettetes Blech und verteilen Sie den Belag darauf.
EINSTELLUNGEN UND FEHLERSUCHE
EINSTELLUNG GESCHWINDIGKEIT
Kneten, mischen Beginnen Sie mit einer langsamen Geschwindigkeit und erhöhen Sie sie dann.
Unterziehen Mittlere Geschwindigkeit.
Rühren Beginnen Sie mit mittlerer Geschwindigkeit und erhöhen Sie sie dann.
Schaumig schlagen Mittlere oder hohe Geschwindigkeit.
Beginnen Sie die Verarbeitung mit niedriger Geschwindigkeit, um das Aufstäuben pulvriger Substanzen und das
Verspritzen von Flüssigkeiten zu vermeiden.

13www.aeg.com
GB
DE
AR
ES
FR
GR
IT
NL
PT
SYMPTOM URSACHE ABHILFE
Der Motor verlangsamt sich
während des Betriebs.
Die Teigmenge überschreitet
möglicherweise die maximale Füllmenge.
Den Teig entfernen und in zwei
Portionen aufteilen.
Der Teig ist möglicherweise zu feucht
und klebt daher am Schüsselrand.
Mehr Mehl hinzugeben, jeweils 1 Teelöel
bis der Motor wieder beschleunigt.
Solange weiterverarbeiten, bis sich der
Teig vom Rand der Schüssel gelöst hat.
Der Motor funktioniert nicht. Das Gerät ist nicht an einer Steckdose
angeschlossen.
Das Gerät vor Betrieb an eine Steckdose
anschließen.
Das Gerät vibriert/bewegt sich
während des Betriebs.
Die Gummifüße sind nass.
Sicherstellen, dass die Gummifüße auf der
Geräteunterseite sauber und trocken sind.
Zu hohe Einstellung des
Geschwindigkeitswählers.
Stellen Sie den Geschwindigkeitswähler
niedriger ein.
Dies ist normal bei schweren
Lebensmitteln (z. B. Teig oder Käse).
Lebensmittel entfernen und in zwei
Portionen aufteilen.
Funktioniert das Gerät immer noch nicht, wenden Sie sich an den Kundendienst.
ENTSORGUNG
Dieses Symbol auf dem Produkt zeigt an, dass das Gerät eine Batterie enthält, die nicht im normaler
Hausmüll entsorgt werden darf.
Das Symbol auf dem Produkt oder der Verpackung weist das Gerät als ein Produkt aus, das nicht in den
Hausmüll gehört. Bitte entsorgen Sie dieses Gerät an einer entsprechenden Sammelstelle oder bringen
es zum Kundendienst von AEG, bei dem Batterie als auch elektrische Bauteile sicher und professionell
entsorgt werden. Beachten Sie die jeweiligen lokalen Vorschriften für die Entsorgung von Elektrogeräten und
wiederauadbaren Batterien.
AEG behält sich das Recht vor, Produkte, Informationen und Spezikationen zu verändern ohne vorherige Ankündigung.

14www.aeg.com
12
13
14
15
16
.AEG
•
•
•
–
–
•
•
•
•
•
•

15www.aeg.com
GB
DE
AR
ES
FR
GR
IT
NL
PT
AEG AEG
.G
.H
.I
.J
.K
.A
.B
.C
.D
.E
.F
3-2
1
2
3
4
5
6
7
8
9
101.512.5
11

16www.aeg.com
AEG

17www.aeg.com
GB
DE
AR
ES
FR
GR
IT
NL
PT
950
600
100
3
2
1
1
2
303
30454
5
6
7

18www.aeg.com
ESPAÑOL
Gracias por escoger un producto AEG. Para asegurarte de obtener los mejores resultados, utiliza siempre accesorios
y recambios originales AEG, que han sido especialmente diseñados para tu producto. Este producto se ha diseñado
pensando en el medio ambiente. Todas las piezas de plástico están marcadas para su reciclado.
COMPONENTES
A. Botón de expulsión
B. Selector de velocidad
C. Tecla “Turbo”
D. Batidora
E. Tecla de basculación del brazo
F. Tecla de desbloqueo
G. Soporte
H. Bol para mezclar de acero
I. Varilla batidora
J. Amasador
K. Base antideslizante
Imagen página 2-3
ANTES DEL PRIMER USO
1 Antes de utilizar el aparato, retire todo el material de embalaje, plástico, etiquetas o pegatinas que puedan estar
adheridas a la base del motor, los boles o los accesorios.
Advertencia! No sumerja la base, el enchufe ni el cable en agua ni otros líquidos.
Precaución: Apague el aparato y desconéctelo de la toma de corriente antes de cambiar los accesorios o de aproxi-
marse a piezas móviles en funcionamiento.
2 Lave todas las piezas en agua tibia con jabón, excepto la base del motor. Seque bien cada una de las piezas antes
del uso.
Los accesorios para batir y amasar se puede limpiar con un cepillo bajo el grifo o en el lavaplatos.
3 El compartimento del motor solo debe limpiarse con un paño suave humedecido; a continuación, debe secarse con
otro paño.
Nota: No utilice limpiadores abrasivos ni estropajos para limpiar las supercies del aparato.
INTRODUCCIÓN
4 Fijación de la batidora a la base del procesador. Antes de colocar o de extraer la batidora, apáguela (moviendo el
selector de velocidad totalmente hacia la izquierda) y desenchufe el aparato de la corriente. Para ponerla, colocarla
sobre el soporte y empujar hacia abajo para bloquearla en su posición.
5 Extracción de la batidora de la base del procesador. Para quitarla, apretar la tecla de des-bloqueo y retirar la
batidora hacia arriban.
6 Bascular el brazo de la batidora hacia arriba / abajo. Antes de bascular el brazo de la batidora hacia arriba,
desconectar el aparato y desenchufarlo de la red! Apretar la tecla de basculación y mover el brazo hacia arriba /
abajo, hasta que se bloquee.
7 Colocación y retirada del recipiente de mezclado. Coloque el bol en la placa. Asegúrese de que el fondo del bol se
cierre alrededor de la placa. Es más fácil acoplar y quitar el cuenco o los accesorios cuando la batidora está levantada.
8 Inserte el accesorio para batir o para amasar en las ranuras para accesorios debajo de la batidora, hasta que encaje.
9 Antes de quitar los accesorios para batir o para amasar, desenchufe la batidora. Después sujete rmemente con
una mano mientras pulsa el botón de expulsar.
Nota: Las varillas o los ganchos solo se pueden extraer cuando el selector de velocidad esté colocado totalmente
hacia la izquierda.
INSTRUCCIONES DE FUNCIONAMIENTO
10 La mezcla para procesar en el bol no deberá ser superior a 2,5 litros. Para batir una masa pesada (p.ej. pizza o
pan) en cantidad superior a 1 kg y hasta 1,5 kg, recomendamos procesar solo 1 porción y dejar que la batidora se
enfríe a temperatura ambiente antes de comenzar con la siguiente porción o proceso. Esto protegerá su producto
contra posibles daños por sobrecalentamiento.

19www.aeg.com
GB
DE
AR
ES
FR
GR
IT
NL
PT
11 Uso de la batidora. Para encender la batidora, mueva el selector de velocidad de izquierda a derecha. Tanto los
ganchos como las varillas amasadoras y el bol giran. Empiece siempre a batir con una velocidad baja y después
vaya aumentándola.
Advertencia! Debido al riesgo de lesiones, no toque nunca los accesorios de batir o de amasar con ninguna her-
ramienta ni con los dedos.
12 Siempre que se mantenga Turboado el botón Turbo durante el uso, la batidora funciona a la máxima velocidad.
Nota: Las batidoras no son convenientes utilizarlas para realizar mezclas consistentes. Para la masa pastosa,
como la tarta y la masa de pan, usar las varillas para masa.
LIMPIEZA Y MANTENIMIENTO
13 Apague el aparato, desenchúfelo y espere hasta que se haya parado completamente.
Advertencia! No sumerja la base, el enchufe ni el cable en agua ni otros líquidos.
14 Lave todas las piezas en agua tibia con jabón, excepto la base del motor. Seque bien cada una de las piezas antes
del uso.
Los accesorios para batir y amasar se puede limpiar con un cepillo bajo el grifo o en el lavaplatos.
15 El compartimento del motor solo debe limpiarse con un paño suave humedecido; a continuación, debe secarse con
otro paño.
Nota: No utilice limpiadores abrasivos ni estropajos para limpiar las supercies del aparato.
16 Antes de guardar, quite el enchufe de la toma de corriente. Asegúrese de que el aparato está limpio y totalmente
seco.
Guarde siempre el accesorio amasador y la varilla batidora dentro del recipiente mezclador colocado en su sitio
sobre el soporte. De este modo evitará que los accesorios se dañen.
¡Disfruta de tu nuevo producto AEG!
CONSEJO DE SEGURIDAD
Lea detenidamente las siguientes instrucciones antes de utilizar la máquina por primera vez.
• Los aparatos pueden ser utilizados por personas cuyas capacidades físicas, sensoriales o
mentales estén disminuidas o que carezcan de la experiencia y conocimientos sucientes
para manejarlos de forma segura y comprendan los riesgos.
• Se deberá controlar que los niños no jueguen con este electrodoméstico.
• Nunca utilice ni manipule el electrodoméstico si
– el cable de alimentación está dañado
– la carcasa está dañada
• Si el electrodoméstico o el cable de alimentación no están en perfectas condiciones,
deben ser sustituidos por el fabricante, por su servicio de asistencia técnica o por personal
debidamente cualicado, para evitar cualquier peligro.
• Desenchufe siempre el electrodoméstico en caso de dejarlo sin supervisión, y antes del
montaje, desmontaje o limpieza.
• Se debe prestar atención al manipular los accesorios, al vaciar el bol y durante la limpieza.
• Apague el aparato y desconéctelo de la toma de corriente antes de cambiar los accesorios o
de aproximarse a piezas móviles en funcionamiento.
• No sumerja el electrodoméstico en agua u otro líquido.
• Este electrodoméstico está previsto exclusivamente para uso doméstico. El fabricante
declina toda responsabilidad por los posibles daños que pudiesen producirse como
consecuencia de su uso inadecuado o incorrecto.

20www.aeg.com
RECETAS
RECETAS LISTA DE INGREDIENTES
Masa de levadura (Masa de pizza)
Cant. máximas
Harina de trigo 950 g.
Agua 600 ml.
Aceite 100 ml.
Sal 3 cucharaditas
Azúcar 2 cucharaditas
Levadura seca 1 cucharada
grande
1. Coloque la levadura, azúcar y agua templada en el cuenco de batidora de la máquina y espere hasta que
tenga aspecto cremoso.
2. Agregue harina, sal y aceite a la mezcla.
3. Mezcle a baja velocidad durante 30 seg.
4. Cuando se forme una masa homogénea, aumente la velocidad a 5 durante 4 m. y 30 seg.
5. La masa está lista cuando deja de pegarse en los lados del cuenco y en la herramienta.
6. Extienda la masa con el espesor que desee usando un rodillo sobre una supercie ligeramente enharinada.
7. Coloque la masa en una bandeja ligeramente engrasada y cubra con los ingredientes.
AJUSTES Y SOLUCIÓN DE PROBLEMAS
AJUSTE VELOCIDAD
Amasar, batir Empiece a baja velocidad y después aumente a alta velocidad.
Envolver Velocidad media.
Revolver Empiece con una velocidad media y después aumente a alta velocidad.
Batir, espumar Velocidad media o alta.
Empiece a una velocidad baja para evitar que los alimentos molidos y los líquidos se salgan.
PROBLEMA CAUSA SOLUCIÓN
El motor se ralentiza durante el
funcionamiento.
La cantidad de masa puede superar la
capacidad máxima.
Quite la mitad y procese en dos series.
La masa puede estar demasiado
húmeda, se pega al lado del cuenco.
Añada más harina, cucharada a
cucharada, hasta que el motor acelere.
Procese la masa hasta que los costados
del cuenco estén limpios.
El motor no funciona. El aparato no está conectado a la red
eléctrica.
Asegúrese de enchufar el aparato antes
de usarlo.
El aparato vibra o se mueve durante
el funcionamiento.
Las patas de goma están mojadas. Asegúrese de que las patas de goma y la
parte inferior de la unidad estén limpias
y secas.
Ajuste demasiado alto del selector de
velocidad.
Reduzca el ajuste de velocidad.
Es normal con cargas pesadas (como
masas densas y queso).
Quite la mitad y procese en dos series.
Si el aparato sigue sin funcionar, póngase en contacto con el servicio de atención al cliente.
Other manuals for SM33 Series
1
Table of contents
Languages:
Other AEG Mixer manuals

AEG
AEG UltraMix KM5520 User manual

AEG
AEG HM 310 Assistent User manual

AEG
AEG STM7 Series User manual

AEG
AEG GourmetPRO Series User manual

AEG
AEG KM55 Series User manual

AEG
AEG SM33 Series User manual

AEG
AEG Ultramix Professional KM6 Series User manual

AEG
AEG HM6 Series User manual

AEG
AEG ULTRAMIX/PRO STM6 series User manual

AEG
AEG KM 550 User manual