manuals.online logo
Brands
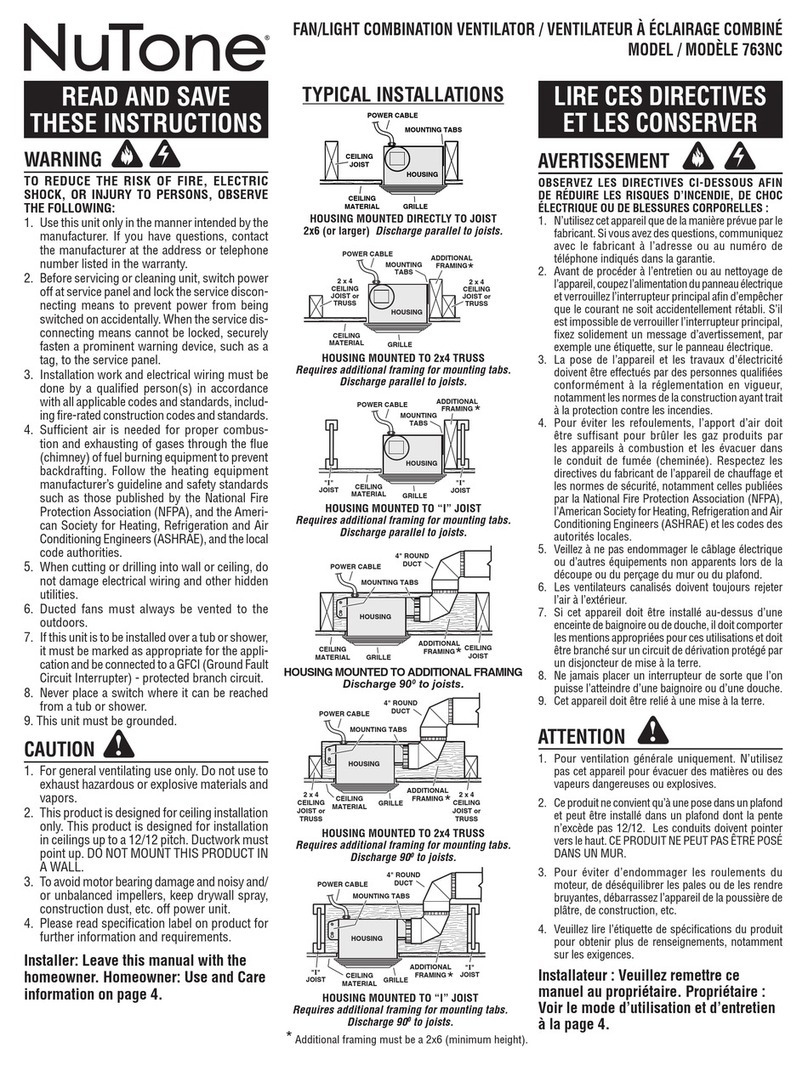
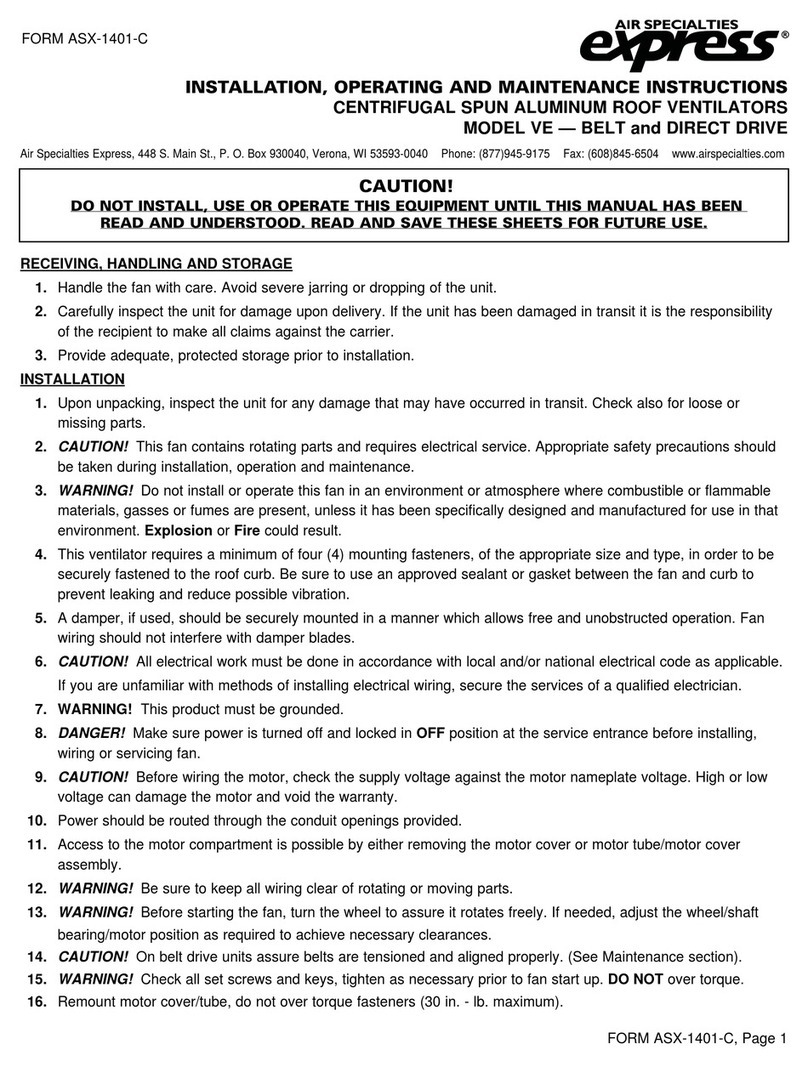
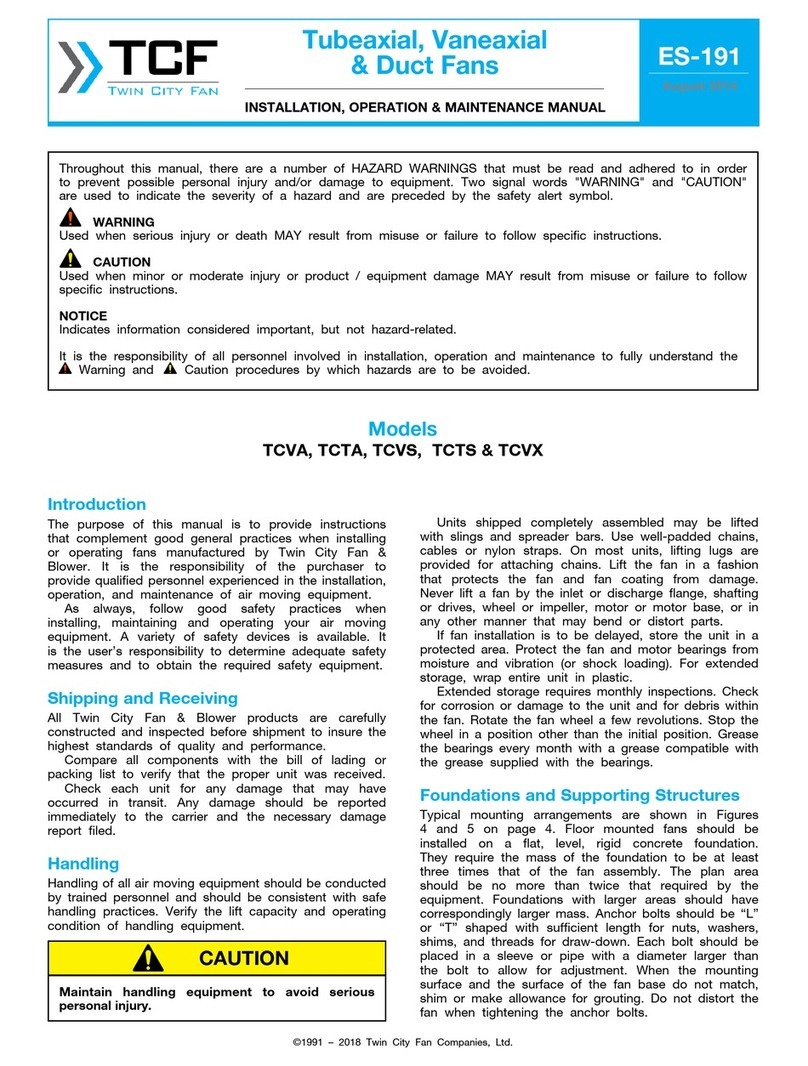
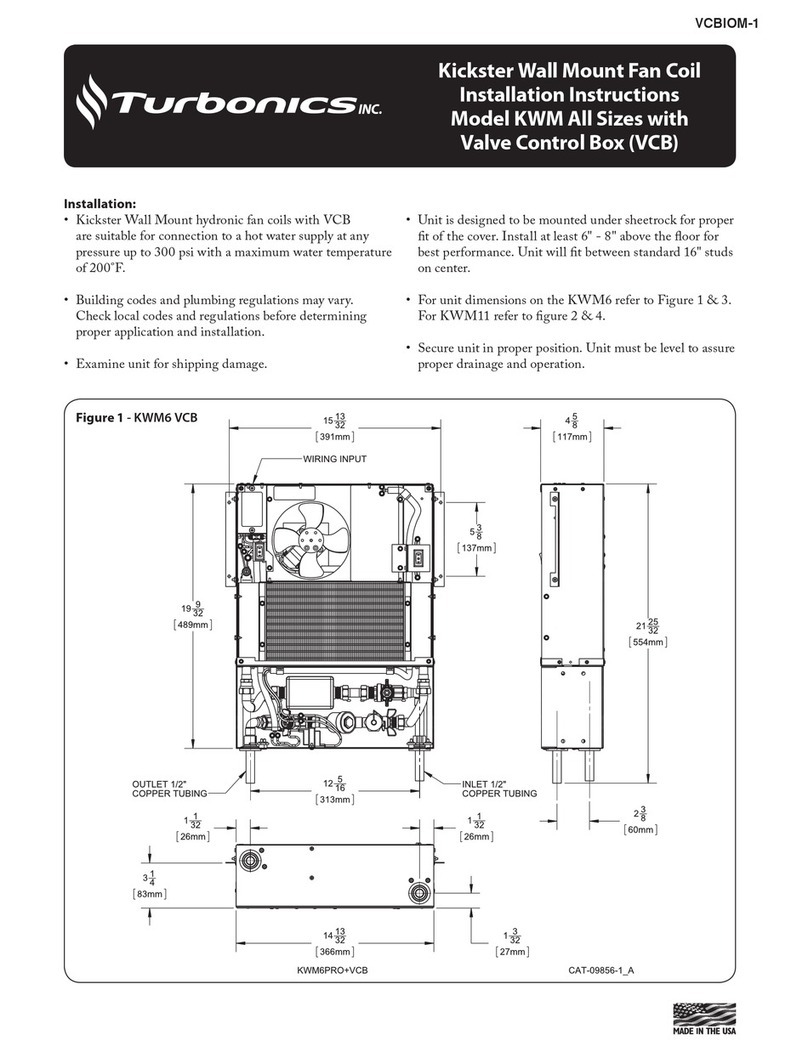
  1. Home
  2. •
  3. Brands
  4. •
  5. Aereco
  6. •
  7. Fan
  8. •
  9. Aereco V2A User manual

Aereco V2A User manual

BEÉPÍTÉSI ÉS HASZNÁLATI ÚTMUTATÓ (HU)
ENGLISH DEUTSCH MAGYAR
V2A
Akusztikus, fordulatszám szabályzott ventilátor 2 helyiség elszívásához
ACOUSTIC FAN FOR 2 WET ROOMS SCHALLGEDÄMMTER VENTILATOR 2
SANITÄRRÄUME
AKUSZTIKUS VENTILÁTOR 2 HELYISÉG
ELSZÍVÁSÁHOZ
Spezifischer Energieverbrauch* : -25.6 kWh/(m2.a)
Max. Luftmenge : 80 m3/h
Max. Druck : 80 Pa
Akustischer Wert bei 20 m3/h : 33 dB(A)
Max. E-Leistung : 13 W
Anschluß (ref. V2A041) : 100 VAC +/- 10%
Anschluß (ref. V2A032) : 230 VAC +/- 10%
Frequenz : 50 Hz oder 60 Hz
Anwendungsbereich : innen
Lagerungstemperatur : von -20°C bis + 55 °C
Verwendungstemperatur : von +5°C bis +40°C.
Verschmutzungsklasse : 2
Gerät durch eine Doppelisolierung komplet geschützt.
* : Im Rahmen der Europäischen Richtlinie 2009/125/EG
werden die Werte für den spezifischen Energieverbrauch
nur gewährleistet, wenn eine zentrale Lüftungsanlage
mit mindestens zwei feuchtegeführten Abluftelementen
installiert ist.
Specific Energy Consumption* : -25.6 kWh/(m2.a)
Maximum airflow : 80 m3/h
Maximum pressure : 80 Pa
Sound level @ 20 m3/h : 33 dB(A)
Maximum power : 13 W
Supply (ref. V2A041) : 100 VAC +/- 10%
Supply (ref. V2A032) : 230 VAC +/- 10%
Frequency : 50 Hz or 60 Hz
Use : indoor
Storage temperature : from -20°C to + 55 °C
Working temperature : from +5°C to +40°C.
Pollution degree : 2
Fan fully protected by a double insulation.
* : Following the implementation of the European
Directive 2009/125 / EC, the values indicating the
specific energy consumption are guaranteed only if
the ventilation unit is installed as a ducted type and
with at least two local demand control units.
Fajlagos energiafogyasztás* : -25.6 kWh/(m2.a)
Max. légszállítás : 80 m3/h
Max. nyomás : 80 Pa
Hangteljesítmény 20 m3/h-nál: 33 dB(A)
Max. teljesítmény: 13 W
Tápfeszültség (V2A032) : 230 VAC +/- 10%
Frekvencia : 50 Hz
Elhelyezés: védett helyen - beltérben
Tárolási hőmérséklet tartomány:-20°C + 55 °C között
Működési hőmérséklet tartomány: +5°C +40°C.között
Szennyezettségi fokozat: 2
* : A 2009 / 125 / EK EU rendelet irnyelveit követve a
feltűntetett fajlagos energiafogyasztás csak elektromos
hálózatra kötve és legalább két vezérlőegységgel telepítve
garantált.
V2A Beépítési és használati útmutató
ENGLISH DEUTSCH MAGYARV2A
Die akustischen Werte des
V2A erlauben die Installation
direkt in der Wohnung, im
beheizten Raum.
Maximal 2 Abluftelemente
(Hygro, mit Bewegungsensor
usw.) mit verschiedenen
Durchmesser können an den
Ventilator angebracht werden.
Einsatzbereich:
- Technikraum (vor allem
Bad und WC) in Wohn- oder
-Bürogebäude. Im Neubau oder
Sanierung.
- Installation im Abstellraum, im
Keller, Dachboden oder im Flur,
an der Wand, Decke oder in der
Zwischendecke.
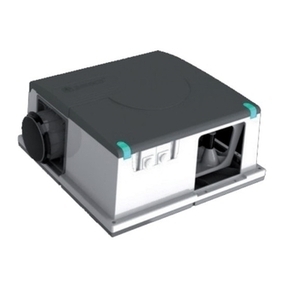
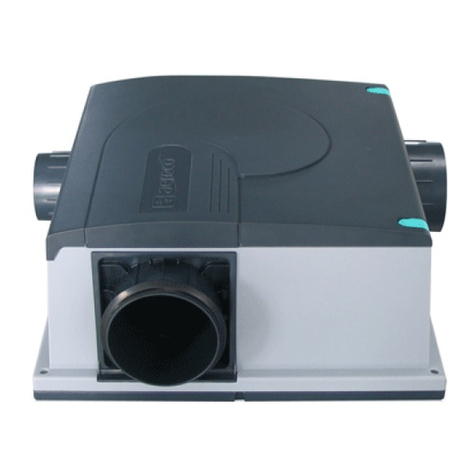
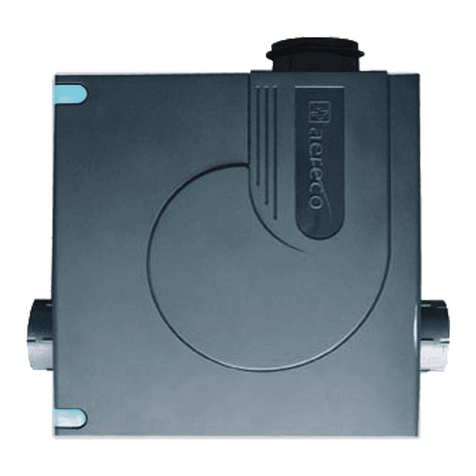
The V2A fan is a silent fan
being able to be installed
directly inside dwelling in the
inhabited space.
It is possible to connect 2
VMC extract units with variable
section (humidity sensitive,
motion sensor…)
Field of application :
Ventilation in service rooms
(mainly bathrooms and toilets)
in private dwelling and business
environment.
- Works : new or refurbishment.
- Place of installation : in
cupboards, loft places or on
walls, in bathrooms, toilets,
corridors or any other inner
rooms.
A V2A akusztikus ventilátort
közvetlenül elhelyezheti
a lakótérbe (pl. beépített
szekrénybe, álmennyezetbe).
A ventilátorra 2 légelvezető
elem csatlakoztatható
(higroszabályozású,
mozgásérzékelős, .....),
melyeket a kiszolgáló
helységekben kell elhelyezni.
A
D
B
C
A. Caisson ventilateur
B. Manchons d’admission
Ø80mm (x2)
C. Bouchons (x3)
D. Sachet vis de fixation + chevilles
+ rondelles
A. Ventilatorgehäuse mit
Revisionsdeckel
B. Anschlussstutzen Ø80 (2x)
C. Abdeckungen (x3)
D. Befestigungsmaterial (Schrauben,
Unterlegscheiben, Dübel)
A. Ventilátor egység
B. Elszívó csatlakozó Ø80 (2x)
C. Csatlakozó fedél (x3)
D. Szerelési tartozékok (csavarok,
dübelek)
Alkalmazási lehetőségek:
- Kiszolgáló helyiségek
szellőztetésére (főként fürdő
és WC helyiségek) lakó és
középületekben egyaránt. -
Új építés és felújítás esetén is
alkalmazható.
- Telepítése történhet: lakásban
(pl. beépített szekrényben),
álmennyezetben, padlásra
(extra szigeteléssel).
V2A Beépítési és használati útmutató
ENGLISH DEUTSCH MAGYARENGLISH
VORWORT
- Die Montage dieses Ventilators darf nur von
einer Fachfirma durchgeführt werden.
- Hersteller und Vertreiber haften nicht bei
nicht gerätekonformer Nutzung des Produkts.
- Der Geräteschutz kann beeinträchtigt
werden, wenn das Produkt nicht
anleitungsgemäß verwendet wird.
- Das Gerät darf NICHT von Kindern
(mindestens8 Jahre alt) oder Personen mit
reduzierten physischen, sensoriellen oder
geistigen Fähigkeiten benutzt werden oder
von solchen, deren Erfahrung und Kenntnisse
hierfür nicht ausreichend sind, es sei denn,
sie haben die diesbezüglich erforderlichen
Anweisungen von einer, für ihre Sicherheit
verantwortlichen Person erhalten.
- Montage, elektrischer Anschluss,
Inbetriebnahme und Wartung des Gerätes,
darf nur durch eine entsprechend
ausgebildete Fachkraft erfolgen.
ELEKTRISCHE SICHERHEIT
- Dieses auf der Anschlussklappe sichtbare
Zeichen besagt eine Spannung von 230 VAC.
- Vor dem önen der Anschlussklappe ist der
Ventilator Spannungsfrei zu schalten und vor
unbeabsichtigtem Wiedereinschalten zu sichern.
- Um Gefahren durch ein versehentliches
Zurücksetzen des Temperaturbegrenzers zu
vermeiden, darf dieses Gerät nicht durch ein
externes Schaltgerät, wie eine Zeitschaltuhr,
mit Strom versorgt oder an einen Stromkreis
angeschlossen werden, der vom Stromanbieter
regelmäßig an- und abgeschaltet wird.
VOR INSTALLATIONSANFANG :
- Vor der Installation des Ventilators sollen die
Abluftlemente eingebaut werden.
- Den Ventilator an den gewünschten Montageplatz
halten, markieren, und die notwendige Plätze für
die Schläuche und den Anschlußleitungdurchgang
vorsorgen.
WARNINGS
- Installation of this product must be
carried out by a qualified technician.
- Manufacturer and distributors decline
responsibility in the event of non
conformed use of the product.
- If the product is used in a way not
specified in this document, the protection
of the product can be compromised.
- This appliance is not intended for use by
persons (including children over 8 years
old) with reduced physical, sensory or
mental capabilities, or lack of experience
and knowledge, unless they have been
given supervision or instruction concerning
use of the appliance by a person
responsible for their safety. To avoid any
risk, do not allow them to play with the
appliance.
- Cleaning and maintenance by the
user should not be done by unattended
children.
ELECTRICAL SECURITY
- This symbol placed on the connection
access panel indicates an electric danger
due to the presence of 230 VAC (in version
230 VAC). It is thus essential to cut o
the supply before dismounting the access
panel.
- The V2A fan must be connected directly
in the low-tension electric control panel.
- In order to avoid a hazard due to
inadvertent resetting of the thermal cutout,
this appliance must not be powered
through an external switching device such
as a timer, or connected to a circuit that is
regularly switched on and o by the power
provider.
BEFORE BEGINNING THE INSTALLATION,
PLEASE :
-Install the extraction units to be
connected,
- Position the fan where it must be fixed,
and locate the place by estimating the
space necessary for ducts and passage of
the electric cable.
Figyelmeztetés
- A ventilátort csak hozzáértő szakember
helyezheti üzembe.
- A gyártó és a viszonteladó nem vállal
felelősséget a szakszerűtlenül üzembe
helyezett és használt készülékért.
- Amennyiben a készüléket nem a leírásban
található helyeken és módon alkalmazzák a
garancia érvényét veszti.
- A termék használatát és karbantartását
nem végezhetik gyermekek (8 év felett
sem), illetve csökkent fizikai, érzékszervi,
vagy menttális képességgel rendelkező
személyek. A balestek elkerülése érdekében
ne játszon a berendezéssel.
- A tisztítési és karbantartási munkálatokat
csak 18. életévét betöltött személyek
végezhetik.
ELEKTROMOS BIZTONSÁG
- Ezen piktogrammal ellátott helyeken
fokozottan ügyelni kell az elektromos
biztonságra - 230 V AC. Minden elektromos
csatlakozást szüntessen meg, mielőtt
elektromosan bekötné a ventilátort.
- A V2A ventilátort az alacsony feszültségű
elektromos kontroll panelbe közvetlenül
bekötheti.
- A hővédelmi kapcsoló esetleges
véletlenszerű kikapcsolását elkerülendő,
a készülék áramellátását tilos külső
kapcsolóeszközön keresztül (pl.: időzítő,
elosztó) megoldani. Illetve tilos olyan
áramforráshoz csatlakoztatni, melynek
folyamatos áramellátása nem biztosított.
MIELŐTT A TELEPÍTÉST MEGKEZDENÉ :
- Építse be a légelvezető elemeket.
- Találja meg a ventilátor elhelyezésére
a legalkalmasabb helyet, építse ki a
légelvezetők és a ventilátor összekötéséhez
szükséges légcsatorna hálózatot. Ezt
követően lásson hozzá a ventilátor
telepítéséhez.
V2A Beépítési és használati útmutató
ENGLISH DEUTSCH MAGYARV2A
1. Die richtige Position des
Schaummaterials bei
jedem Zubehör prüfen.
1. SCheck the good
installation of the foam of
each accessory.
1. Ellenőrizze az összes
tartozék szigetelésének
helyes pozicióját, szállítás
közben elmozdulhat.
x4 CLIC !
OK !NO
2. Enter connection sleeves
and stoppers on the 4
openings of the case.
2. Die richtige Position des
Schaummaterials bei
jedem Zubehör prüfen.
2. Pattintsa be a
csatlakoztatható
zárófedeleket (3 db) vagy a
légcsatorna csatlakozókat
(2db) a lehetséges 4
nyílásba.
5. Withdraw the lid by
drawing the 2 green clips
5. Die 2 grünen Clips
ziehen und den Deckel
abnehmen.
5. A ventilátorházról emelje
le a fedelet, a 2 zöld színű
klipsz segítségével.
3. Withdraw the base of the
case : begin by the angles.
3. Zum Befestigen des
Ventilators den Sockel
des Gehäuses abnehmen,
dabei die Ecken zuerst
abklicken.
3. Válassza le a
ventilátorházat a ventilátor
talapzatáról. Kezdje az
egyik saroknál.
4. Fix the base using the
provided 4 screws + rings
(+ bolts if necessary).
Tighten moderately (be
careful not to crush the
silent block).
4. Den Sockel mit den 4
mitgelieferten Schrauben,
Unterlegscheiben und
Dübeln (wenn notwendig)
befestigen.
Den Sockel mit den 4
mitgelieferten Schrauben,
Unterlegscheiben und
Dübeln (wenn notwendig)
befestigen.
4. A talapzatot rögzítse a
4 csavar és a dübelek
segítségével a kívánt
helyre.
Ügyeljen arra, hogy a
csavarokat ne húzza
meg túl erősen, mert a
műanyag talapzat könnyen
elpattanhat.
V2A Beépítési és használati útmutató
ENGLISH DEUTSCH MAGYARV2A
6. Den Styroporkeil
entnehmen.
6. Withdraw the hold. 6. A ventilátorból távolítsa el
a rögzítő elemeket.
7. Unscrew the lid of the
electrical case by using a
PH1 screwdriver.
7. Den Deckel des
Anschlusskastens mit
einem kleinen
Kreuzschlitzschrau-
bendreher abnehmen.
7. Csavarja ki az elektromos
fedél csavarjait, majd
emelje le a fedelet.
Do not connect the electrical
supply network as long as
the fitting is not completely
finished.
An Elektriknetz nicht
anschliessen bevor die
Montage fertig ist.
Ne csatlakoztassa az
elektromos vezetéket a
hálózathoz, mindaddig amíg a
szerelést be nem fejezik.
10. Block the cable in the
cleat and thread the
cable-shifter in the lid of
the case.
10. Die Anschlussleitung
mit der Zugentlastung
befestigen und die
Kabeldurchführung in den
Gehäusedeckel einfädeln.
10. Rögzítse az elektromos
vezetéket a kábel
rögzítővel.
8. Thread the cable-shifter
on the feeder (feeder not
provided).
8. Die Anschlussleitung (wird
Bauseits gestellt) durch
die Kabeldurchführung
einfädeln.
8. A tápkábelt (nem tartozék)
húzza át a ventilátor
oldalán található nyíláson.
9. Connect the feeder to the
corresponding terminals.
L Phase
Ground
N Neutral
9. Die Anschlußleitung an die
entsprechenden Klemmen
anschliessen.
L Phase
Masse
N Neutral
9. Kösse be az elektromos
vezetéket.
L Fázis
Föld
N Nulla
V2A Beépítési és használati útmutató
ENGLISH DEUTSCH MAGYARV2A
OUTPUT 1A2CV
CLIC !
11. Ausgangsspannung im
Anschlusskasten 12 VAC
zum Anschluss von einem
oder zwei Abluftelemente
mit Stoßlüftungsfunktion.
In diesem Fall müssen in
die Abluftelemente die
Netzstabilisatoren ANA
12 V zusätzlich eingesetzt
werden.
11. Output 12 VAC : Connect
if necessary 1 or 2 extract
units with peak airflow
supply.
Then use the transformer
ref. AEA878 (transformer
12 VAC - 8 VDC)
11. A ventilátor 12 V-os
kimenettel rendelkezik,
melyről 1 vagy 2
mozgásérzékelős
légelvezető üzemeltethető.
A légelvezetőkhöz ebben
az esetben egy elektromos
átalakító adapter
szükséges, melynek típusa
CAL 261(12 V AC - 9 V
DC, nem tartozék).
12. Close and screw up the lid
of the electric case.
12. Den Deckel des
Anschlusskasten wieder
verschließen.
12. Tegye vissza az elektromos
rész fedelét és zárja vissza
a csavarokkal.
15. Check the installation
of the fixing clips in the
middle on each side
15. Darauf achten, dass
der Ventilator auf dem
Sockel in der Mitte richtig
einrastet.
15. A felhelyezést követően
ellenőrizze, hogy minden
oldalon a középső rész
megfelelően rögzült.
13. Close the lid 13. Den Deckel des Ventilators
wieder zumachen.
13. Tegye vissza a ventilátor
fedelét.
14. Fix the box on its base 14 Das Ventilatorgehäuse auf
seinen Sockel klicken.
14. A ventilátorházat pattintsa
fel a talapzatra.
V2A Beépítési és használati útmutató
ENGLISH DEUTSCH MAGYARV2A
x4
16. Das Gehäuse mit den
mitgelieferten Schrauben
auf dem Sockel
befestigen.
16. Fix the case on its base
(4 provided screws) using
a PZ2 screwdriver.
16. A ventilátorházat erősítse
a talapzatra a 4 csavar
segítségével (tartozék).
17. Carry out the holes for the
passage of the ducts in
front of the inlet and outlet
sleeves.
Take care not to insert
debris and dust in the
motor !
17. Die Wanddurchbrüche
in der Nähe der
Ansaugstutzen und
des Fortluftstutzens
durchführen.
Beachten Sie, dass
keine Fremdkörper (z. B.
Staub oder Steine) in den
Ventilator eindringen.
17. Az elszívó és kifúvó
csonkokhoz közel fúrja át
a falat (amennyiben ez
szükséges)
Vigyázzon, hogy a
ventilátorba ne kerüljön
semmilyen idegen anyag
(pl. szemét, építési
törmelék).
20. Connect the 2 extract units
and the extract grille: the
fan is ready to operate !
20. Die Abluftelemente
und das Fortluftgitter
anschließen. Der Ventilator
ist jetzt Betriebsbereit,
wenn die Stromzufuhr
eingeschaltet wird.
20. Már csak a két
légelvezetőt és a kifúvó
elemet kell csatlakoztatnia,
és a ventilátor üzemkész!
18. If you connect ducts Ø
100mm, encase the
accessory ref. SE3203 on
the inlet sleeve.
If you connect ducts Ø
80mm, no accessory is
necessary
18. Wenn Sie von den
Abluftelementen
Flex-Rohre mit Ø100
anschließen wollen,
müssen Sie den
Anschlussstutzen AS
100 mitbestellen. Flex-
Rohr Ø80 kann direkt
angeschlossen werden.
An den Fortluftstutzen
kann nur ein Flex-Rohr
Ø100 angeschlossen
werden.
18. Amennyiben az elszívó
légcsatorna Ø100 mm,
szüksége lesz az Ø 80
/ 100 mm átalakítóra
(SE3203, mely külön
rendelhető).
Ha a légcsatorna
Ø 80 mm-es, akkor
közvetlenül a ventilátorhoz
csatlakoztathatja.
19. Encase the duct then
make it integral by using
a special AV adhesive.
Do the same for the other
inlet and outlet ducts.
19. Die Flex-Rohre auf die
Stutzen stecken und mit
Klebeband abdichten.
19. Miután a légcsatornát
a ventilátorhoz
csatlakoztatta, a
csatlakozási pontokon
tekerje át rögzítő
szalaggal (alu szalag vagy
ragasztószalag).
ENGLISH DEUTSCH MAGYARV2A
V2A Beépítési és használati útmutató
1. Before any intervention,
cut o the fan supply from
the circuit breaker.
1. Unterbrechen Sie
vor jedem Eingri die
Stromversorgung der
Lüftungseinheit.
1. Bármely szerelési, vagy
karbantartási munka előtt
győződjön meg róla, hogy a
készülék nem csatlakozik
elektromos hálózathoz.
FIGYELMEZTETÉS A MÁR
TELEPÍTETT KÉSZÜLÉK
BIZTONSÁGOS BIZTOSÍTÉK
CSERÉJÉHEZ:
· A cserét csak szakember
végezheti el
· A gyártó és a forgalmazó
nem vállal felelősséget a
termék nem rendeltetésszerű
használatából adódó
esetleges károkért.
· Ezen ajánlások figyelmen
kívül hagyása a termék
meghibásodásához és
garanciavesztéshez vezethet.
WARNING CONCERNING
REPLACEMENT OF THE FUSE
ON A PRODUCT ALREADY
INSTALLED:
· The replacement must be
carried out by a qualified
technician
· The manufacturer and
the distributor decline any
responsibility in the event of
a non conformity use of the
product
· In the event of non respect
of these recommendations,
the protection of the product
can be compromised.
WARNUNG BEI AUSTAUSCH
DER SICHERUNG AN EINEM
BEREITS INSTALLIERTEN
PRODUKT:
· Der Austausch muss von
einem qualifizierten Techniker
durchgeführt werden.
· Der Hersteller und der
Händler lehnen jede
Verantwortung im Falle einer
nicht konformen Verwendung
des Produkts ab.
· Bei Nichtbeachtung
dieser Empfehlungen kann
der Schutz des Produkts
beeinträchtigt werden.
REPLACEMENT FUSE FOR V2A
ERSATZSICHERUNG FÜR V2A
BIZTOSÍTÉK CSERE V2A KÉSZÜLÉKBEN
2. Withdraw the lid. 2. Entfernen Sie den Deckel. 2. A ventilátorházról emelje le
a fedelet.
3. Unscrew (1 screw) and
withdraw the trap door of
the electrical case.
3. ösen Sie die Schraube und
ziehen Sie die Falltür des
elektrischen Gehäuses
heraus.
3. Csavarja ki az elektromos
fedél csavarját, majd
emelje le a fedelet.
V2A Beépítési és használati útmutató
ENGLISH DEUTSCH MAGYARV2A
5. Unscrew the fuse holder
and replace with a new
fuse 5x20mm, delayed:
class T, 200mA, 250V.
5. Schrauben Sie den
Sicherungshalter ab
und ersetzen Sie die
Sicherung durch eine
neue. 5x20mm Sicherung,
Zeitverzögerung: Typ T,
200mA, 250V.
5. Csavarja ki a
biztosítéktartót, és cserélje
ki egy új, késleltetett
5x20mm-es biztosítékra: T
osztály, 200mA, 250V.
4. Take out the fuse holder. 4. Nehmen Sie den
Sicherungshalter heraus.
4. Húzza ki a biztosíték
tartóját.
7. Fix the trap door (1 screw). 7. Befestigen Sie die Falltür
(1 Schraube).
7. Csavarja vissza az
elektromos fedél csavarját
(csavar).
6. Screw the fuse holder. 6. Schrauben Sie den
Sicherungshalter fest.
6. Csavarja vissza a
biztosíték tartót.
8. Put the lid back. 8. Setzen Sie den Deckel
wieder auf.
8. Tegye vissz a ventilátorház
tetejét.
9. Engage the circuit breaker
in order to supply the fan
and check its operat.
9. Schalten Sie den
Leistungsschalter ein, um
den Lüfter zu versorgen
und überprüfen Sie dessen
Funktionierung.
9. Csatlakoztassa a
készüléket az elektromos
hálózthoz és ellenőrizza a
működést.
Note: Colours of wires may vary according to the V2A version. Pictures not contractual.
Hinweis: Die Farben der Drähte können je nach V4A-Version variieren. Bilder nicht verträglich.
Megjegyzés: A vezetékek színei a V2A verziótól függően eltérhetnek. A képek csak illusztrációk.
V2A Beépítési és használati útmutató_2021 - TF3486_E
Aereco Légtechnika Kft.
1139 Budapest, Fáy u. 12/a. Tel (+36 1) 214 44 21- fax (+36 1) 225 03 73
e-mail: aereco@aereco.hu - www.aereco.hu

Other manuals for V2A

4

Other Aereco Fan manuals

Aereco ZLT VTZ Series Installation instructions

Aereco

Aereco ZLT VTZ Series Installation instructions

Aereco VBP+ Instruction Manual

Aereco

Aereco VBP+ Instruction Manual

Aereco HAT-HD Operator's manual

Aereco

Aereco HAT-HD Operator's manual

Aereco CONNECT WP120 User manual

Aereco

Aereco CONNECT WP120 User manual

Aereco V4A User manual

Aereco

Aereco V4A User manual

Aereco V2A User manual

Aereco

Aereco V2A User manual

Aereco V4A Premium User manual

Aereco

Aereco V4A Premium User manual

Aereco VCZ Series Technical specifications

Aereco

Aereco VCZ Series Technical specifications

Aereco DXA 230 EXCELLENCE Technical specifications

Aereco

Aereco DXA 230 EXCELLENCE Technical specifications

Aereco V2A User manual

Aereco

Aereco V2A User manual

Aereco VAM User manual

Aereco

Aereco VAM User manual

Aereco VTZ-0.5 Technical specifications

Aereco

Aereco VTZ-0.5 Technical specifications

Aereco VPH2 User manual

Aereco

Aereco VPH2 User manual

Aereco VCR-HD Operator's manual

Aereco

Aereco VCR-HD Operator's manual

Aereco V5S User manual

Aereco

Aereco V5S User manual

Aereco ZLT VTZ Series Technical specifications

Aereco

Aereco ZLT VTZ Series Technical specifications

Aereco VTZ-0.5 Operating and maintenance instructions

Aereco

Aereco VTZ-0.5 Operating and maintenance instructions

Aereco V2A User manual

Aereco

Aereco V2A User manual

Aereco BFX User manual

Aereco

Aereco BFX User manual

Aereco VTZ 0.6 Operating and maintenance instructions

Aereco

Aereco VTZ 0.6 Operating and maintenance instructions

Aereco VCZ Series Installation instructions

Aereco

Aereco VCZ Series Installation instructions

Aereco VCZ 0 Smart Operating and maintenance instructions

Aereco

Aereco VCZ 0 Smart Operating and maintenance instructions

Aereco AWN ECO+ Series User manual

Aereco

Aereco AWN ECO+ Series User manual

Aereco VTR-HD Operator's manual

Aereco

Aereco VTR-HD Operator's manual

Popular Fan manuals by other brands

V-TAC VT-6052-5 instruction manual

V-TAC

V-TAC VT-6052-5 instruction manual

Mi 1C user manual

Mi

Mi 1C user manual

Fanaway ORBIT DC Installation and operation

Fanaway

Fanaway ORBIT DC Installation and operation

Emerson CF552AW00 instructions

Emerson

Emerson CF552AW00 instructions

Westinghouse 73001 manual

Westinghouse

Westinghouse 73001 manual

Fanelite WT-F44 USER MANUAL, INSTALLING AND OPERATING MANUAL

Fanelite

Fanelite WT-F44 USER MANUAL, INSTALLING AND OPERATING MANUAL

Pensonic PF-31S instruction manual

Pensonic

Pensonic PF-31S instruction manual

Turbonics Kickster KWM Series installation instructions

Turbonics

Turbonics Kickster KWM Series installation instructions

Heylo PV 12000 Translation of the original instruction manual

Heylo

Heylo PV 12000 Translation of the original instruction manual

Airflow 7006A installation instructions

Airflow

Airflow 7006A installation instructions

Arctic Cove MODF001 Operator's manual

Arctic Cove

Arctic Cove MODF001 Operator's manual

Ayce FD-40M Original instruction

Ayce

Ayce FD-40M Original instruction

NuAire Genie/tops 230 volt Installation and Maintenance

NuAire

NuAire Genie/tops 230 volt Installation and Maintenance

Raydan Home 23039 operating instructions

Raydan Home

Raydan Home 23039 operating instructions

Costway ES10234US manual

Costway

Costway ES10234US manual

Exodraft RSHG manual

Exodraft

Exodraft RSHG manual

Inspire Bahamas M52021-XY-3L(WH) Assembly, Use, Maintenance Manual

Inspire

Inspire Bahamas M52021-XY-3L(WH) Assembly, Use, Maintenance Manual

Trox Hesco QL-WE-O Assembly instructions

Trox Hesco

Trox Hesco QL-WE-O Assembly instructions

manuals.online logo
manuals.online logoBrands
  • About & Mission
  • Contact us
  • Privacy Policy
  • Terms and Conditions

Copyright 2025 Manuals.Online. All Rights Reserved.