Aetertek AT-211SW User manual
www.aetertek.com
AT-211SW
R
Owner’s Manual for Professional Remote Dog Trainer AT-211SW
350 Merers
www.facebook.com/groups/AetertekFans
www.aetertek.com

System Included------------------------------------------1
Quick Start--------------------------------------------------------2,3
Trouble Shooting----------------------------------------------- 4,5
Training Tips--------------------------------------------------6
Safety Guidance---------------------------------------------------7
Information for Terms of Use & Limitation of Liability--------8
Warranty Card--------------------------------------------------9,10
-01-
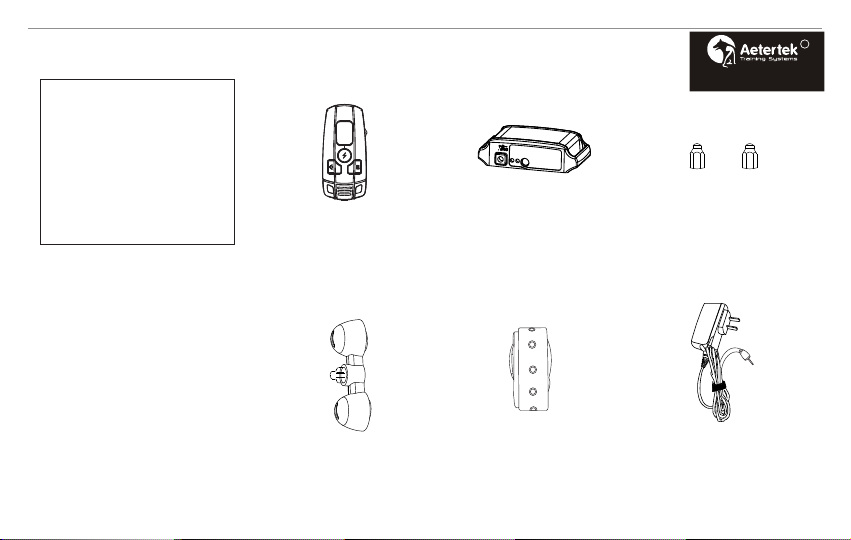
Transmitter
Receiver
prongs
Test Kit
Collar
Charger
prongs
Receiver
Test Kit Charger
AT-211SW System Included R
Professional Dog Trainer
AT-211SW
Collar
Transmitter

Step 2: Screw the metal
prongs onto the receiver till
securely attached. (Normally it
was assembled already
in the factory. )
Quick Start
-02-
Step 1: Charge the
transmitter. The power
remained icon will move
from low to high to indicate
charging process.
2
Step 3: Charge the receiver.
A Red LED on the receiver
will turn on during charging .
When charging is over, the
Blue LED light will light up.
Once unplugged, the Red LED
will stay in solid-waiting for
sync, at the same time, the
Blue LED light will go off.
Tip 1: Recommend to charge the receiver up to 3 hours for the
first 3 times.
Tip 2: To do a self-test, press the On/Off button of receiver three
times it should beep, vibrate and shock, indicating a functional
unit.
Tip 3:After 3 minutes of inactivity, transmitter will go into sleep
mode. You can wake it up by pressing any function keys
(Vibrate, Shock and Beep).
3
1power
remained icon
M Button
Quick press one by one
time will choose 0,1 or 2
dog system;
Dog 0,1 or 2 Icon:
0 means both dogs;
1 means the 1st dog;
2 means the 2nd dog.
Step 4: Turn the remote on by pushing any function
buttons (Shock, beep and vibrate). Choose the dog mode
(dog 1, dog 2 or dog 0). Quickly press M button time by
time will choose 0, 1, or 2 dog you want to train. If Dog0 is
selected, both dogs will receive correctional signals.
4

Step 6: Check the button function. Push the beep button,
the receiver will produce beeping sound and similarly, push the
vibrate button, it will cause vibration. Cap the shock test kit on
the metal prongs and push the shock button. If the bulb lights
up, the shock function is ok.
6
Tip 4: Longer(shorter) holding beep, vibrate or shock button will
lead to longer (shorter) duration of beep, vibrate or shock time.
Quick Start
-03-
Step 6: Press the M button up or down to increase or
decrease shock level. There are 10 available levels.
Step8: Start to train. Put the collar into the receiver and wear
the receiver around dog’s neck. Remember to leave one finger
place between collar and neck, then it’s ready to train.
7
Push up M button will increase shock
level;
push down M button will reduce shock
level;
Shock Level
Shock But ton
Beep Button Vibrate Butt on
5
a:Press and hold
on On/Off
button until the
RED LED light
stay in
solid.
b:Press down Shock,
Beep or Vibrate button,
receiver will be synced
with transmitter.
or
or
Step 5: Match the receiver and transmitter. Choose the
dog mode (Dog1, dog2 or dog00) by pushing the M button .
For the first receiver, choose dog 1 and quick press one of the
three buttons on the front , the first receiver will be connected
with the remote along with red light turns off and blue light
starts flash. If you have another receiver, turn it on and choose
dog 2, press any fuction buttons. The second receiver will be
paired; You can train different dogs separately in different dog
system. If Dog00 is selected, both dogs will receive
correctional signals.
Table of contents
Other Aetertek Pet Care Product manuals

Aetertek
Aetertek AT-216 User manual

Aetertek
Aetertek AT-211D User manual

Aetertek
Aetertek AT-918 User manual

Aetertek
Aetertek AT-216C User manual

Aetertek
Aetertek AT-216 User manual

Aetertek
Aetertek AT-216F User manual

Aetertek
Aetertek AT-216F User manual

Aetertek
Aetertek AT-219 User manual

Aetertek
Aetertek AT-218C User manual

Aetertek
Aetertek AT-918C User manual


