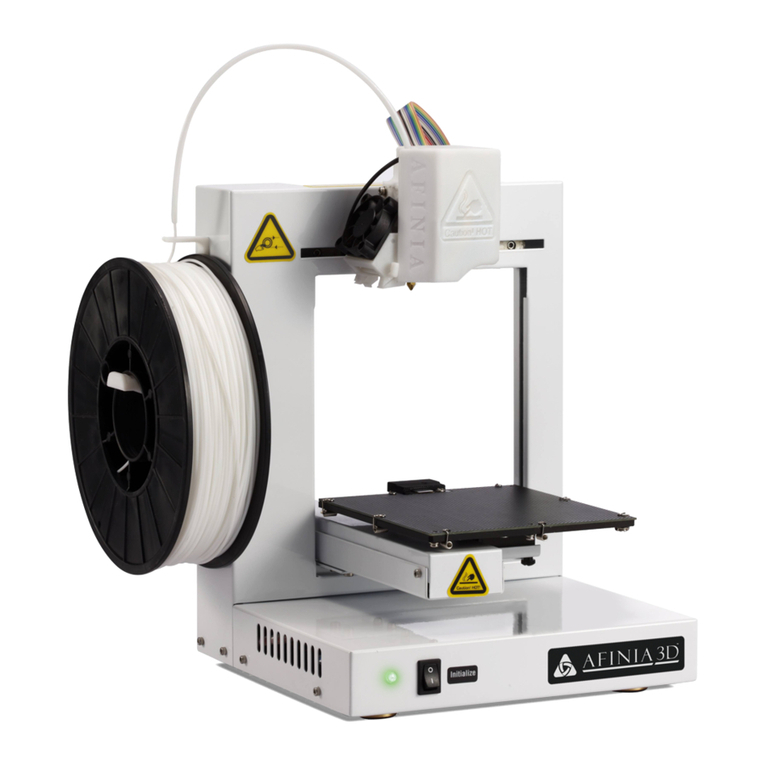
Afinia H800 User manual

H800 3D Printer
Version 1.2

Afinia H800 3D Printer User’s Manual
2

Afinia H800 3D Printer User’s Manual
3
TABLE OF CONTENTS
Safety Precautions .................................................................................................................. 5
Protecting the Printer .............................................................................................................. 5
Overview ................................................................................................................................... 6
Unpacking the Afinia H800 3D Printer............................................................................................... 8
The Print Head ................................................................................................................................... 9
The Control Buttons .......................................................................................................................... 9
nstalling the Afinia H800 3D Printer .................................................................................... 10
Dri er and Software Installation ...................................................................................................... 10
Installing the Printer ........................................................................................................................ 10
Loading the Filament ....................................................................................................................... 11
Getting Ready to Print ........................................................................................................... 12
Starting the Afinia 3D Program ........................................................................................................ 12
Initializing the Printer ...................................................................................................................... 12
Preparing the Platform .................................................................................................................... 13
Le eling the Print Platform .............................................................................................................. 14
Platform Calibration ........................................................................................................................ 15
Automatic Platform Calibration ....................................................................................................... 15
Manual Platform Calibration ........................................................................................................... 16
Calibrating the Nozzle Height .......................................................................................................... 17
Other Maintenance Options ............................................................................................................ 18
Printing with the H800 3D Printer ......................................................................................... 20
Loading a 3D Model ......................................................................................................................... 20
View Options ................................................................................................................................... 22
Model transformations .................................................................................................................... 22
Placing Models onto the Build Platform .......................................................................................... 24
Print Setup Options ......................................................................................................................... 25
Print Settings ................................................................................................................................... 25
Part Settings .................................................................................................................................... 25
Printing ............................................................................................................................................ 29
Print Options ................................................................................................................................... 29
Save as Project ...................................................................................................................... 31
Model Removal ...................................................................................................................... 32
Remo ing Support Material ............................................................................................................ 33
Maintenance ........................................................................................................................... 34
Changing the Filament..................................................................................................................... 34
Cleaning the Nozzle ......................................................................................................................... 35
Remo ing / Changing the Nozzle ..................................................................................................... 35
Cleaning the Extruder Gear ............................................................................................................. 36
Cleaning the Platform ...................................................................................................................... 37
Lubrication of Extruder Rails ........................................................................................................... 37
Changing the HEPA Filter ................................................................................................................. 37
Spare parts ...................................................................................................................................... 37
Vertical Calibration .......................................................................................................................... 37
Tips & Tricks .......................................................................................................................... 39
Status ndicator ...................................................................................................................... 41
Changing Languages ............................................................................................................ 41
Updating the Printer ROM ..................................................................................................... 42
Troubleshooting ..................................................................................................................... 42
Specifications ........................................................................................................................ 45
Technical Support .................................................................................................................. 46
Acronyms and Jargon ........................................................................................................... 46

Afinia H800 3D Printer User’s Manual
4
Afinia 1-Year Limite Warranty
Below is the one-year limite warranty inclu e with this Afinia pro uct. Afinia pri es itself on its outstan ing
pro uct line an its technical support. If for some reason, your pro uct fails, Afinia, a ivision of Microboar s
Technology, LLC, stan s behin its warranties an assures you the best service possible in a quick an timely
manner.
Afinia warrants to the original purchaser that this pro uct is free from efects in material an workmanship.
Afinia will for one year, at its option, repair or replace at no charge for parts an labor from the ate you
purchase the pro uct from an authorize Afinia reseller. Nozzles an Cell/Perf Boar s are warrante for
ninety (90) ays.
• Warranty registration must be complete within 30 ays of receipt of the pro uct in or er to vali ate the
warranty.
• Afinia, a ivision of Microboar s Technology, LLC, reserves the right to etermine the vali ity of all warranty
claims.
• Warranty is voi if the pro uct serial number has been altere or remove .
• Warranty is voi if the pro uct has been misuse or amage or if evi ence is present that the pro uct was
altere , mo ifie , or service by unauthorize service people.
The above state warranty is exclusive an replaces all other warranties, express of implie , inclu ing those of
merchantability an fitness for a particular purpose. Afinia, a ivision of Microboar s Technology, LLC, will not
be liable for any other amages or loss, inclu ing inci ental or consequential amages an loss of profits or
revenues from whatever cause, inclu ing breach of warranty or negligence.
This pro uct has been thoroughly teste an inspecte at the factory prior to shipment. Nevertheless, inspect
your pro uct completely for any amage or loss of parts that may have occurre uring shipment. Notify the
elivering carrier promptly if amage claims are to be file .
Afinia reserves the right to mo ify or up ate its pro uct without obligation to replace any equipment elivere
prior to any such change.
To register your warranty, please visit www.afinia.com/register
FCC D: 026-H800
This evice complies with Part 15 of the FCC Rules. Operation is subject to the following two con itions: (1)
this evice may not cause harmful interference, an (2) this evice must accept any interference receive ,
inclu ing interference that may cause un esire operation.
Changes or mo ifications not expressly approve by the party responsible for compliance coul voi the
user's authority to operate the equipment.
NOTE: This equipment has been teste an foun to comply with the limits for a Class B igital evice,
pursuant to Part 15 of the FCC Rules. These limits are esigne to provi e reasonable protection against
harmful interference in a resi ential installation. This equipment generates, uses, an can ra iate ra io
frequency energy an , if not installe an use in accor ance with the instructions, may cause harmful
interference to ra io communications. However, there is no guarantee that interference will not occur in a
particular installation. If this equipment oes cause harmful interference to ra io or television reception, which
can be etermine by turning the equipment off an on, the user is encourage to try to correct the
interference by one or more of the following measures:
•
Reorient or relocate the receiving antenna.
•
Increase the separation between the equipment an receiver.
•
Connect the equipment into an outlet on a circuit ifferent from that to which the receiver
is connecte .
•
Consult the ealer or an experience ra io/TV technician for help.

Afinia H800 3D Printer User’s Manual
5
Safety Precautions
Please rea this section carefully before using the printer.
• The printer can only be use with the power a apters supplie by this company, or the
pro uct may be amage , with a risk of fire.
• To avoi burning or mo el eformation, o not touch the mo el, nozzle, or the platform by
han or any other part of the bo y while the printer is working or imme iately after it has
finishe printing.
• Protective glasses shoul always be worn when removing support material, especially
PLA.
• There is a slight smell from ABS when it is being extru e . A well-ventilate room is
recommen e ; however when printing, keep the printer away from any rafts as this can
affect the warping of ABS prints.
• When ABS is burnt it releases toxic fumes. Never set the nozzle temperature high enough
to burn the material.
The following classifications are used in this manual:
CAUTION: In icates a potentially hazar ous situation which, if not avoi e , may
result in minor or mo erate injury.
WARNING: In icates a potentially hazar ous situation which, if not avoi e , may
result in serious injury.
GLOVES: When performing certain maintenance proce ures, the machine may
be hot an gloves are require to avoi burns.
SAFETY GLASSES: Wear safety glasses to avoi injury to your eyes.
Protecting the Printer
• The printer must not be expose to water or rain, or amage may occur.
• Do not shut own the Afinia H800 3D System or pull out the USB cable when loa ing a
igital mo el or the mo el ata may be lost.
• When using the “Extru e” function, keep at least 50mm between the nozzle an the
platform. If too close, the nozzle may get blocke .
• The printer is esigne to work properly at an ambient temperature of between 60°F an
85°F an humi ity of between 20% an 50%. Operating outsi e these limits may result in
low quality mo els.

Afinia H800 3D Printer User’s Manual
6
Overview
The Afinia H800 was esigne specifically for e ucators an professionals looking for fast,
hassle-free 3D printing with exceptional quality. The Afinia H800 boasts a host of features, from
Smart Support, user-frien ly software an automatic leveling, to paper-thin layer HD resolution
with a heate buil platform. Everything about this printer is geare towar s creating high
stan ar professional 3D mo els.
Print a working bearing in one esign, make a part for a ishwasher or just unleash your creativity
an bring your esigns to life with your new Afinia H800.
The Afinia 3D software sen s the print ata from a Mac or PC to the Printer over a single USB
cable. The Extru er elivers the Filament from the Spool into the Nozzle, which heats the filament
to printing temperature an eposits it on the Platform.
100 Micron
High
-
Definition Detail
Large 10” x 8” x 8”
Buil Platform
HEPA Air
Filtration System
Fully Automate
Calibration
Easy Filament
Replacement
Smart Support
Technology
One
-
Button Filament
Change
-
out
51 B
-
Quiet
an Fast!

Afinia H800 3D Printer User’s Manual
7
The Afinia H800 with HEPA filter is packe with a vance technologies in a stylish an robust
esign.

Afinia H800 3D Printer User’s Manual
8
Unpacking the Afinia H800 3D Printer
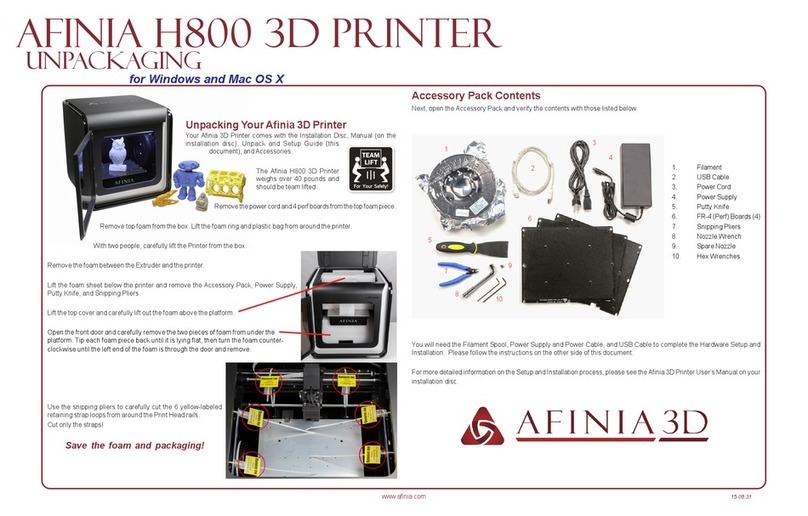
The Afinia H800 3D Printer weighs over 40 poun s an shoul be team-lifte !
Remove the power cor an 4 perf boar s from the top foam piece.
Remove top foam from the box. Lift the foam ring from aroun the printer.
With two people, carefully lift the Printer from the box.
Lift the foam sheet below the printer an remove the Accessory Pack,
Power Supply, Putty Knife, an Snipping Pliers.
Lift the top cover an carefully lift out the foam above the platform.
Open the front oor an carefully remove the two pieces of foam from
un er the platform. Tip each foam piece back until it is lying flat, then
turn the foam counter-clockwise until the left en of the foam is through
the oor.
Use the snipping pliers to carefully cut the 6 labele
retaining strap loops from aroun the Print Hea rails
near the top of the printer.
Cut only the straps!
Next, check the Accessories:
• Reel of Filament (1, Natural/White)
• Power Supply
• Power Cable
• USB Cable
• FR-4 (Perf) Boar s
• Extra Nozzle
• Nozzle Wrench
• Hex Wrenches
• Putty Knife
• Snipping Pliers

Afinia H800 3D Printer User’s Manual
9
The Print Head
The Print Hea is hel in place using three gui e magnets in the extru er bracket.
The Print Hea is alrea y installe in the Printer. You o not nee to o any assembly.
The Control Buttons
You can o a lot with your Afinia H800 by using the Control Buttons, so it follows your every
comman .
You also use the Afinia software to control the Afinia H800.
Filament Button
Power Button Pause Button

Afinia H800 3D Printer User’s Manual
10
nstalling the Afinia H800 3D Printer
You will nee the USB Cable, Power Supply an Cable, an Filament Spool to complete the Afinia
H800 3D Printer installation.
Driver and Software nstallation
Mac
Insert the Installation Disc into your Mac. Open the isc, go into the Mac fol er, an
ouble-click Afinia Mac Setup.pkg. Follow the prompts through the installation. The rivers
will be a e an the Afinia software will be installe to the Applications fol er.
Windows
Insert the Installation Disc into your PC. If the installer oes not launch automatically, start the
Afinia 3D Printer setup.exe file in the PC irectory on the installation isc.
Note: This installs the Afinia 3D Printer software, the Afinia 3D Printer rivers, an the Afinia
3D Printer sample files into your Program files\Afinia\Afinia 3D Printer fol er.
Follow the instructions in the Installer to be sure the rivers an software are all in place
before attempting to use the Printer. The instructions below will follow the same or er as those
in the Installer.
nstalling the Printer
Connect the power a apter as shown with the flat si e out an turn
on the power switch.
Long Press the Power button on the control panel to initialize the
printer.
Connect the printer to your computer using the supplie USB cable.
The Printer will be recognize an automatically installe when it is connecte to
your PC or Mac.
US connection

Afinia H800 3D Printer User’s Manual
11
Loading the Filament
A. Insert the en of filament into one en of the Filament tube,
which is on the upper right si e of the spool hol er.
B. Fee the filament through the tube until about 4 inches of
filament protru es from the tube.
C. Put the Filament Spool onto the hol er with the en of the filament pointing up from the
back.
D. Fee the filament into the extru er hea as far as it can
go, about 2 inches.
E. Long Press the Filament button.
a. If the filament oesn’t start fee ing when the
printer beeps, gently push in the filament.
F. Replace the magnetic filament cover.

Afinia H800 3D Printer User’s Manual
12
Getting Ready to Print
Starting the Afinia 3D Program
Open the Afinia 3D software on the esktop (Win ows) or in the Applications fol er (Mac).
Win ows version Mac version
nitializing the Printer
Long Press the Power Button or click nitialize in the 3D Print menu. The printer will beep, the
platform an print hea will move to the printer’s home positions, an beep again when it is rea y.
Win ows version Mac version
T P: If your printer is not respon ing properly, always first try to re-initialize the printer.

Afinia H800 3D Printer User’s Manual
13
Preparing the Platform
The print platform nee s to be prepare so the mo el a heres to the platform enough to be printe
while still being easy to remove from the platform when one.
Never print irectly to the aluminum platform!
There are several options:
FR 4 Board (Glass-reinforce Epoxy Laminate)
The FR-4 Boar , also calle the “Perf” boar , is hel
in place by the 13 mounting screws an two
spring-loa e bearings.
Apply slight ownwar pressure on the two spring
bearings when sli ing the perf boar back into place.
The hea s of all 13 mounting screws will lock own
the boar when installe correctly.
Borofloat Glass
Many people use Borofloat glass as the print surface, brushe with an ABS/acetone slurry an
allowe to ry into a thin ABS film.
The ABS film will hol the mo el to the glass, an release from the glass as the glass cools.
If the mo el oes not easily release, spray a small amount of ammonia-base glass cleaner
aroun the mo el. The same glass cleaner can be use to clean the film from the glass.
It is recommen e that you clean an recoat the print surface after each print.
The Borofloat glass can be place irectly on top of the installe perf boar or on the platform
screws. Use office clips to hol the glass in place.
BuildTak Print Surface
Buil Tak is a print surface that self-a heres to the Perf boar or to glass. If a hering to glass, be
sure that no air is trappe between the glass an the Buil Tak.
Position the Buil Tak surface on the actual print zone – the Perf boar is larger than the surface,
with the perimeter outsi e of the print zone.
Borofloat glass and BuildTak are available at store.afinia.com.
Whichever platform preparation method you use, having a well leveled platform, a
correctly set nozzle height, and a pre heated print surface will improve your results.
The next few pages walk you through these steps.

Afinia H800 3D Printer User’s Manual
14
Leveling the Print Platform
Before calibrating the nozzle height, check the vertical nozzle istance at each corner an center
of the print platform. Open Maintenance from the 3D Print menu an click the Center button.
If you know the nozzle height, enter that height in the To: box, then click the To: button.
If you on’t know the nozzle height, click the To: button to bring the platform to the isplaye
height, then slowly increase the height until the platform is about 0.2 mm from the nozzle, clicking
To: after each increase.
Use the five position buttons to check that the platform at all four corners an the center are close
to the same istance from the nozzle.
If the platform is not close to the same istance from the nozzle at
all five points, a just the platform until it is as level as possible.
Use the 3 Leveling Dials un er the platform arm to level the print
platform.
Turning a ial clockwise will raise the platform above that ial.
Always recalibrate the platform an nozzle height after leveling the
platform.
The more level your platform is, the better your print will be!
Mac version
Win ows version
Leveling Dials
(Viewed from under platform)

Afinia H800 3D Printer User’s Manual
15
Platform Calibration
Along with manual leveling the platform, the Afinia software can run a Platform Calibration to
a just the printing of the raft, laying own a level foun ation for your mo el to be printe on.
This process is not inten e to replace physically leveling the platform, but to work with the
leveling.
Note: The Platform Calibration will only affect printing when using a raft. If you are printing without
a raft, the Calibration is not use .
You can calibrate the platform automatically or manually.
Automatic Platform Calibration
The automatic process will check the height of nine calibration points on the platform.
Select Auto Level from the 3D Print menu.
The ifferences in height between the nine calibration points are use to buil up the raft to give
your mo el a level foun ation on which to print.
After the Calibration is complete, the
Nozzle Height will be automatically set.
To check the calibration values, open the Platform
Calibrate option in the 3D Print menu. Calibration
values are in the mi le section of that win ow.
NOTE: If the Platform Calibrate win ow oesn’t open
(Mac) or any of the values are left empty (PC),
the platform is out-of-level by more than 0.9mm
at one or more points. You will nee to
manually level the platform before running the
Platform Calibration again (see page 14).

Afinia H800 3D Printer User’s Manual
16
Manual Platform Calibration
Select Platform Calibrate from the 3D Print menu.
Click the button labele 5 to move the nozzle to the
center of the platform. Use the Up button to raise the
platform.
Hol the button own to move the platform stea ily, or
use single clicks to fine-tune the platform height.
If you are using clips to secure the print surface to the
platform, be careful to position the clips so they o not
interfere with the nozzle or win barrier.
Raise the platform until the print surface is just
touching the nozzle an note the current height.
Click the Down button a few times to lower the
platform an check the other 8 calibration points.
Once you have foun the calibration point with the
lowest nozzle height, move to that point an a just
the platform position so the nozzle is just touching the
print surface.
Click Set nozzle height.
Once the nozzle height is set, select the istances
from the rop- own lists that brings the platform at
the other 8 points into contact with the nozzle.
Once all 9 values have been entere , click Apply
current values.
Reset will clear all calibration values.
Click Quit when you are finishe .
In the example above, the print surface is slightly warpe with the center higher than both the front
an back e ges. The manual leveling process woul not be able to account for the warp, but the
Platform Calibration can.

Afinia H800 3D Printer User’s Manual
17
Calibrating the Nozzle Height
This section is one of the most important of the entire manual. Please read it
carefully to help you understand the nozzle height setup procedure.
To print successfully, the platform shoul be 0.2mm from the nozzle. As each printer is slightly
ifferent, this istance nee s to be calibrate before starting to print.
You can set the nozzle height either automatically or manually.
If you are using any print surface other than the supplie FR-4 (Perf) Boar , you will nee to set
the Nozzle Height manually!
Automatic Nozzle Height Calibration
The Automatic Nozzle Height Calibration process will only work with the supplie FR-4 perf boar
as the print surface. If you are using any other surface, or the perf boar with Buil Tak or any other
surface a here to the boar , manually set the nozzle height.
Select Nozzle Height Detect from the 3D Print menu.
The extru er will move to the back left of the printer an the platform
will lift until the nozzle contacts the Nozzle Sensor. The etecte
nozzle height will then be isplaye .
Click OK to close the win ow an your nozzle height is set!
Manual Nozzle Height Calibration
To manually set the correct nozzle height:
1. Open Maintenance from the 3D Print menu. The current nozzle height is shown in the
Maintenance ialog images below.
In the Win ows example, the platform is at the bottom of the printer; the Mac example has
the platform 135.5mm from the bottom.
2. Click the Center button.
3. Raise the platform by entering a value into the To: textbox an click the To button.
4. Check the istance between the nozzle an the print surface. If the platform is more than
0.2mm from the nozzle, slowly raise the To value an click the To button each time. Small
changes will help avoi striking the print surface into the nozzle.
Mac version
Win ows version

Afinia H800 3D Printer User’s Manual
18
5. Repeat until the print surface is
0.2mm from the nozzle, about the
thickness of a piece of paper
fol e in half.
6. Check the nozzle height at all four
corners of the platform. If any of
the corners is closer to the nozzle
than the center, use that point to
set the height.
7. With the print surface 0.2mm from
the nozzle, click the Set Nozzle
Height button to save the current nozzle height.
f you haven’t manually re-leveled the platform since the last time the Auto Level
was run, you can stop here. f you have manually leveled the platform, follow the
next 4 steps.
8. Take note of the nozzle height - you may nee to reset the height when you run the Auto
Level feature again.
9. Select Auto Level from the 3D Print menu.
10. After the Auto Level finishes, the automatic Nozzle Height etection will be run again.
11. Once that is complete, go back into the Maintenance win ow, set To to the value from
step 7, an click the Set Nozzle Height button.
T P: If the print surface contacts the nozzle while making height a justments, re-initialize the
printer an before un ertaking any other operations.
Other Maintenance Options
Extrude heats the nozzle an loa s material into the nozzle. When the temperature is high
enough the material is squeeze out of the nozzle. The printer beeps before material starts
extru ing an it beeps again when finishe .
Withdraw clears the filament from the nozzle when you change the filament or if the nozzle nee s
to be cleane . When the nozzle is up to temperature an the printer beeps, gently pull out the
material.
New Spool is use by the software to keep track of how much material has been use on the
spool, an will warn you if you on’t have enough material left to print your mo el.
Click the button an enter the grams of material on the spool. If it is a new spool, enter the weight
of the filament in grams. Also select the filament type to set the nozzle an platform temperatures.
Mac version
Win ows version

Afinia H800 3D Printer User’s Manual
19
T P: An empty Afinia Premium spool weighs about 280 grams. If you are installing a partially use
Afinia Premium filament spool, weigh it, an subtract 280 grams from the weight. Enter that value
into the material Weight text box.
Status
This area isplays the current temperature of the nozzle an platform an if either element is
currently being heate .
Nozzle & Platform Position Controls
The five buttons (FL, FR, Center, NL, NR) control the position of the nozzle an the platform.
The To button controls the height of the platform, an is use in the manual nozzle height
calibration proce ure escribe on page 17.
Bottom returns the platform to the lowest position.
Set Nozzle Height
Uses the value in the To box an saves it as the Nozzle Height.
Stop All
Stops heating an all the movement of the printer. Once you click this button, the current mo el
being printe is cancelle .
You CANNOT resume a print job once the printer has been stoppe .
Pause Print
This button will pause a print in mi -progress while allowing you to resume the print job where it
left off. This is useful if you want to change the material color mi -print or to allow fasteners to be
inserte into printe cavities an then printe over to lock the fastener into place.
This option is only available when the printer is printing an above the first four printe layers.
Table Heat 1 hr
Click the Table Heat 1 hr button to heat the table for a full hour to the correct temperature for the
selecte filament type.
The Status bar will show the
progress of the platform heating.
Heating the platform will not take the full hour, but the longer the platform heats, the more the outer
e ges of the platform will be heate . For prints exten ing close to the e ge of the platform, this will
help prevent warping of the mo el uring printing.
Note: You shoul always preheat the platform prior to printing to ensure the best results.
Stop Preheat (Windows) / Stop Heat (Mac)
This button halts any heating of the table, either the 1 hour heat or the 15 minute preheat from the
3D Print menu or control panel.
This option only appears when the table is being heate .

Afinia H800 3D Printer User’s Manual
20
Printing with the H800 3D Printer
Loading a
3D Model
Click File / Open or
the Open icon on the
toolbar (Win ows
only) an select the
mo el you want to
open. The Afinia 3D
Printer software only
supports STL files,
UP3, an UPP
formats.
You can open several mo els an print them
all at the same time; see Placing Models
onto the Build Platform (page 24).
nsert Copy
A multiple copies of the same mo el to the
platform by selecting nsert Copy from the
right-click options (Win ows) or by selecting
Copy from the Tools menu. Select the
number of copies to a from the list.
You will nee to reposition the mo els after
the copies have been a e .
Unloading the Model, Windows
Left-click a mo el an then click
Unload on the toolbar to remove
the selecte mo el.
You can also right-click anywhere in
the software win ow then choose
Unload by the selecte mo el
name or Unload All mo els if you
want to clear everything.
Unloading the Model, Mac
Use either the Unload or Unload
All button in the right tool pane.
Click the Unload button to remove the currently selecte mo el, or Unload All to clear all mo els
from the workspace.
Mac Software Win ows Software
Multiple parts,
Win ows Software
Unloa with Right-click
Win ows Software
Other manuals for H800
2
Table of contents
Other Afinia 3D Printer manuals
