Troubleshooting Guide
Prior to troubleshooting, check the following
.
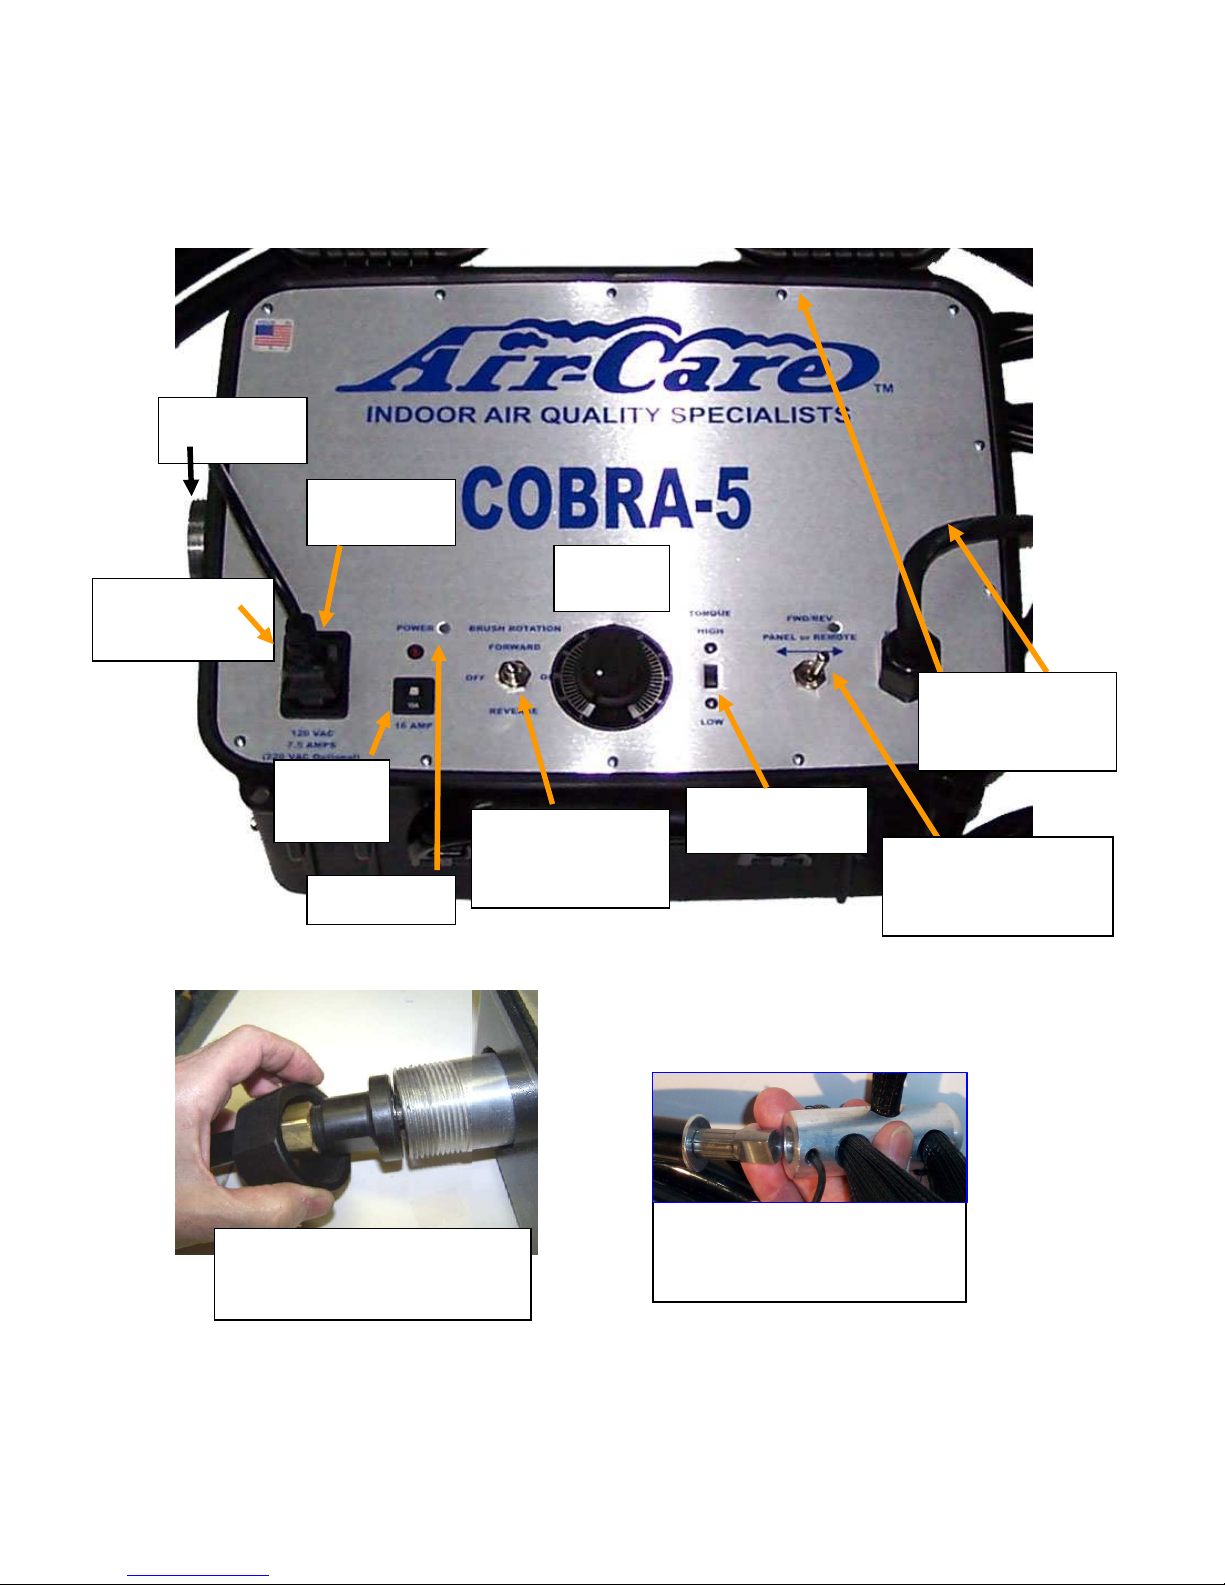
1. Be sure power cord is in the power inlet on the COBRA-5 Motor Case Panel, AND the switch is in
the “ON” or “1” position. The LED should be on, if not try another outlet.
2. When testing the motor, select “Remote” for FORWARD or REVERSE, and use the remote
switch to turn the motor on for the first test.
3. Set the speed control on the front of the motor case to “40”.
4.
It is SAFER to run the COBRA-5 with the cable end DISCONNECTED. You will be told when to
attach it.
Problem Check IF Action
Motor does not
run. 1. Did you follow the first 5
steps at the top of this page? Yes
No
Be sure the Brush and Cable have been
disconnected and Go to #2
Follow the 5 instructions above then go to
#2.
Motor does not
run 2. Turn the Motor “ON” with the
Remote switch in FWD Then
switch to REV. Did the Motor
Run in BOTH directions?
Yes
No
Go to #3
The Remote switch may defective, call Air-
Care
Motor does not
run. 3. Switch the “FWD / REV”
selector to “PANEL” and flip the
“FWD/REV” switches to
Forward then Reverse. Does
the Motor run?
Yes
No
The Remote Switch may be defective, call
Air-Care.
Go to #4
Motor Does not
Run 4. Does the Motor HUM when
turned on? Yes
No
Call Air-Care.
Go to #5
Motor does not
run. 5. Check the circuit breaker on
the panel, has it popped up? Yes
No
Reset the circuit breaker and try the motor
again. Go to #6.
Call Air-Care
6. Does the circuit breaker trip
every time the motor is turned
on in forward and reverse?
Yes
No Call Air-Care
Run a full test in forward, reverse, fast and
slow,
If it runs OK, attach the brush and cable and
run in all modes, then go to #7.
7. Did the COBRA-5 run
properly in all modes? Yes
No
Problem solved. A power surge may have
tripped the breaker.
Look for the new symptom in the left column
or call Air-Care
The Brush
slows down
when set to
#100 on speed
Control
8. Is the Cable coiled tightly or
is this a brand new cable? Yes
No
When being used, the cable must be coiled
loosely, about 24” diameter or larger coils. A
new cable must “break in” a few hours.
Go to #10
9. Is the Large 36” brush
attached?
Yes
No
The 36” brush should only be run at speeds
of 5 and lower.
Go to #11
10. Is the standard cable being
used (3/8” Core) Yes
No Be sure the torque switch is set to “High”
Call Air-Care
The Dryer
Cable (5/16”)
twists
11. Is the torque switch set to
“LOW” Yes
No Call Air-Care
Set the torque switch to LOW and test
again.