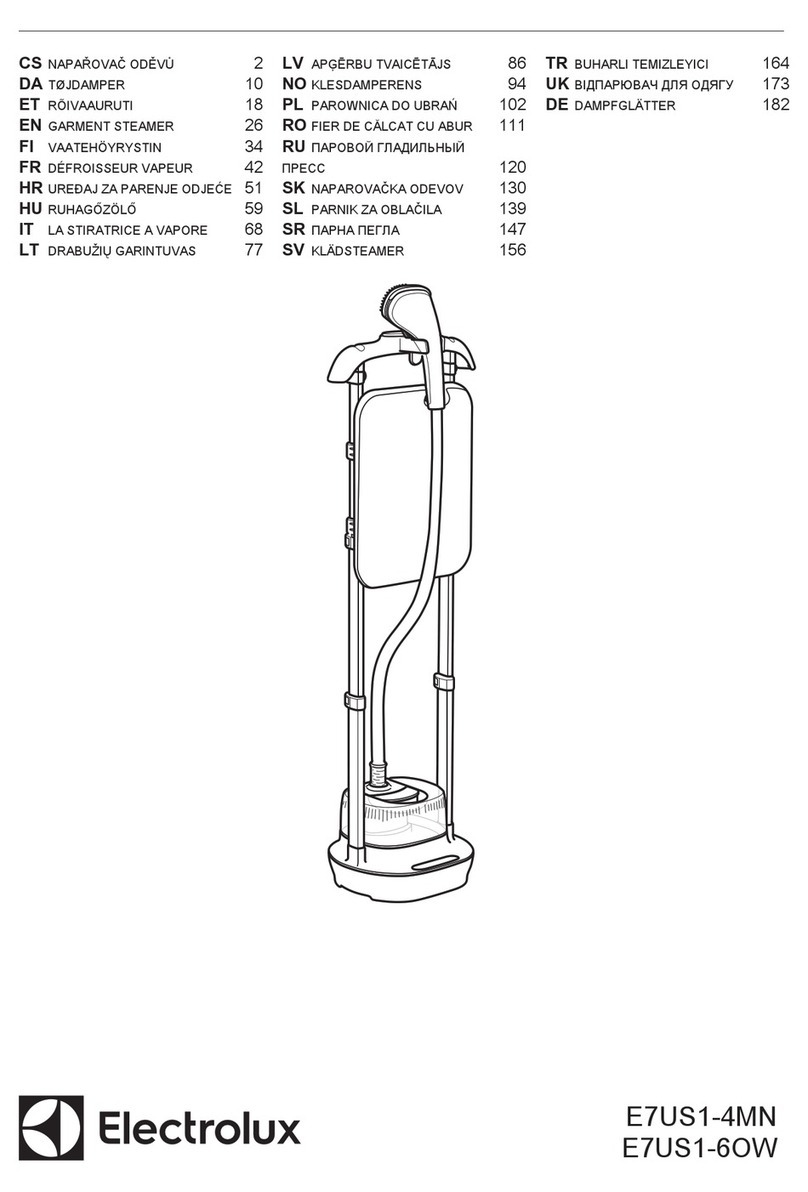
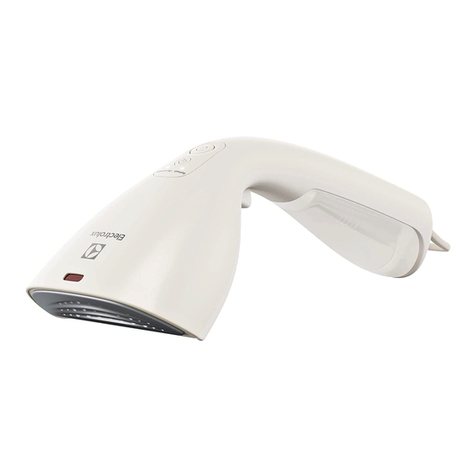
Electrolux Refine 500 User manual

Refine 500 Garment steamer
E5GS1-55DB
E5GS1-89BM
EN INSTRUCTION BOOK
CNS
CNT
ID Buku Panduan
TH
VN Sách Hng Dn

2www.electrolux.com
A
B
C
D
E
I
J
M
F
G
H
K* L*
N

3www.electrolux.com
E5GS1-55DB E5GS1-89BM
O1 √ √
O2 √ √
P√ √
Q√ √
R√ √
S√ √
T** √
U** √
V** √

4www.electrolux.com
E5GS1-5xxx E5GS1-8xxx

5www.electrolux.com
ID
TH
VN
CNT
CNS
EN
INSTRUCTION MANUAL
Graphics and drawings in this manual are solely for illustration purposes and are subject to variations from
actual product.
Read all instructions carefully before using the appliance for the first time.
Keep this manual for future reference.
COMPONENTS
A. Steam nozzle
B. Clothes rack
C. Support frame
D. Locking sleeves
E. Steam hose
F. Support locking ring
G. Steam inlet seat
H. Steam outlet
I. Water tank
J. Base unit
K. ON/OFF switch button* (only on E5GS1-5xxx
models)
L. Steam setting selector* (only on E5GS1-8xxx
models)
M. Wheels
N. Drain valve
O. Combined brush
O1. Brush
O2. Static brush
P. Line clip
Q. Trousers rack with 2 garment clips
R. Garment clip
S. Protective glove
T. Ironing board for collar and sleeve**
U. Auxiliary ironing board**
V. Accessory bag**
** Specifications vary by models
SAFETY ADVICE
• This appliance is not intended for use by persons (including children) with reduced physical, sensory or
mental capabilities, or lack of experience and knowledge, unless they have been given supervision or
instruction concerning the use of the appliance by a person responsible for their safety.
• Keep the appliance and its power cord out of reach of children. Children should be supervised to
ensure that they do not play with the appliance.
• Cleaning and user maintenance shall not be performed by children without supervision.
• The appliance can only be connected to a power supply which voltage and frequency comply with the
specifications on the rating plate.
• The appliance is not to be used if it has been dropped, if there are visible signs of damage on the
appliance or its cord or if it is leaking.
• The appliance must only be connected to an earthed socket.
• If the appliance or the supply cord is damaged, it must be replaced by the manufacturer, its service
agent or similar qualified person, in order to avoid hazard.
• The appliance must be used and rested on a stable surface.
• Never leave the appliance unattended while connected to the supply mains.
• The appliance must be switched off and the main plug withdrawn each time after use, before cleaning
and maintenance.
• The plug must be remove from the socket outlet before the water tank is filled with water.
• The main cable must not come into contact with any hot parts of the appliance.
• Do not immerse the appliance in water or any other liquid.
• Do not exceed the maximum filling volume as indicated on the appliances.
• This appliance is intended for domestic use only. The manufacturer cannot accept any liability for
possible damage caused by improper or incorrect use.
• Do not bend the steam hose or block the steam outlet or else accidents may happen because of
overpressure.
• Do not pull the steam hose when the appliance is in use.
• Do not fill hot water into the water tank or else the water tank may deform.
• To avoid irregular steam or water droplets spitting from the steam nozzle, lift the steam nozzle in up-
right position to remove condensation when there is a bubbling sound.

6www.electrolux.com
ID
TH
VN
CNT
CNS
EN GETTING STARTED
Before first use, remove all adhesive remains and gently rub with a dampened cloth. Rinse the water tank to
remove foreign particles. When switched on for the first time, temporary vapours/odours may occur.
1 Take out the support frame and the clothes rack, press down to install the clothes rack and lift it. If
the clothes rack is stationary, it has been properly installed.
2 Press the clothes rack button, hold the clothes rack support with hands and unfold and fold the
clothes rack to adjust it.
3 Insert the support into the corresponding hole on the product and rotate the support locking ring to
lock the support.
4 Loosen the locking sleeves, lift the support, adjust it to the proper position and then lock the support
locking sleeves.
5 Insert the steam inlet seat into the steam outlet along the direction in the figure and then tighten it
turning clockwise.
6 Place the steam nozzle on the clothes rack hook.
7 Take out the water tank, unscrew the knob at its bottom, fill water into it. This product is appropriate
for use with tap water. It is recommended to use distilled water or a mix of 50% distilled, 50% tap wa-
ter. Never put scented water, vinegar or ironing aids in the water tank. This may cause brown spitting
and staining.
8 Place the water tank in the base unit, then insert the plug into the power socket.
For E5GS1-5xxx models, press the ON/OFF switch button to heat up the product.
For E5GS1-8xxx models, select the desired steam setting by turning the steam setting selector.
Icon Fabric
OFF position
Silk
Thinner clothes such as silk clothes and shirts.
Cotton/Fiber
Thicker clothes such as cotton clothes and chemical fiber clothes.
Fur/Linen
Thicker clothes such as fur coats and linen coats.
9 The power light will be on and steam will be released soon. Hang clothes on the clothes rack. Always
steam the clothes from up to down.
CAUTION: The steam hose becomes warm during steaming. This is normal.
NOTE: Do not release steam towards people or animals.

7www.electrolux.com
ID
TH
VN
CNT
CNS
EN
ACCESSORIES
PROBLEM POSSIBLE CAUSE
Brush For removing fluff and hair from garments.
Static brush For removing the slight dust/fluff by the special static strip on it.
Line clip For ironing the shirt sleeves and collars. Just clip it to the tab on the
underside of the nozzle. Place the garment between the nozzle and
the line clip.
Trousers rack with 2 garment clips For hanging trousers and skirts. Push up the trouser rack along
the support, it is properly installed after its locking knob hooks the
support of the clothes rack. Evenly hang a pair of trousers or skirt
in the middle of the trousers rack and firmly clip the garment with
trousers clips.
Garment clip For holding sleeves, dresses and other longer items in place for quick
steaming.
Protective glove For protection against scalding from the steam released from the
steam nozzle.
Ironing board for collar and
sleeve
For ironing collar, sleeves and pockets.
Auxiliary ironing board For smoother and better steaming results, hold the auxiliary ironing
board underneath the garment while steaming the garment.
Accessory bag For storage of accessories.
CLEANING AND CARE
Switch off the product and unplug from the mains. Allow the product to cool down for at least 30 minutes.
10 Remove the water tank from the base unit, drain the remaining water from the water tank.
11 Open the drain valve to thoroughly drain the remaining water from the heating unit and wipe the re-
maining water on the steam outlet and the base unit to prevent scaling. After draining, close the drain
valve.
In areas with medium water hardness, we recommend to descale the product every 2 months, while in areas
with very hard water, we recommend to descale every 1 month or after 10 sessions.
12 Mix a descaler agent and water at the specified ratio, prepare at least 300ml descaler mixture. (Use
the recommended ratio for the mixture. If there is much scaling, properly increase the proportion of
descaler.)
Note: Please follow the water/descaler liquid ratio instructions on the bottle.
13 Fill the mixture into the water tank, tighten the knob and then place the water tank in the base unit.
Soak for one to two hours under room temperature (if there is much scaling, increase the soaking time;
however, the soaking time should not be longer than 8 hours).
CAUTION: Do not switch on the product during soaking.
14 Pour out the mixture from the water tank and the base unit (refer to Cleaning and Care section, point 10
and 11)
15 Fill in clean water via the steam hose joint and into the water tank and then pour it out. Repeat this
step for several times until the scales in the product are removed and there is no longer a descaler
smell.
16 Reassemble the accessories to continue using it.

8www.electrolux.com
ID
TH
VN
CNT
CNS
EN TROUBLESHOOTING
PROBLEM POSSIBLE CAUSE SOLUTION
No steam is released and
the power light is off.
Connection problem. Check main power supply cable, plug
and outlet.
The appliance is not switched on.
For E5GS1-5xxx models, press the ON/
OFF switch button.
For E5GS1-8xxx models, please turn
the steam setting selector to the
desired setting.
No steam is released but
the power light is on.
The water level in the water tank
is too low. Fill water into the water tank.
Water leakage from steam
nozzle.
The steam nozzle cracked. Replace with a new set of steam hose.
Condensation from the steam
hose.
Lift the steam nozzle in up-right
position.
Water leakage from the
steam hose joint. The steam hose joint has loosen. Tighten the steam hose joint.
Water flowing out from the
water tank.
The water tank cracked. Replace with a new water tank.
The steam hose is in U-shape or
bent for a long period of time. Lift the steam hose in up-right position.
The water tank is deformed.
Filling up the water tank with hot
water. Replace with a new water tank.
Chemical residue from
inadequate cleaning process.
The steam output is too
little.
Scales accumulation in heating
unit.
Please refer to "CLEANING AND
CARE" section, point 12-15 for
descaling process.
The switch or the heating unit is
damaged.
Please contact Electrolux Customer
Service team for further assistance.
There is a bubbling sound
when appliance is in
operation.
Condensation from the steam
hose.
Lift the steam nozzle in up-right
position.
The steam hose is in U-shape or
bent for a long period of time. Lift the steam hose in up-right position.
DISPOSAL
Recycle the materials with the symbol . Put the packaging in applicable containers to recycle it. Help
protect the environment and human health and to recycle waste of electrical and electronic appliances.
Do not dispose appliances marked with the symbol with the household waste. Return the product to
your local recycling facility or contact your municipal office.
CUSTOMER CARE AND SERVICE
When contacting Service, ensure that you have the following data available: Model, PNC, Serial Number.
The information can be found on the rating plate.
Due to the Electrolux policy of continual product development; specifications, colours, and details of our
products and those mentioned in this manual are subject to change without notice.
9www.electrolux.com
CNT
ID
TH
VN
EN
CNS
使用手册
本手册中的图形和图示仅用于说明目的,并可能与实际产品有所不同。
首次使用前请仔细阅读所有使用说明。
保存本手册,以备将来参考。
部件名称
A. 蒸汽喷嘴
B. 衣架
C. 支架
D. 锁套
E. 蒸汽软管
F. 支架锁环
G. 进气口基座
H. 出气口
I. 水箱
J. 主机
K. ON/OFF开/关按钮*(仅限E5GS1-5xxx型号)
L. 蒸汽设置选择钮*(仅限E5GS1-8xxx型号)
M. 脚轮
N. 排水阀
O. 组合刷头
O1. 衣物刷
O2. 静电刷
P. 褶线夹
Q. 带两个衣夹的裤架
R. 衣夹
S. 防护手套
T. 衣领和衣袖用烫衣板**
U. 辅助烫衣板**
V. 配件收纳包**
** 规格根据不同型号而所有不同
安全建议
• 本电器不适合那些身体行动障碍、感官功能降低或智力缺陷或缺乏经验和知识的人(包括儿童)使用,除非
对其安全负有责任的人就电器的使用对他们进行了监督或指导。
• 将电器及其电源线放在儿童无法触及的地方。应监督儿童,确保他们不会把电器当作玩具。
• 在没有监督的情况下儿童不得进行清洁和维护。
• 该电器只能连接到电压和频率与产品所要求的规格相符的电源上。
• 如果电器被摔坏、电器或其电线上有明显损坏迹象、或出现漏水,则不要再使用该电器。
• 电器必须只与接地插座连接。
• 如果电器或电源线损坏,必须由制造商、其服务代理商或类似的合格人员更换,以避免危险。
• 必须在稳固的表面上使用和放置电器。
• 电器接通电源时,不要让电器处于无人看管的状态。
• 每次使用后或清洗和维护前,必须关掉电器并拔掉插头。
• 必须先将插头从插座拔掉,再往水箱里注水。
• 不要让电缆与电器的任何热部件接触。
• 不要将电器浸入水或任何其他液体中。
• 不要超过电器上标示的最大装水量。
• 该电器只供家庭使用。因使用不当或不正确而可能造成的损坏,制造商不承担任何责任。
• 不要弯曲蒸汽软管或堵塞出汽孔,否则会因压力过大而发生事故。
• 在使用电器时,不要拉扯蒸汽软管。
• 不要将热水注入水箱内,否则水箱会变形。
• 为避免蒸汽喷嘴喷出不规则的蒸汽或水滴,当有冒泡声时,将蒸汽喷嘴垂直放置以清除冷凝物。

10 www.electrolux.com
CNT
CNS
ID
TH
VN
CNS
EN
开始使用
第一次使用前,清除所有残留的粘合剂,用湿布轻轻擦拭。冲洗水箱,清除异物。第一次通电使用时,可能会
产生短暂的水蒸汽/气味。
1 取出支架和衣架,把衣架向下按压在支架上并在完成后提起。如果衣架仍然固定不动,说明已经安装正
确。
2 按下衣架按钮,用双手抓住衣架支撑杆,即可通过展开和收起对衣架进行调整。
3 将支架插入产品对应的插孔中,再旋转支架锁环以锁定支架。
4 拧松锁套,提起支架并调整到适当位置后再拧紧锁套。
5 将进气口基座依图中所示方向插入出气口,并以顺时针方向拧紧。
6 将蒸汽喷嘴放在衣架的挂钩上。
7 取出水箱,拧开底部旋钮并注水。本产品适合使用自来水。建议使用蒸馏水,或50%蒸馏水加50%自来水
的混合液体。请勿将香水、醋或熨烫添加剂注入水箱。那样可能会留下棕褐色的喷溅物和污渍。
8 将水箱放入主机,然后将插头插入电源。
对于E5GS1-5xxx型号,按下ON/OFF开关按钮使产品预热。
对于E5GS1-8xxx型号,通过旋转蒸汽设置选择钮选择所需的蒸汽设置。
图标 面料
关闭位置
丝质
适用于丝质的衣物和衬衫等较轻薄的衣服。
棉质/纤维
适用于棉质衣物和化学纤维等较厚重的衣服。
皮制/麻质
适用于皮制和麻布外套等较厚重的衣服。
9 电源灯将亮起,不久后蒸汽便会喷出。把要熨烫的衣物挂在衣架上。熨烫时,一律由上往下进行。
警告:随着蒸汽流动,蒸汽管也会逐渐升温。这属于正常情况。
注:请勿将蒸汽朝人或动物喷放。
配件
配件 用途
衣物刷 清除衣物上的绒毛和毛发。
静电刷 利用刷子上所贴附的静电毡清除较为细微的灰尘/绒毛。
褶线夹 熨烫衬衫衣袖和衣领。只需要将其夹在喷嘴下方的挂环上,再把衣物置于喷嘴和
褶线夹中间。
带两个衣夹的裤架 用于吊置的裤子和衬衫。把裤架沿着支架往上推,直到其锁扣扣住衣架的支架即
表示安装正常。将裤子或衬衫平滑地挂在裤架中央,再用衣夹夹紧。
衣夹 固定长袖、礼服和其他较长的衣物,以便快速熨烫。
防护手套 防止被蒸汽喷嘴释放的蒸汽烫伤。
衣领和衣袖用烫衣板 熨烫衣领、衣袖和衣物口袋。
辅助烫衣板 为使熨烫更平滑、效果更好,熨烫衣物时将辅助熨衣板放在衣物下方。
配件收纳包 存放配件。

11www.electrolux.com
CNT
ID
TH
VN
EN
CNS
清洁和护理
关闭产品电源并将电源从插座拔掉。让产品冷却至少30分钟。
10 从主机中取出水箱,把水箱里的剩余水倒掉。
11 打开排水阀,让加热装置里的残留水分完全流出,将蒸汽出口和主机上剩余的水擦拭干净,以防止结垢。
水分排尽后,关闭排水阀。
对于中等水质硬度的区域,建议每两个月除一次水垢,在水质非常硬的区域,建议每一个月或使用十次后
除一次水垢。
12 将除垢剂与水按规定的比例混合,配制至少300ml的除垢剂混合液体。(使用推荐的混合比例。如果结垢较
多,适当增加除垢剂的比例。)
注:请按照瓶子上的水/除垢剂混合比例说明操作。
13 将混合液体倒入水箱中,拧紧旋钮,将水箱放入主机。在室温下浸泡一至两个小时(如果结垢较多,增加
浸泡时间;但是浸泡时间不得超过八小时)。
警告:浸泡期间不要接通产品电源。
14 把水箱和主机中的混合液体倒掉(参见清洁和护理章节第10条和第11条)
15 通过蒸汽软管接头向水箱内注入清水,然后倒掉。多次重复该步骤,直至去除产品中的水垢并且不再有除
垢剂的气味为止。
16 重新组装各个配件并再次使用。
故障排除
问题 可能原因 解决方法
没有蒸汽喷出且电源灯未
亮。
电源连接问题。 检查电源线、插头和插座。
电器没有开启。
对于E5GS1-5xxx型号,按下ON/OFF开关
按钮。
对于E5GS1-8xxx型号,请旋转蒸汽设置选
择钮选择所需的设置。
没有蒸汽喷出但电源灯已
亮。 水箱内没有足够的水。 为水箱注水。
蒸汽喷嘴漏水。
蒸汽喷嘴有裂缝。 更换新的蒸汽软管。
蒸汽软管有凝结。 垂直放置蒸汽喷嘴。
蒸汽软管接口处漏水。 蒸汽软管接口处松动。 拧紧蒸汽软管接口。
水从水箱向往流出。
水箱有裂缝。 更换新的水箱。
蒸汽软管呈U型,或长期处于弯折
状态。 拉直蒸汽软管并垂直放置。
水箱已变形。 使用时注入了热水。 更换新的水箱。
清洁过程中产生的化学残留物。
蒸汽量过少。 加热装置内积累了水垢。 请参见“清洁和保养”章节第12-15条的
除垢程序。
开关或加热装置损坏。 请联系伊莱克斯客户服务部门提供协助。
电器运行时有冒泡声。
蒸汽软管有凝结。 垂直放置蒸汽喷嘴。
蒸汽软管呈U型,或长期处于弯折
状态。 拉直蒸汽软管并垂直放置。

12 www.electrolux.com
CNT
CNS
ID
TH
VN
CNS
EN
弃置
标有 标识的产品均可以回收。您可将产品所有部件放入适当的容器内再回收。为了营造健康宜人的生活环
境,请配合并回收废弃的电器用品。
请勿将标有 记号的产品当作家庭垃圾丢弃。回收时,请将产品交由当地回收服务厂商处理,或联络当地政府
机构寻求协助。
客户服务
联系客服部门时,请确保您已掌握了以下信息:型号、PNC、序列号。此类信息可在铭牌上找到。
由于伊莱克斯(Electrolux)坚持持续开发产品的政策,本手册之中提及的产品规格、颜色、详细信息等等均可能
随时更改,恕不另行通知。
伊莱克斯(中国)电器有限公司
联系地址: 上海共和新路1968号大宁国际广8号楼5室
注册地址: 长沙经济技术开发区漓湘路98号和祥科技园
产品: 伊莱克斯挂烫机
型号: E5GS1-55DB
电源: 220V~ 50Hz
功率: 1300W
产地: 江苏 苏州
产品标准: GB4706.1-2005, GB4706.84-2007

CNT
ID
TH
VN
EN
CNS
CNT
13www.electrolux.com
A.
B.
C.
D.
E.
F.
G.
H.
I.
J.
K.
L.
M.
N.
O.
O1.
O2.
P.
Q.
R
S.
T.
U.
V.
•
•
•
•
•
•
•
•
•
•
•
•
•
•
•
•
•
•
•

CNS
CNS
ID
TH
VN
CNT
EN
14 www.electrolux.com
1
2
3
4
5
6
7 50%50%
8
E5GS1-5xxxON/OFF
E5GS1-8xxx
圖示 面料
關閉
絲質
適用於絲質的衣物和襯衫等較輕薄的衣服。
棉質/纖維
適用於棉質衣物和化學纖維等較厚的衣服。
皮質/麻料
適用於皮制和麻料外套等較厚的衣服。
9
配件 用途

CNT
ID
TH
VN
EN
CNS
CNT
15www.electrolux.com
30
10
11
12 300ml
/
13
14 1011
15
16

CNS
CNS
ID
TH
VN
CNT
EN
16 www.electrolux.com
PNC
Electrolux
RoHS
RoHS -->-->RoHS
http://www.electrolux.com.tw/Support/Customer-Care/

CNT
TH
VN
EN
CNS
ID
17www.electrolux.com
BUKU PANDUAN PENGGUNAAN
Gambar dan visual di dalam buku panduan ini hanya ditujukan sebagai ilustrasi dan mungkin berbeda
dengan wujud asli produk.
Bacalah semua petunjuk dengan saksama sebelum mulai menggunakan perabot untuk pertama kali.
Simpanlah buku panduan ini sebagai referensi ke depannya.
KOMPONEN
A. Nosel uap
B. Rak pakaian
C. Kerangka penopang
D. Lengan pengunci
E. Selang uap
F. Cincin pengunci palang penopang
G. Penahan lubang uap
H. Lubang hembusan uap
I. Tangki air
J. Bodi unit
K. Tombol ON/OFF* (hanya model E5GS1-5xxx)
L. Kenop pilihan uap* (hanya model E5GS1-
8xxx)
M. Roda
N. Katup penguras
O. Sikat kombinasi
O1. Sikat
O2. Sikat statis
P. Penjepit lipit
Q. Rak celana panjang dengan 2 penjepit
R. Penjepit pakaian
S. Sarung tangan
T. Papan setrika untuk kerah dan lengan**
U. Papan setrika tambahan**
V. Kantong aksesori**
** Spesifikasi berbeda-beda, tergantung model
ANJURAN DEMI KESELAMATAN
• Perabot ini tidak dimaksudkan untuk digunakan oleh orang (termasuk anak-anak) yang memiliki
kekurangan fisik, inderawi, atau gangguan kejiwaan, atau tidak punya pengalaman dan pengetahuan,
kecuali mereka berada di bawah pengawasan atau diberi pengarahan terkait penggunaan perabot
oleh orang yang bertanggung jawab atas keselamatan mereka.
• Jauhkan perabot dan kabelnya dari jangkauan anak-anak. Anak-anak harus diawasi agar tidak
bermain-main dengan perabot ini.
• Pembersihan dan perawatan mandiri tidak boleh dilakukan oleh anak-anak tanpa pengawasan.
• Perabot seharusnya hanya dihubungkan ke sumber listrik sesuai rating voltase dan frekuensi yang
tercantum pada pelat spesifikasi.
• Jangan gunakan perabot jika terjatuh, terlihat ada tanda-tanda kerusakan pada perabot atau
kabelnya, atau jika ada kebocoran.
• Hubungkan perabot hanya ke stopkontak listrik yang diardekan.
• Jika perabot atau kabelnya rusak, maka penggantian hanya boleh dilakukan oleh produsen, agen
servis resmi, atau teknisi yang kompeten untuk menghindari bahaya.
• Gunakan dan letakkan perabot pada permukaan yang datar dan stabil.
• Jangan sekali-kali meninggalkan perabot tanpa pengawasan ketika masih terhubung ke sumber listrik.
• Matikan perabot dan cabut stekernya dari sumber listrik setelah selesai digunakan, sebelum
membersihkan, dan melakukan perawatan.
• Steker harus dicabut dari stopkontak listrik sebelum mengisi tangki air.
• Usahakan jangan sampai kabel menyentuh komponen perabot yang masih panas.
• Jangan sekali-kali merendam perabot di dalam air atau cairan apa pun.
• Jangan melampaui batas volume pengisian maksimal yang tertera pada tangki perabot.
• Perabot ini hanya ditujukan untuk penggunaan skala rumah tangga. Produsen tidak bertanggung
jawab atas kerusakan apa pun akibat penggunaan yang tidak benar atau menyimpang.
• Jangan sampai selang uap terlipat atau lubang uap terhalang karena dapat menyebabkan insiden
akibat tekanan berlebih.
• Jangan menarik selang uap ketika perabot sedang digunakan.
• Jangan mengisi tangki dengan air panas karena dapat menyebabkan tangki penyok.
• Hindari hembusan uap insidental atau tetesan air dari lubang nosel uap, pegang nosel uap dengan
posisi tegak untuk menghilangkan embun ketika ada suara air bergejolak.

CNT
CNS
TH
VN
ID
EN
18 www.electrolux.com
MULAI MENGGUNAKAN
Sebelum mulai menggunakan, kelupas semua stiker dan lap sisa perekat perlahan-lahan dengan kain
lembap. Bilas tangki air untuk menghilangkan benda asing. Ketika pertama kali dihidupkan, mungkin akan
tercium bau/keluar sedikit asap.
1 Tarik keluar kerangka penopang dan rak pakaian, dorong ke bawah untuk memasang rak pakaian
dan menegakkannya. Pemasangan sudah benar jika posisi rak tidak bergerak-gerak.
2 Tekan tombol rak pakaian, pegang penopang rak pakaian, lalu buka dan tutup kembali rak pakaian
untuk melakukan penyetelan.
3 Masukkan palang penopang ke lubangnya lalu putar cincin pengunci untuk mengunci palang
penopang.
4 Longgarkan lengan pengunci, angkat penopang, setel ke posisi yang sesuai lalu kunci lengan
pengunci penopang.
5 Masukkan penahan lubang uap ke dalam lubang hembusan uap sesuai arah panah pada gambar
lalu putar ke kanan untuk mengencangkannya.
6 Gantung nosel uap pada kait rak pakaian.
7 Ambil tangki air, buka kenop di bagian bawahnya lalu isi dengan air. Produk ini cocok digunakan
dengan air keran. Sebaiknya gunakan air suling atau campuran antara 50% air suling dan 50%
air keran. Jangan sekali-kali mengisi tangki dengan air berpewangi, cuka, atau cairan pengharum
lainnya. Karena dapat menimbulkan noda dan bercak kecokelatan.
8 Pasang tangki air pada bodi unit, lalu tancapkan steker ke stopkontak listrik.
Untuk model E5GS1-5xxx, tekan tombol ON/OFF untuk memanaskan setrika.
Untuk model E5GS1-8xxx, pilih pengaturan uap dengan memutar kenop pilihan uap.
Ikon Kain
OFF position
Sutera
Bahan kain tipis seperti baju dan kemeja dari sutera.
Katun/Serat
Bahan kain lebih tebal seperti pakaian dari katun dan serat kimia.
Bulu/Linen
Bahan kain sangat tebal seperti jaket berbulu dan linen.
9 Lampu akan menyala dan uap akan segera dihembuskan. Gantung pakaian pada rak pakaian. Asapi
pakaian dengan uap dari sisi atas ke bawah.
PERHATIAN: Selang uap akan menjadi hangat selama menyetrika. Ini bukan suatu kerusakan.
CATATAN: Jangan menghembuskan uap ke arah orang lain atau binatang.

CNT
TH
VN
EN
CNS
ID
19www.electrolux.com
AKSESORI
AKSESORI FUNGSI
Sikat Menghilangkan serat dan rambut-rambut dari pakaian.
Sikat statis Menghilangkan debu/serat halus dengan strip statis khusus.
Penjepit lipit Menyetrika lipatan pada bagian lengan dan kerah. Cukup pasang
pada ceruk di bawah nosel. Jepit pakaian di antara nosel dan
penjepit lipit.
Rak celana panjang dengan 2
penjepit
Menggantung celana panjang dan rok. Dorong rak celana panjang
ke atas di sepanjang palang penopang, pemasangan sudah benar
jika kenop pengunci terkait ke penopang rak pakaian. Gantung
celana panjang atau rok di bagian tengah rak lalu jepit dengan
kencang menggunakan penjepit.
Penjepit pakaian Menggantung lengan, gaun, dan pakaian yang panjang lainnya
ketika akan disetrika uap.
Sarung tangan Melindungi tangan dari luka bakar akibat uap pans yang
dihembuskan nosel uap.
Papan setrika untuk kerah dan
lengan
Untuk menyetrika kerah, lengan, dan saku.
Papan setrika tambahan Untuk hasil setrika yang lebih baik dan mulus, pegang papan setrika
tambahan di bawah pakaian ketika menyetrika.
Kantong aksesori Menyimpan aksesori.
PEMBERSIHAN DAN PERAWATAN
Matikan perabot dan cabut stekernya dari sumber listrik. Biarkan perabot hingga dingin selama minimal 30
menit.
10 Lepaskan tangki air dari bodi unit, keluarkan semua sisa air yang ada di dalam tangki.
11 Buka katup penguras untuk mengeluarkan air dari unit pemanas lalu lap sisa-sisa air pada lubang
uap dan bodi unit untuk mencegah terbentuknya kerak. Pasang kembali katup penguras setelah
selesai.
Di wilayah dengan tingkat kesadahan air sedang, sebaiknya lakukan pembersihan kerak perabot
setiap 2 bulan sekali, namun di wilayah dengan tingkat kesadahan air yang tinggi, sebaiknya lakukan
pembersihan kerak perabot 1 bulan sekali atau setelah 10 kali menyetrika.
12 Campurkan cairan penghilang kerak dengan perbandingan tertentu, buat sekitar 300 ml larutan. (Ikuti
petunjuk perbandingan campuran. Jika kerak sudah tebal, tambah cairan pengilang kerak bila perlu.)
Catatan: Ikuti petunjuk perbandingan antara air/agen penghilang kerak pada botol.
13 Masukkan larutan campuran ini ke dalam tangki air, kencangkan kenop lalu pasang tangki pada bodi
unit. Rendam selama 1 atau 2 jam di bawah suhu ruangan (jika kerak tebal, rendam lebih lama; namun
jangan sampai lebih dari 8 jam).
PERHATIAN: Jangan menghidupkan perabot ketika ada larutan penghilang kerak.
14 Kuras larutan di dalam tangki air dan bodi unit (lihat bagian Pembersihan dan Perawatan, butir 10 dan
11)
15 Isi tangki dengan dengan air bersih dari bagian sambungan selang untuk pembilasan, lalu kuras. Ul-
angi pembilasan beberapa kali hingga semua kerak rontok dan tidak tercium bau larutan penghilang
kerak.
16 Pasang kembali semua aksesori untuk disimpan.

CNT
CNS
TH
VN
ID
EN
20 www.electrolux.com
PEMECAHAN MASALAH
MASALAH KEMUNGKINAN PENYEBAB SOLUSI
Tidak ada hembusan uap
dan lampu tidak menyala.
Sambungan listrik bermasalah. Periksa kabel, steker, dan stopkontak.
Perabot belum dihidupkan.
Untuk model E5GS1-5xxx, tekan
tombol ON/OFF untuk menghidupkan
setrika.
Untuk model E5GS1-8xxx, putar kenop
pilihan uap ke pengaturan yang dipilih.
Tidak ada hembusan uap
tetapi lampu menyala. Air di dalam tangki terlalu sedikit. Isi kembali tangki air.
Air merembes dari nosel
uap.
Nosel uap retak. Ganti dengan set selang uap yang
baru.
Terjadi kondensasi pada selang
uap.
Pegang nosel uap dengan posisi
tegak.
Air menetes dari bagian
sambungan selang uap. Sambungan selang longgar. Kencangkan kembali sambungan
selang.
Air mengalir keluar dari
tangki.
Tangki air retak. Ganti dengan tangki yang baru.
Selang uap ditekuk atau terlipat
dalam jangka waktu lama.
Pegang selang uap dengan posisi
tegak.
Tangki air penyok.
Tangki diisi dengan air panas.
Ganti dengan tangki yang baru.
Ada residu bahan kimia karena
proses pembersihan tidak
menyeluruh.
Hembusan uap terlalu
sedikit.
Terbentuk kerak di dalam unit
pemanas.
Lihat bagian “PEMBERSIHAN DAN
PERAWATAN” butir 12-15 untuk
menghilangkan kerak.
Sakelar atau unit pemanas rusak. Hubungi pusat Layanan Konsumen
Electrolux untuk bantuan lebih lanjut.
Terdengar suara air
bergejolak ketika perabot
dioperasikan.
Terjadi kondensasi pada selang
uap.
Pegang nosel uap dengan posisi
tegak.
Selang uap ditekuk atau terlipat
dalam jangka waktu lama.
Pegang selang uap dengan posisi
tegak.
MEMBUANG PRODUK
Daur ulang bahan yang bertanda . Masukkan kemasan ke tempat sampah yang sesuai untuk didaur
ulang. Bantu lestarikan lingkungan dan menjaga kesehatan dengan mendaur ulang limbah perabot listrik
dan elektronik.
Jangan membuang perabot yang bertanda sebagai limbah rumah tangga biasa. Bawa produk
bekas ke fasilitas daur ulang setempat atau hubungi layanan pembuangan sampah di kota Anda.
LAYANAN KONSUMEN DAN SERVIS
Sebelum menghubungi Pusat Servis, persiapkan data berikut ini: Model, PNC, Nomor Seri. Informasi
tersebut dapat ditemukan pada pelat spesifikasi.
Sesuai kebijakan pengembangan produk Electrolux secara berkelanjutan; spesifikasi, warna, dan detail
produk dan rincian yang tercantum dalam buku panduan ini dapat diubah tanpa pemberitahuan
sebelumnya.
This manual suits for next models
2
Table of contents
Languages:
Other Electrolux Steam Cleaner manuals

Electrolux
Electrolux ERGORAPIDO User manual

Electrolux
Electrolux EGS2103 User manual

Electrolux
Electrolux Zanussi Professional N 700 User manual

Electrolux
Electrolux Precision User manual

Electrolux
Electrolux Precision User manual

Electrolux
Electrolux ERGORAPIDO User manual

Electrolux
Electrolux 7000 User manual

Electrolux
Electrolux EGS2003 User manual

Electrolux
Electrolux LX15002 User manual

Electrolux
Electrolux MULTI-STEAMER Z370 Series User manual