Airgle Purepal AG950 User manual
OWNER'S MANUAL
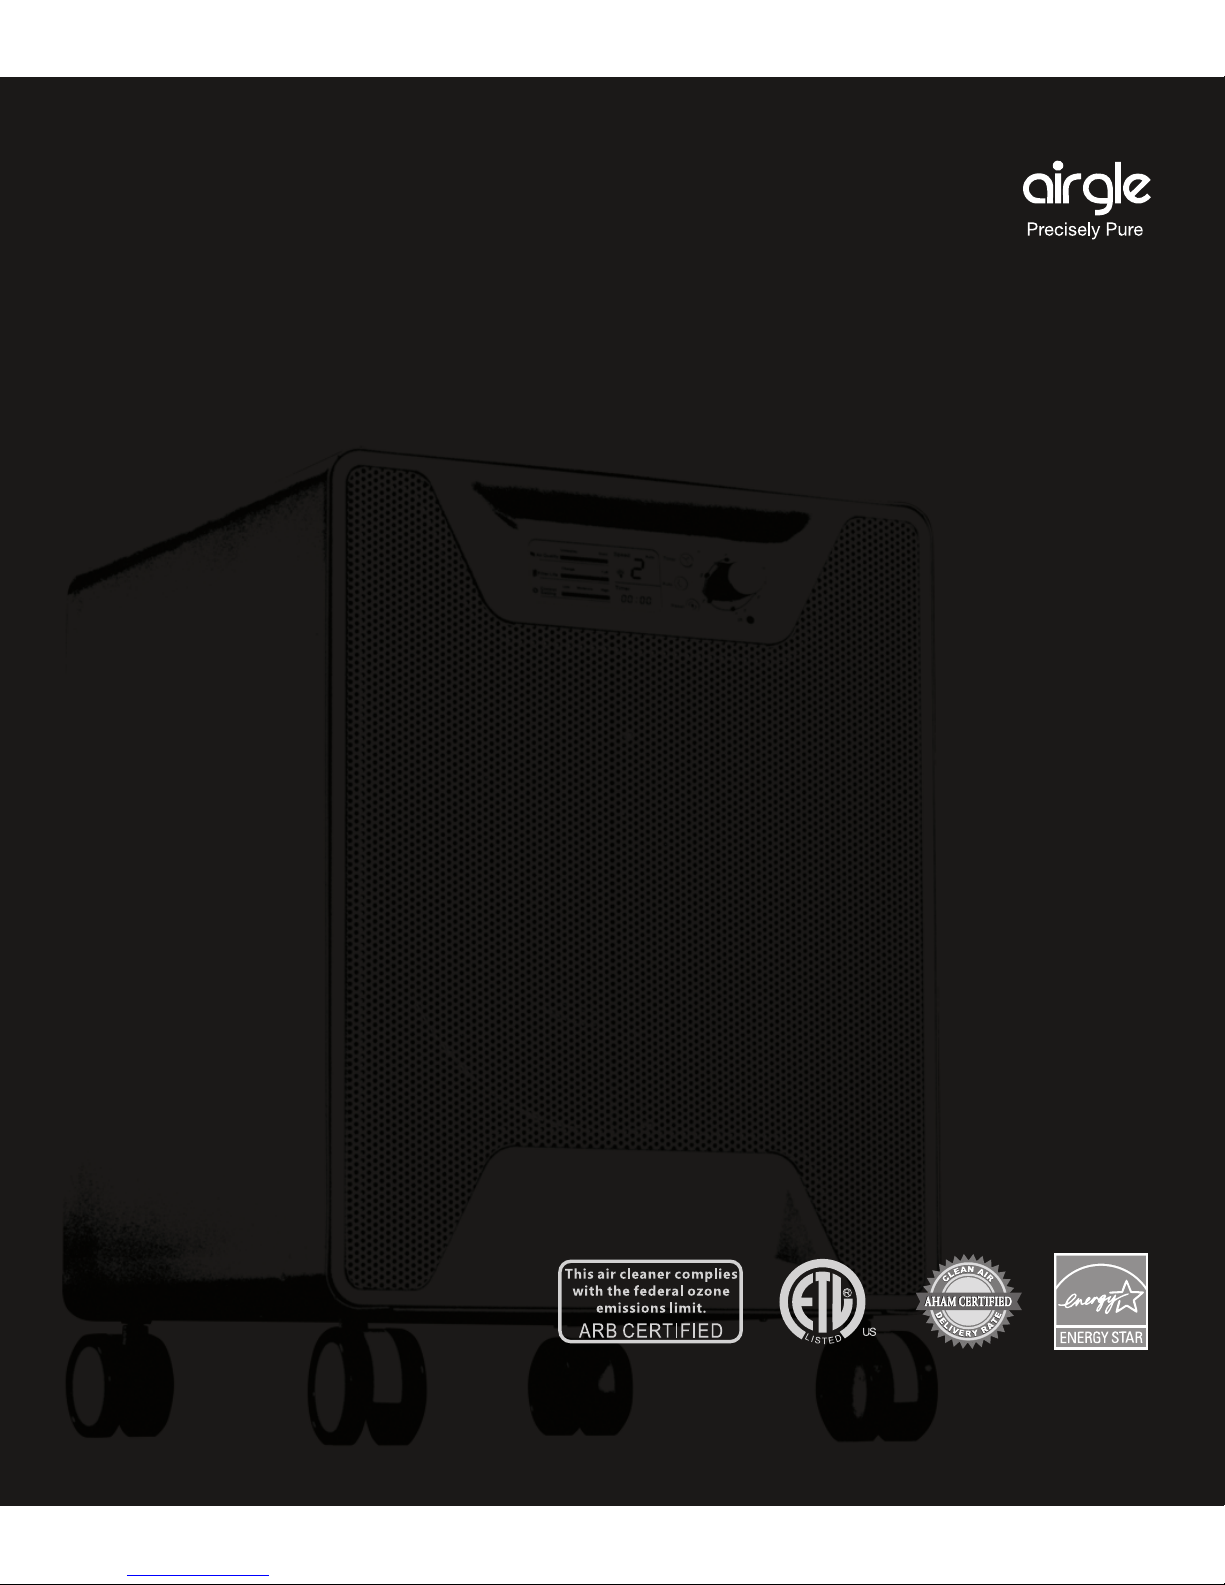
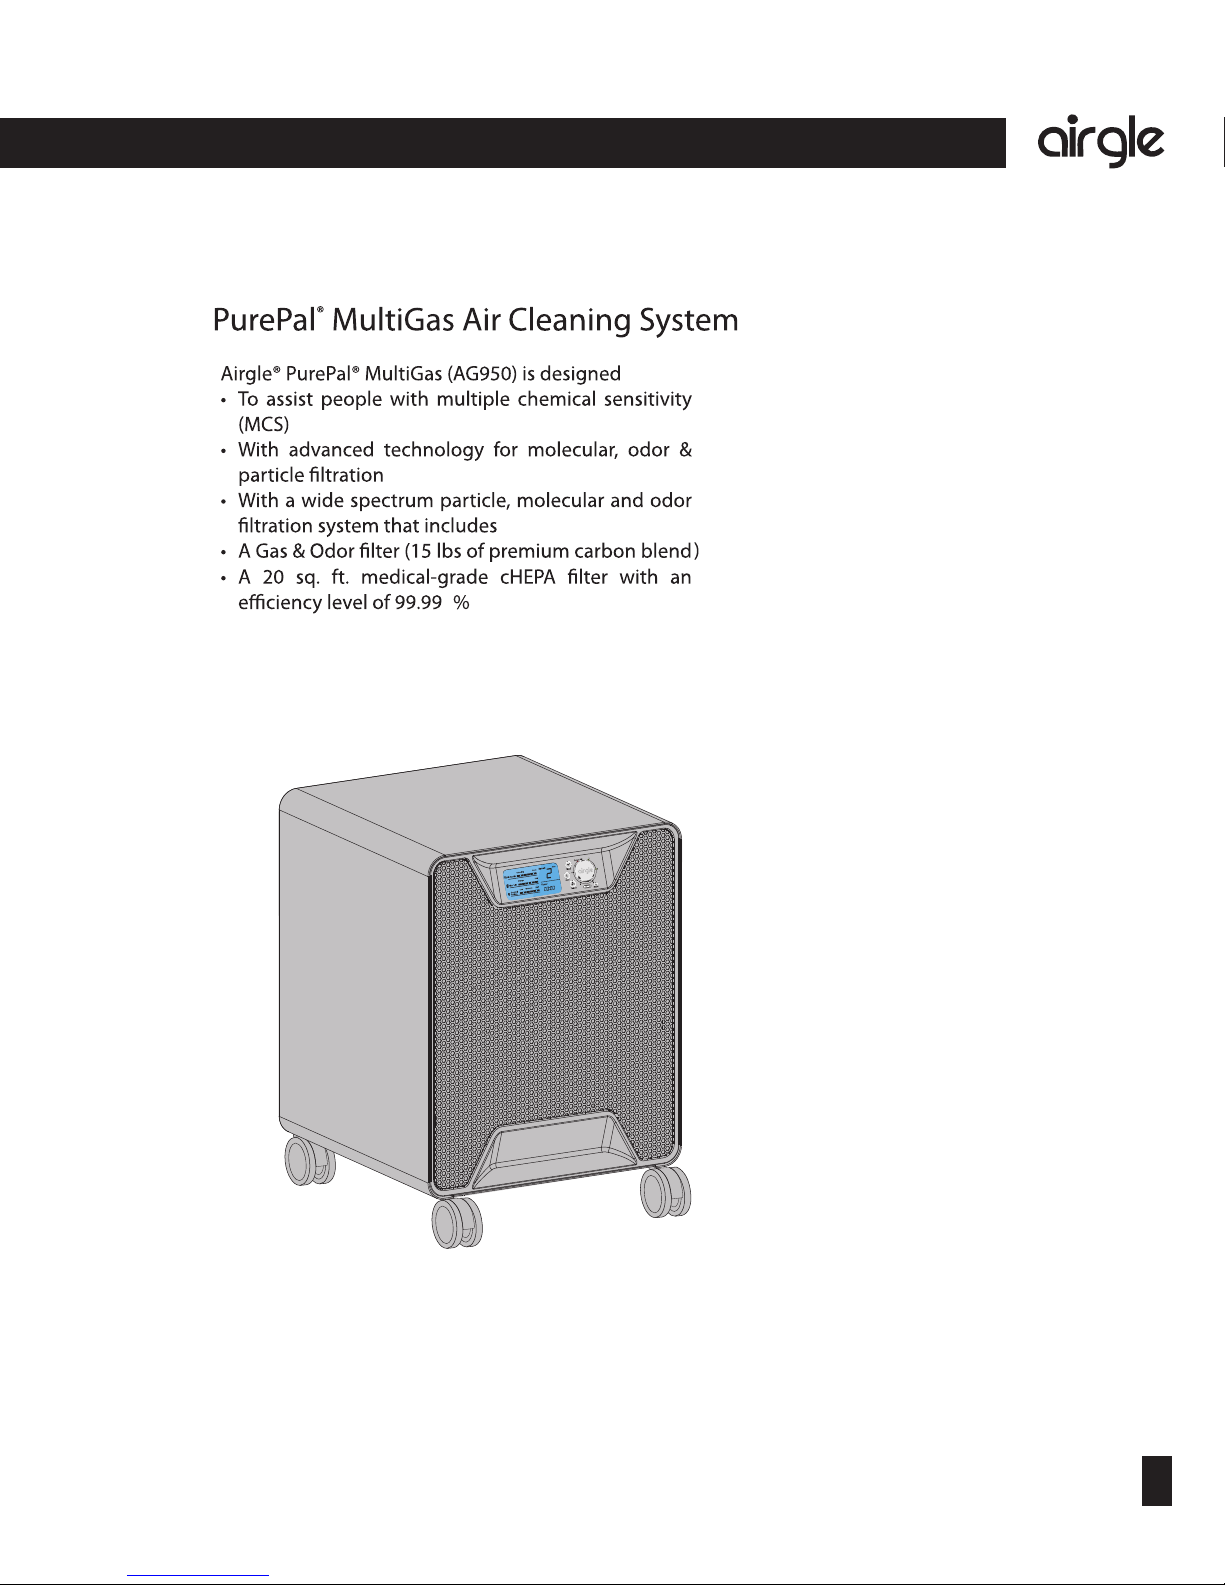
PurePal® MultiGas Air Cleaner (Model: AG950)
®

erupylesicerP
2
®
3
®
The gold standard for air cleaner
Save these instructions
CONTENTS
Warning: IMPORTANT SAFETY INSTRUCTIONS 2
The Airgle®PurePal®Air Cleaning System 4
Unpacking 6
Choosing a Suitable Location 7
Connecting to Power 9
Airgle® PurePal®Components 10
How the Airgle®PurePal®System Works 11
Using the Control Panel 12
Using the Remote Control 17
Care and Maintenance of Your PurePal®Air Cleaning System 18
Congratulations on your purchase of this Airgle®PurePal®air cleaner.
Please study this manual carefully to familiarize yourself with the
features and functions of your Airgle®PurePal®air cleaner. Inside you
will find many helpful hints on how to use and maintain your Airgle®
PurePal®properly.
WARNING
Important safety instructions
Read all instructions before using this air cleaner
When using an electrical appliance, basic precautions should always be
followed, including the following:
tMake sure the cleaner is plugged into a live 110-120V AC outlet (if you
purchased this unit outside the United States and Canada, your dealer
outlet).
tAlways
tDisconnect the power supply from your air cleaner by unplugging the
tDo not use ®.
tDo not use the air cleaner outdoors.
tDo not attempt
tDo not attempt to repair the air cleaner.
tDo not attempt to plug in the machine when your hands are wet.
tDo not soak the cleaner in water or splash water on it.
tDo not operate
tDo not obstruct the air inlet and air outlet of the air cleaner.
tSave these instructions for future reference.
t5PSFEVDFUIFSJTLPGFMFDUSJDTIPDLEPOPUFYQPTFUPXBUFSPSSBJO
This product employs overload protection (fuse). A blown fuse indicates an
overload or short-circuit situation. If the fuse blows, unplug the product from
the outlet. Replace the fuse as per the user servicing instructions (follow
product marking for proper fuse rating) and check the product. If the
replacement fuse blows, a short-circuit may be present and the product
should be discarded or returned to an authorized service facility for
FYBNJOBUJPOBOEPSSFQBJS
Do not run cord under carpeting. Do not cover cord with throw rugs, runners,
or similar coverings. Do not route cord under furniture or appliances. Arrange
cord away from trac area and where it will not be tripped over.
t
t
READ AND SAVE THESE INSTRUCTIONS
4
®
5
®
The art of purication
The art of purication
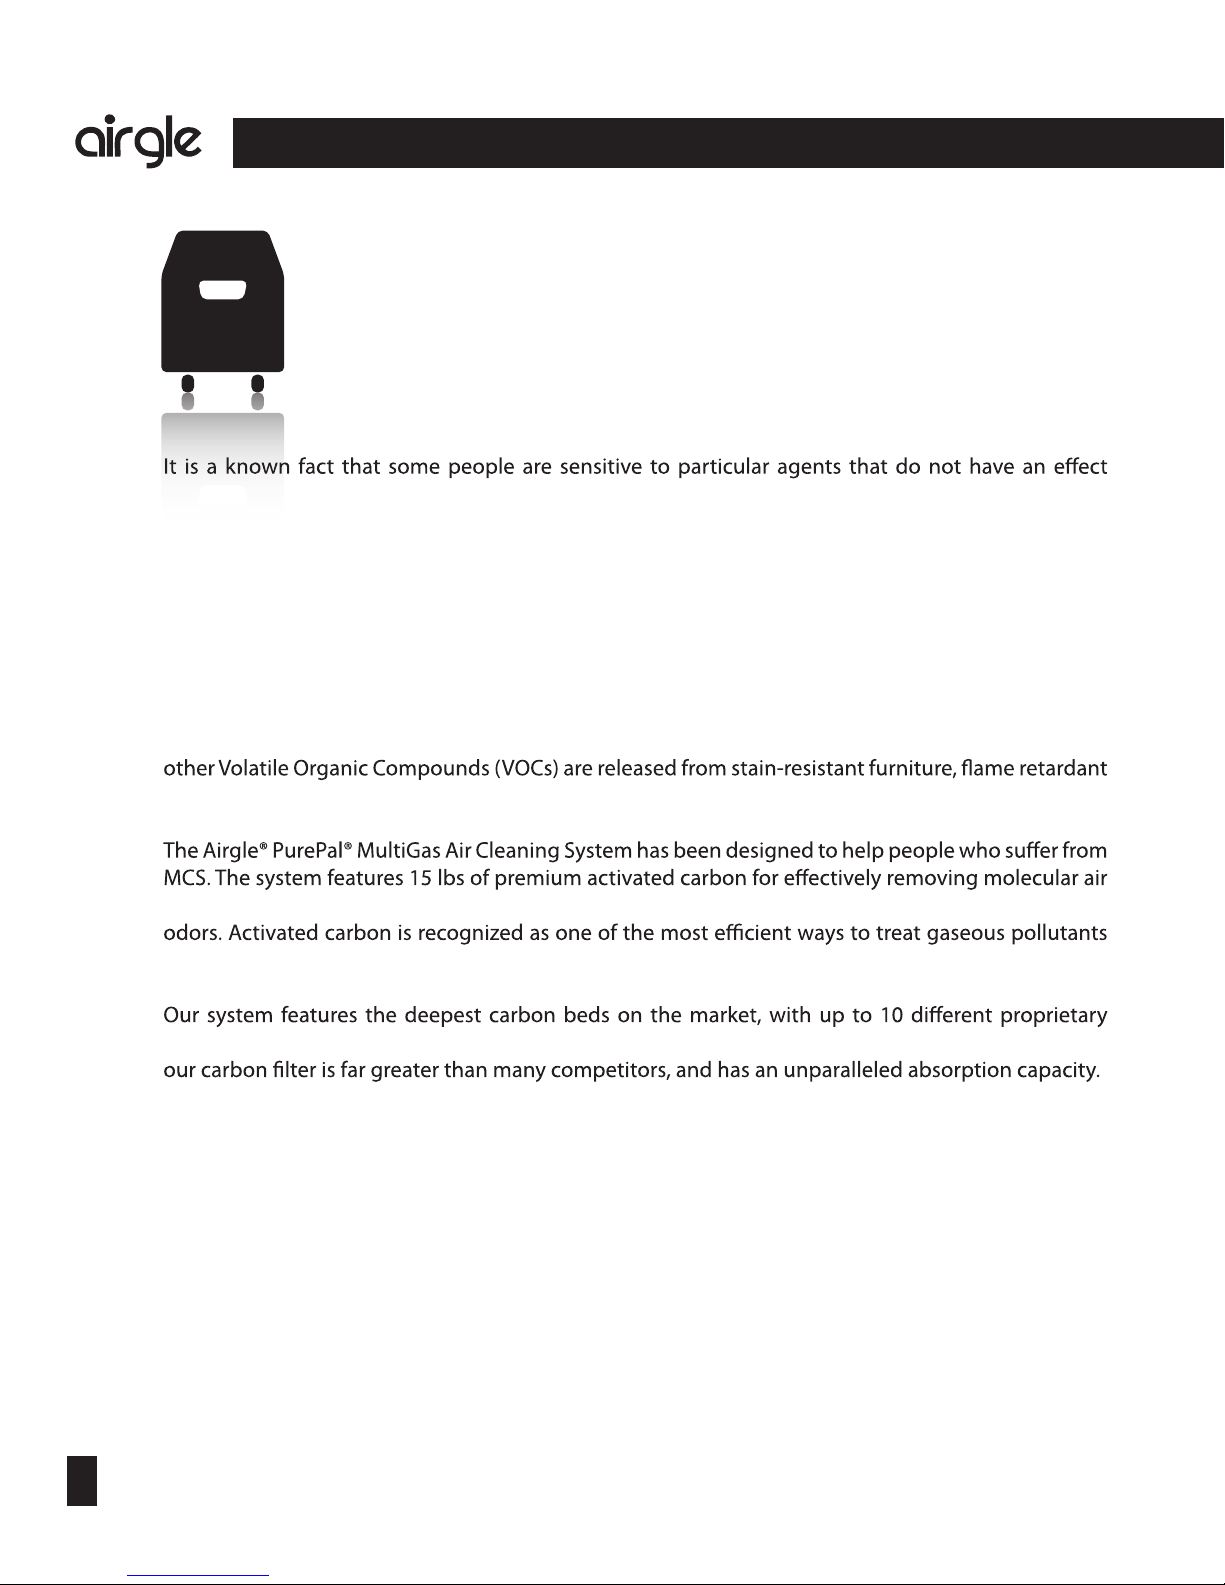
THE AIRGLE
The Airgle®PurePal®MultiGas System
on others in the general population. It is also known that certain chemicals used by the general
1
population may cause a small reaction – sneezing, tearing of the eyes and such that stop as soon as
the chemical dissipates or when the person using the chemical leaves the immediate area. But for a
small portion of the population, those chemicals, even in very small amounts, cause a much larger
reaction and sometimes a dangerous reaction.
Many of the chemicals are in products that are used every day in our homes, workplaces and places
of leisure – in other words…everywhere. This type of reaction is now called multiple chemical
sensitivity or MCS. The triggers for MCS are found in products such as household cleaners, fragrances,
furniture, and outdoor air pollutants. Other chemicals like chloroform, benzene, formaldehyde and
clothing, pressed wood products, carpeting, and upholstery.
pollutants, such as volatile organic compounds (VOCs) and other gaseous chemicals and unpleasant
and airborne chemicals.
carbon blends. The carbon beds are made up of actual granular pieces of carbon and the lifespan of
4
®
5
®
The art of purication
The art of purication
THE AIRGLE
The Airgle®PurePal®MultiGas System
on others in the general population. It is also known that certain chemicals used by the general
1
population may cause a small reaction – sneezing, tearing of the eyes and such that stop as soon as
the chemical dissipates or when the person using the chemical leaves the immediate area. But for a
small portion of the population, those chemicals, even in very small amounts, cause a much larger
reaction and sometimes a dangerous reaction.
Many of the chemicals are in products that are used every day in our homes, workplaces and places
of leisure – in other words…everywhere. This type of reaction is now called multiple chemical
sensitivity or MCS. The triggers for MCS are found in products such as household cleaners, fragrances,
furniture, and outdoor air pollutants. Other chemicals like chloroform, benzene, formaldehyde and
clothing, pressed wood products, carpeting, and upholstery.
pollutants, such as volatile organic compounds (VOCs) and other gaseous chemicals and unpleasant
and airborne chemicals.
carbon blends. The carbon beds are made up of actual granular pieces of carbon and the lifespan of
6
®
7
®
The art of purication
The art of purication
UNPACKING
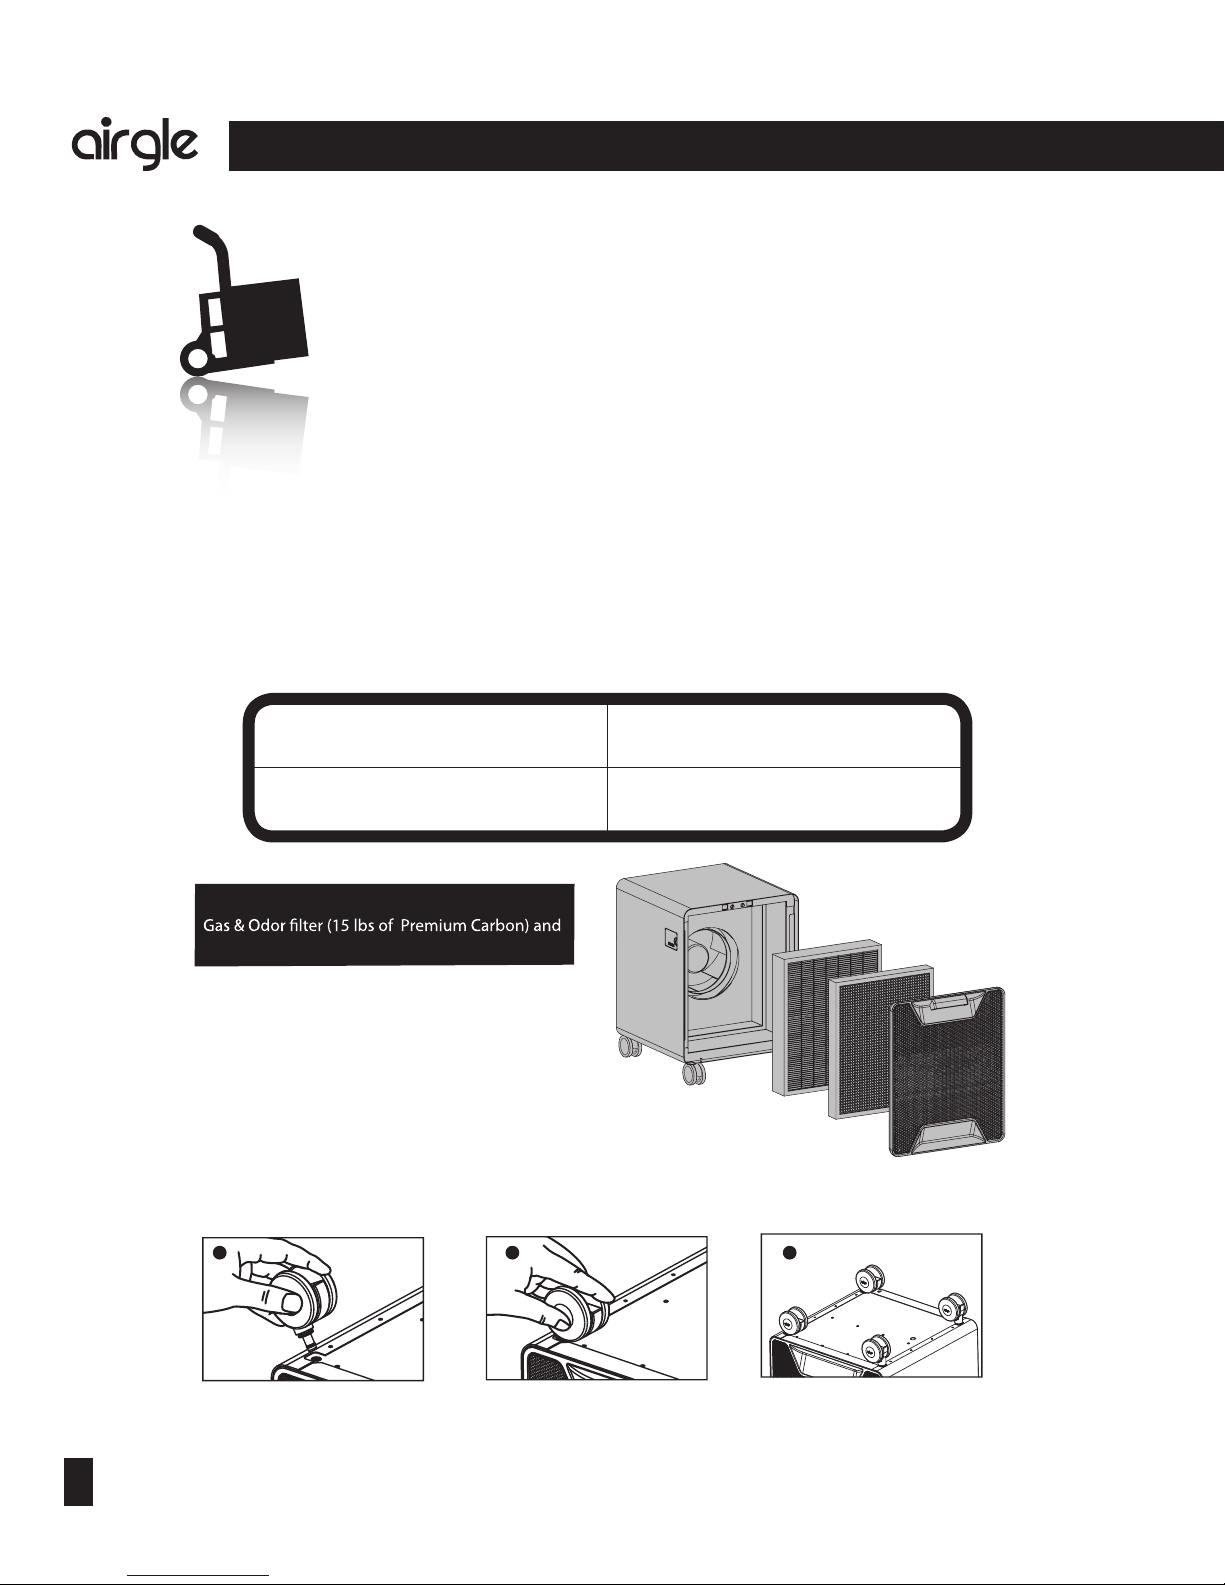
1. Remove the PurePal®MultiGas System from the packaging.
2. Do not throw the original boYand packaging away. Keep it in case you have to transport the unit
again sometime in the future.
3. Check the components received against your packing slip to make sure you have all the parts.
4. Check the unit and all the components for damage. If the unit or any of the components show
damage from shipping, contact your local dealer.
5. For your future convenience, record the model information here. Model information can be found
on the name plate located on the bottom of your unit.
Model Number:
Purchase Date:
Model Name:
Serial Number:
Unpack your Airgle®PurePal® MultiGas
System as follows:
Pre-installed Filters:
cHEPA Filter
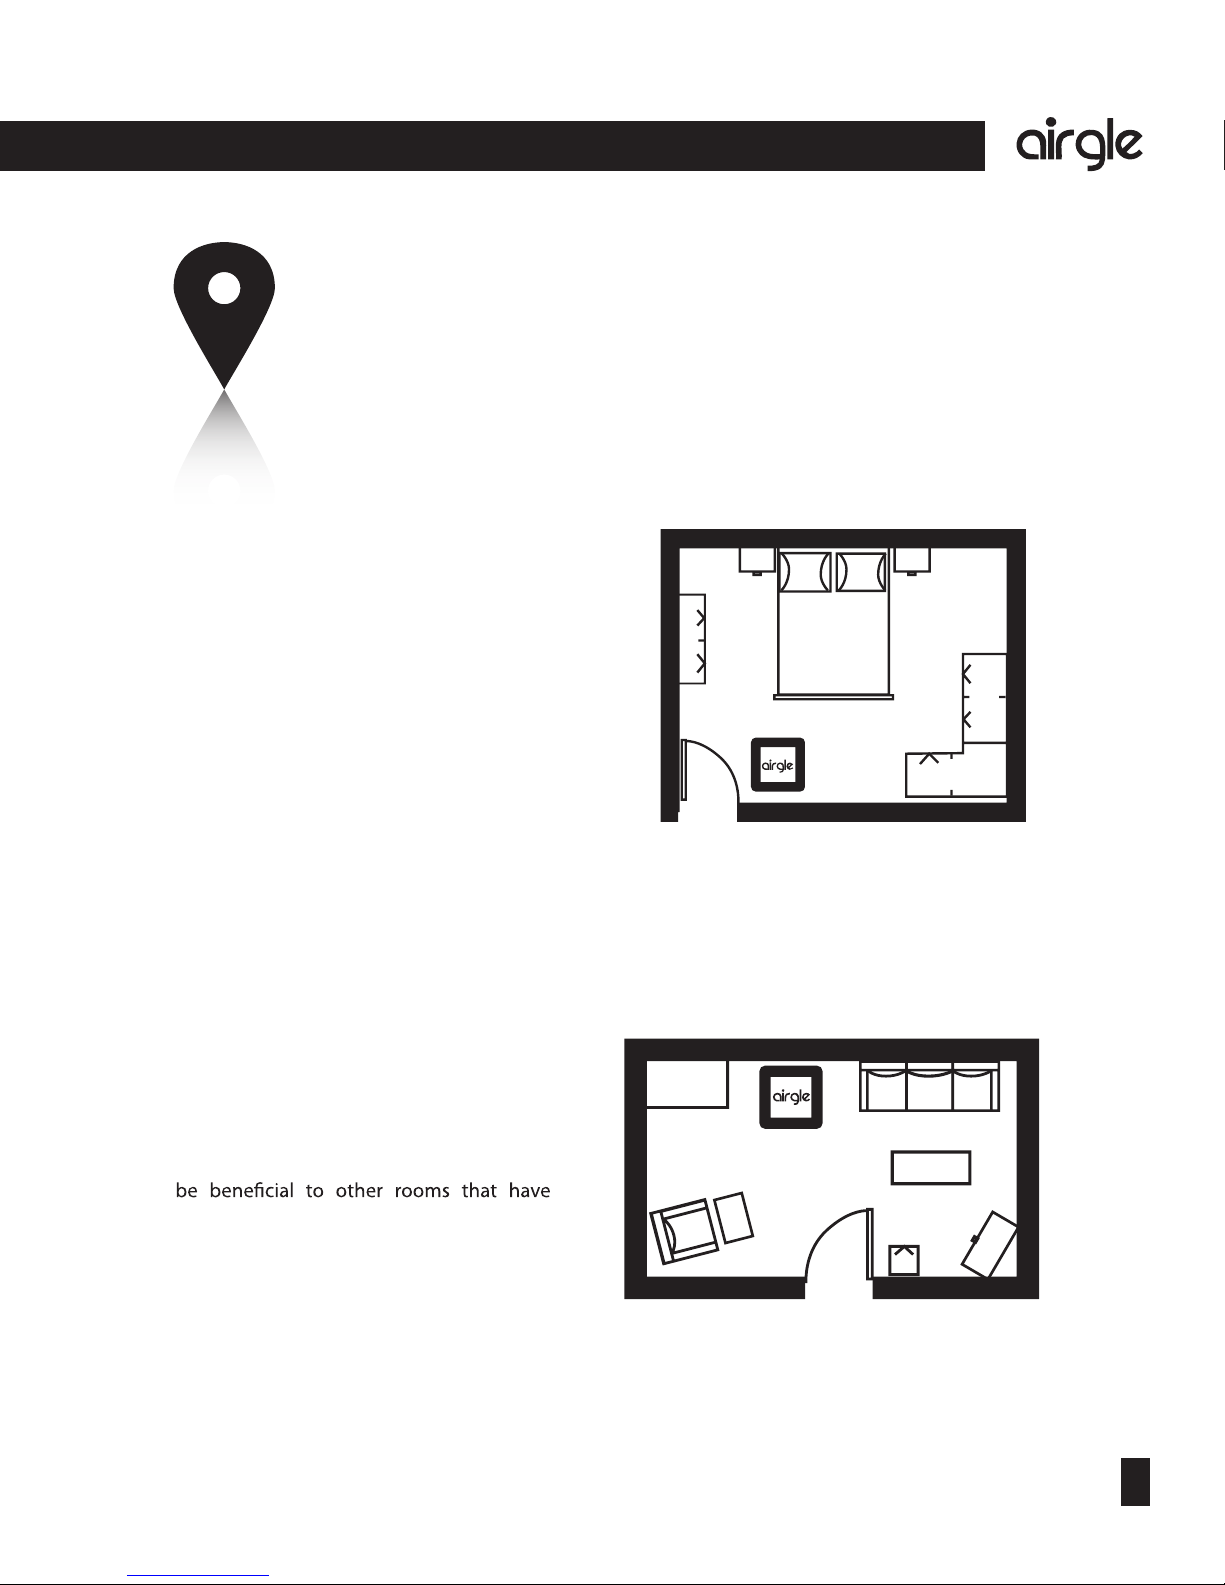
CHOOSING A SUITABLE LOCATION
Now that you have unpacked your air cleaning
system, where are you going to use it?
Does someone in your family have allergies
and asthma? People with allergies and
asthma sometimes have a hard sleeping
as many of their symptoms worsen during
the night. Moving your air cleaning system
into your bedroom at night will help them.
Be sure to have one foot of space between
the system and any walls, cabinets or large
furniture to allow for better air circulation.
Placing your air cleaning system in a central
location of your largest room will help
purify the air in the entire room and may
doorways to the main room. Be sure to
have one foot of space between the system
and any walls, cabinets or large furniture to
allow for better air circulation.
Bedrooms:
-JWJOHGBNJMZrooms:
123
Installing the supplied casters. They make it easy to
move the air purier between rooms.
1) Carefully insert caster stem into receptor tube.
2)Press on caster, until it snaps into place. Repeat
steps 1) and 2) with the remaining casters.
3)Ensure that each caster is securely tted before
placing the machine in its upright position onto the casters.
6
®
7
®
The art of purication
The art of purication
UNPACKING
1. Remove the PurePal®MultiGas System from the packaging.
2. Do not throw the original boYand packaging away. Keep it in case you have to transport the unit
again sometime in the future.
3. Check the components received against your packing slip to make sure you have all the parts.
4. Check the unit and all the components for damage. If the unit or any of the components show
damage from shipping, contact your local dealer.
5. For your future convenience, record the model information here. Model information can be found
on the name plate located on the bottom of your unit.
Model Number:
Purchase Date:
Model Name:
Serial Number:
Unpack your Airgle®PurePal® MultiGas
System as follows:
Pre-installed Filters:
cHEPA Filter
CHOOSING A SUITABLE LOCATION
Now that you have unpacked your air cleaning
system, where are you going to use it?
Does someone in your family have allergies
and asthma? People with allergies and
asthma sometimes have a hard sleeping
as many of their symptoms worsen during
the night. Moving your air cleaning system
into your bedroom at night will help them.
Be sure to have one foot of space between
the system and any walls, cabinets or large
furniture to allow for better air circulation.
Placing your air cleaning system in a central
location of your largest room will help
purify the air in the entire room and may
doorways to the main room. Be sure to
have one foot of space between the system
and any walls, cabinets or large furniture to
allow for better air circulation.
Bedrooms:
-JWJOHGBNJMZrooms:
123
Installing the supplied casters. They make it easy to
move the air purier between rooms.
1) Carefully insert caster stem into receptor tube.
2)Press on caster, until it snaps into place. Repeat
steps 1) and 2) with the remaining casters.
3)Ensure that each caster is securely tted before
placing the machine in its upright position onto the casters.

8
®
9
®
The art of purication
The art of purication
Many people will turn on their air cleaner periodically throughout the day – we recommend that you
leave it on for constant air cleaning while you are using the room– after all, air pollution never takes
a break- why should your air cleaner?
We have found that many people start with one air cleaning system and move it from room to room
spend the most time. Some of them continue the practice of moving the air cleaner from room to
room – others purchase additional units. How you end up using your system or systems, you need to
remember this one thing…
For optimal performance, keep these 3 things in mind:
1. Position the air cleaning system at least 1 foot away from the wall.The more centrally the air cleaner
is positioned, the better and faster air cleaner can purify the air.
2. Keep the power cord away from walk ways.
3. Make sure you can easily access the control panel.
Keeping your system in your home
air in that room – but probably only
that room.
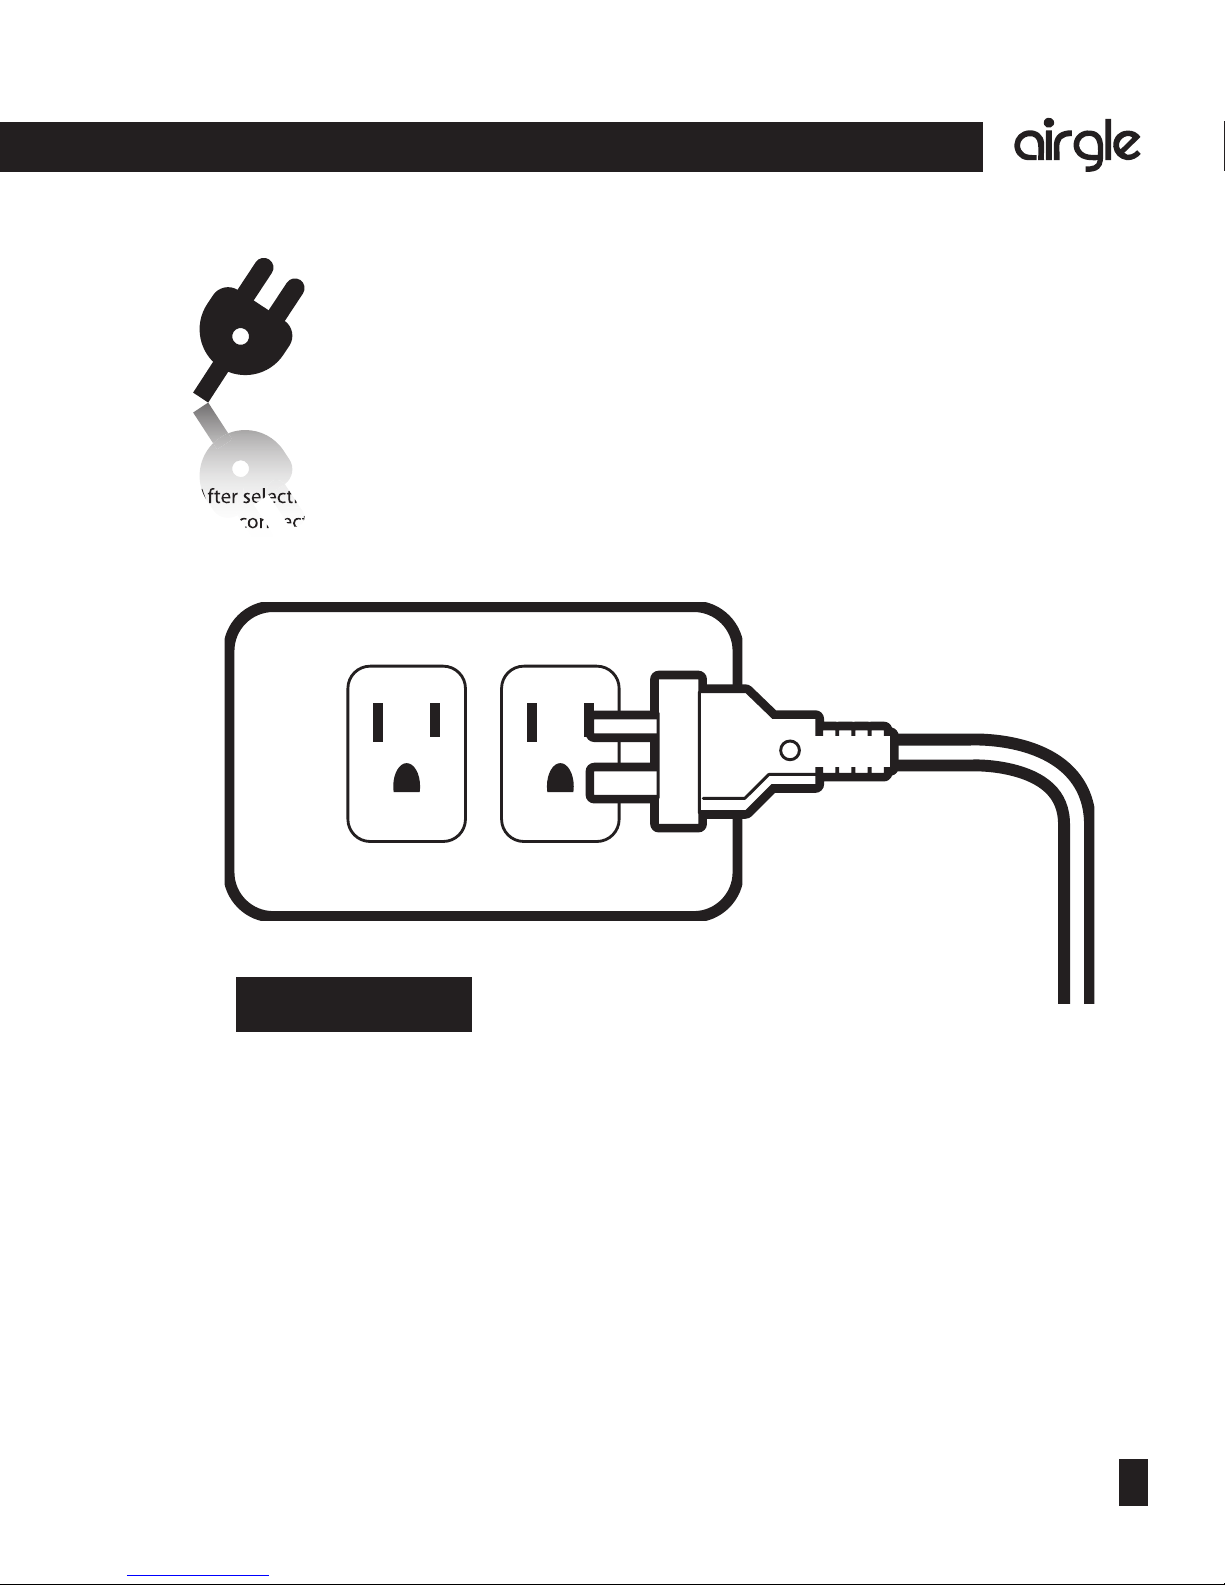
CONNECTING TO POWER
Make sure the cleaner is
plugged into a live 110-
120V AC outlet (or 220-
240V AC outlet if you are
located outside the United
States and Canada).
After selecting the location for your air cleaning system, and clearing the space around where it will
stay, connect the power cord to the unit and the other end into the socket.
Plug type may vary
8
®
9
®
The art of purication
The art of purication
Many people will turn on their air cleaner periodically throughout the day – we recommend that you
leave it on for constant air cleaning while you are using the room– after all, air pollution never takes
a break- why should your air cleaner?
We have found that many people start with one air cleaning system and move it from room to room
spend the most time. Some of them continue the practice of moving the air cleaner from room to
room – others purchase additional units. How you end up using your system or systems, you need to
remember this one thing…
For optimal performance, keep these 3 things in mind:
1. Position the air cleaning system at least 1 foot away from the wall.The more centrally the air cleaner
is positioned, the better and faster air cleaner can purify the air.
2. Keep the power cord away from walk ways.
3. Make sure you can easily access the control panel.
Keeping your system in your home
air in that room – but probably only
that room.
CONNECTING TO POWER
Make sure the cleaner is
plugged into a live 110-
120V AC outlet (or 220-
240V AC outlet if you are
located outside the United
States and Canada).
After selecting the location for your air cleaning system, and clearing the space around where it will
stay, connect the power cord to the unit and the other end into the socket.
sele
c
ting
onne
c
t the p
c
onne
A
f
t
ftf
er
sele
sele
sele
Plug type may vary

10
The art of purication
®
11
The art of purication ®
1.
auto)
2. Housing: The outside “boY” for the unit. You will want to make sure that this is kept clean and that
3. Casters: Install the casters provided with your cleaning system to make it easier to move as needed
4.
5.
6. Rear Door: Make sure that the rear door is latched on correctly so as not to overload the air cleaning
system with additional air intake that is not entering the unit in the proper manner.
7.
while the unit is running.
7
1
2
3
4
5
6
PUREPAL®MultiGas COMPONENTS
PurePal®Plus Components Showing 1 to 7 here
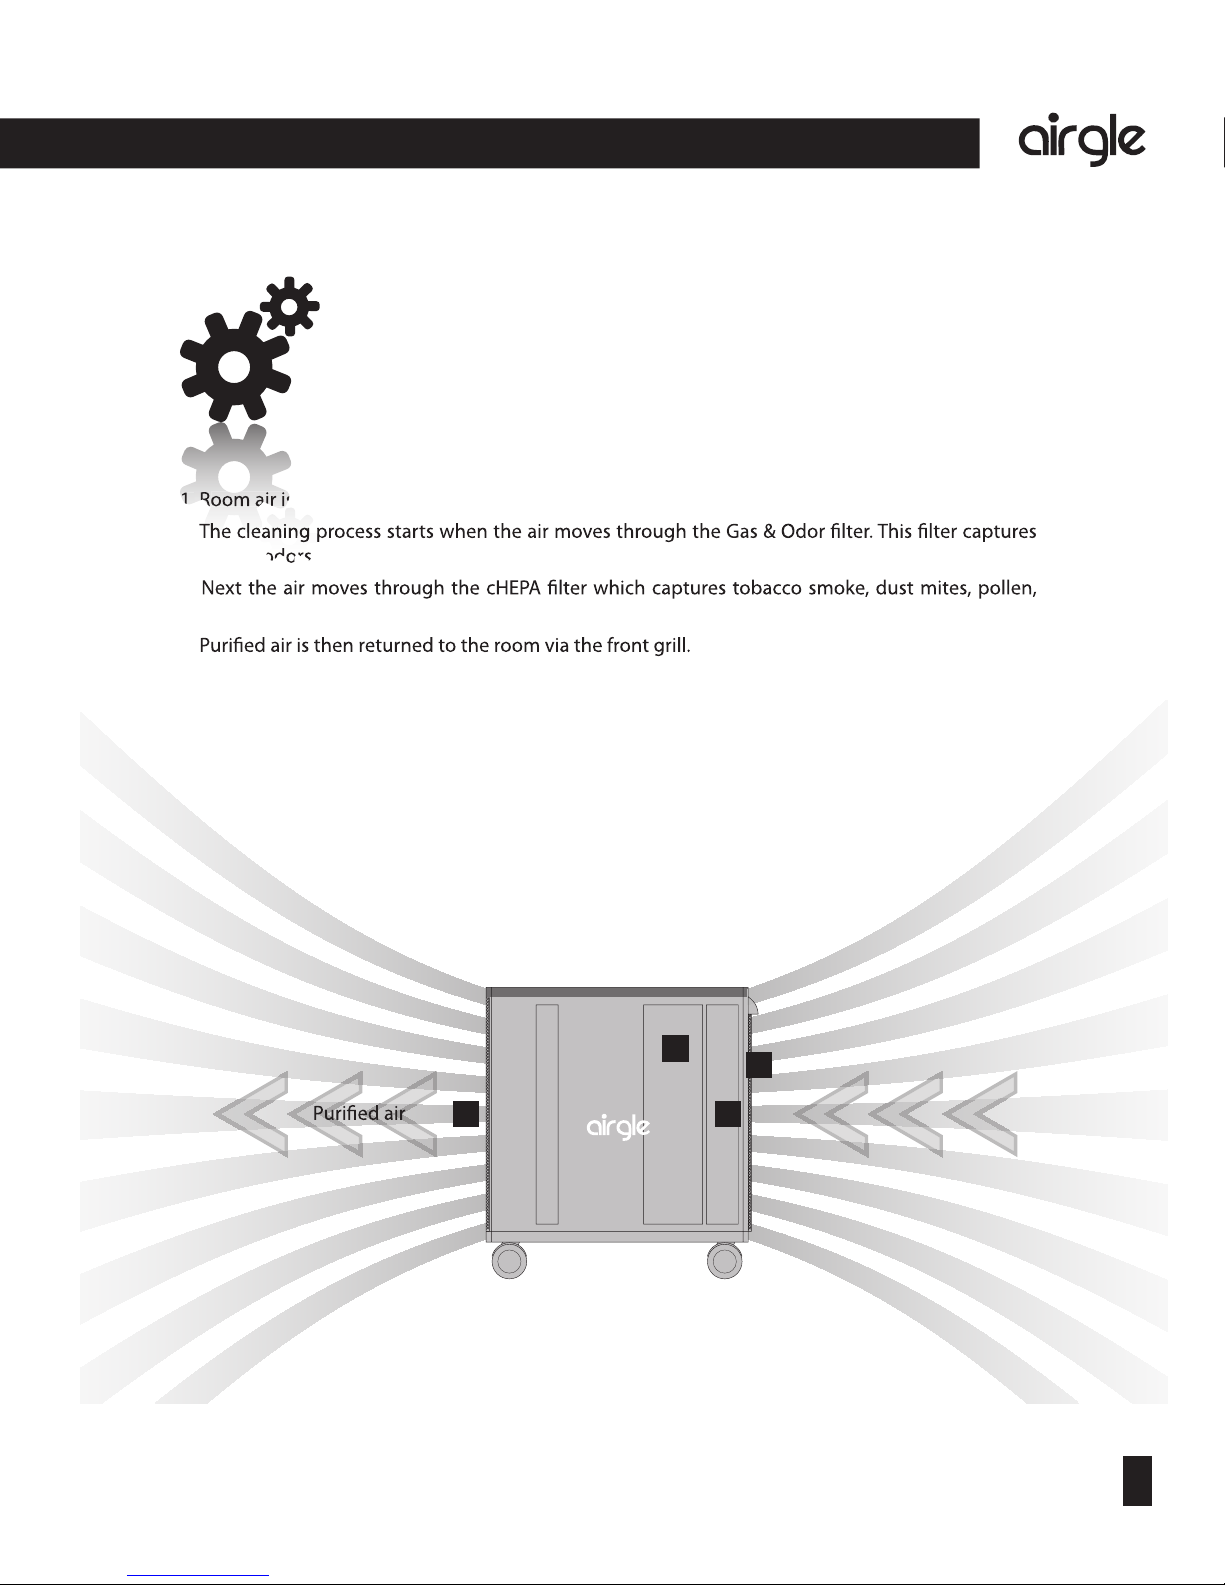
HOW THE AIRGLE®PUREPAL®
MultiGas SYSTEM WORKS
1. Room air is drawn into the system via the rear grill.
2.
gases, odors and volatile organic chemicals (VOCs) that are adding to air pollution.
3.
dander, smog, mold, and other airborne pollutants.
4.
3
4 2
1
Air Intake
Fan
Room air is drawn into the system via
the rear grill.
10
The art of purication
®
11
The art of purication ®
1.
auto)
2. Housing: The outside “boY” for the unit. You will want to make sure that this is kept clean and that
3. Casters: Install the casters provided with your cleaning system to make it easier to move as needed
4.
5.
6. Rear Door: Make sure that the rear door is latched on correctly so as not to overload the air cleaning
system with additional air intake that is not entering the unit in the proper manner.
7.
while the unit is running.
7
1
2
3
4
5
6
PUREPAL®MultiGas COMPONENTS
PurePal®Plus Components Showing 1 to 7 here
HOW THE AIRGLE®PUREPAL®
MultiGas SYSTEM WORKS
1. Room air is drawn into the system via the rear grill.
2.
gases, odors and volatile organic chemicals (VOCs) that are adding to air pollution.
3.
dander, smog, mold, and other airborne pollutants.
4.
1.
R
oom air is d
, odors and
3
4 2
1
Air Intake
Fan
Room air is drawn into the system via
the rear grill.

12
The art of purification
®
13
The art of purification ®
USING THE CONTROL PANEL
The Airgle®System is equipped with a state-of-the-art control panel. This advanced control panel
allows you to see unit status with one quick glance.
1
6
4
5
2
3
IR
2.
into account both the already elapsed operation time and fan speed. This allows for a more
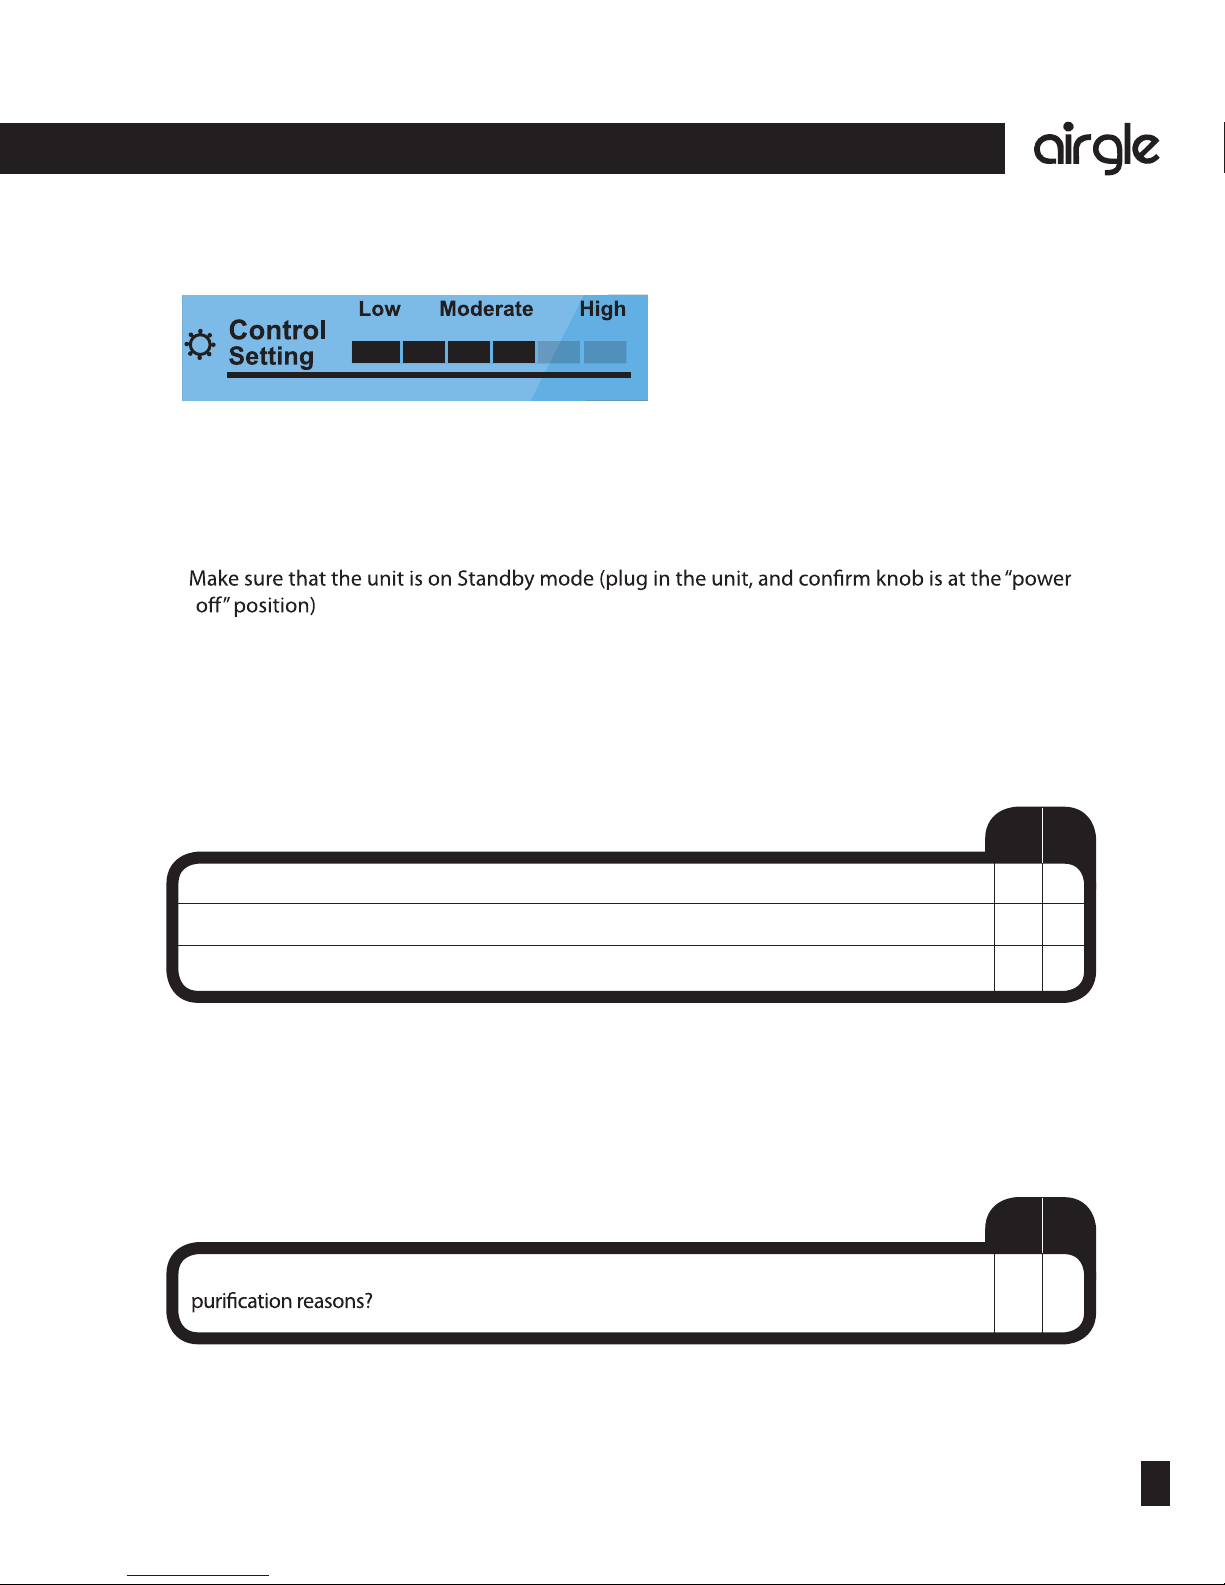
3. Control Setting: This advanced setting is for users who encounter challenging air pollution
environments and/or needs. The default setting is Moderate which should work for most users.
For more information, see the Control Setting section in this manual.
4. Speed: This indicates the speed selected by using the knob on the right hand side of the panel.
5. Auto: This indicates if you have elected to use the Auto-Mode (selected using the button on the
right side of the panel).
6. Timer: This indicates how much time is left until the system shuts down (activated by the Timer
button on the right hand side of the panel).
1. Air Quality: The Airgle®system is equipped with an advanced air quality monitoring sensor. The
Air Quality Gauge displays the quality of the air in the room – the air you breathe. The 6 status
bars indicate the quality from Unhealthy (1 bar) to Good (6 bars).
Unhealthy
Change
66% Remaining
33% Remaining
Full Life
Moderate Good

12
The art of purification
®
13
The art of purification ®
USING THE CONTROL PANEL
The Airgle®System is equipped with a state-of-the-art control panel. This advanced control panel
allows you to see unit status with one quick glance.
1
6
4
5
2
3
IR
2.
into account both the already elapsed operation time and fan speed. This allows for a more
3. Control Setting: This advanced setting is for users who encounter challenging air pollution
environments and/or needs. The default setting is Moderate which should work for most users.
For more information, see the Control Setting section in this manual.
4. Speed: This indicates the speed selected by using the knob on the right hand side of the panel.
5. Auto: This indicates if you have elected to use the Auto-Mode (selected using the button on the
right side of the panel).
6. Timer: This indicates how much time is left until the system shuts down (activated by the Timer
button on the right hand side of the panel).
1. Air Quality: The Airgle®system is equipped with an advanced air quality monitoring sensor. The
Air Quality Gauge displays the quality of the air in the room – the air you breathe. The 6 status
bars indicate the quality from Unhealthy (1 bar) to Good (6 bars).
Unhealthy
Change
66% Remaining
33% Remaining
Full Life
Moderate Good

14
The art of purification
®
15
The art of purification ®
IR
Control Panel details: right hand side
1. Timer: Press this button to set the timer for up to 12 hours of continuous operation. The time left
displays on the left hand side of the panel.
2. Auto: When you select auto mode, your unit will automatically change to the optimum speed
when to raise or lower fan speed depending on the amount of particles in the room.
button and hold down for 3 or more seconds to set the panel on Sleep mode. Press Auto button
again and hold down for 3 or more seconds to turn the LCD back on.
3.
Note:
the button is disabled to prevent the accidental press of the button.
4. Power/Speed: To turn the system on, rotate knob to select a speed from 1 to 5. The light indicator
for the selected speed will display as blue and the speed you selected will display on the left
1
2
3
4
5
5. IR: This infrared receiver is used by your remote control to change unit settings
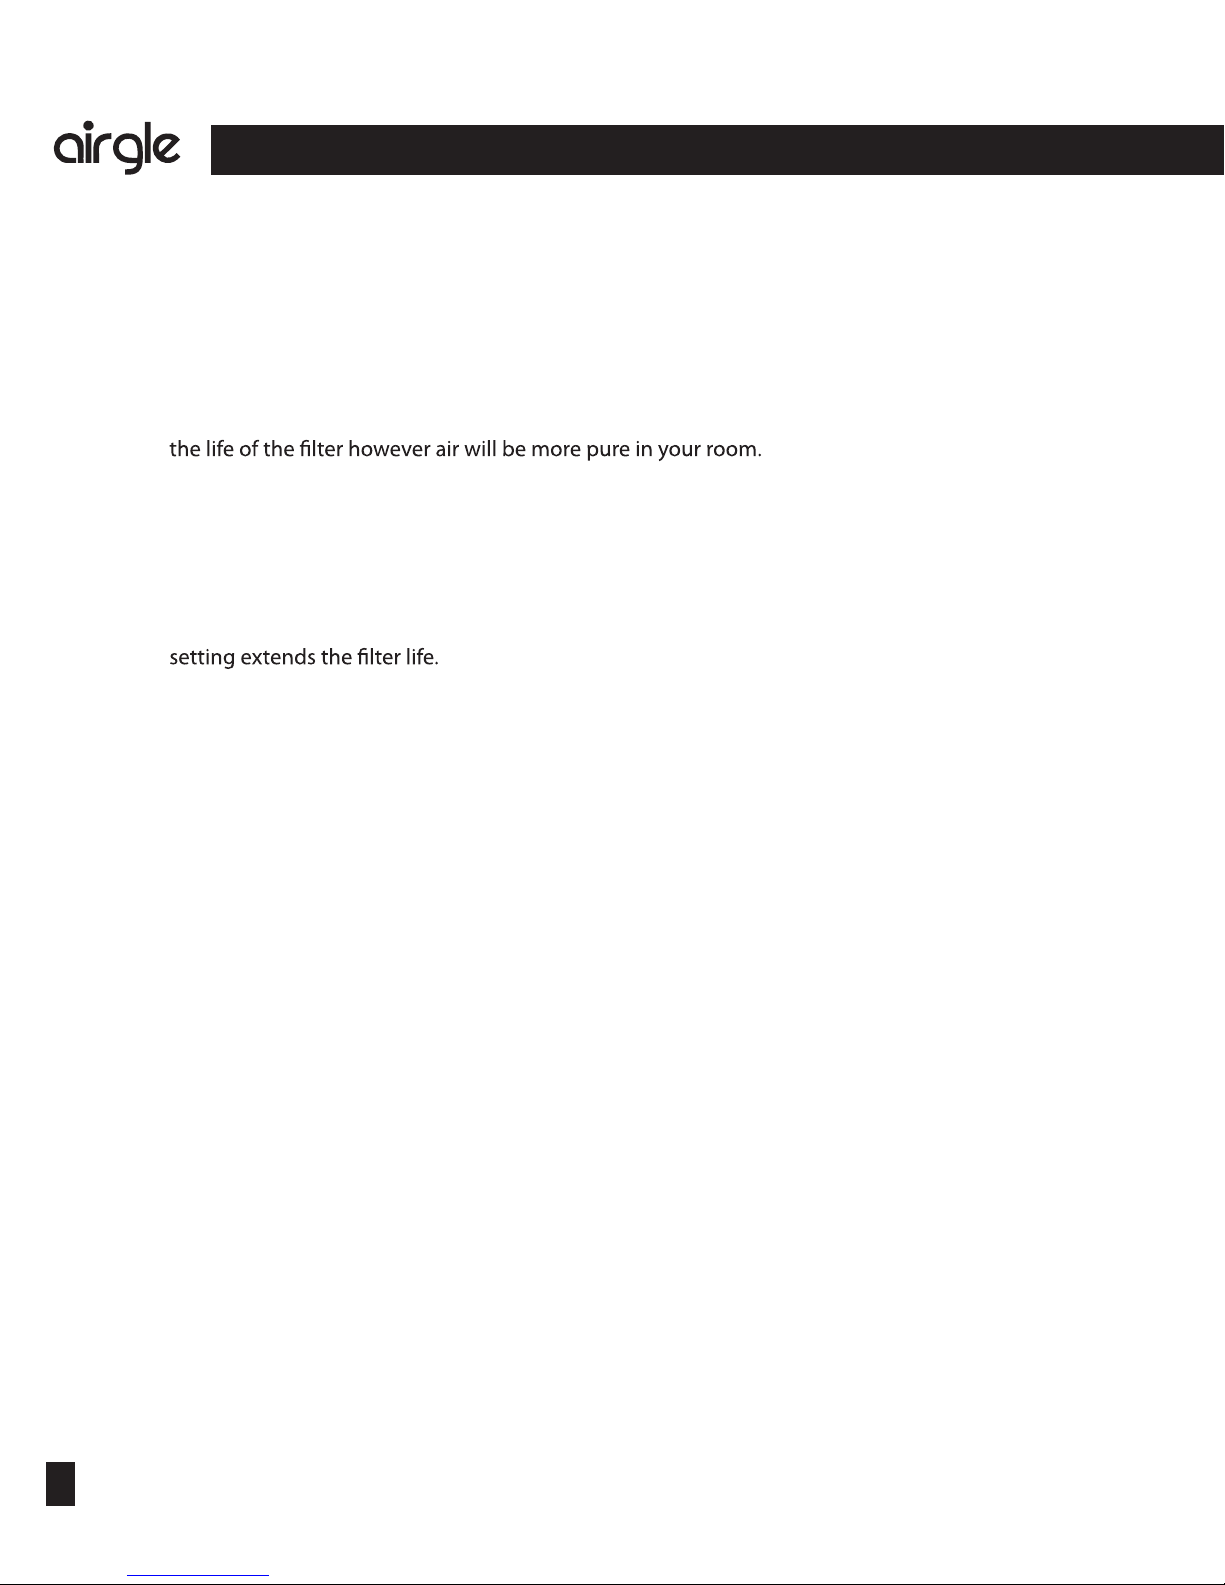
The default setting for the unit is moderate and will be displayed as 4 bars on the control panel. This
setting should meet most needs.
For advanced users only:
1.
2. Press and hold “Auto” button for more than 5 seconds. You will hear a “ding”sound, the Control
Setting bars will go from High, Moderate, Low, Moderate....... and then start blinking.
3. If you release “Auto“ button when“High” is blinking, the system is set to High Mode.
Answer the following questions to see if you need to change your setting.
Auto Mode: Your system will start on high to purify the air until it senses an extremely low
concentration of particles and then auto change itself to the low setting.
If you answered“Yes” to any of the questions above, you may want to consider changing your
setting to “High”. If you answered “No”, answer the following question.
If you answered“Yes” to this question, you may want to consider changing your setting to “Low”.
Control Setting
Are you noticing severe indoor air pollution problems?
Are you or a member of your family having severe asthma and/or allergy issues?
Do you want to able to always set your system to Auto mode?
Yes No
Do you have a clean environment and purchased the unit for general air
Yes No
14
The art of purification
®
15
The art of purification ®
IR
Control Panel details: right hand side
1. Timer: Press this button to set the timer for up to 12 hours of continuous operation. The time left
displays on the left hand side of the panel.
2. Auto: When you select auto mode, your unit will automatically change to the optimum speed
when to raise or lower fan speed depending on the amount of particles in the room.
button and hold down for 3 or more seconds to set the panel on Sleep mode. Press Auto button
again and hold down for 3 or more seconds to turn the LCD back on.
3.
Note:
the button is disabled to prevent the accidental press of the button.
4. Power/Speed: To turn the system on, rotate knob to select a speed from 1 to 5. The light indicator
for the selected speed will display as blue and the speed you selected will display on the left
1
2
3
4
5
5. IR: This infrared receiver is used by your remote control to change unit settings
The default setting for the unit is moderate and will be displayed as 4 bars on the control panel. This
setting should meet most needs.
For advanced users only:
1.
2. Press and hold “Auto” button for more than 5 seconds. You will hear a “ding”sound, the Control
Setting bars will go from High, Moderate, Low, Moderate....... and then start blinking.
3. If you release “Auto“ button when“High” is blinking, the system is set to High Mode.
Answer the following questions to see if you need to change your setting.
Auto Mode: Your system will start on high to purify the air until it senses an extremely low
concentration of particles and then auto change itself to the low setting.
If you answered“Yes” to any of the questions above, you may want to consider changing your
setting to “High”. If you answered “No”, answer the following question.
If you answered“Yes” to this question, you may want to consider changing your setting to “Low”.
Control Setting
Are you noticing severe indoor air pollution problems?
Are you or a member of your family having severe asthma and/or allergy issues?
Do you want to able to always set your system to Auto mode?
Yes No
Do you have a clean environment and purchased the unit for general air
Yes No
16
The art of purification
®
17
The art of purification ®
When your unit is set on High, the sensor (on the side of the unit) is more sensitive to the environment.
The system will auto-activate when it detects small amounts of particles in the air. And since it is
more responsive to these small amounts of particles, it will activate frequently and this will shorten
When you unit is set on Low, The sensor (on the side of the unit) is less sensitive to the environment.
The system does not auto-activate until it senses a medium to high amount of particles in the air. This
What happens in High Mode?
What happens in Low Mode?
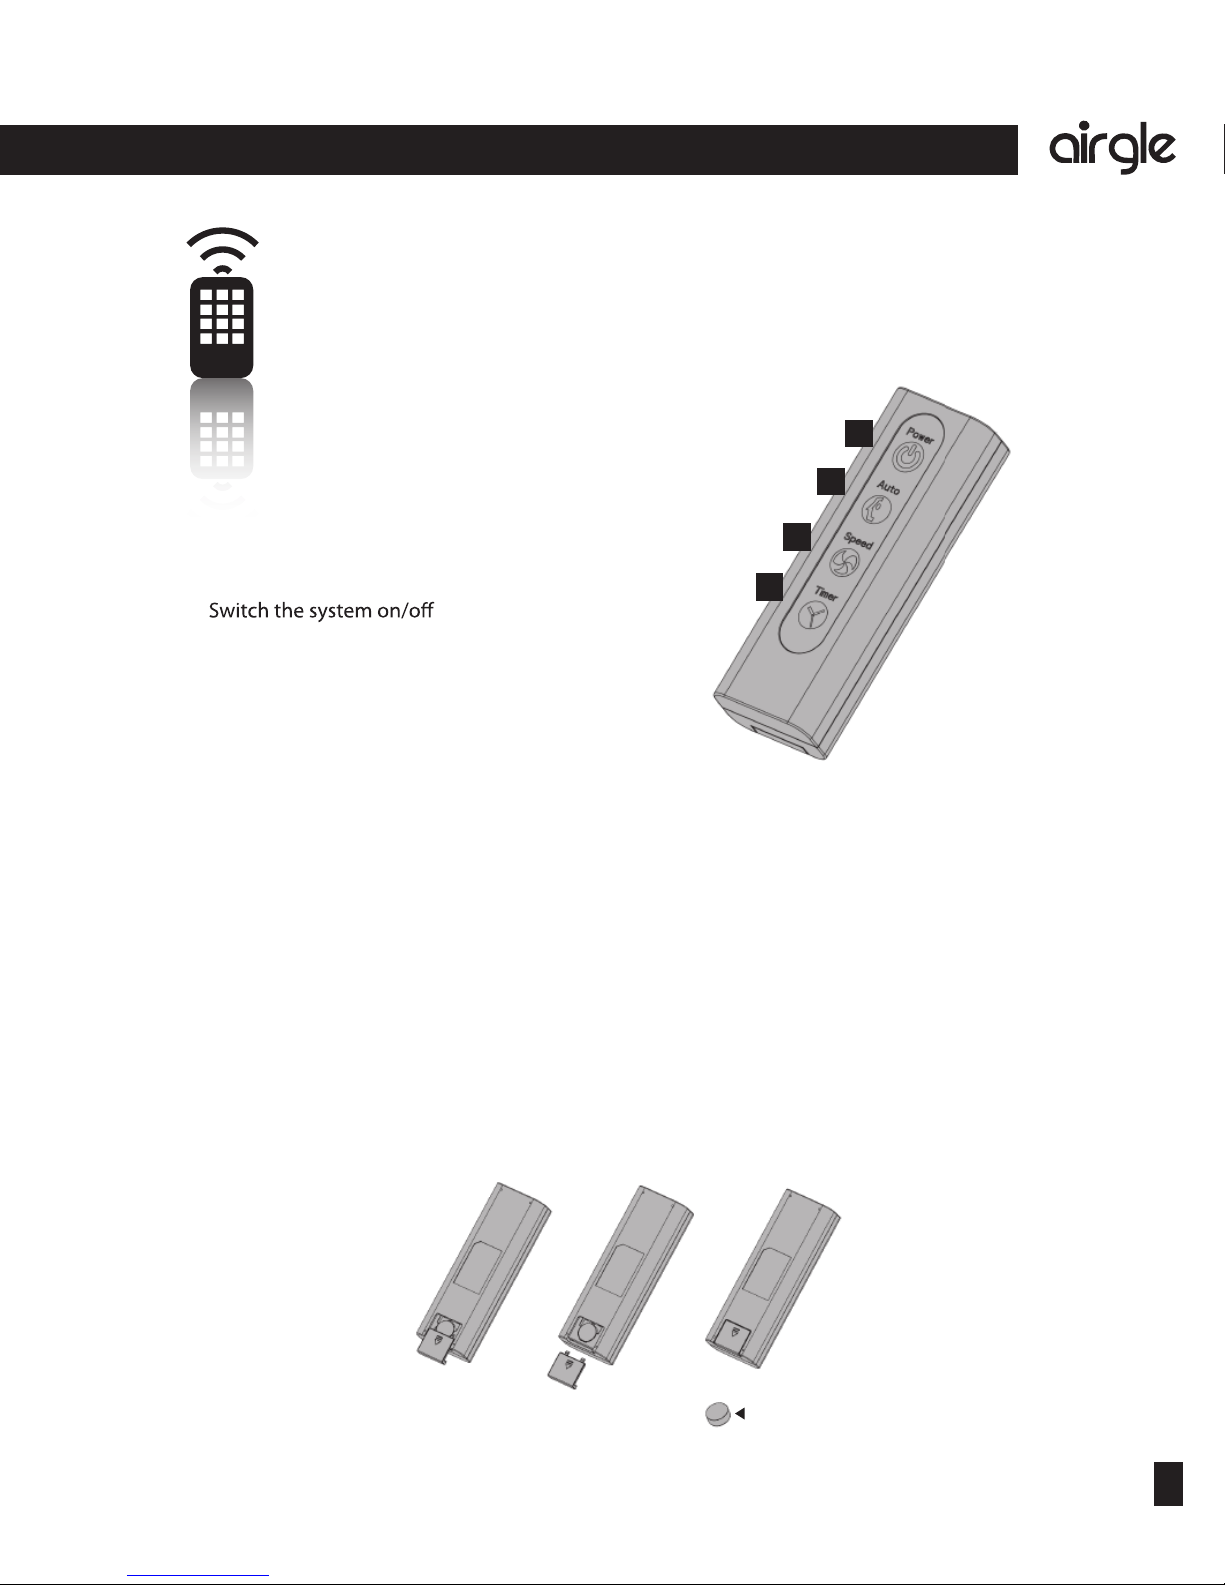
USING THE REMOTE CONTROL
Use the remote control to:
1.
2. Change mode from manual to auto
3. Regulate fan speed
4. Set Timer
The infrared receiver of the Airgle®system is located in the right hand bottom corner of the control
panel. In order to get the best signal transmission, the remote control should be pointed at the
control panel when pressing any button on the remote.
1. Open the battery compartment by pressing the small lever to the side and slide the battery
compartment out.
2. Remove the used battery.
3. Insert the new battery (Lithium coin battery 3V). Be sure that the (+) and (-) are correct.
Note: Rechargeable batteries are not compatible with the remote control.
Replacing the remote control battery
1
2
3
4
Used battery
16
The art of purification
®
17
The art of purification ®
When your unit is set on High, the sensor (on the side of the unit) is more sensitive to the environment.
The system will auto-activate when it detects small amounts of particles in the air. And since it is
more responsive to these small amounts of particles, it will activate frequently and this will shorten
When you unit is set on Low, The sensor (on the side of the unit) is less sensitive to the environment.
The system does not auto-activate until it senses a medium to high amount of particles in the air. This
What happens in High Mode?
What happens in Low Mode?
USING THE REMOTE CONTROL
Use the remote control to:
1.
2. Change mode from manual to auto
3. Regulate fan speed
4. Set Timer
The infrared receiver of the Airgle®system is located in the right hand bottom corner of the control
panel. In order to get the best signal transmission, the remote control should be pointed at the
control panel when pressing any button on the remote.
1. Open the battery compartment by pressing the small lever to the side and slide the battery
compartment out.
2. Remove the used battery.
3. Insert the new battery (Lithium coin battery 3V). Be sure that the (+) and (-) are correct.
Note: Rechargeable batteries are not compatible with the remote control.
Replacing the remote control battery
1
2
3
4
Used battery
19
18
The art of purification
®
®
19
The art of purification
YOUR PUREPAL®MultiGas AIR
CLEANING SYSTEM
Your PurePal®
tasks.
Your PurePal®
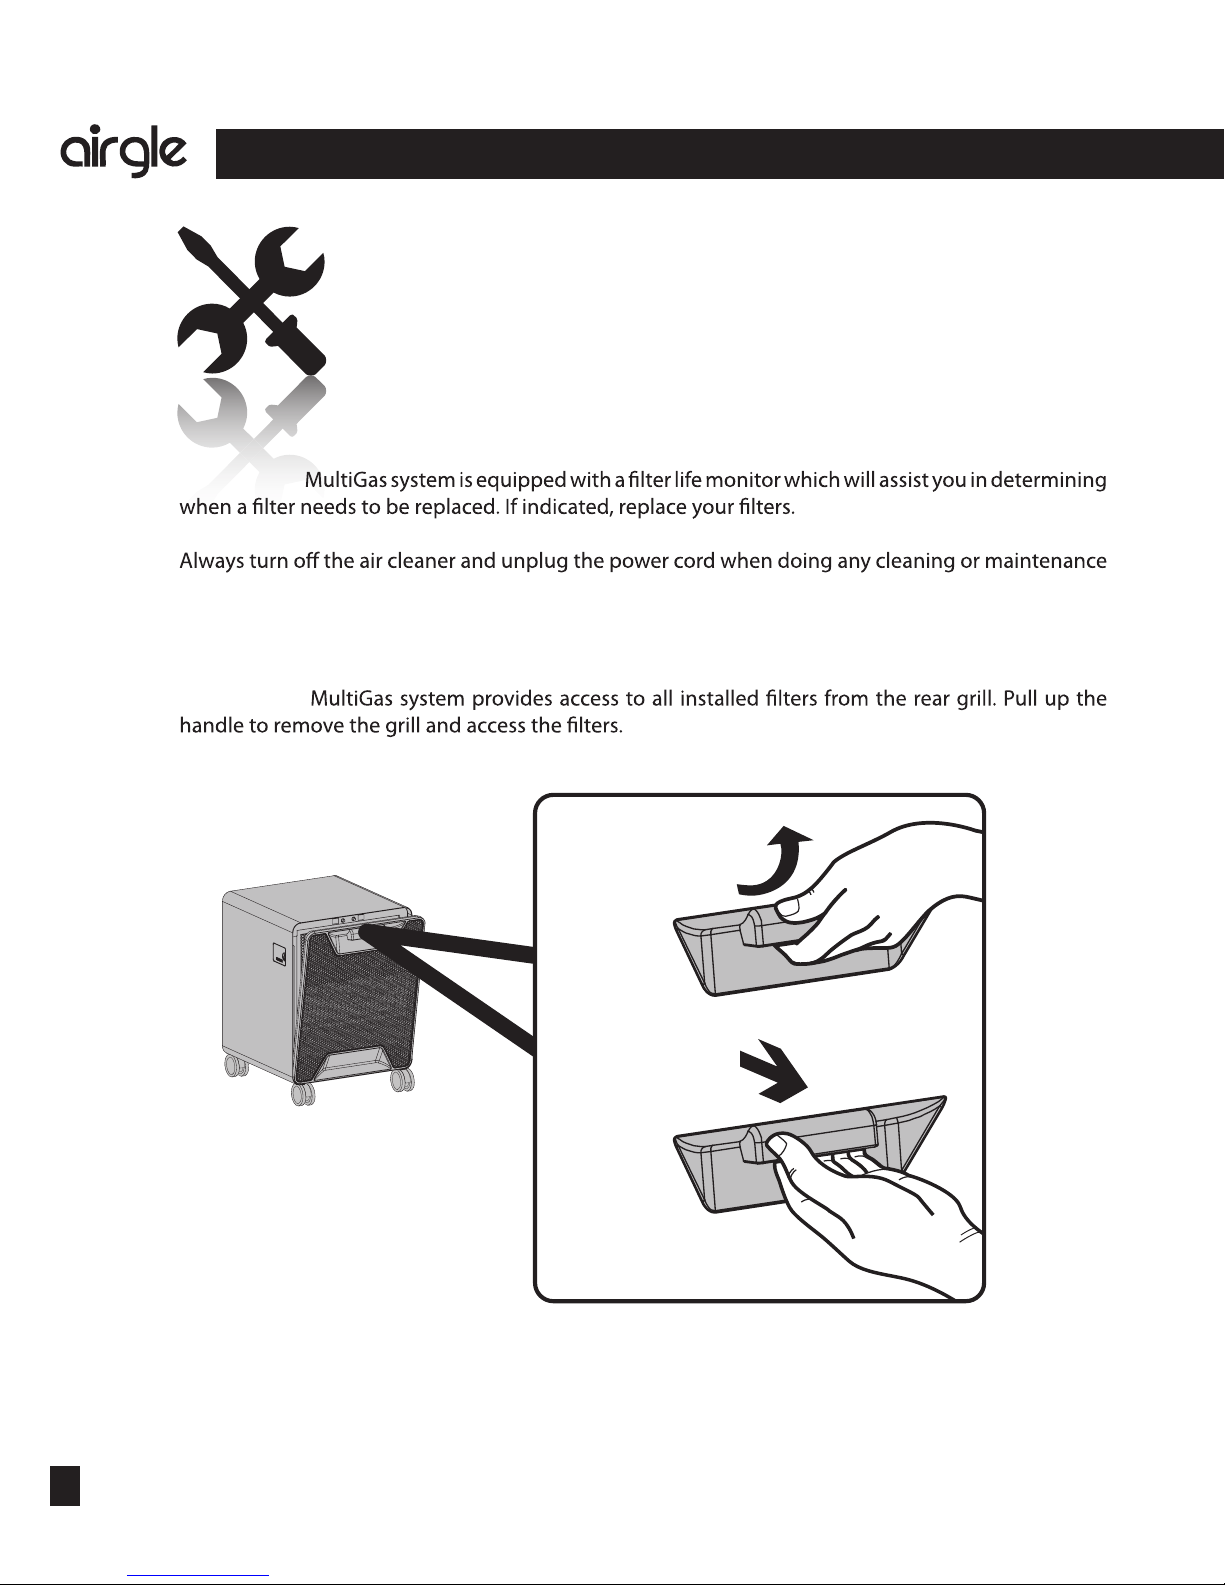
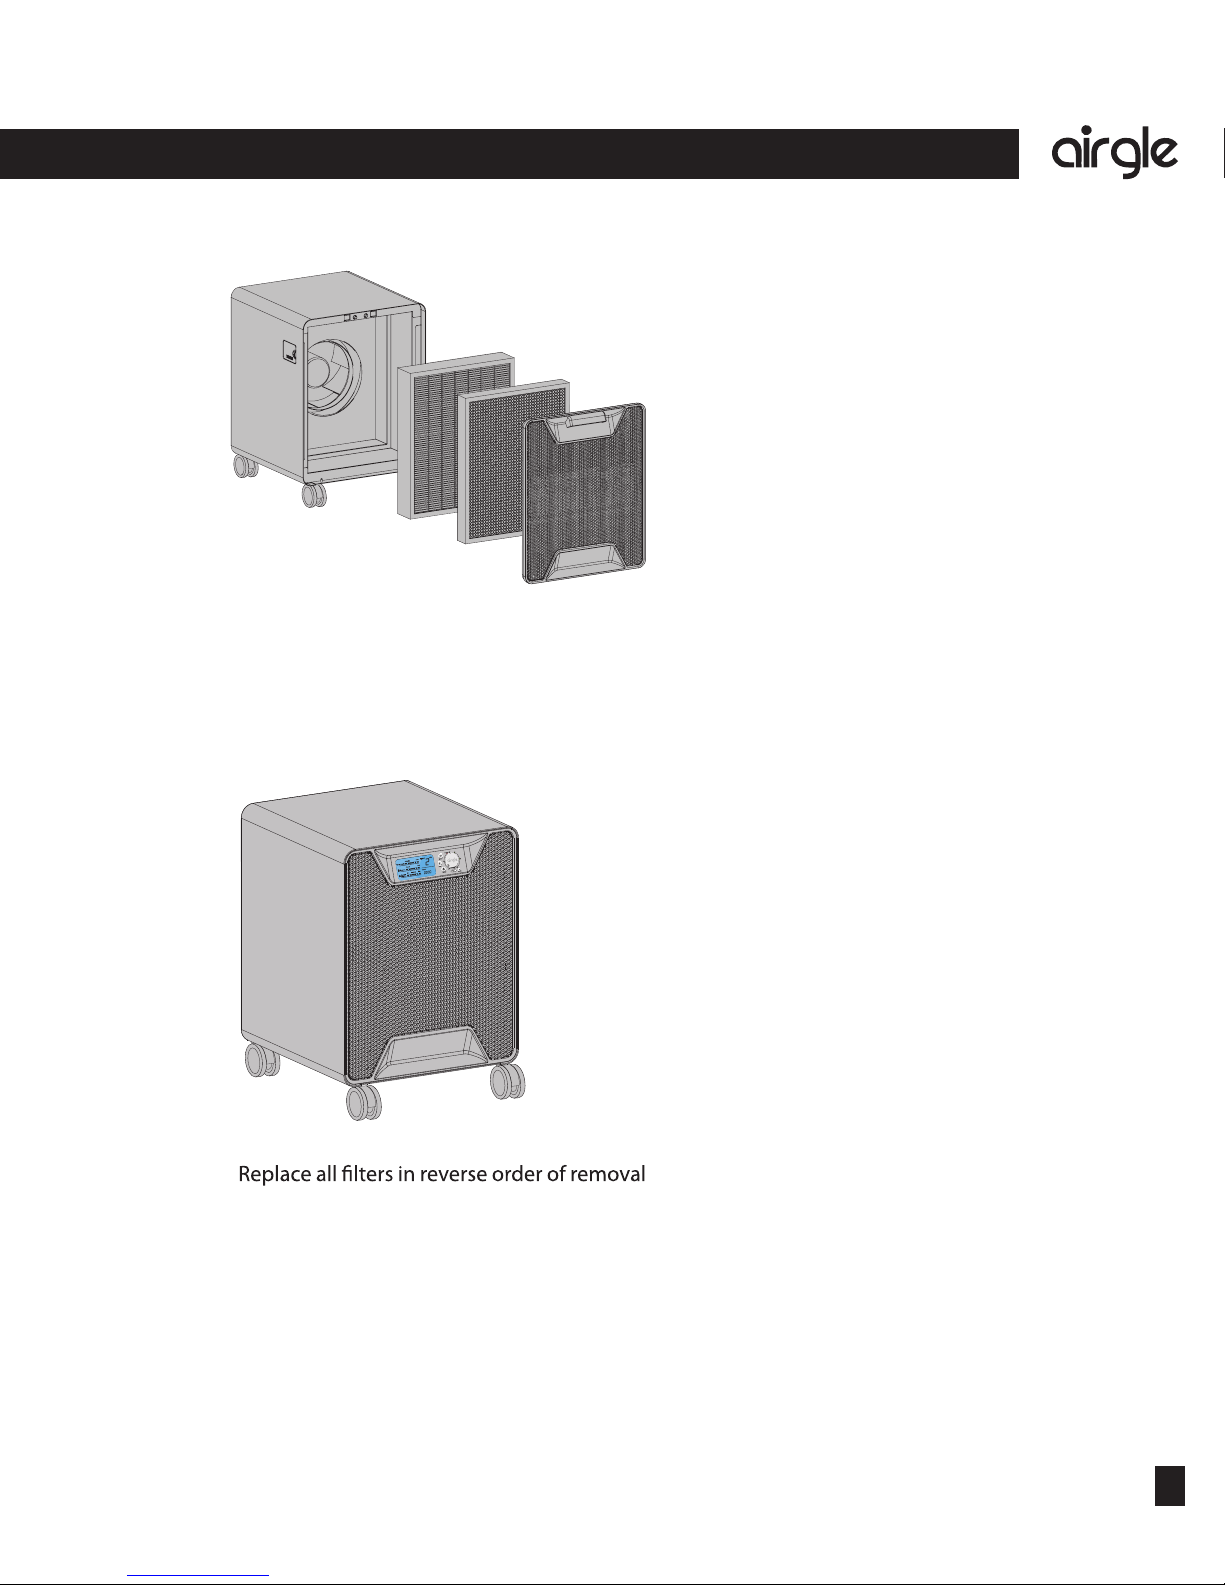
Filter Removal
Remove Filters (AG950 Model)
when done and make sure that the rear door
is completed closed.
1 pull upȟ
2 pull outȟ
Open Rear Door
USER SERVICING INSTRUCTIONS OF
19
18
The art of purification
®
®
19
The art of purification
YOUR PUREPAL®MultiGas AIR
CLEANING SYSTEM
Your PurePal®
tasks.
Your PurePal®
Filter Removal
Remove Filters (AG950 Model)
when done and make sure that the rear door
is completed closed.
1 pull upȟ
2 pull outȟ
Open Rear Door
USER SERVICING INSTRUCTIONS OF
®
20
®
The art of purification
The art of purification
21
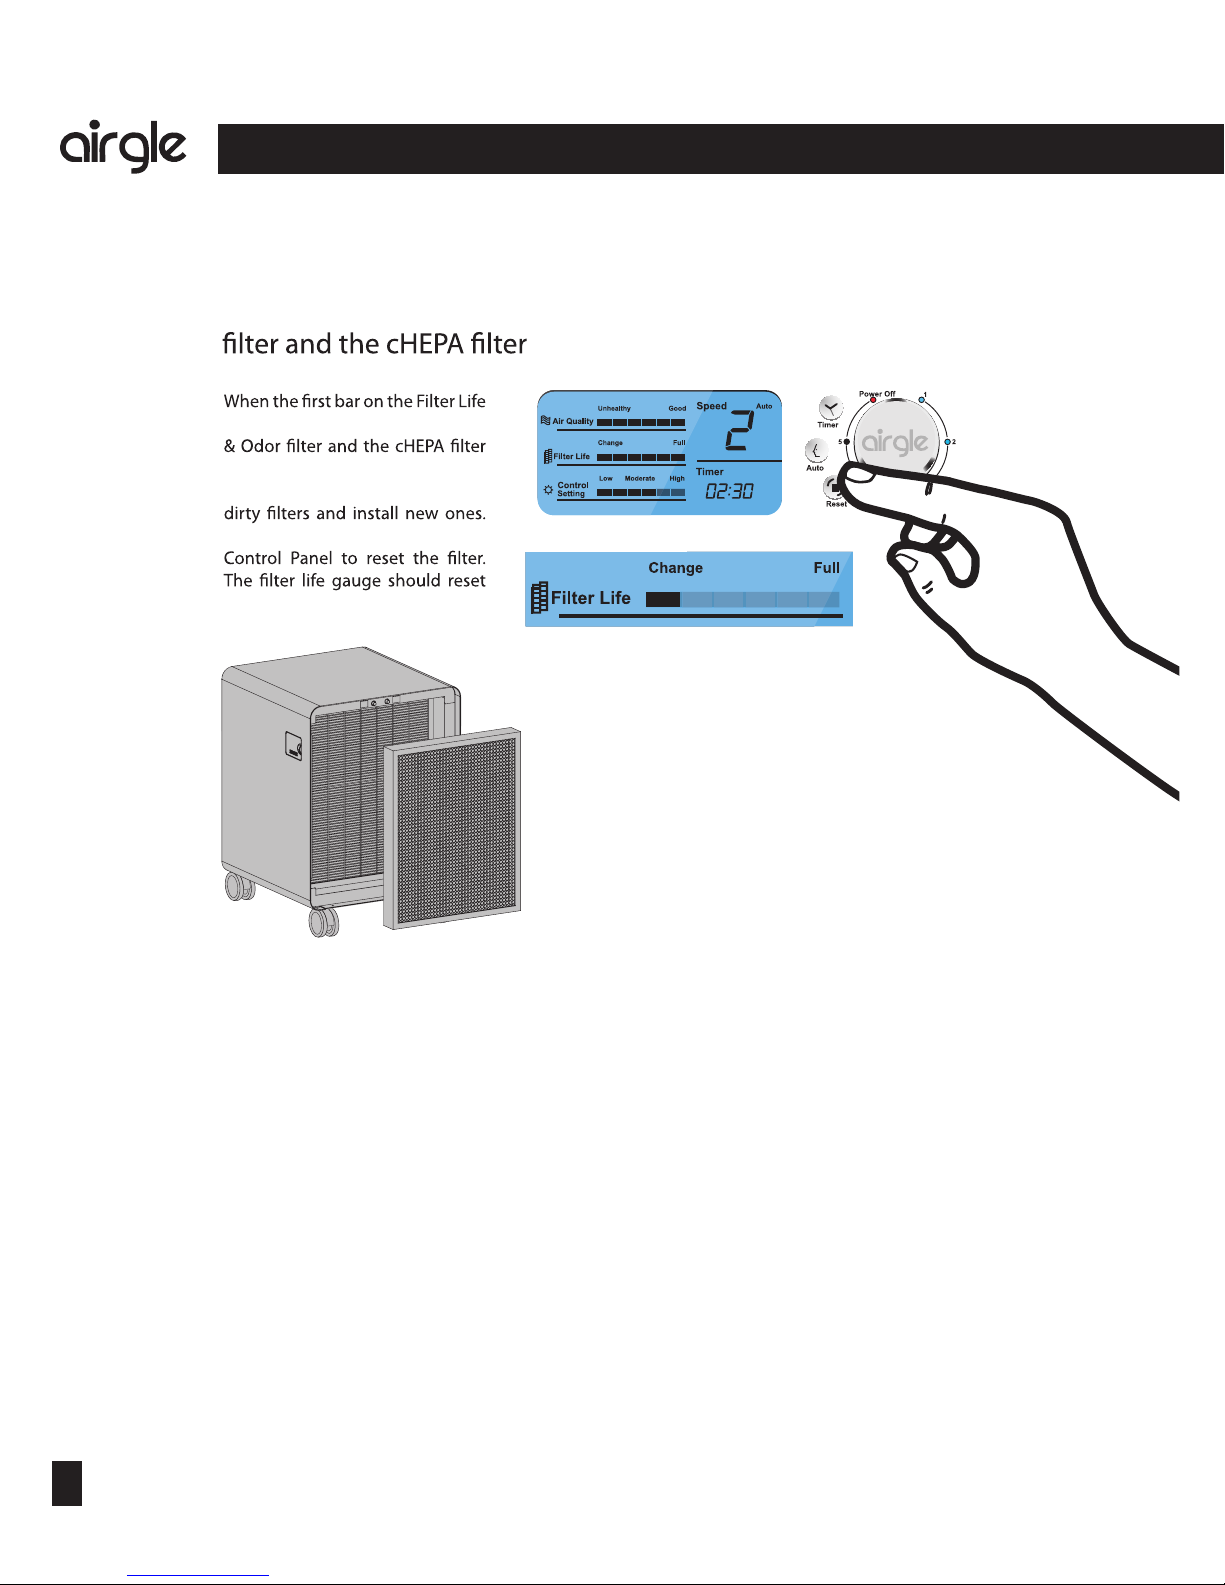
All other electronic components of the unit such as motor/fan are maintenance-free.
IR
LCD is blinking, it means the Gas
need replacement. Follow the
instructions above to remove the
Press the “Reset” button on the
to 6 full bars.
Replacing the Gas & Odor
Cleaning the Housing and Sensor
Our unique Airgle®system design includes
for human hair and large particles. This
the cHEPA filter. Use your vacuum to clean the
grill on the rear door.
The sensor and housing can be cleaned
using lukewarm water and a small amount
of detergent.
and
Other manuals for Purepal AG950
1
Table of contents
Other Airgle Air Cleaner manuals

Airgle
Airgle AG500 User manual

Airgle
Airgle Purepal AG950 Maintenance manual

Airgle
Airgle 750 User manual

Airgle
Airgle AG600 User manual

Airgle
Airgle 750 User manual

Airgle
Airgle AG500 User manual

Airgle
Airgle AG800 User manual

Airgle
Airgle PurePal AG900 User manual

Airgle
Airgle AG600S User manual

Airgle
Airgle PurePal AG900 User manual


