Airlink101 Redwing CDMA User manual

Copyright © 1993-2006 AirLink Communications, Inc. All rights reserved.
Redwing CDMA
Quick Start
Version 2.40 - September 2006

September 2006 1
Redwing CDMA for Bell Mobility -
Quick Start, version 2.40
You can find the Setup Wizard installation on the CD which came with your modem or on the Air-
Link website: http://www.airlink.com/support. Use only the Setup Wizard for Bell Mobility for best
results.
b. Connect the power adapter and antenna to your Redwing.
c. Install the Setup Wizard by running Bell MobilitySetupWizard.exe and follow the prompts.
d. Run the Setup Wizard from the Windows Start menu.
Start>All Programs>AirLink Communications>Setup Wizard>Setup Wizard
This Quick Start guide details using the Setup Wizard for the initial setup and any configuration
necessary to register your AirLink Redwing online with Bell Mobility. For additional modem
configuration options, please refer to the Redwing CDMA for Bell Mobility User Guide.
1. Starting the Setup Wizard
Note: The Setup Wizard requires the Microsoft .NET framework v. 1.1 and
Microsoft Windows 98, Windows 2000, Windows XP, or later.
a. Connect the Redwing to your computer using a serial cable.

September 2006 2
Redwing CDMA for Bell Mobility - Quick Start, version 2.40
After the Setup Wizard connects it should show the details for your modem. If the incorrect modem
is displayed, press the Reset Button on your modem. Click Next.
2. Connecting to the Modem
The Setup Wizard needs to establish a connection to your modem. When it connects, The Setup
Wizard will automatically detect the model of your modem to offer specific tasks.
Select Connected to a Serial Port, check Auto Detect Port Settings or select the port from the
drop down menu. Click Next.
3. Selecting Tasks
After the model of your Redwing is detected, you will be
offered Setup tasks. Choose the tasks you need. Some
tasks shown here might not be available for your Redwing
model.
Click Next when you have selected your desired options.
Activate Modem: Configure your Redwing to connect on the Bell Mobility network.
Update PRL List: Update to Bell Mobility’s most current PRL.
Test Modem Setup: Verify your Redwing is properly configured and connecting on Bell Mobil-
ity’s network.
Setup a DUN Connection: Create a Dial-Up Networking entry for local connection. This part of
the setup is only needed if you will be using your Redwing to connect directly from a computer to
the Internet or other network.

September 2006 3
Redwing CDMA for Bell Mobility - Quick Start, version 2.40
To configure or provision your modem to work on the Bell Mobility network, you will need device
activation information provided by Bell Mobility. Fill in the requested information and Click Next.
Once you have entered all the requested settings, the modem will check your signal strength, RSSI.
Click Next to begin “provisioning” and setting the configuration into memory. The process may
take a few minutes. Progress information will display across the bottom.
4. Activate the Redwing
•MSL (also known as the Master Subsidy LockCode, MSL or OTKSL, Activation Code, or
NAM Lock Code) is the code needed to enter data into the Redwing.
Caution: If this is not set to the correct Master Code for your Redwing, the PRL
Update will fail.
C3110 only.
•Mobile Identification Number (MIN), the ten digit number assigned to your account.
•Network Access Identifier (NAI) and Password. The fields for NAI and @should be filled in
for you. Verify they are correct and enter the password you have been given for your account.
If you have an account with a static IP address, use the drop down menu for the @field to
select static.1x.bell.ca.

September 2006 4
Redwing CDMA for Bell Mobility - Quick Start, version 2.40
The Preferred Roaming List (PRL) is a list of network identifiers your modem uses to connect to
the network. Occasionally this list is modified by Bell Mobility as they alter their network foot-
print.
The version of the PRL will be automatically detected. It is recommended you ensure you have an
updated PRL so your modem will be performing optimally.
5. Update PRL List (C3110 only)
Note: If you do not have a C3110, this section is omitted from the Wizard.
6. Test Modem Setup
Your Redwing’s connection to the Bell Mobility cellular network is tested.

September 2006 5
Redwing CDMA for Bell Mobility - Quick Start, version 2.40
Green checks in the boxes indicate the tests were successful and your Redwing is functioning prop-
erly. At this point your modem is configured and activated to work on the Bell Mobility network.
Dial-up Networking (DUN) allows a computer or other device to use an AirLink modem to con-
nect to the Internet or private network just like an analog modem using a standard phone line. The
Setup Wizard will install a driver for the modem and set up the connection between your computer
and the modem. You will need to have administrator access on the computer for this section of the
installation.
Select Install to begin adding the driver for the AirLink modem to your computer. The COM port
and speed should match your modem (the default settings will be pre-entered). Select Next to begin
the modem driver installation. You will see a confirmation box from Microsoft Windows to spec-
ify you wish to install this driver on your computer. Select Continue Anyway to install the driver.
Note: These tests, depending on the
strength of your signal, may take a few
minutes. Initially, while the tests are being
performed, there may be red Xs in the
boxes.
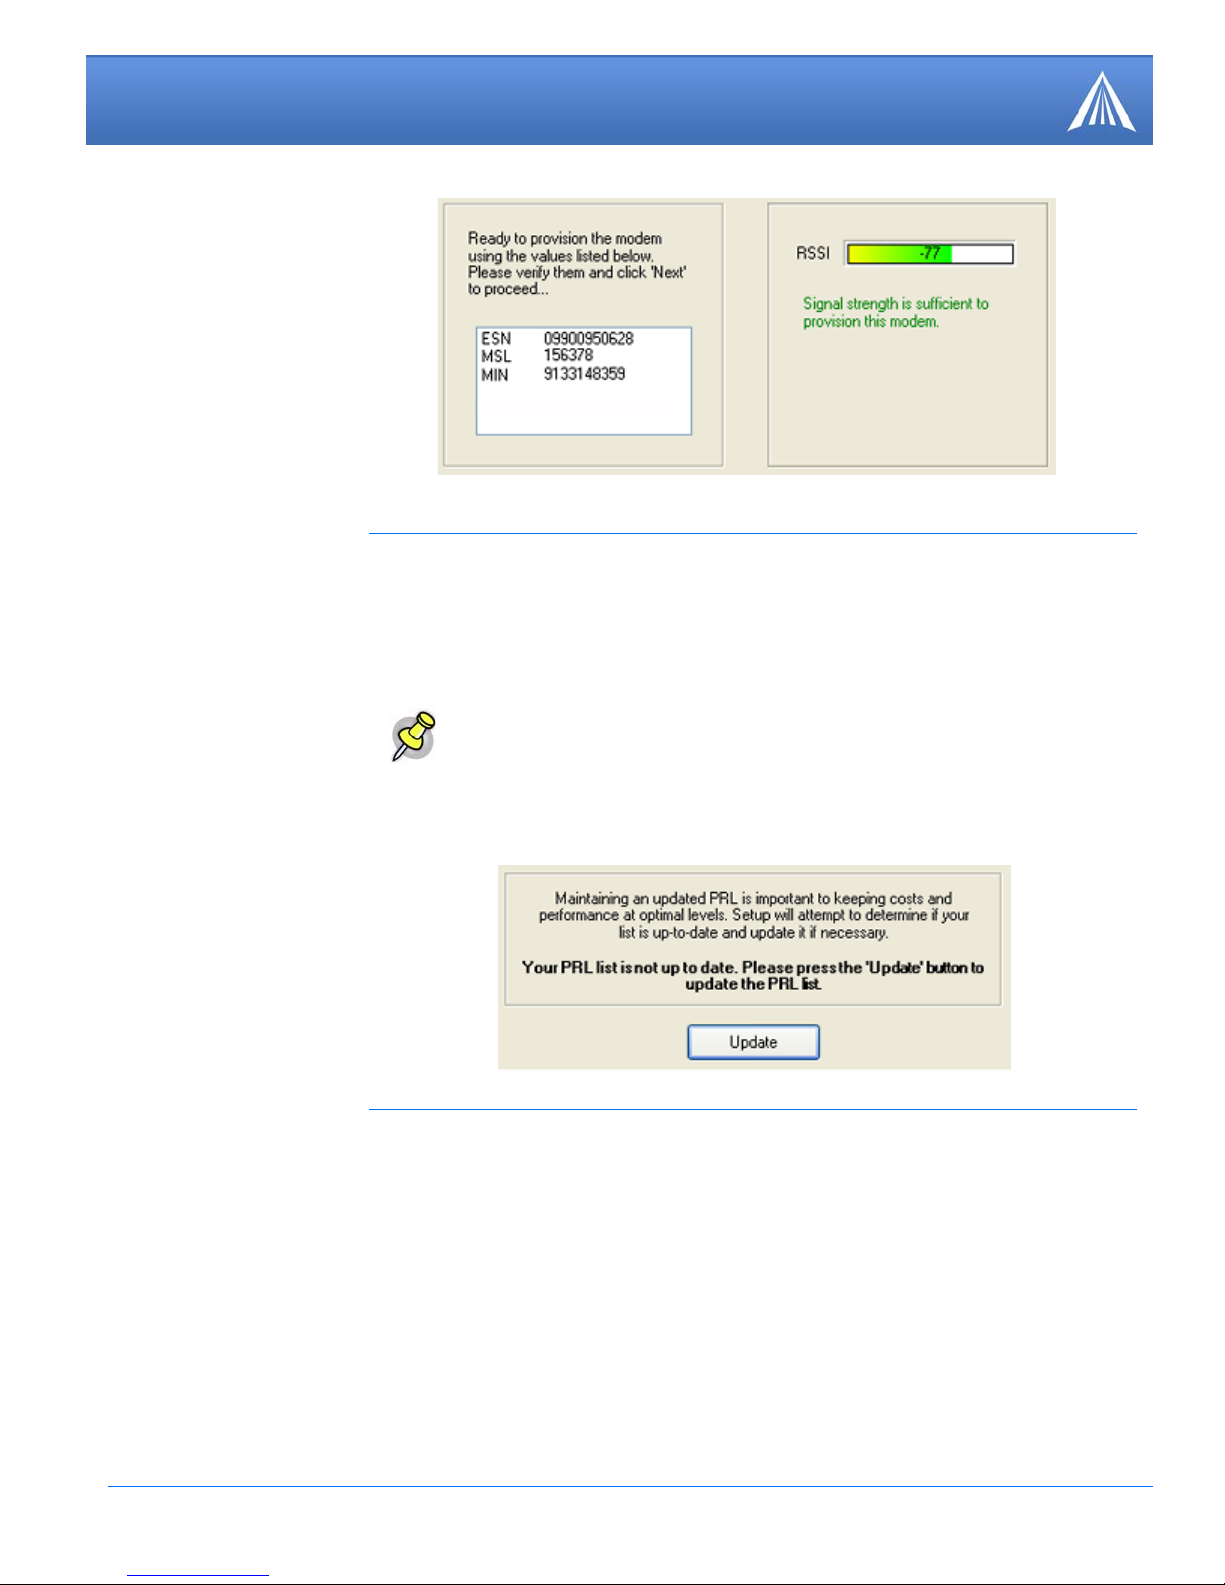
Caution: If your PRL is out of date, you may experience trouble with activating
your modem on Bell Mobility’s network. You should check to be sure you have
the most recent Setup Wizard available on the AirLink website or consult with the
Redwing CDMA for Bell Mobility User Guide on how to update the PRL over the
air.
If you want to verify connectivity to the Internet with your Redwing modem, you
need to set up a DUN connection.
7. Setting up a DUN Connection
If you already have other modems installed on
your computer, they will be listed on the AirLink
Modem Installation screen. If you have other
modems installed on your computer using the same
serial port, they may conflict. As long as you do
not intend to use them, you can Remove other
modems using this menu.

September 2006 6
Redwing CDMA for Bell Mobility - Quick Start, version 2.40
When the driver is installed, you will return to the AirLink Modem Installation screen. The Air-
Link modem should now be listed (in addition to any other modem installed).
Select Next to begin installing the DUN connection.
From the drop down menu, select the AirLink modem. The defaults for the phone number, user
name and password will already be entered. Select Next to begin the install.
At the completion of the DUN installation, you will return to the Dial-up Networking Connection
screen. The AirLink modem should now be listed as a connection.
Your modem is now ready to be used as a DUN device for any applications on your computer
needing a network connection. If you have DUN installed for more than one modem, you will
need to specify in your application which DUN to use. Unless it is the only DUN, your AirLink
modem may not be the one your computer sees as a default.
Your AirLink Redwing should be mounted in a position that allows easy access for the cables so
they are not bent or constricted. The LEDs on the front panel should be visible for ease of opera-
tional verification. You should ensure that there is adequate airflow around the modem but that it is
kept free from direct exposure to the elements (sun, rain, etc.)
If you already have a DUN connection installed for
a different modem, it will be listed on the Dial-up
Networking Connection screen.
Select Add to create a new connection for the Air-
Link modem.
Hardware Installation
An optional accessory for your modem is a mounting kit. The bracket is designed to snugly cra-
dle the modem and hold it in place where you need it.
Connecting the Antenna
Your AirLink Redwing will work with most Dual-Band PCS cellular antennas with a TNC con-
nector that works in the high and low frequencies of CDMA . Connect the antenna or RF cable
directly to the TNC connector on the back of the Redwing.

September 2006 7
Redwing CDMA for Bell Mobility - Quick Start, version 2.40
Your Redwing can be used with either DC (available in most automobiles) or 110 AC (standard
US wall power) with the appropriate power adapter (available from AirLink).
The power cable positive lead should be connected to the battery or power source positive termi-
nal. The power cable negative lead should be connected to the battery or power source negative ter-
minal. The Redwing has an internal polysilicon circuit breaker that opens at 0.5 to 1.0 amps of
current.
When your Redwing is connected to power and an antenna, there is a specific pattern to the lights
to indicate its operation mode. Refer to the User Guide for more information on light patterns.
AirLink Technical Support
If you encounter problems with operation of your Redwing, AirLink’s support staff can help.
Connecting power
Connecting the Redwing to a computer or other device
Your Redwing’s serial port can be connected directly to most computers or other devices using a
standard straight through cable. If you have a DCE device, you will need a null modem or null
modem cable.
Your Redwing can also be connected to a USB to serial device connected to a computer or other
device which does not have an available serial port but does have USB.
Redwing Indicator Lights
Net (network) - Indicates when there is traffic on the network.
Pwr (power) -Indicates the power adapter is connected and there is power getting to the modem.
The Reset button performs the same function as unplugging power from the modem and plugging
it back in. Reset will not alter any saved configuration settings.
Refer to the User Guide for your modem or the AirLink website for AirLink prod-
uct warranties.

September 2006 8
Redwing CDMA for Bell Mobility - Quick Start, version 2.40
AirLink Support Web Site
The AirLink web site is updated frequently with Setup Wizards, Utilities, How-To Guides, and
other documentation: http://www.airlink.com/support.
AirLink Documentation and Guides
•Modem User Guides - These guides are specific to your modem type, cellular provider, and
cellular technology and contain comprehensive information about the operation of the modem
and its features.
•Modem Quick Start guides - These guides are also specific to the modem type, cellular pro-
vider, and cellular technology and are a step by step guide to activating the modem using the
Setup Wizard or other steps as applicable.
•Utility Guides - These guides focus on the features of one of the AirLink modem utilities:
Wireless Ace, AceView, AceNet, Modem Doctor, etc.
•Application Notes and How-To Guides - These guides detail configuring the modem to work
with a specific feature set or how the modem can be set up to work with a specific 3rd party
(non-AirLink) device.
•Data Sheets and White Papers - These are technology based information documents.
Contacting Technical Support
Friday 5 AM to 5 PM Pacific Time (8 AM to 8 PM Eastern Time). Support is not available week-
ends or holidays.
Other manuals for Redwing CDMA
2
Table of contents
Other Airlink101 Modem manuals

Airlink101
Airlink101 H4223-CD - Raven X HSUPA User manual

Airlink101
Airlink101 Raven G3210 Operating instructions

Airlink101
Airlink101 XR90 User manual

Airlink101
Airlink101 Redwing CDMA Series User manual

Airlink101
Airlink101 Redwing CDMA User manual

Airlink101
Airlink101 H4323-C - PinPoint X HSUPA User manual