Damage
Requiring
Service
Have
the
units
serviced
by
a
qualified
service
technician
if:
-
The
AC
power
cord
or
plug
has
been
damaged.
-
Foreign
objects
or
liquid
have
got
inside
the
unit.
-
The
unit
has
been
exposed
to
rain
or
water.
-
The
unit
does
not
seem
to
operate
normally.
-
The
unit
exhibits
a
marked
change
in
performance.
-
The
unit
has
been
dropped,
or
the
cabinet
has
been
damaged.
DO
NOT
ATTEMPT
TO
SERVICE
THE
UNIT
YOURSELF.
Check
your
system
and
accessories
CX-NSZ70
Compact
disc
stereo
cassette
receiver
SX-WNSZ70
Front
speakers
FM
antenna
Remote
control
MW/LW
antenna
TABLE
OF
CONTENTS
PRECAUTIONS
......ccccsesseccscnssenseensuserssenneusseseeneauanesenseesonenes
2
PREPARATIONS
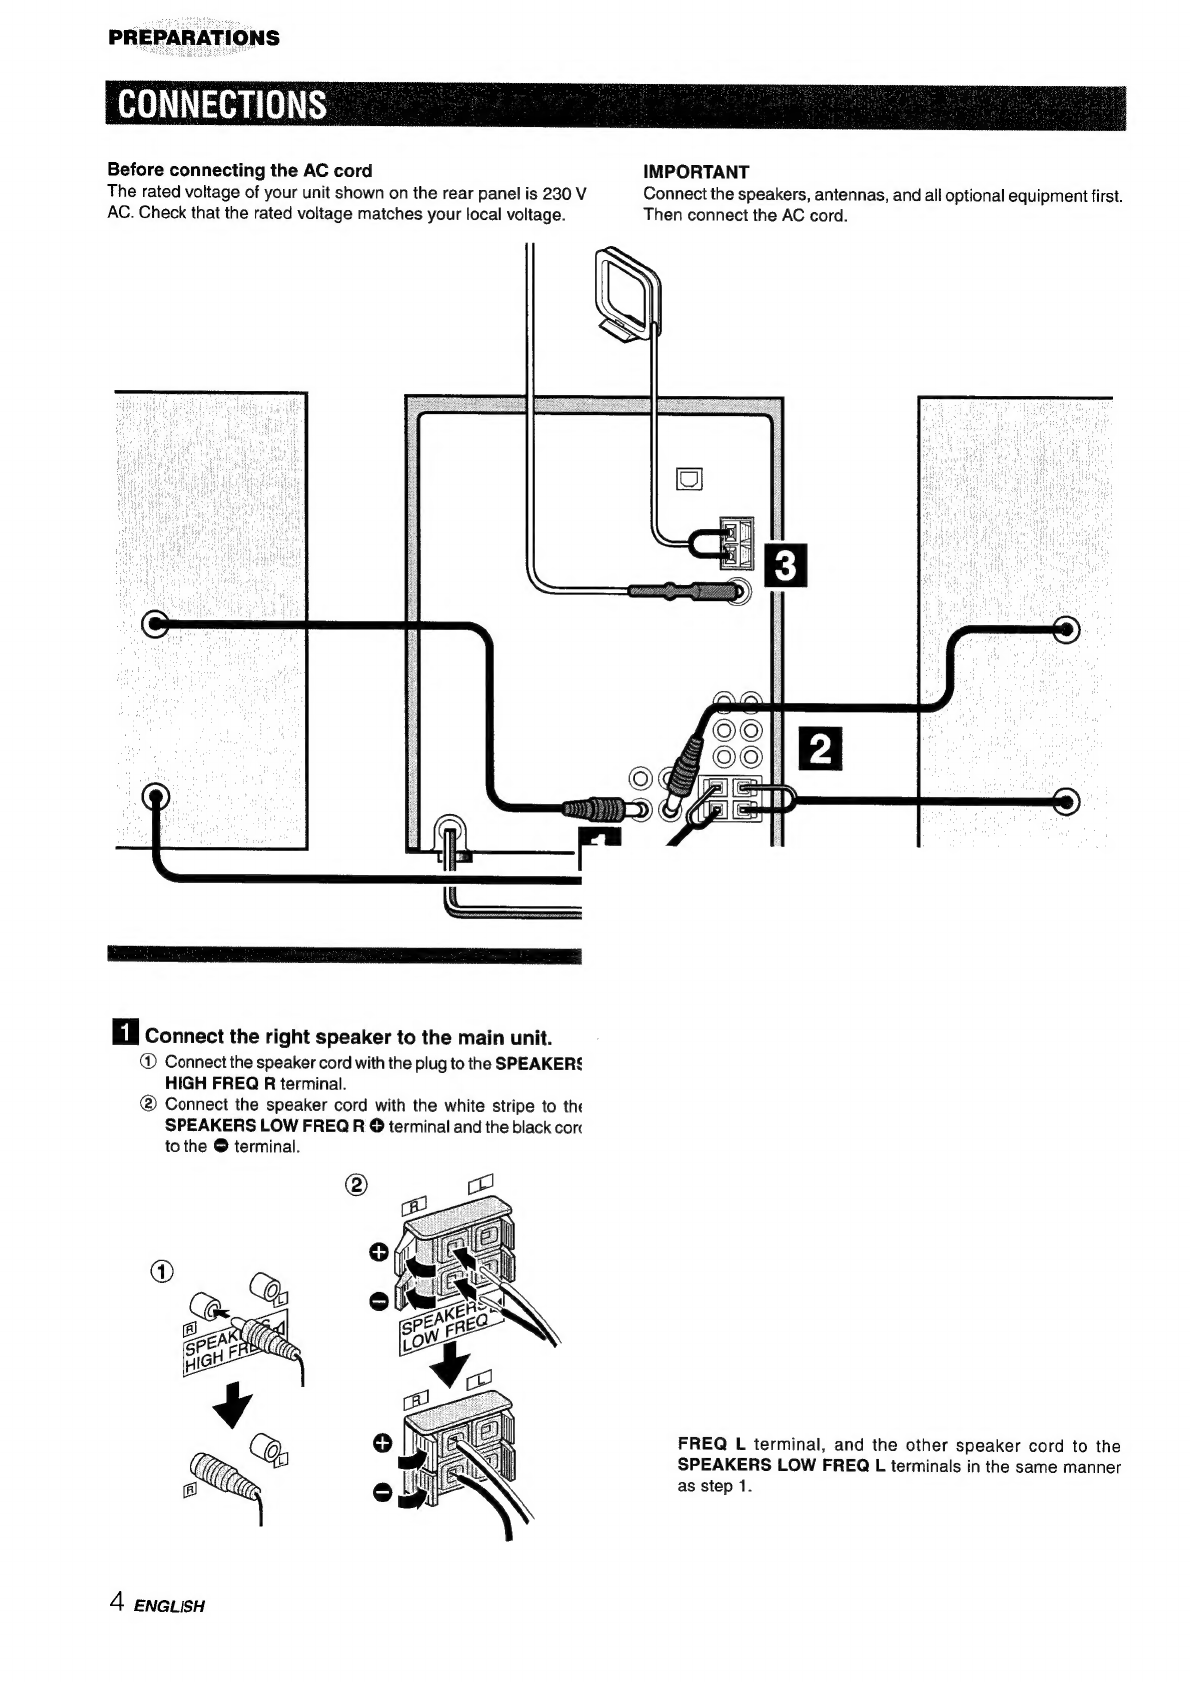
CONNECTIONS
un.
ecccsscsscsnsesssceneesssseseessenenenessneuseesesneanenne
4
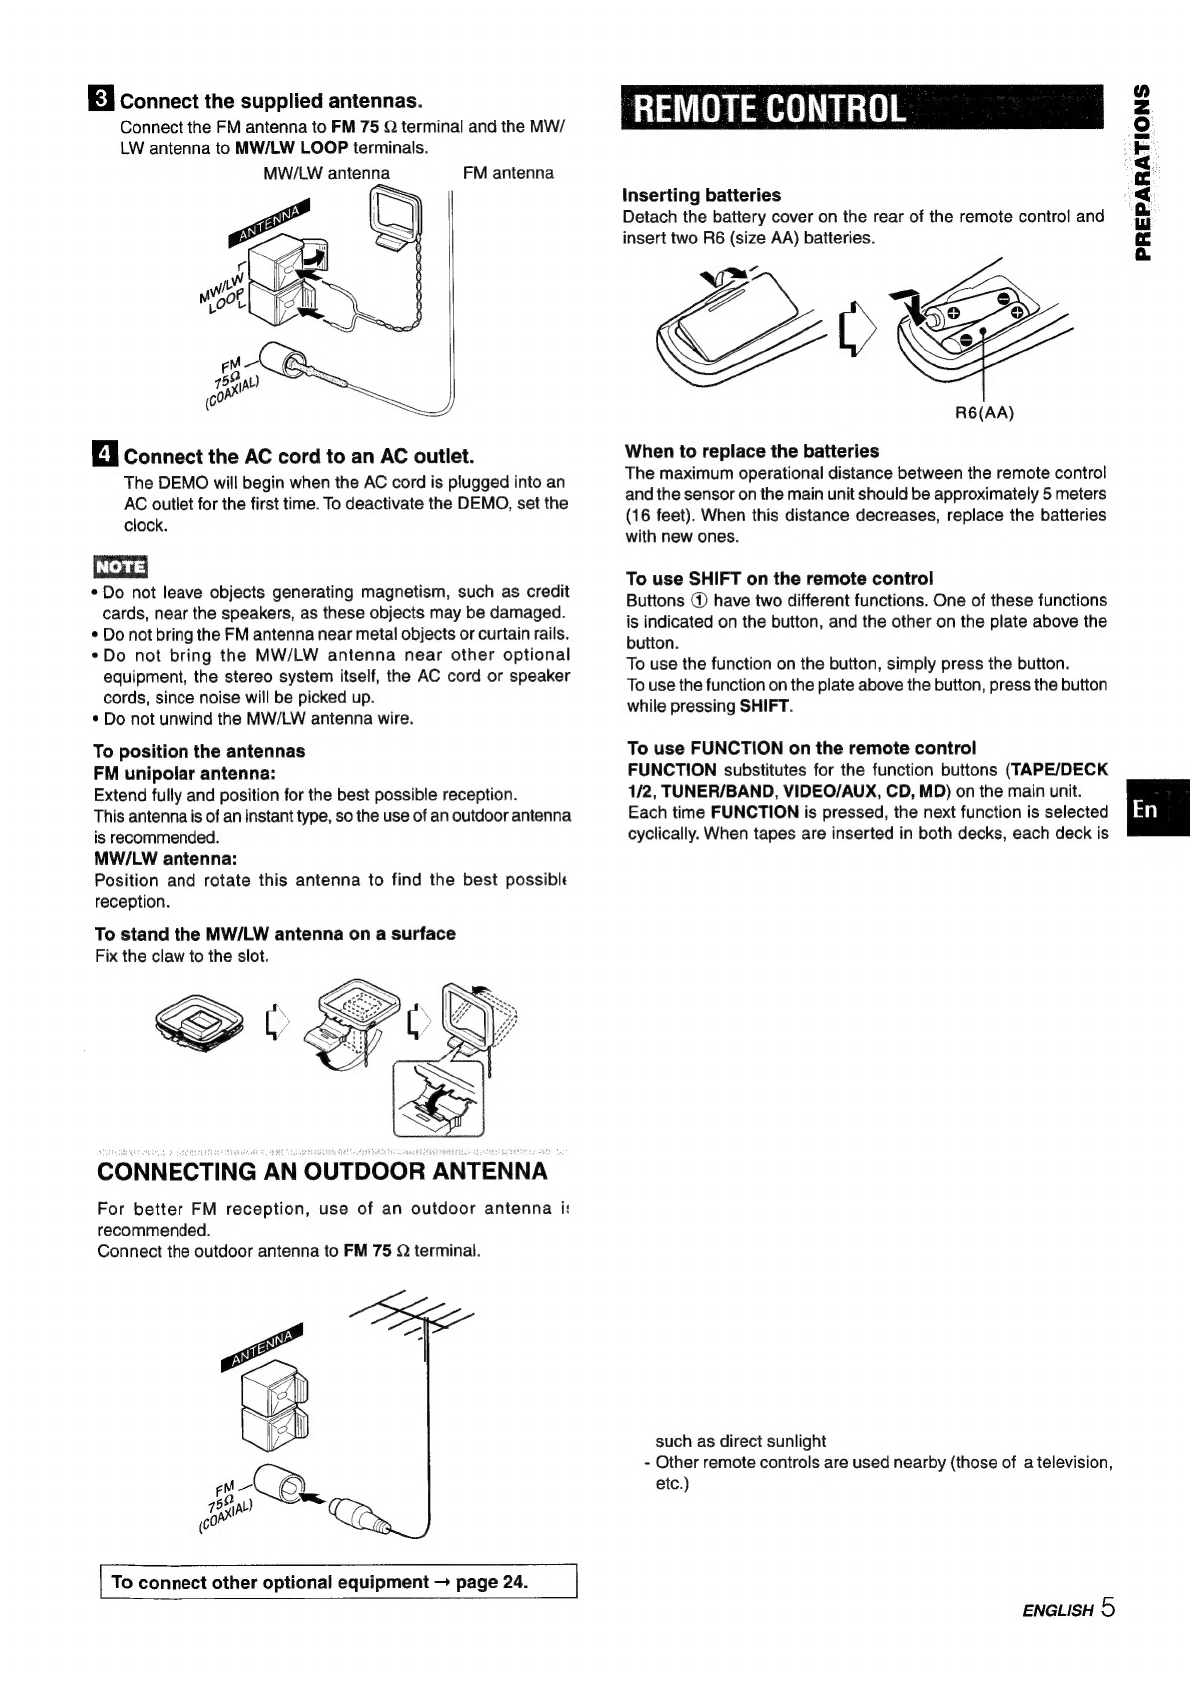
REMOTE
CONTROL
........cccsssesscssecstessesssesssseesserssnssesserseeees
5
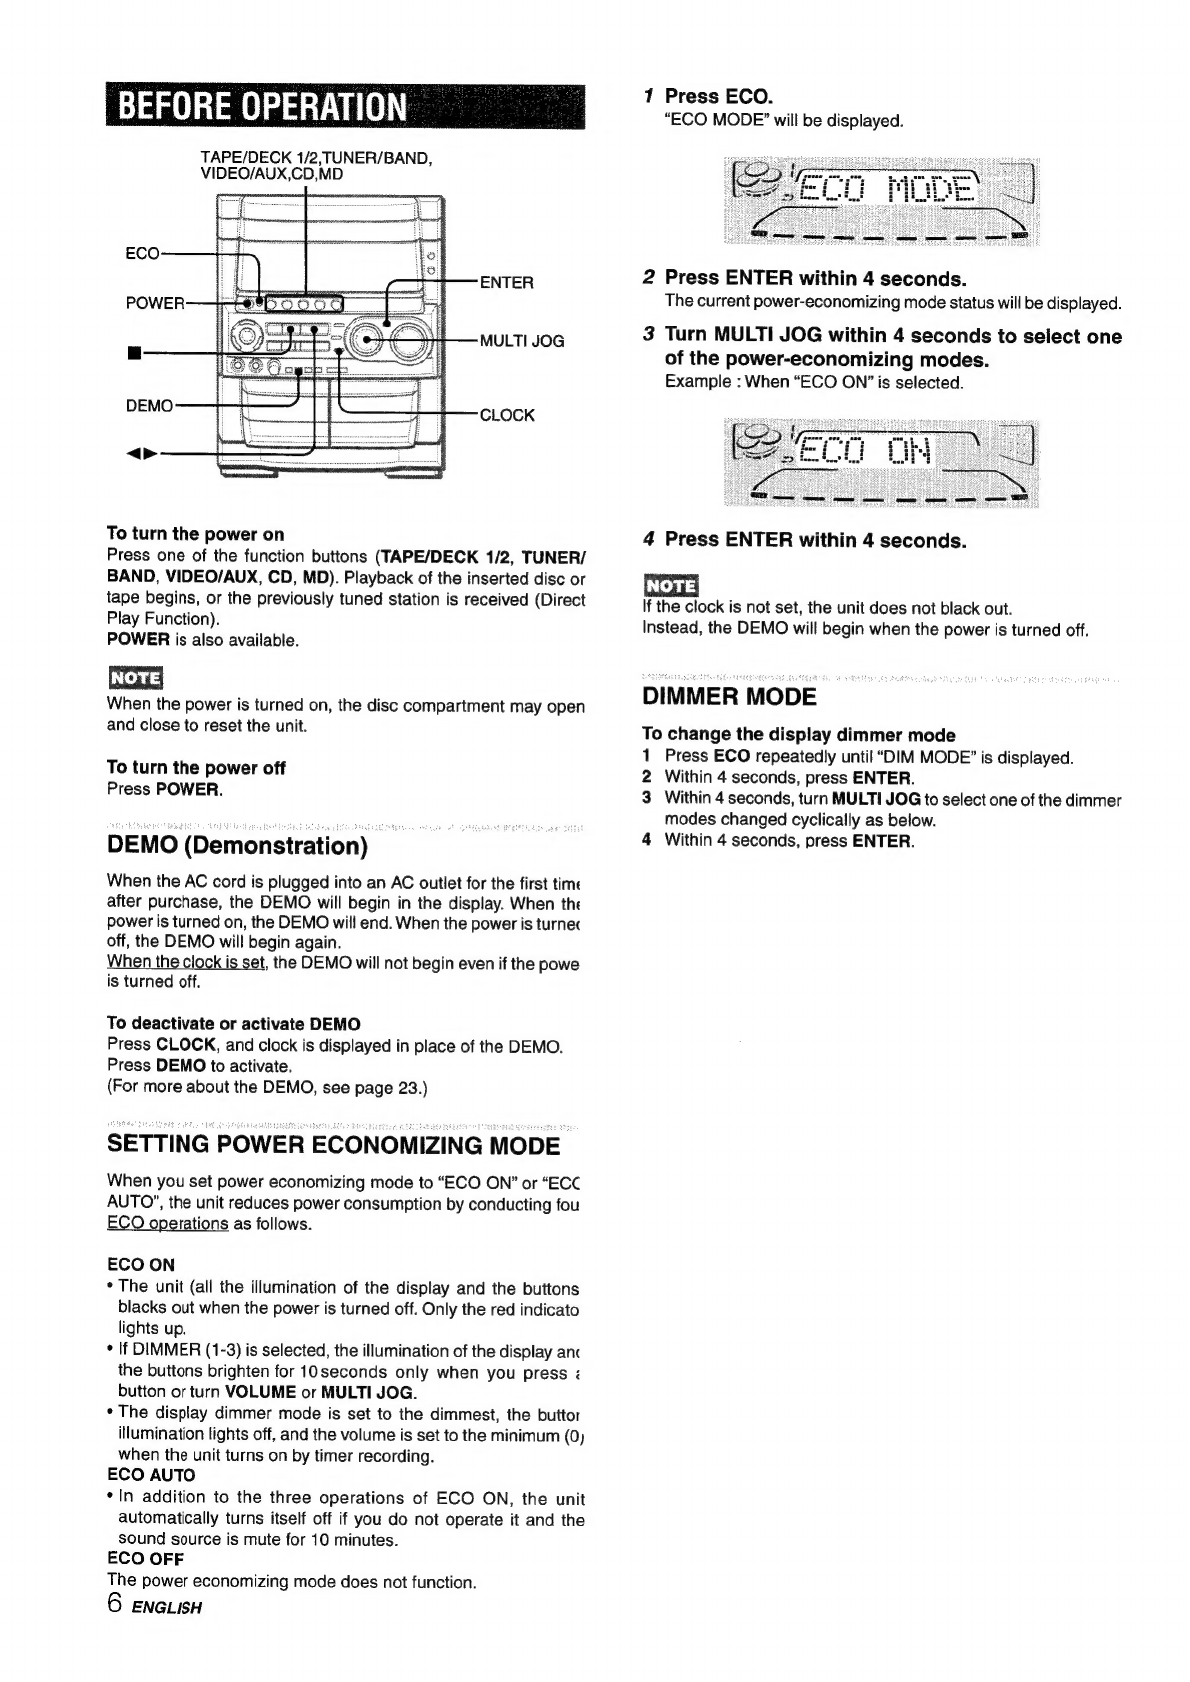
BEFORE
OPERATION
.......c.sccssssessssessasseserecssorseeeeeuneensaenes
6
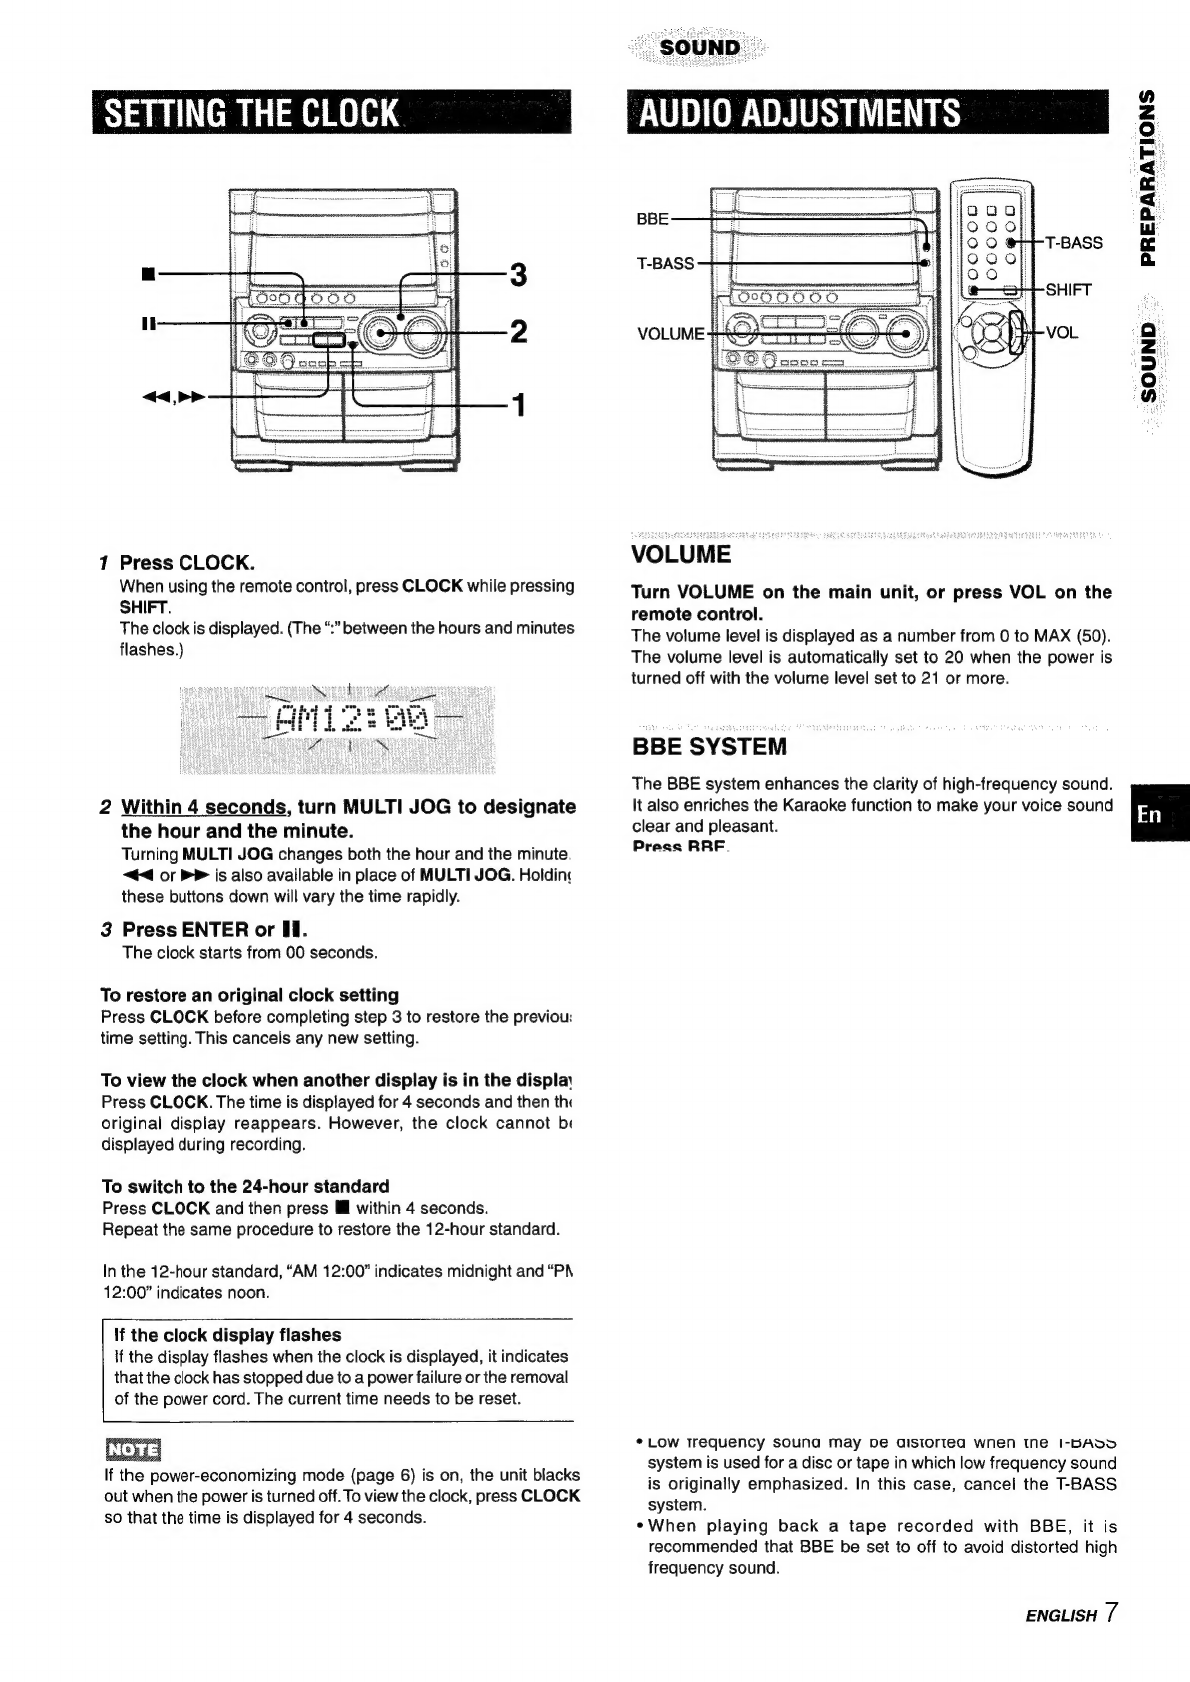
SETTING
THE
CLOCK...........cscsssestessesssenersnnssenseesnenseenneens
7
SOUND
AUDIO
ADJUSTMENTS.
..........ccsccssseessnteoseserssersessneseeeseeees
7
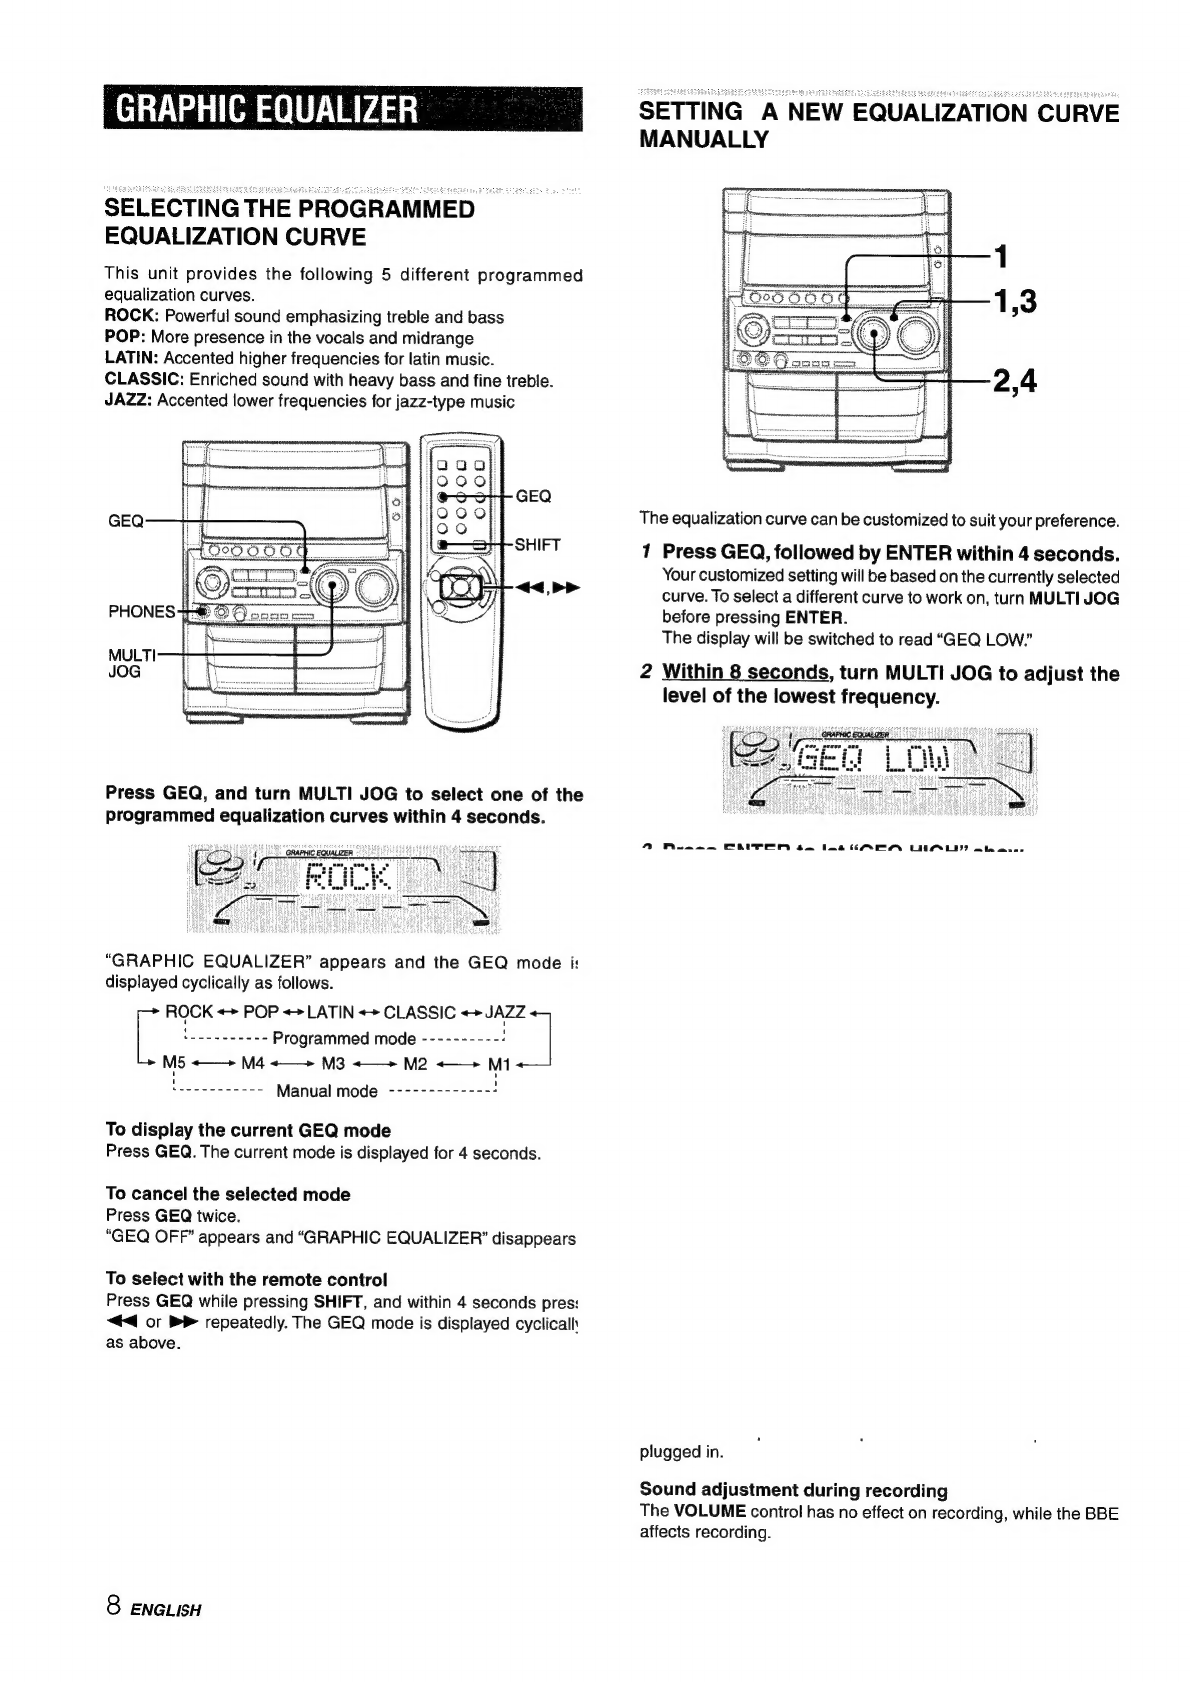
GRAPHIC
EQUALIZER
uu...
.ecesesssecenseeneesseneersensenseesneeneenaee
8
RADIO
RECEPTION
MANUAL
TUNING
uu.
cect
cteecesesssneneesnesesseasensranoseontanen
10
PRESETTING
STATIONS
.........ccssssssceessrserseesssesssnensseessees
10
TAPE
PLAYBACK
BASIC
OPERATIONS.
........ccccsssesssscsensssessensensveaverssseassonss
11
CONTINUOUS
PLAY
....
ccc
csecentensesonsensensreavannsteenneosensens
12
CD
PLAYING
BASIC
OPERATIONS
......csseccssecsessceneesesnseessseeennneassonanes
13
PROGRAMMED
PLAY
..........ccccssssessssecusessensensseeennenneeses
14
RECORDING
BASIC
RECORDING
.......cssssssssssssnssssscessseneesseeneenenaneneen
15
DUBBING
A
TAPE
MANUALLY
............ccccsssssssssneesensensees
16
DUBBING
THE
WHOLE
TAPE
Al
EDIT
RECORDING
.............csssssesessensesssereseseeneusereersnesns
ENGLISH
3