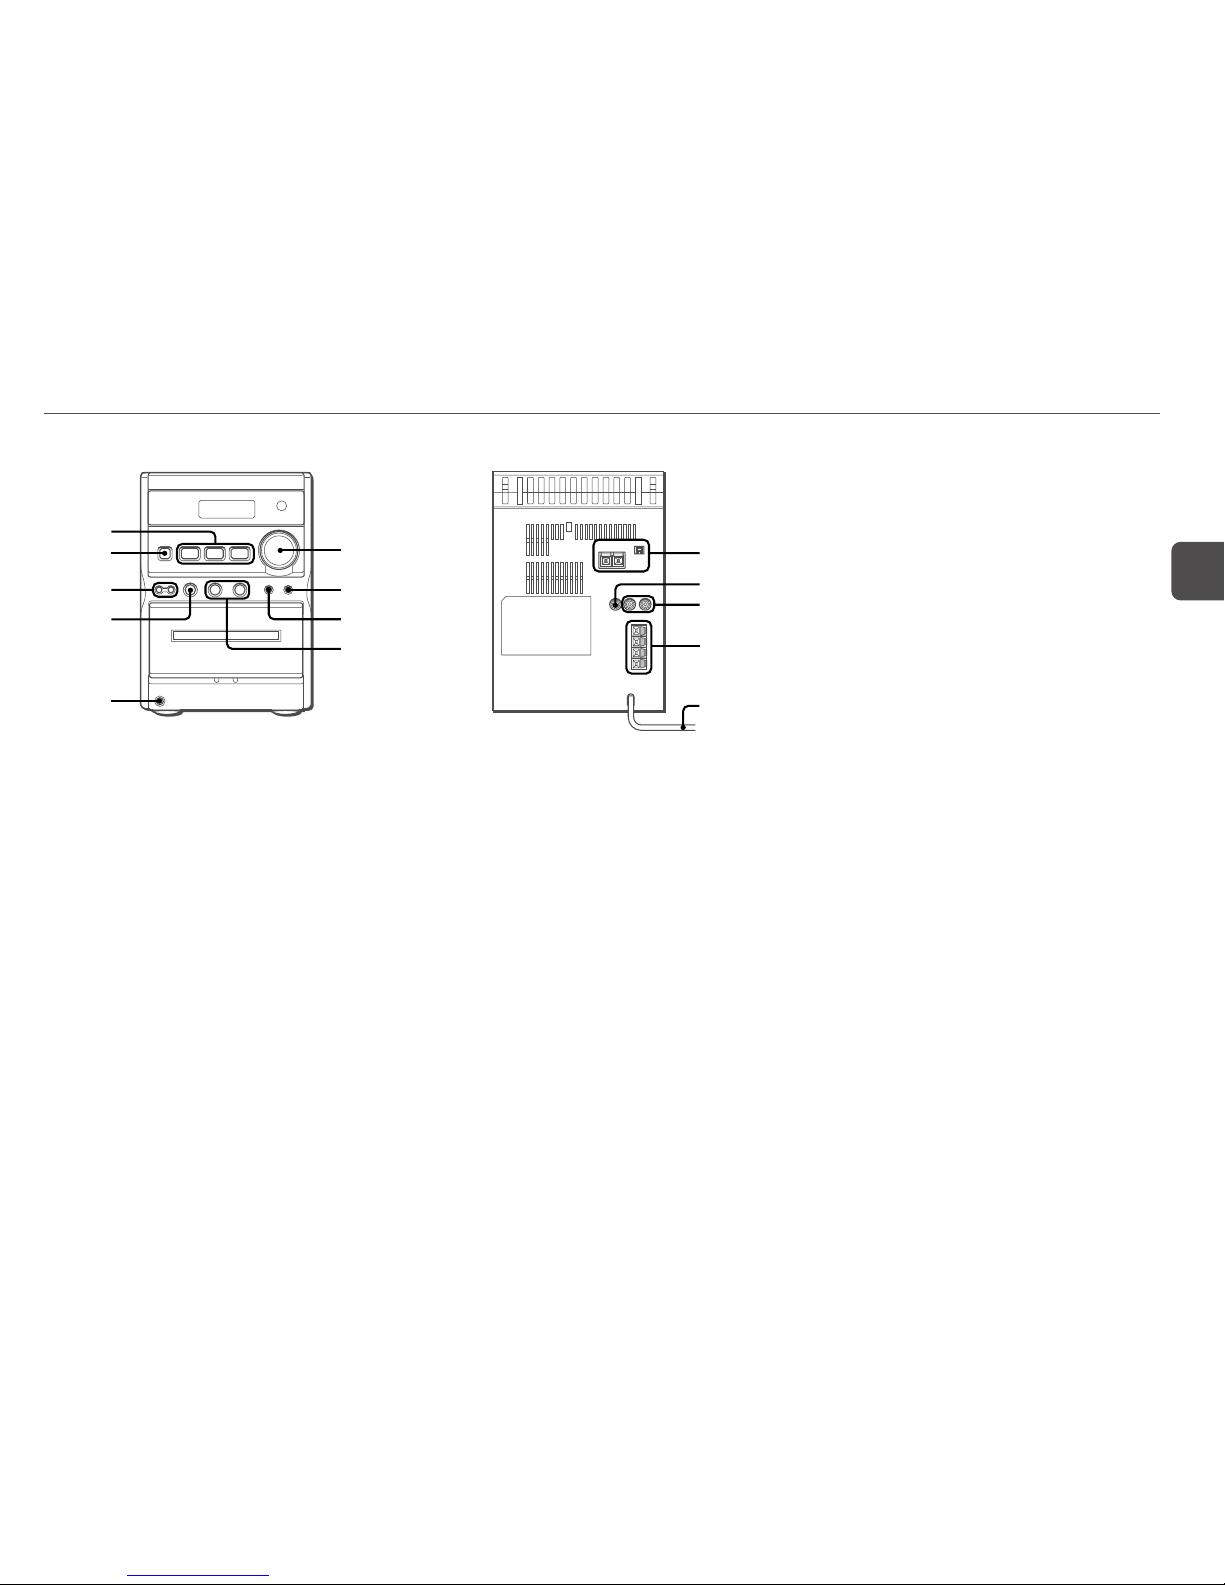
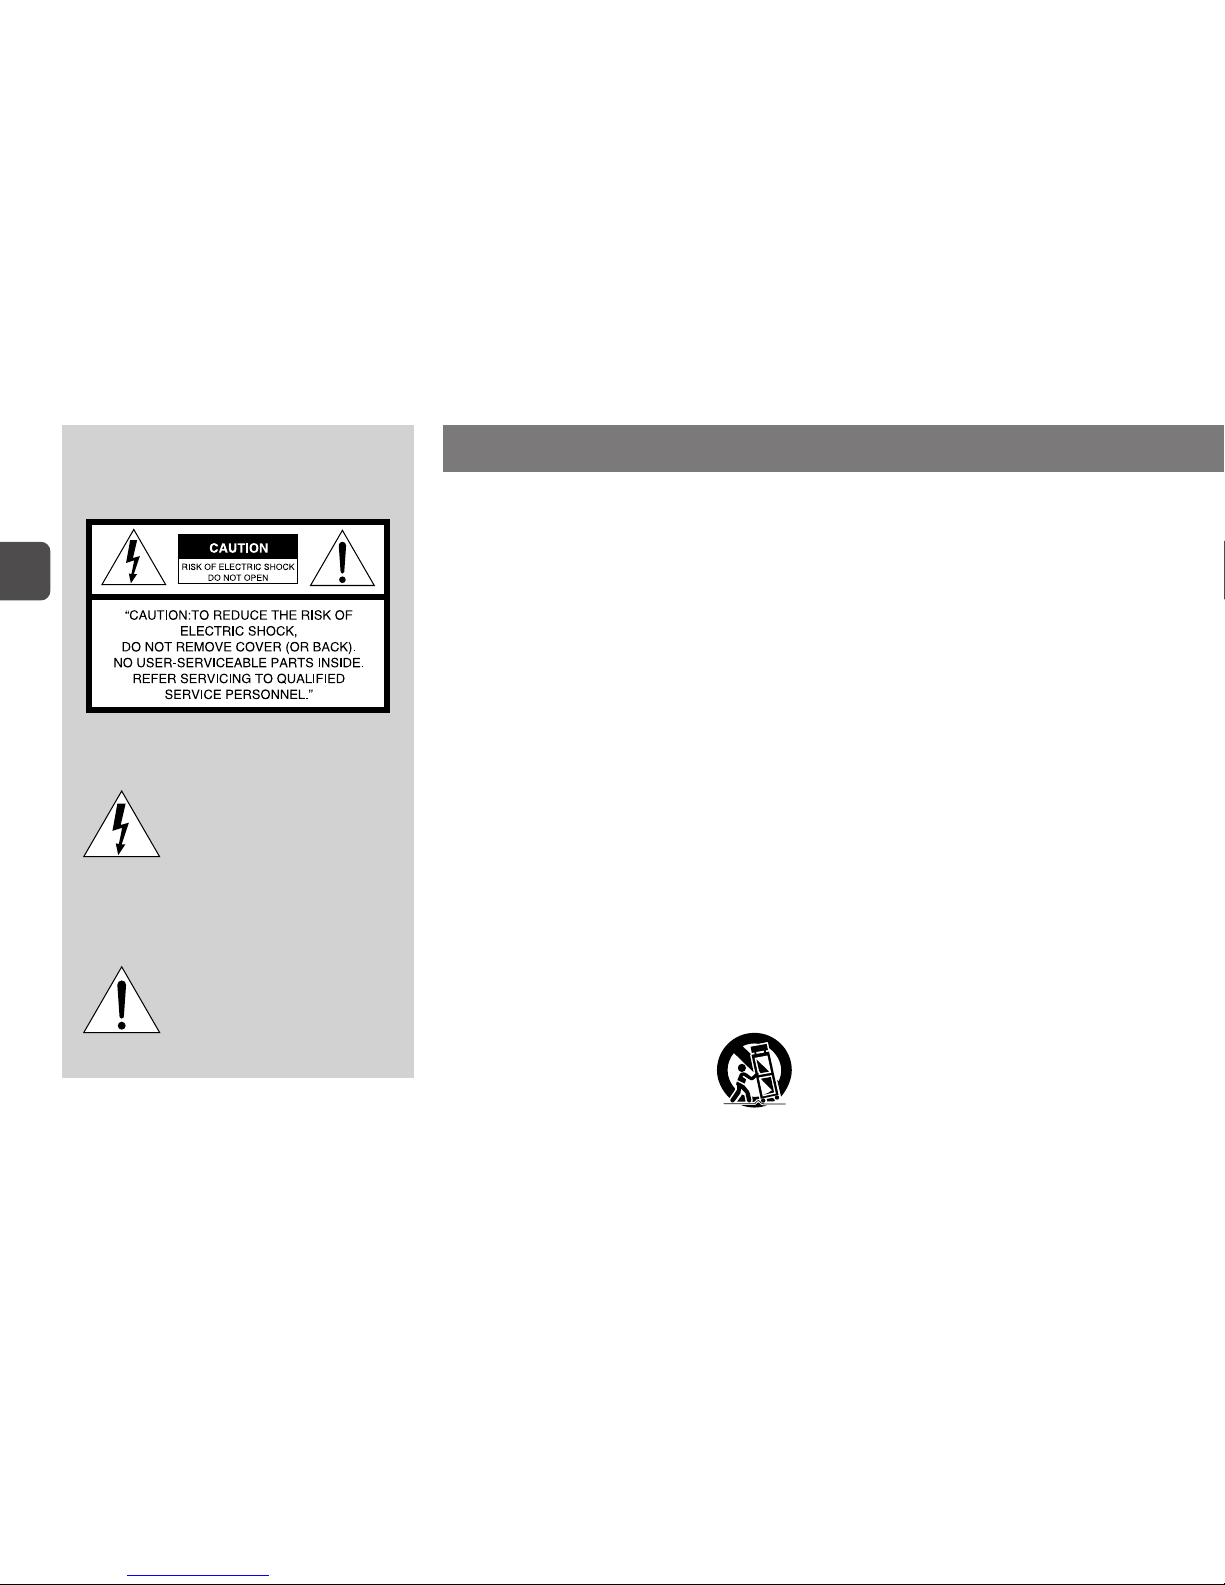
Aiwa XR-EM20 User manual

U
XR-EM20
8C-CL7-903-01
011228ACK-H-BF
For assistance and information
(United States and Puerto Rico)
Owner’s record
For your convenience, record the model number and serial
number(youwillfindthemontherearofyourset)inthespace
provided below. Please refer to them when you contact your
Aiwa dealer in case of difficulty.
Model No. Serial No. (Lot No.)
CD Stereo System
C
En (English)
E (Español)
F (Français)
MODE D'EMPLOI
MANUAL DE INSTRUCCIONES
OPERATING INSTRUCTIONS

2
En
WARNING
To reducetheriskoffireorelectricshock,donotexpose
this appliance to rain or moisture.
Explanation of Graphical Symbols:
The lightning flash with arrowhead
symbol,withinanequilateraltriangle,
is intended to alert the user to the
presence of uninsulated “dangerous
voltage”withintheproduct’senclosure
thatmay beofsufficient magnitudeto
constitute a risk of electric shock to
persons.
The exclamation point within an
equilateraltriangleisintendedtoalert
the user to the presence of important
operatingandmaintenance(servicing)
instructions in the literature
accompanying the appliance.
Read the Operating Instructions carefully and completely before
operating the unit. Be sure to keep the Operating Instructions for
future reference. All warnings and cautions in the Operating
Instructions and on the unit should be strictly followed, as well as
the safety suggestions below.
Warning
To preventelectricshockorinjury,thesesafetyinstructionsshould
be followed in the installation, use and servicing the unit.
Installation
Attachments - Do not use attachments not recommended by the
unitmanufacturerastheymayresultintheriskoffire,electricshock
or injury to persons.
Water and Moisture - Do not use this unit near water - for
example,nearabathtub,washbowl,kitchensink,orlaundrytub,in
a wet basement, or near a swimming pool, and the like.
Heat- Do not use this unit near sources of heat, including heating
vents,stoves,orotherappliancesthatgenerate heat. It alsoshould
not be placed in temperatures less than 5˚C (41˚F) or greater than
35˚C (95˚F ).
Mounting surface - Place the unit on a flat, even surface.
Accessories - Do not place this unit on an unstable cart, stand,
tripod, bracket, or table. The unit may fall, causing serious injury
to a child or an adult, and serious damage to the appliance. Use
only with a cart, stand, tripod, bracket, or table recommended by
the manufacturer, or sold with the unit. Any mounting of the
applianceshouldfollowthemanufacturer’sinstructions,andshould
use a mounting accessory recommended by the manufacturer.
Portable cart - An appliance and cart
combinationshouldbemovedwithcare.Quick
stops,excessiveforce,andunevensurfacesmay
cause the appliance and cart combination to
overturn.
Ventilation - The unit should be situated with adequate space
around it so that proper heat ventilation is assured. Allow 10 cm
clearance from the rear and the top of the unit, and 5 cm from the
each side.
Slots and openings in the cabinet and the back or bottom are
providedforventilation,andtoensurereliableoperationoftheunit
and to protect it from overheating, these openings must not be
blocked or covered. The openings should never be blocked by
placing the unit on a bed, sofa, rug or other similar surface. This
unitshouldnotbeplacedinabuilt-ininstallationsuchasabookcase
unless proper ventilation is provided.
Object and Liquid Entry - Never push objects of any kind into
this unit through the cabinet slots as they may touch dangerous
voltage points or short-circuit parts that could result in a fire or
electric shock. Never spill liquid of any kind on the unit.
Electric Power
Power Sources -Thisunitshouldbeoperatedonlyfromthetype
ofpowersourceindicatedonthemarkinglabel. Ifyouarenotsure
of the type of power supply to your home, consult your appliance
dealerorlocalpowercompany.Tooperateunitonbatterypower,or
other sources, refer to the operating instructions.
GroundingorPolarization-Thisunitisprovidedwithapolarized
alternating-current line plug (a plug having one blade wider than
the other). This plug will fit into the power outlet only one way.
Thisis asafetyfeature.Ifyouareunabletoinsert the plugfullyinto
the outlet, try reversing the plug. If the plug should still fail to fit,
contactyourelectriciantoreplaceyourobsoleteoutlet.Donotdefeat
the safety purpose of the polarized plug.
Power-Cord Protection -Power-supply cords should berouted
so that they are not likely to be walked on or pinched by items
placeduponoragainstthem,payingparticularattentiontocordsat
plugs,conveniencereceptacles,and the point wheretheyexitfrom
the product.
Overloading - Do not overload wall outlets, extension cords,
integral convenience receptacles as this can result in a risk of fire
or electric shock.
IMPORTANT SAFETY INSTRUCTIONS

3
En
Outdoor Antenna
Power lines - An outside antenna system should not be located
inthevicinityofoverheadpowerlinesorotherelectriclightorpower
circuits,orwhereitcanfallintosuchpowerlinesorcircuits. When
installinganoutsideantennasystem,extremecareshouldbetaken
to keep from touching such power lines or circuits as contact with
them might be fatal.
Outdoor Antenna Grounding - If an outside antenna or cable
systemisconnectedtotheunit,besuretheantennaorcablesystem
isgroundedsoastoprovidesomeprotectionagainstvoltagesurges
and built-up static charges. Section 810 of the National Electrical
Code,ANSI/NFPANo.70,providesinformationwithregardtoproper
grounding of the mast and supporting structure, grounding of the
lead-in wire to an antenna discharge unit, size of grounding
conductors, location of antenna-discharge unit, connection to
groundingelectrodes,andrequirementsforthegroundingelectrode.
See the figure.
Lightning
Foraddedprotectionforthisunitreceiverduringalightningstorm,
or when it is left unattended and unused for long periods of time,
unplug it from the wall outlet and disconnect the antenna or cable
system. This will prevent damage to the unit due to lightning and
powerline surges.
Maintenance
Cleaning - Unplug this unit from the wall outlet before cleaning.
Do not use liquid cleaners or aerosol cleaners. Use a damp cloth
for cleaning.
Damage Requiring Service
Unplugthisunitfromthewalloutletandreferservicingtoqualified
service personnel under the following conditions:
1) When the power cord or plug is damaged.
2) If liquid has been spilled, or objects have fallen into the unit.
3) If the unit has been exposed to rain or water.
4) If the unit does not operate normally by following the operating
instructions. Adjust only those controls that are covered by the
operatinginstructions as improperadjustment of othercontrols
mayresult indamage and will often require extensive work by a
qualified technician to restore the unit to normal operation.
5) If the unit has been dropped or the cabinet has been damaged.
6) When the unit exhibits a distinct change in performance - this
indicates a need for service.
Donotattempttoservice thisunityourselfasopeningor removing
coversmayexposeyoutodangerousvoltageorotherhazards.Refer
all servicing to qualified service personnel.
Replacement Parts - When replacement parts are required, be
sure the service technician has used replacement parts specified
bythemanufacturerorhavingthesamecharacteristicsastheoriginal
part. Unauthorized substitutions may result in fire, electric shock
or other hazards.
Safety Check - Upon the completion of any service or repairs to
this unit, ask the service technician to perform safety checks to
determine that the unit is in proper operating condition.
System and accessories
Main unit CX-LEM20
Speakers SX-LEM20
Remote control
FM antenna
AM antenna
TABLE OF CONTENTS
IMPORTANT SAFETY INSTRUCTIONS ......... 2
PREPARATIONS ................................... 4
PARTS AND CONTROLS ......................... 5
ADJUSTMENTS BEFORE OPERATION.......... 7
CD OPERATIONS .................................. 8
RADIO OPERATIONS ........................... 10
SOUND ADJUSTMENTS........................ 11
TAPE PLAYBACK ................................ 12
TAPE RECORDING .............................. 13
TIMER OPERATIONS ........................... 16
REFERENCE ..................................... 18

4
En
Remote control
Detach the battery compartment lid at the rear of the remote
control and insert two R6 (size AA) batteries with correct
polarity.
R6(AA)
•Replace the batteries with new ones when the operational
distancebetweentheremotecontrolandmainunitbecomes
shorter.
•Remove the batteries if the unit is not going to be used for
an extended period of time.
•Theremotecontrolmaynotoperateifitisusedunderintense
sunlight or if its line of sight is obstructed.
Connection
Plug in the AC power cord to the AC outlet after all other
connectionsare made.
1
Connect the speakers to the main unit.
Connect the right speaker to the SPEAKERS R terminals
and the left to the SPEAKERS L terminals. The speaker
cords with the stripes go to the 0terminals.
2
Connect the supplied antennas.
Connect the FM antenna to the FM 75 Ωterminals and
the AM antenna to the AM LOOP jack. Connect the FM
antenna to the FM 75 Ωterminals without the 2mark,
as illustrated. FM antenna
PREPARATIONS
3
Connect the AC power cord to an AC outlet.
The clock will flash on the display.
For setting the clock, see page 7.
Speakers
•Do not short-circuit the 0and 9speaker cord leads.
•Do not leave objects generating magnetism or objects
affected by magnetism near the speakers.
Antennas
Keep antennas away from metallic objects, electrical
equipment and cords.
•FM antenna: Extend fully and position for the best
reception.If reception ispoor,connect an optionaloutdoor
antenna to the FM 75 Ωterminals. When connecting an
optionaloutdoorantenna,besuretoconnecttheshieldbraid
of the antenna to the 2terminal.
•AM antenna: Rotate to find best reception.
AM antenna

5
En
PARTS AND CONTROLS
Main unit
4sCLEAR
CD and Tape: stops playback.
Radio: clears a preset station.
5PHONES jack
Plugin optionalheadphones setwitha stereomini plug
(ø3.5 mm). Speaker output is canceled.
6VOLUME
Adjusts the volume etc..
7TONE
Selects the sound adjusting mode, "BAS" (bass) or
"TRE" (treble).
8DISPLAY
Changes the display in CD playback mode.
2
1
7
9
8
6
5
3
4
0
!
@
#
$
1cTAPE (REC MUTE)
Starts playback.
Also used to enter 4-second blank spaces during
recording.
TUNER/AUX/BAND
Selects Radio function and the radio band.
Alsoselectsthefunctionofexternalequipmentconnected
to AUX IN jacks.
ECD
Starts and pauses CD play.
2POWER 6STANDBY/ON
Switches the unit on and off (standby).
3REC/REC PAUSE
Starts and pauses recording.
SYNCHRO REC
Starts recording and CD play simultaneously.
9f/r, t/g(TUNING DOWN,UP)
CD: skips to a previous or a succeeding track when
pressed, searches a track in fast forward or reverse
playback when held down.
Tape: rewinds or fast forwards the tape.
Radio: manually tunes up or down within the band.
0AM LOOP jack and FM 75 Ωterminals
Connect the supplied AM and FM antennas.
!SUB WOOFER3jack
Connect optional powered sub woofer with a built-in
amplifier to the jack.
@AUX IN jacks
Accept analog sound signals from external equipment.
Connectexternalequipmentusinganoptionalconnecting
cable with RCA phono plugs (red plug to R jack, white
plug to L jack). Refer also to the operating instructions
for your equipment.
To switchfunction toexternalinput, pressTUNER/AUX/
BAND repeatedly.
#SPEAKERS3terminals
Connect the speaker cords of the supplied speakers.
$AC power cord

6
En
Remote control
1
4
7
5
6
9
8
!
0
2
3
Buttons with the same or similar names on the main unit
basicallyhave thesamefunction.
1POWER
20–10, +10
CD: selects a track of the specified number.
Radio: tunes in the station with the specified preset
number.
Thenumberedbuttonstakeonthesefunctionswhenpressedwith
SHIFTheld down:
CLOCK
Selects clock mode.
TUNER MODE
Switches between stereo or monaural FM reception.
DISPLAY
PROGRAM
Selects programmed CD playback mode.
TIMER
Selects timer mode.
SLEEP
Selects sleep-timer mode.
RANDOM/REP
Selects random or repeat CD playback mode.
CD EDIT/CHECK
Selects edited CD recording.
3REC/REC PAUSE
Starts and pauses recording when pressed with SHIFT
held down.
REC MUTE
Enters 4-second blank spaces during recording.
4ECD
AUX
Select the function of external equipment connected to
AUX IN jacks.
cTAPE
TUNER/BAND
Selects Radio function and the radio band.
sCLEAR
5SET
Determines the mode.
Stores the received station to preset.
6SHIFT
Holddownwhenpressinganumberedbuttontochange
its function to that printed above the number.
7FUNCTION
Switchesthe active function amongTAPE, TUNER, AUX
and CD.
8PRESET +,-
Tunes in a preset station.
9f/r, t/g
0VOLUME +,-
!TONE

7
En
ADJUSTMENTS BEFORE OPERATION
CLOCK
SET
SHIFT
f,g
s
POWER
6STANDBY/ON
TAPE,
TUNER/AUX/BAND,
CD
CD,
TUNER/BAND,
TAPE,AUX,
s
TONE
DISPLAY
DISPLAY
f,g
Setting the clock
1
HolddownSHIFTandpressCLOCKontheremote
control.
When the unit is turned off, you can also press SET.
2
Within 6 seconds, press for gto set the
time.
Each press changes the time in 1-minute steps.
Holdingthesebuttonsdownwillvarythetimein10-minute
units.
3
Press SET.
Thetimedisplaystopsflashingandthe clock starts from
00 seconds.
When setting the clock on the unit in stop mode, hold down
sandpressgin step 1. After settingthetimein step 2,
press TONE in step 3.
To display the time while the power is on
Hold down SHIFT and press CLOCK on the remote control.
The time will be displayed for 6 seconds.
To switch to the 24-hour standard
Display the time and press swithin 6 seconds.
With each press, the clock alternates between 12- and 24-
hour standard time.
Tip:
Inthe12-hourstandard,"AM12:00"indicatesmidnightand
"PM12:00" noon.
If the clock display flashes when the unit is turned
off
There has been a power interruption. Reset the clock.
Power
Turning the unit on
Press POWER 6STANDBY/ON (POWER on the remote
control).
Alternatively,pressTAPE,TUNER/AUX/BAND(TUNER/BAND
or AUX on the remote control) or CD. Playback will start
automatically if a disc or tape is loaded.
Turning the unit off
Press POWER 6STANDBY/ON again.
The unit goes into standby.
To change the display window brightness (Dimmer)
Hold down DISPLAY (hold down SHIFT and press DISPLAY
ontheremotecontrol)forabout4secondswhilethepoweris
on.
Repeat the above to restore the brightness.

8
En
This unit plays back finalized CD-R/RW discs as well as audio
CDs.
Playing a CD
1
Press OPEN to open the disc compartment.
Place a disc with the label side up. Then close the disc
compartment by pressing OPEN.
2
Press Eto start play.
To stop play
Press s.
To pause play
Press E. Press again to resume play.
To skip to the beginning of the current/preceding/
succeeding track
Press for grepeatedly .
CD OPERATIONS
To search (playback in fast forward or reverse)
Hold down for g. Release at the desired point.
To selectatrack withtheremotecontrol (Directplay)
Press the numbered buttons to select a track.
-To select the 25th track, press +10, +10 and 5.
-To select the 11th track, press +10 and 1.
To change the display in playback mode
PressDISPLAY(holddownSHIFTandpressDISPLAYonthe
remote control) during play.
The display changes in the following order:
Track number being played and elapsed playing time
Remaining time of play
•Remaining time of play cannot be displayed during "1,
random or programmed play.
Random/Repeat play
In random play mode the unit plays all the tracks in random
order.Inrepeat play mode itplays repeatedlyall the tracksor
thetrackbeingplayed. Youcanselectrandomandrepeat all
playat thesametime.
1
Hold down SHIFT and press RANDOM/REP
repeatedly on the remote control.
The mode changes as follows:
""1": Plays one track repeatedly. Select the track with
for g.
""": Plays all the tracks repeatedly.
"RANDOM": Plays all the tracks randomly.
"RANDOM "": Plays all the tracks repeatedly in
random order.
2
Press Eto start play.
To cancel random/repeat play
Hold down SHIFT and press RANDOM/REP on the remote
control repeatedly until "RANDOM" or """ disappears.
Direct selection of the tracks with the numbered buttons
cancels random play mode.
To repeat a selected set of tracks
First select the tracks with programmed play (see
"Programmed play" on page 9).
Then select repeat playback.
SHIFT
s
f,g
OPEN
DISPLAY
E
E
DISPLAY
RANDOM/
REP
PROGRAM
0–10, +10
s
f,g

9
En
Programmed play
Playsback up to30 selected tracksin programmed order.
1
Hold down SHIFT and press PROGRAM on the
remote control in stop mode.
"PRGM" flashes on the display.
2
Press the numbered buttons on the remote
control to program a track.
-To select the 25th track, press +10, +10 and 5.
-To select the 11th track, press +10 and 1.
The selected track number lights up on the display.
3
Repeat step 2 to program other tracks.
Thetotalnumberofselectedtracksandtotalplayingtime
will be displayed.
4
Press Eto start play.
The track number for the current track flashes on the
display.
•Duringprogrammedplay,youcannotselectatrackwiththe
numberedbuttons. "CAN’T USE"is displayedwhenyou
try to select a track .
•Ifthe total playingtimeofthe program exceeds99minutes
and59seconds,orifatrackwithatracknumberexceeding
30 is programmed, the playing time is displayed as
"- -:- -".
•You cannot program more than 30 tracks. "FULL" is
displayed.
To check the program
Press for grepeatedly in stop mode. The track
number and program number are displayed in succession.
To clear the program
Presssinstopmode."PRGM"disappearsfromthedisplay.
To add tracks to the program
Repeat step 2 before starting playback. The tracks are added
to the end of the program.
To change the programmed tracks
Clear the program and repeat all the steps again.
Notes on CDs
•Do not place more than one disc.
•Do not tilt the unit with a disc loaded.
•TheunitmaynotplayCD-R/RWdiscsrecordedonpersonal
computers or certain kinds of CD-R/RW recorders.
•Do not attach adhesive label to either side of
CD-R/RW discs, as doing so may cause malfunction.
•DonotloadanunrecordedCD-R/RWdisc.Thediscmaybe
damaged.
•Do not use irregular-shaped CDs.

10
En
RADIO OPERATIONS
Manual tuning
1
Press TUNER/AUX/BAND (TUNER/BAND on the
remote control) repeatedly to select a band.
2
Pressforgrepeatedlytotuneinastation.
"TUNE" is displayed when a station is tuned in.
"1" is displayed for FM stereo reception.
To search for a station automatically (Auto search)
Hold down for g.
The unit searches for a station and stops at reception.
To stop the search manually, press for g.
•Auto search may not stop at stations with weak signals.
Preset tuning
Preset up to 32 of your favourite stations and tune them in
directly.
Presetting stations
1
Tune in the desired station.
2
Press SET on the remote control to store the
station.
The preset number, beginning from "1" flashes on the
display.
3
Repeat steps 1 and 2 to preset other stations.
The next station will not be stored if a total of 32 preset
stationshavealreadybeenstored.("FULL"isdisplayed.)
•Ifpowerisinterruptedformorethanapproximately12hours,
allsettingsstoredinmemoryafterpurchaseneedtobereset.
Tuning in preset stations
1
Select the band.
2
Press PRESET +,-on the remote control
repeatedly.
With each press, the station with the succeeding or
preceding preset number is tuned in.
You can tune in the desired preset station directly by
pressing the numbered buttons on the remote control.
-To select preset number 11, press +10 and 1.
-To select preset number 15, press +10 and 5.
To clear a preset station
1Tune in the station by preset tuning.
2 Press s, then press SET on the remote control within 6
seconds.
Preset station numbers in the band which are higher than
the cleared number decrease by one.
s
f,g
TUNER/
AUX/BAND
SET
TUNER MODE
0–10, +10
PRESET +,-
TUNER/BAND
POWER
f,g
SHIFT

11
En
SOUND ADJUSTMENTS
Volume
Turn VOLUME (press VOLUME +,-on the remote
control).
Adjust from 0 (minimum) to 30 and MAX (maximum).
Tip:
Volume level setting is retained during power-off standby. If
the unit is turned off with the volume set to 17 or higher, it is
automaticallyturneddownto16thenexttimetheunitisturned
on.
VOLUME
TONE
VOLUME +,-
TONE
Adjustments
To switch to monaural FM reception
Hold down SHIFT and press TUNER MODE on the remote
control so that "MONO" is displayed.
To cancel,repeattheabovesothat"STEREO"isdisplayed.
Tip:
When FM stereo reception is poor, switching to monaural
reduces noise.
To switch the AM tuning interval
ThedefaultsettingoftheAMtuningintervalis10kHz/step.If
you use this unit in an area where the frequency allocation
system is 9 kHz/step, change the tuning interval.
HolddownTUNER/AUX/BANDandpressPOWERonthemain
unit.
Tip:
When the AM tuning interval is changed, all preset stations
are cleared.
Bass and treble
1
PressTONErepeatedlytodisplay"BAS"or"TRE".
"BAS" : Adjusts the bass level
"TRE" : Adjusts the treble level
2
Within6seconds,turnVOLUME(pressVOLUME
+,-on the remote control).
Each level can be adjusted from "–2" to "+5".
•If the sound becomes distorted, lower the level.

12
En
TAPE PLAYBACK
Playback
Useonly typeI(normal) tapes.
1
PresszPUSHEJECTtoopenthecassetteholder.
2
Insert the tape.
Insertwiththeexposedsidedownandthesidetobeplayed
facing out from the unit, and press zPUSH EJECT to
close the cassette holder.
3
Press cto start play.
To stop playback
Press s.
To rewind or fast forward
Press for g.
To reset the tape counter
Presssinstopmode,andthetapecounteronthedisplayis
reset to "0000".
Opening and closing the cassette holder will also reset the
tape counter.
To eject the tape
Press zPUSH EJECT after the deck stops completely.
SHIFT
f,g
f,g
s
zPUSH
EJECT
REC/
REC PAUSE
SYNCHRO
REC
c
s
FUNCTION
REC/
REC PAUSE
REC MUTE
c
TUNER MODE
Notes on cassettes
•Use of 120-minute or longer tapes is not recommended
since they are extremely thin and easily deformed or
damaged.
•Wind up any slack in the tape with a pencil or similar tool
before use. Slack tape may jam in the mechanism.

13
En
To start CD recording more easily
Insert the tape to be recorded, load the disc, and press
SYNCHROREC.Regardlessofthefunctioncurrentlyselected,
CD play and tape recording start simultaneously.
•InCDstop mode, tape recording starts from the beginning
of the disc (all tracks recording).
When CD playback stops, tape recording stops
simultaneously.
•In CD playback mode, the unit returns to the beginning of
the current track and it records only that track (one track
recording).
Theunit continues playbacktillthe end ofthedisc. To stop
playback, press s.
To stop recording
Press s.
To pause recording (only for TUNER or AUX source)
Press REC/REC PAUSE. Press again to resume.
To record a selected set of tracks from a CD
Programthedesired tracks (see "Programmedplay"onpage
9) and then press SYNCHRO REC.
To record a 4-second blank space (only for TUNER
or AUX source)
Inserting 4-second blank spaces may help you locate the
beginning of the track on other equipment with the "Music
Sensor"function.
1 Press cduring recording or in recording pause mode.
"REC MUTE" flashes on the display for 4 seconds (a
blank space is added) and then the unit enters recording
pause mode.
2Press REC/REC PAUSE to resume recording.
•RECMUTEontheremotecontrol is also available to add a
blank space in step 1.
To record a blank space shorter than 4 seconds, press again
while "REC MUTE" flashes.
To record a blank space longer than 4 seconds, press again
after the unit enters recording pause mode.
Each time the button is pressed, a 4-second blank space is
added.
To erase a tape
1Insert the tape. Set the tape to the desired point if needed.
2 Select the AUX function.
IfoptionalequipmentisconnectedtotheAUXINjacks,turn
it off.
3Press REC/REC PAUSE twice.
Basic recording
Useonly typeI(normal) tapes.
1
PresszPUSHEJECTtoopenthecassetteholder.
2
Insert the recording tape.
Insert with the exposed side down, and the side to be
recorded on facing out from the unit. Press zPUSH
EJECT to close the cassette holder.
3
PressFUNCTIONontheremotecontrol toselect
the source to be recorded.
4
Prepare the source.
To record CD, load a disc.
To record a radio broadcast, tune in the desired station.
Torecordfromconnectedexternalequipment,preparethe
equipment.
5
Press REC/REC PAUSE twice to start recording.
When recording a CD, CD playback starts automatically.
When recording input from connected equipment,
manually start playback of the source.
Onthe remote control, holddownSHIFT and pressREC/
REC PAUSE twice to start recording.
•Volume or tone adjustment(s) does not affect recording.
TAPE RECORDING

14
En
4
Press the numbered buttons on the remote
control to enter the length of the recording tape.
10 to 99 minutes can be specified.
- For a 60-minute tape press 6 and 0.
In a few seconds, the unit determines the tracks to be
recorded for each side.
TherecordingtimeleftforsideAappearsonthedisplay.
•forgcanalsobe used to specify tapelength.
5
Press REC/REC PAUSE once.
The tape is rewound to the beginning of side A. "REC
MUTE" flashes on the display and the lead segment is
played through for 10 seconds, and recording starts.
Go to the next step when recording on side A finishes.
Onthe remote control, holddownSHIFT and pressREC/
REC PAUSE to start recording.
6
Hold down SHIFT and press CD EDIT/CHECK
once.
TherecordingtimeleftforsideBappearsonthedisplay.
7
Turn over the tape and press REC/REC PAUSE
once.
Recording on side B starts in the same way as side A.
Edited CD recording
AI Edit Recording
Preparation
Prepare a tape that is longer than the CD length.
WhenrecordingawholeCD,AIEditRecordingtakesthelength
ofyourtapeintoaccountandrearrangestherecordingorderof
thetracksif necessary, so thatnotrackis cut shortat theend
ofthe side.
(AI:Artificial Intelligence)
•Recording cannot startfroma pointhalfwayin the tape.
•AIEditRecordingcannotbe used with discs containing more
than30 tracks.
1
Insert the recording tape.
2
Press FUNCTION on the remote control to select
the CD function, and load the disc.
3
Hold down SHIFT and press CD EDIT/CHECK on
the remote control in stop mode.
"AI C--00" is displayed.
Programmed Edit Recording
As you program the CD tracks to record, Programmed Edit
Recording displays the remaining recording time for each side
of the tape, so you can easily select a set of desired tracks
withinthe length ofyour tape.
•Recordingcannot startfroma pointhalfwayin the tape.
•You cannot programmorethan 30 tracks.
•Youcannotprogramatrackwith atracknumberlargerthan
30.
1
Insert the recording tape.
2
Press FUNCTION on the remote control to select
the CD function, and load the disc.
3
Hold down SHIFT and press CD EDIT/CHECK
twice on the remote control in stop mode.
"PRGC--00" is displayed.
4
Press the numbered buttons on the remote
control to enter the length of the recording tape.
10 to 99 minutes can be specified.
-For a 60-minute tape press 6 and 0.
•forgcanalsobe used to specify tapelength.
5
Press the numbered buttons on the remote
control to select the first track to be recorded on
side A.
-To select the 25th track, press +10, +10 and 5.
-To select the 11th track, press +10 and 1.
6
Repeat step 5 to select the rest of the tracks for
side A.
Theremaining recording timeofside Aisdisplayed. You
cannot select a track with a longer playing time.
7
HolddownSHIFTandpressCDEDIT/CHECKonce
to switch to side B and select the tracks for the
side.
SHIFT
s
f,g
0–10, +10
FUNCTION
REC/
REC PAUSE
CD EDIT/
CHECK
s
REC/
REC PAUSE
f,g

15
En
Side A
Tab for side A
8
HolddownSHIFTandpressCDEDIT/CHECKonce
to switch back to side A.
9
Press REC/REC PAUSE once.
The tape is rewound to the beginning of side A. "REC
MUTE" flashes on the display and the lead segment is
played through for 10 seconds, and recording starts.
Go to the next step when recording on side A finishes.
Ontheremote control, hold down SHIFTandpressREC/
REC PAUSE to start recording.
10
HolddownSHIFTandpressCDEDIT/CHECKonce
to switch to side B.
11
Turn over the tape and press REC/REC PAUSE
once.
Recording on side B starts in the same way as side A.
To stop recording
Press s. Recording and CD playback stop simultaneously.
To check the program
1Before recording, hold down SHIFT and press
CD EDIT/CHECK on the remote control to select side A or
B.
2Press for grepeatedly. The track number and
program number are displayed in succession.
To change the program of each side
Hold down SHIFT and press CD EDIT/CHECK on the remote
controltoselectsideAorB,andpressstocleartheprogram
for the selected side. Then, select tracks again.
To clear the edit program
Press stwice.
To prevent accidental erasure
Breakofftheplastictabofthecassettetapewithascrewdriver
or other pointed tool. To record on the tape again, cover the
detection slot with adhesive tape.

16
En
TIMER OPERATIONS
Sleep timer
Turns off theunitautomatically afteraspecified time.
1
HolddownSHIFTandpressSLEEPontheremote
control.
"5" and "SLP" is displayed.
2
Within6seconds,pressforgrepeatedly
to set the sleep timer duration.
With each press, the timer duration changes in 5-minute
stepsbetween5to240minutes.Ifthereisnobuttoninput
for6seconds,thecurrentsettingisenteredautomatically.
The unit turns off after the selected time.
To check the remaining time until the unit turns off
Hold down SHIFT and press SLEEP on the remote control.
The remaining time is displayed for 6 seconds.
To cancel the sleep timer
Hold down SHIFT and press SLEEP on the remote control
repeatedly so that "SLP OFF" is displayed.
Timer playback
Turnsontheunitataspecifiedtimeforthespecified duration.
Makesure theclockis set correctly.
1
HolddownSHIFTandpressTIMERontheremote
control repeatedly so that "5" and "5PLAY" is
displayed.
2
Within 6 seconds, press SET.
3
Pressforgtosetthetimer-ontime,and
press SET.
Each press changes the time in 1-minute steps.
Holdingthesebuttonsdownwillvarythetimein10-minute
units.
4
Pressforgtoselectthesource,andpress
SET.
•For timer play of a CD, select "CD".
•For timer play of a tape, select "TP".
•For timer play of a radio broadcast, select "TU". You
will select the band later in step 7.
•For timer play of the equipment connected to the AUX
IN jacks, select "AUX".
5
Press for gto set the timer-activated
duration, then press SET.
With each press, the timer-activated duration changes in
5-minute steps between 5 to 240 minutes.
6
Pressforgtoadjustthevolumefortimer
playback, and press SET.
The volume level can be adjusted from 0 to 16.
7
Prepare the source.
To play CD, load a disc.
To play a tape, insert the tape.
To play the radio, select the band and tune in the desired
station.
ToplayexternalequipmentconnectedtotheAUXINjacks,
setanexternaltimerfortheequipmentsothatitsplayback
begins at the same time.
8
Press POWER 6STANDBY/ON (POWER) to turn
the unit off.
"5"remainsonthedisplay toindicatethetimerstandby
mode.
Attimer-ontime, the unitturnson andplaysthe selected
source. After the specified timer-activated duration, the
unit turns off again.
•To stop timer setting in steps 3 to 6, press s.
Timer standby mode is also canceled.
•Timer playback will not begin unless the unit is turned off
first.
•Connectedequipmentcannotbeturnedonoroffbythebuilt-
in timer of this unit. Use an external timer.
POWER
TIMER SLEEP
SET
SHIFT
f,g
POWER
6STANDBY/ON
f,g
s
TONE

17
En
Timer recording
Timerrecording isavailableonly forTUNERand AUX(withan
external timer) sources.
1
HolddownSHIFTandpressTIMERontheremote
controlrepeatedlysothat"5REC"is displayed.
2
Within 6 seconds, press SET.
3
Pressforgtosetthetimer-ontime,and
press SET.
Each press changes the time in 1-minute steps.
Holdingthesebuttonsdownwillvarythetimein10-minute
units.
4
Pressforgtoselectthesource,andpress
SET.
•For timer recording of a radio broadcast, select "TU".
You will select the band later in step 7.
•For timer recording of the equipment connected to the
AUX IN jacks, select "AUX".
5
Press for gto set the timer-activated
duration, then press SET.
With each press, the timer-activated duration changes in
5-minute steps between 5 to 240 minutes.
6
Pressforgtoadjustthevolumefortimer
recording, and press SET.
The volume level can be adjusted from 0 to 16.
7
Prepare the source.
Torecordtheradio,selectthebandandtuneinthedesired
station.
To record external equipment connected to the AUX IN
jacks, set an external timer for the equipment so that its
playback begins at the same time.
8
Insert the recording tape and then turn the unit
off.
"5REC" remains on the display to indicate the timer
standby mode.
Attimer-ontime,theunitturnsonandrecordstheselected
source. After the specified timer-activated duration, the
unit turns off again.
•To stop timer setting in steps 3 to 6, press s.
Timer standby mode is also canceled.
•Connectedequipmentcannotbeturnedonoroffbythebuilt-
in timer of this unit. Use an external timer.
When setting the timer on the unit
Hold down sand press fin stop mode.
Repeattheaboveto select timer playback, timer recording or
timer off mode, and use TONE instead of SET on the remote
control in the following steps.
To check the timer setting
Hold down SHIFT and press TIMER on the remote control
repeatedlyso that "5PLAY"or "5REC" appears on the
display.
Thetimer-ontime,thesourceandthetimer-activatedduration
are displayed for 6 seconds.
To change the timer setting
Reset the timer again.
To cancel the timer
Hold down SHIFT and press TIMER on the remote control
repeatedly until "5OFF" is displayed. "5" or
"5REC" disappears from the display.
Tip:
Your timer setting is retained even if the timer is canceled.
Nexttimethetimerisactivated,youcanchangeyourprevious
setting, or simply use the same setting again.

18
En
Care and maintenance
Occasionalcareandmaintenance of theunitandthesoftware
areneeded tooptimizethe performanceof your unit.
To clean the cabinet
Use a soft and dry cloth. If the unit surfaces are extremely
dirty, use a soft cloth lightly moistened with mild detergent
solution.Donotusestrongsolventssuchasalcohol,benzine
or thinner.
To clean the tape heads
Dirty tape heads cause sound deterioration. After every 10
hours of use, clean the tape heads with a head cleaning
cassette. Refer to the instructions of the cleaning cassette.
To demagnetize the tape heads
Use a demagnetizing cassette after every 20 to 30 hours of
use. Refer to the instructions of the demagnetizing cassette.
Care of CDs
When a CD becomes dirty, wipe it from the centre out with a
cleaningcloth.After playing a CD, store it in its case. Do not
keep it in hot or humid places.
Care of tapes
Store tapes in their cases after use. Do not leave tapes near
magnets,motors,televisionsets,oranysourceofmagnetism.
Donotexposetapes to direct sunlight, or leave them inacar
parked in direct sunlight.
REFERENCE
Troubleshooting
Ifyourunitfailstoperformproperly,checkthefollowingguide
andthe relevantsectionsof the OperatingInstructions.
There is no sound
•Are the speakers and AC power cord connected properly?
The unit shut off suddenly
•Possiblyashortcircuitinthespeakerterminals.Disconnect
the AC power cord from the AC outlet and reconnect the
speaker cords correctly.
Erroneous display
•Reset the unit. (See "Resetting the unit" on this page.)
Poor radio reception
•Check antenna connection. Adjust the antenna to find the
best reception.
•Move the unit and antenna away from other electric
appliances and cords.
Poor tape sound
•Check for dirty heads. Clean them if needed.
Cannot record
•Is the erasure prevention tab of the tape broken off? If so,
cover the detection slot with adhesive tape.
The CD player works poorly
•Is the disc correctly loaded?
•Is the disc dirty?
•Is the lens affected by condensation? If so, wait
approximately one hour and try again.
Condensation
Moisture may form on the CD pickup lens when:
•The unit is moved from a cold spot to a warm spot
•The heating system has just been turned on
•The unit is used in a very humid room
•The unit is cooled by an air conditioner
When this unit has condensation inside, it may not function
normally. Should this occur, leave the unit for a few hours,
then try to operate again.
Resetting the unit
If an unusual condition occurs in the display window or the
cassette deck, reset the unit as follows:
1Press POWER to turn off the power.
Ifthepowercannot be turned off, disconnect the AC power
cord, then plug it in again.
2 Hold down sand press POWER on the main unit.
Everything stored in memory after purchase is cleared.

19
En
Specifications
MAIN UNIT CX-LEM20
TUNER
FM tuning range 87.5 MHz to 108 MHz
FM usable sensitivity (IHF) 13.2 dBf
FM antenna terminal 75 ohms (unbalanced)
AM tuning range 530 kHz to 1710 kHz (10 kHz step)
531 kHz to 1602 kHz (9 kHz step)
AM usable sensitivity 350 µV/m
AM antenna Loop antenna
AMPLIFIER
Power output 6 W + 6 W (40 Hz - 20 kHz, THD
less than 1 %, 6 ohms)
7.5 W + 7.5 W (1 kHz, THD 10 %,
6 ohms)
Total harmonic distortion 0.1 % (3 W, 1 kHz, 6 ohms, DIN
AUDIO)
Input AUX IN: 500 mV
Outputs SPEAKERS: 6 ohms or more
PHONES: 32 ohms or more
CASSETTE DECK
Track format 4 tracks, 2 channels stereo
Frequency response 50 Hz – 10000 Hz
Recording system AC bias
Heads Recording/playback ×1, erase ×1
CD PLAYER
Laser Semiconductor laser (λ= 780 nm)
D/A converter 1 bit dual
Signal-to-noise ratio 80 dB (1 kHz, 0 dB)
Wow and flutter Unmeasurable
GENERAL
Power requirements 120 V AC, 60 Hz
Power consumption 26 W
Dimensions (W ×H ×D) 163 ×230 ×215.7 mm
(6 1/2×9 1/8×8 1/2in.)
Weight 2.7 kg (5 lbs 15 oz)
SPEAKER SYSTEM SX-LEM20
Speakers system 1 way, bass reflex (magnetic
shielded)
Speaker units Full range: 100 mm cone
Impedance 6 ohms
Dimensions (W ×H ×D) 140 ×230 ×195 mm
(5 5/8×9 1/8×7 3/4in.)
Weight 1.8 kg (3 lbs 15 oz)
Specificationsandexternal appearancearesubjecttochange
without notice.
COPYRIGHT
Check copyright laws relevant to recordings from discs, radio
or tape for the country where the unit is to be used.

Printed in China
NOTE
Thisequipmenthasbeentestedandfoundtocomplywiththe
limits for a Class B digital device, pursuant to Part 15 of the
FCC Rules. These limits are designed to provide reasonable
protection against harmful interference in a residential
installation.
This equipment generates, uses, and can radiate radio
frequencyenergyand,ifnotinstalledandusedinaccordance
withtheinstructions,maycauseharmfulinterferencetoradio
communications. However, there is no guarantee that
interference will not occur in a particular installation. If this
equipment does cause harmful interference to radio or
televisionreception, which can be determined by turning the
equipmentoffandon,the userisencouragedtotrytocorrect
the interference by one or more of the following measures:
-Reorient or relocate the receiving antenna.
-Increasetheseparationbetweentheequipmentandreceiver.
-Connect the equipment into an outlet on circuit different
from that to which the receiver is connected.
-Consult the dealer or an experienced radio/TV technician
for help.
CAUTION
Modifications or adjustments to this product, which are not
expressly approved by the manufacturer, may void the user’s
right or authority to operate this product.
CAUTION
TO PREVENT ELECTRIC SHOCK DO NOT USE THIS
(POLARIZED) PLUG WITH AN EXTENSION CORD,
RECEPTACLEOROTHEROUTLETUNLESSTHEBLADESCAN
BE FULLY INSERTED TO PREVENT BLADE EXPOSURE.
This Class B digital apparatus complies with Canadian
ICES-003.
Only for C models.
ATTENTION
POUR PREVENIR LES CHOCS ELECTRIQUES NE PAS
UTILISER CETTE FICHE POLARISEE AVEC UN
PROLONGATEUR, UNE PRISE DE COURANT OU UNE AUTRE
SORTIE DE COURANT, SAUF SI LES LAMES PEUVENT ETRE
INSEREES A FOND SANS EN LAISSER AUCUNE PARTIE A
DECOUVERT.
CetappareilnumériquedelaclasseBestconformeàlanorme
NMB-003 du Canada.
Pour les modèles C uniquement.
REMARQUE
Cet appareil a été testé et jugé conforme aux limites des
appareilsnumériques de Classe B, conformément à la Partie
15 des Règles FCC. Ces limites sont conçues pour fournir
une protection raisonnable contre les interférences néfastes
dans une installation résidentielle.
Cet appareil produit, utilise et peut rayonner une énergie de
fréquence radio et, s'il n'est pas installé et utilisé
conformément aux instructions, peut provoquer des
interférencesgênantes pour lescommunicationsradio. Mais
rien ne garantit qu'une telle interférence ne se produira pas
dans une installation particulière. Si cet appareil produit des
interférencesgênantespourlaréceptionradiooudetélévision,
ce qui peut se déterminer en allumant et éteignant l'appareil,
il est recommandé à l'utilisateur d'essayer de corriger cette
interférence en appliquant une ou plusieurs des mesures
suivantes:
-Réorientation ou déplacement de l'antenne réceptrice.
-Éloignement de l'appareil du récepteur.
-Raccordementdel'appareilàuneprised'uncircuitdifférent
de celui du récepteur.
-Consultez le revendeur ou un technicien radio/télévision
expérimenté.
PRÉCAUTION
Les modifications ou ajustements de ce produit, non
expressémentapprouvésparlefabricant,peuventinvaliderle
droit ou l'autorité de l'utilisateur à utiliser ce produit.
Other manuals for XR-EM20
2
Table of contents
Other Aiwa Stereo System manuals

Aiwa
Aiwa NSX-SZ310 User manual

Aiwa
Aiwa NSX-WV59 User manual

Aiwa
Aiwa CX-N4000 U User manual

Aiwa
Aiwa XS-G3 SERIES User manual

Aiwa
Aiwa NSX-BL54 LH User manual

Aiwa
Aiwa NSX-AV540 User manual

Aiwa
Aiwa XR-M55 Instructions for use

Aiwa
Aiwa NSX-T99 LH User manual

Aiwa
Aiwa NSX-BL54 LH User manual

Aiwa
Aiwa NSX-D707 User manual

Aiwa
Aiwa NSX-HMT75 User manual

Aiwa
Aiwa NSX-MTD9 User manual

Aiwa
Aiwa CX-NA222 User manual

Aiwa
Aiwa NSX-AJ700 User manual

Aiwa
Aiwa XH-N3 ez User manual

Aiwa
Aiwa nsx-vc58 hc User manual

Aiwa
Aiwa XR-M100 User manual

Aiwa
Aiwa NSX-SZ209 User manual

Aiwa
Aiwa NSX-S555 - SERVICE User manual

Aiwa
Aiwa XR-MS5 K User manual