peta
oni
etna
What
you
should
know
to
protect
yourself
@
Never
touch
the
plug
with
wet
hands.
@
Always
pull
out
by
the
plug
and
never
the
cord.
®
Only
'et
a
qualified
professional
repair
or
reassemble
the
CD
(Compact
Disc)
player.
An
inexperienced
person
might
touch
the
internal
parts
and
receive
a
serious
electric
shock.
@
Never
put
anything,
especially
metal,
into
the
CD
player.
Protect
the
CD
player
too
@
Use
only
a
household
AC
power
source.
Never
use
a
DC
power
source.
@
If
water
is
spilled
on
the
CD
player,
disconnect
it
and
call
your
dealer.
@
Make
sure
that
the
CD
player
is
well
ventilated
and
away
from
direct
sunlight.
®@
To
avoid
damage
to
the
internal
circuits
and
the
external
surface,
keep
it
away
from
heat
(stoves,
etc.).
e
Avoidusing
spray
type
insecticide
near
the
CD
player.
Itcan
damage
the
finish
and
might
ignite
suddenly.
@
To
avoid
damaging
the
finish,
never
use
paint
thinner
or
other
similar
chemicals
to
clean
the
CD
player.
@
Place
the
CD
player
on
a
flat
and
solid
surface.
@
if
you
don't
plan
to
use
the
CD
player
for
a
long
period
of
time,
disconnect
the
power
cord.
Condensation
Condensation
inside
the
CD
player
is
an
important
point
to
be
considered.
If
the
ambient
temperature
of
the
CD
player’s
environment
increases
sharply
within
a
short
time,
such
as
when
a
cold
room
is
heated
up,
or
when
the
player
is
trans-
ported
from
a
cold
location
to
a
warm
one,
tiny
droplets
of
water
will
condense
on
the
laser
pick-up’s
lens
section,
pre-
venting
correct
playback.
If
excess
condensation
forms
on
the
compact
disc
or
inside
the
CD
player,
operation
of
the
CD
player
will
not
resume
until
the
condensation
has
had
ample
time
to
dissipate.
Wait
30
minutes
to
one
hour
for
the
CD
player
to
operate
normally.
Interference
If
there
is
interference
during
FM,
AM
broadcasts
or
TV
recep-
tion,
turn
OFF
the
POWER
button
of
the
CD
player
if
you
are
not
using
it.
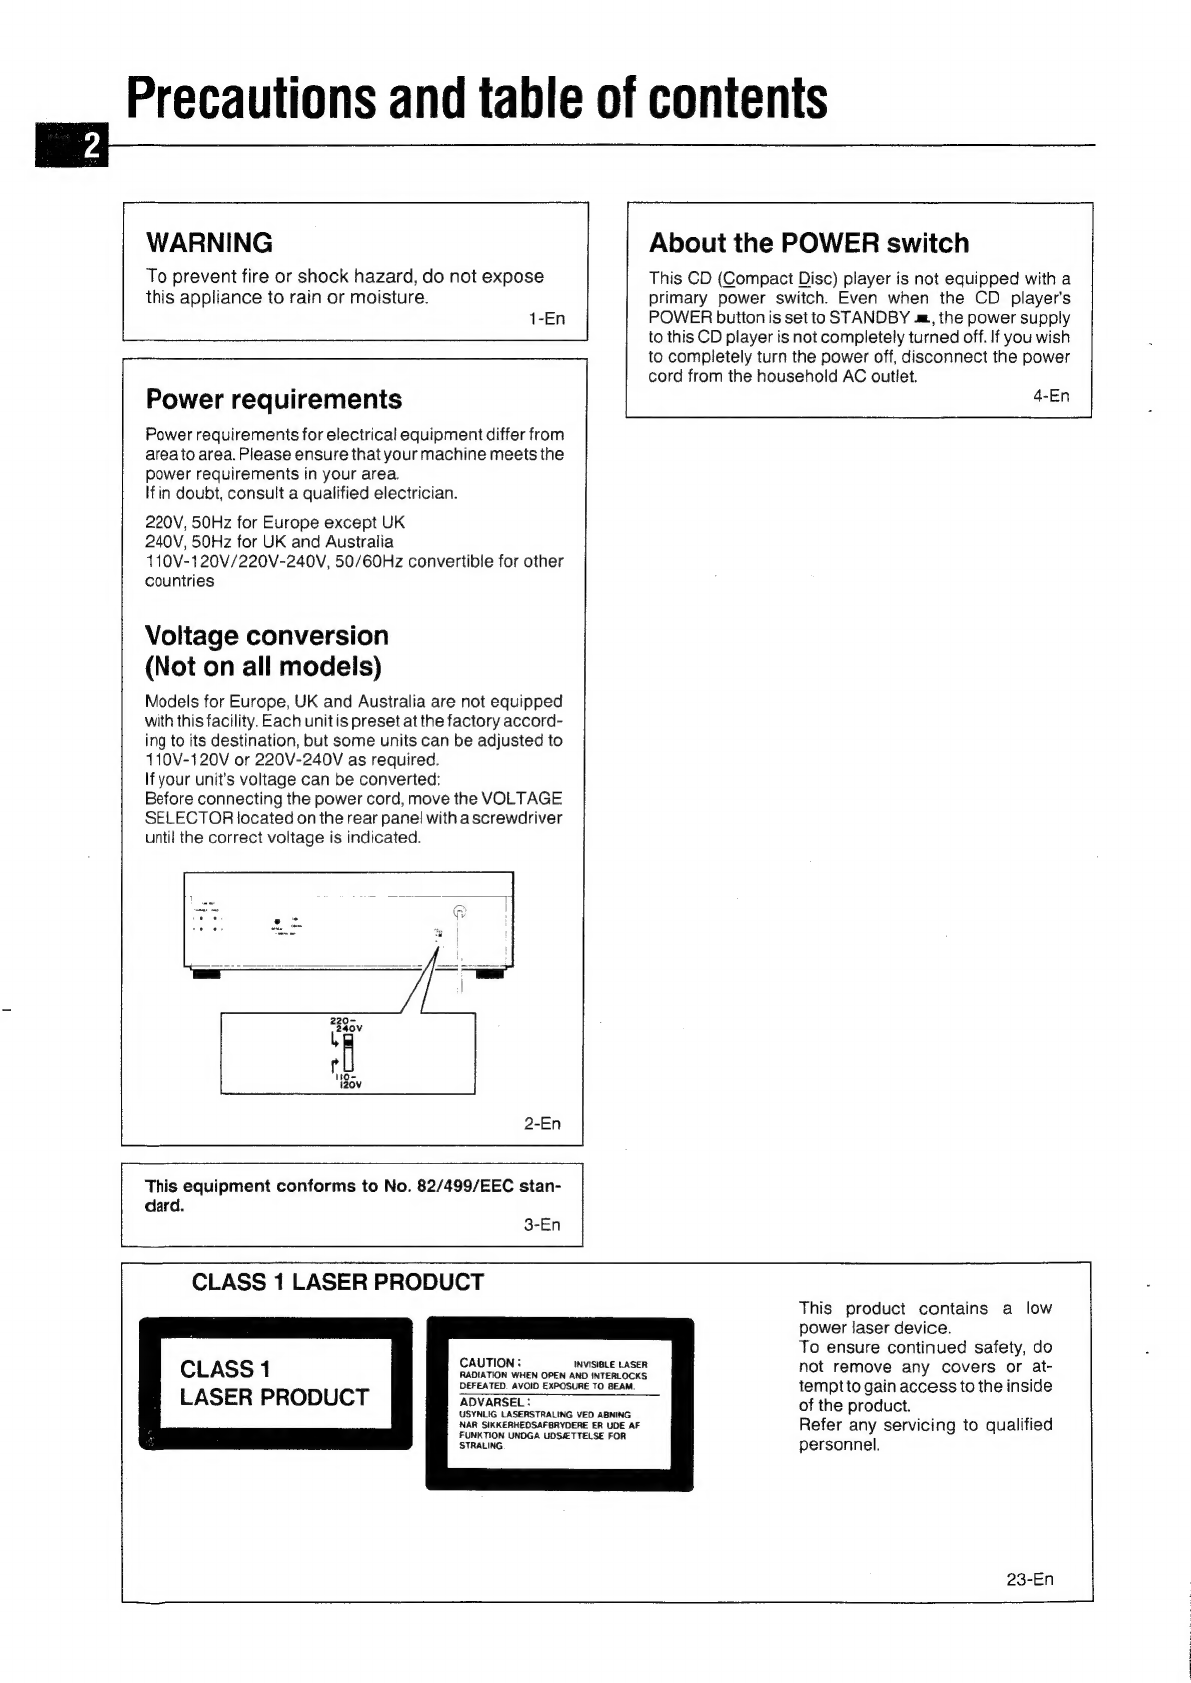
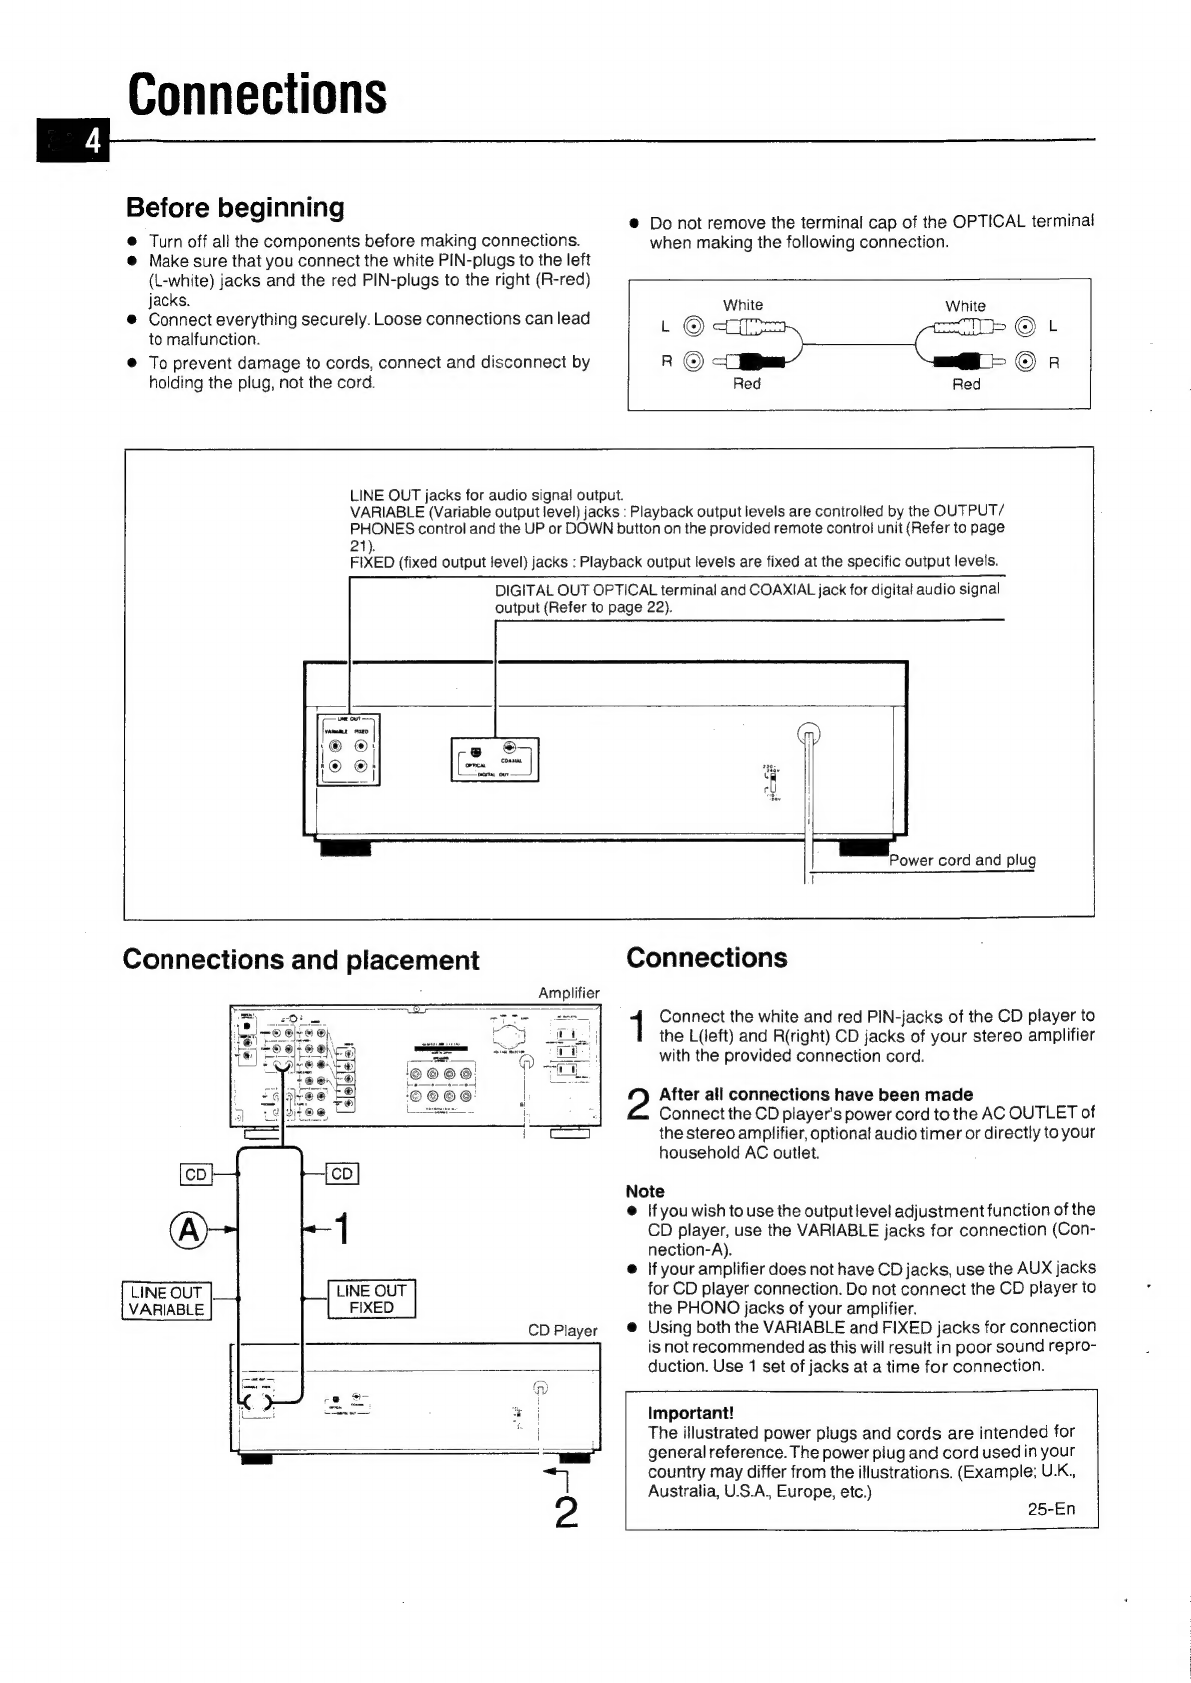
DIGITAL
OPTICAL
OUTPUT
terminal
and
cap
Only
remove
the
terminal
cap
when
making
connections
to
this
terminal.
Keep
the
inside
of
the
OPTICAL
terminal
clean.
Table
of
contents
Precautions
and
table
of
contents
Connections
...........:
cee
Before
using
your
CD
player
Aword
about
compact
dISCS
...........ee
Controls
(CD
player)...
ceeeeeereeteeeeees
Controls
(Remote
control
unit)
0...
ee
renee
erreeees
Compact
disc
playback
00.0.0...
ccc
cence
ee
eee
tnnseeeeeeetes
Music
selection
Direct
search
SKIP
SCA
Cis
ose
cicetess
Rc
tees
tgs
sasha
velsatiettonwentas
Manual
Search...
sc.
.c.ccccnstcss
ee
ec
letaciunsianeecoenteeeteians
Random
program
playback
How
tO’
program):
.v.cc:d2sieca
cerca
Nha
k
ened
tees
Sample
programming
for
random
program
playback
.
13
About
the
FL
display
...........
4
Repeat
playback
|...
Infinite
repeat
playback
A~~B
repeat
playback
Convenient
playback
features
2.0...
eer
eer
ee
eee
16-20
Auto
edit
program
playback
.............:cccceeeeseeeeeeees
16-21
Peak:level
Check:
..:.:.cc2s.ccssecsecetasssevevebievvagereumetedeaenes
Random
playback
...........
Auto
space
playback
INDEX:
SCARCME
sch
ct
esees
ccoteeniti
Go
eteee
toca
dagennes
donee
sees
Playback
standby
and
Start
....0...0
cece
eeeeeeseereeeeeeee
20
Timer
Controlled
playDack
oo...
eeeeeeeeceeesseeeeeeeeeees
21
Headphone
listening
&
output
level
control
...........-.6
21
Digital
connections
Troubleshooting
..................
Specifications
oe
FGAtUOS)
a:
teiet
a
eces
teestteok
coshaendtuatt
ative
elie
kann
eters