Akai MPC 3000 User manual

MIDI PRODUCTION CENTER
WARNING
Software version 3.0
To prevent fire or shock hazard, do not
expose this appliance to rain or moisture.
Operator's Manual


MIDI PRODUCTION CENTER


MIDI Production Center
Software version 3.0
Operator’s Manual
By Roger Linn
Copyright 1987-1994 Akai Electric Co., LTD.
Document Revision date: May 1994

ii
WARNING!!
To prevent fire or shock hazard, do not expose this appliance to rain or moisture.
1-En
The lightning flash with the arrowhead symbol superimposed across a graphical
representationofaperson,withinanequilateraltriangle,isintendedtoalerttheuser
to the presence of uninsulated “dangerous voltage” within the product’s enclosure;
that may be of sufficient magnitude to constitute a risk of electric shock.
The exclamation point within an equilateral triangle is intented to alert the user
tothepresenceofimportantoperatingandmaintenance(servicing)instructions
in the literature accompanying the appliance.
CAUTION
RISK OF ELECTRIC SHOCK
DO NOT OPEN
CAUTION: TO REDUCE THE RISK OF ELECTRIC SHOCK
DO NOT REMOVE COVER (OR BACK).
NO USER-SERVICEABLE PARTS INSIDE.
REFER SERVICING TO QUALIFIED SERVICE PERSONNEL.
THE SYMBOLS ARE RULED BY UL STANDARDS (U.S.A).
5A-En

iii
WARNING
The MPC3000 is designed to be used in a standard household environment.
Powerrequirementsforelectricalequipmentvaryfromareatoarea. Pleaseensure
that your MPC3000 meets the power requirements in your area. If in doubt, consult
a qualified electrician or Akai Professional dealer.
120V @60Hz for USA and Canada
220V – 230/240V @50Hz for Europe
240V @50Hz for Australia
PROTECTING YOURSELF AND THE MPC3000
• Never touch the AC plug with wet hands.
• AlwaysdisconnecttheMPC3000fromthepowersupplybypullingontheplug,not
the cord.
• Allow only an “Akai Professional” dealer or qualified professional engineer to
repair or reassemble the MPC3000. Apart from voiding the warranty, unautho-
rized engineers might touch live internal parts and receive a serious electric
shock.
• Do not put, or allow anyone to put any object, especially metal objects, into the
MPC3000.
• Use only a household AC power source. Never use a DC power source.
• If water or any other liquid is spilled into or onto the MPC3000, disconnect the
power, and call your dealer.
• Make sure that the MPC3000 is well-ventilated, and away from direct sunlight.
• To avoid damage to internal circuitry, as well as the external finish, keep the
MPC3000 away from sources of direct heat (stoves, radiators, etc.).
• Avoidusing aerosolinsecticides, etc.neartheMPC3000. Theymaydamagethe
surface, and may ignite.
• Do not use denaturated alcohol, thinner or similar chemicals to clean the
MPC3000. They will damage the finish.
• Place the MPC3000 on a flat and solid surface.

iv
WARNING
THIS APPARATUS MUST BE EARTHED
IMPORTANT
This equipment is fitted with an approved non-rewireable UK mains plug.
To change the fuse in this type of plug proceed as follows:
1) Remove the fuse cover and old fuse.
2) Fit a new fuse which should be a BS1362 5 Amp A.S.T.A or BSI approved type.
3) Refit the fuse cover.
If the AC mains plug fitted to the lead supplied with this equipment is not suitable for your type of
AC outlet sockets, it should be changed to an AC mains lead, complete with moulded plug, to the
appropriate type. If this is not possible, the plug should be cut off and a correct one fitted to suit
the AC outlet. This should be fused at 5 Amps.
If a plug without a fuse is used, the fuse at the distribution board should NOT BE GREATER than 5 Amp.
PLEASE NOTE: THE SEVERED PLUG MUST BE DESTROYED TO AVOID A POSSIBLE
SHOCK HAZARD SHOULD IT BE INSERTED INTO A 13 AMP SOCKET
ELSEWHERE.
The wires in this mains lead are coloured in accordance with the following code:
GREEN and YELLOW —EARTH
BLUE —NEUTRAL
BROWN —LIVE
As the colours of the wires in the mains lead of this apparatus may not correspond with the
coloured markings identifying the terminals in your plug, please proceed as follows:
The wire which is coloured GREEN and YELLOW must be connected to the terminal which is
marked with the letter E or with the safety earth symbol or coloured GREEN or coloured
GREEN and YELLOW.
The wire which is coloured BLUE must be connected to the terminal which is marked with the
letter N or coloured BLACK.
The wire which is coloured BROWN must be connected to the terminal which is marked with
the letter L or coloured RED.
THIS APPARATUS MUST BE EARTHED
Ensure that all the terminals are securely tightened and no loose strands of wire exist.
Before replacing the plug cover, make certain the cord grip is clamped over the outer sheath of
the lead and not simply over the wires. 6D-En
This equipment conforms to No. 82/499/EEC, 87/308/EEC standard
3A-En
CONFORME AL D.M. 13 APRILE 1989 DIRETTIVA CEE/87/308
3B-It

v
LITHIUM BATTERY
This product uses aLithium Battery for memory back-up. The lithium battery should only be
replaced by qualified service personnel. improper handling may cause risk of explosion.
24A-En
FCC warning
This equipment has been tested and found to comply with the limits for a Class A digital
device, pursuant to Part 15 of the FCC Rules. These limits are designed to provide
reasonable protection against harmful interference when the equipment is operated in
a commercial environment. This equipment generates, uses, and can radiate radio
frequency energy and, if not installed and used in accordance with the instruction
manual, may cause harmful interference to radio communications. Operation of this
equipment in a residential area is likely to cause harmful interference in which case the
user will be required to correct the interference at his own expense.
21A-En
AVIS POUR LES ACHETEURS CANADIENS DU MPC3000
Le présent appareil numérique n’ément pas des bruits radioélectriques dépassant les
limitesapplicablesauxappareilsnumériques de la ClassAprescritesdansleRèglement
surle brouillageradioélectrique édictépar le ministèredes Communicationsdu Canada.
27-F
This digital apparatus does not exceed the Class A limits for radio noise emissions
from digital apparatus set out in the Radio Interference Regulations of the Canadian
Department of Communications.
27-En
FÜR KUNDEN IN DER BUNDESREPUBLIK DEUTSCHLAND
Bescheinigung von AKAI
Hiermit wird bescheinigt, daß das Gerät AKAI
MPC3000
in Übereinstimmung mit den Bestimmungen der
Amtsblattverfügung 1046/1984
funkentstört ist.
Der Deutschen Bundespostwurde das Inverkehrbringen dieses Gerätes angezeigt und
dieBerichtigungzurÜberprüfungderSerieaufEinhaltungderBestimmungeneingeräumt.
AKAI ELECTRIC CO., LTD. 17B-G
COPYRIGHT NOTICE
The AKAI MPC3000 is a computer-based instrument, and as such contains and uses
software in ROMs and disks. This software, and all related documentation, including this
Operator’s Manual, contain proprietary information which is protected by copyright laws. All
rightsare reserved. Nopart of thesoftware orits documentationmay be copied,transferred
or modified. You may copy the operating software and any samples, programs, etc.
containedondisksforyourownpersonaluse. Allothercopiesofthesoftwareareinviolation
of copyright laws. You may not distribute copies of the software to others, or transfer the
software to another computer by electronic means. You may not modify, adapt, translate,
lease, distribute, resell for profit or create derivative works based on the software and its
related documentation or any part there of without prior written consent from AKAI Electric
Co., Ltd, Yokohama, Japan.
vi
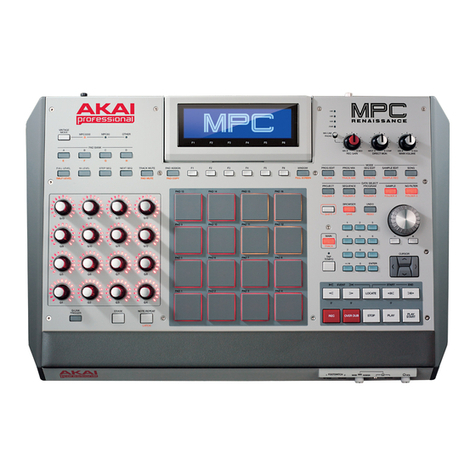
FRONT PANEL
TAP
TEMPO
INTEGRATED RHYTHM MACHINE
16BIT DRUM SAMPLER/MIDI SEQUENCER
STEREO VOLUME
RECORD LEVEL
MIDI PRODUCTION CENTER
MPC3000
SOFT KEY 1
DISPLAY
CONTRAST
SOFT KEY 2 SOFT KEY 3 SOFT KEY 4
DATE ENTRY COMMANDS
87 9
54 6
21 3
•0 ENTER
+–
DATA ENTRY
PROGRAM/
SOUNDS
DISK MIXER/
EFECTS
a b c
MIDI
d e f
SONG OTHER
SEQ EDIT
g
h i
STEP EDIT EDIT LOOP
TEMPO/SYNC
jk l
TRANSPOSE SIMUL SEQ
AUTO PUNCH
n o
COUNT IN
WAIT FOR KEY
m
CURSOR
p
q
SOFT KEY 1 SOFT KEY 2 SOFT KEY 3 SOFT KEY 4
FULL LEVEL
PAD BANK
A
CB
D
16 LEVELS
ASSIGN
AFTER
NOTE VARIATION
10
0
10
0
13141516
9101112
5678
1234
REAL TIME
ERASE
r
TIMING
CORRECT
s t
HELP
MAIN
SCREEN
u v w
REC
Z # &
x y
PLAY
START
space A / a
LOCATE
OVER DUB STOP PLAY
PLAY / REC
DRUMS
CRASH
HIGH TOM MID TOM LOW TOM FLOOR TOM
ALT SNARE HIHAT OPEN HIHAT PEDALSNARE
SIDE STICK BASS HIHAT CLOSED HIHAT LOOSE
CRASH2 RIDE CYMBAL RIDE BELL
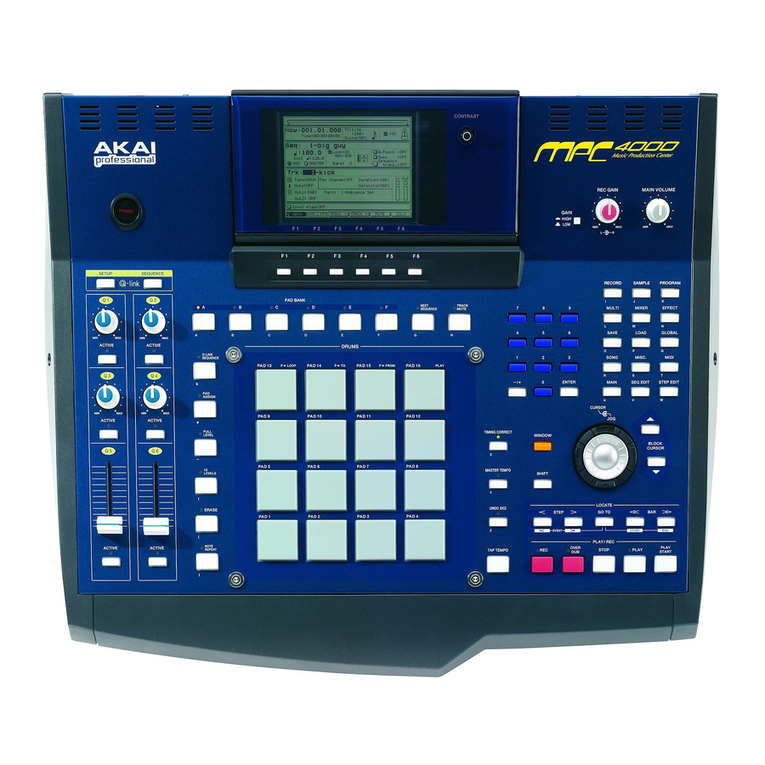
REAR PANEL
POWER
ON OFF
FOOT SW
1 2
MIDI IN
1 D2 A B C
MIDI OUT
LEVEL IN OUT
SYNC
SCSI
RECORD IN
DIGITAL
GAIN
LOW MID HI
LEFT RIGHT LEFT RIGHT PHONS
12345678
STEREO OUT
MODEL NUMBER MPC3000
AKAI ELECTRIC CO.,LTD.
MADE IN JAPAN
INDIVIDUAL MIX OUTPUTS

vii
Table of Contents
Chapter 1: Introduction.........................................................................................................1
Welcome! ......................................................................................................................... 2
Features .......................................................................................................................... 3
What’s Different From the MPC60?.............................................................................. 6
If You Already Know the MPC60 ...................................................................... 8
Chapter 2: The Basics...........................................................................................................13
Hooking Up Your System............................................................................................. 14
Getting Around on the MPC3000 ................................................................................ 15
The Cursor, Cursor Keys, Data Fields, and Command Keys ........................ 15
The Numeric Keypad, Data Entry Control, and [+] & [–] Keys .................... 16
The Soft Keys ................................................................................................... 17
The HELP key .................................................................................................. 18
Definitions: Sequence, Track, Song, Sound, Pad, Note Number, and Program ....... 19
Loading and Playing Sounds and Programs............................................................... 22
Playing the Pads, the PAD BANK, & FULL LEVEL Keys ........................... 22
Selecting Programs .......................................................................................... 23
The Note Variation Slider, ASSIGN and AFTER keys.................................. 24
The 16 LEVELS key......................................................................................... 26
Chapter 3: Recording Sequences....................................................................................... 29
How Sequences are Organized .................................................................................... 30
The MAIN SCREEN Key & Play/Record Screen........................................................ 32
The Play/Record Keys .................................................................................................. 39
Sequence Recording Example 1: A Looped Drum Pattern......................................... 42
Sequence Recording Example 2: A Multitrack Sequence........................................... 44
The TIMING CORRECT Key: Correcting Timing Errors, Swing Timing ................ 49
The Note Repeat Feature ................................................................................ 52
Tempo and the TEMPO/SYNC Key............................................................................. 53
Mid-Sequence Tempo Changes........................................................................ 56
The TAP TEMPO Key...................................................................................... 58
The WAIT FOR and COUNT IN Keys ........................................................................ 59
The AUTO PUNCH Key .............................................................................................. 60
The SIMUL SEQUENCE Key ..................................................................................... 62
The OTHER Key........................................................................................................... 63
Metronome, Foot Switches, and Free Sequence Memory .............................. 63
Initializing System Parameters ...................................................................... 66
The Record 16 Channels Function: Multichannel Recording ........................ 67
Recording MIDI System-Exclusive Data .................................................................... 70
Chapter 4: Editing Sequences ............................................................................................ 71
The ERASE Key ........................................................................................................... 72
Erasing Notes in Real Time While in Overdub Mode .................................... 72
Erasing Notes or Other Events While Stopped.............................................. 72
Initializing a Sequence .................................................................................... 75
The SEQ EDIT Key ...................................................................................................... 77
Viewing and Changing Time Signature.......................................................... 77
Rearranging the Track Order.......................................................................... 78
Inserting Blank Bars Into a Sequence............................................................ 79
Deleting Bars From a Sequence ...................................................................... 80
Copying Bars (All Tracks) ............................................................................... 81

viii
Copying Events ................................................................................................ 82
Copying an Entire Sequence to Another......................................................... 84
Shifting the Timing of Many Notes................................................................. 85
Global Editing of Note Event Data ................................................................. 86
Editing Note Velocity or Duration Data ............................................. 87
Editing Note Number Assignment of Drum Note Events ................. 89
Editing Note Variation Data of Drum Note Events........................... 90
The STEP EDIT Key .................................................................................................... 92
Using Step Edit ................................................................................................ 93
Step Edit Event Types ..................................................................................... 95
Step Edit Options............................................................................................. 99
Step Recording ............................................................................................... 102
The EDIT LOOP Key ................................................................................................. 103
Using Edit Loop as an Undo Function.......................................................... 104
The TRANSPOSE Key ............................................................................................... 105
Transposing in Real Time While Playing ..................................................... 106
Chapter 5: Song Mode ........................................................................................................ 107
Overview ..................................................................................................................... 108
The SONG Key and Song Mode Screen .................................................................... 109
An Example of Creating and Playing a Song............................................................ 112
Converting a Song Into a Long Sequence ................................................................. 114
Chapter 6: Creating and Editing Programs.................................................................. 115
What Are Programs? .................................................................................................. 116
Selecting the Active Program, Assigning Sounds..................................................... 119
Envelope, Velocity Modulation, Tuning, Poly Mode................................................. 125
The Dynamic Filter .................................................................................................... 128
Copying and Initializing Programs ........................................................................... 130
Chapter 7: The MIXER/EFFECTS Key ........................................................................... 133
The Stereo Output Mixer ........................................................................................... 134
The Individual Outputs/Effects Mixer ...................................................................... 136
Viewing the Mix Data in Text Form ......................................................................... 139
Mixer Source Select, Automated Mix........................................................................ 142
Effects Generator ....................................................................................................... 145
Chapter 8: Creating and Editing Sounds ...................................................................... 147
Sampling a New Sound.............................................................................................. 148
Editing a sound........................................................................................................... 154
Renaming, Copying, and Deleting a Sound .............................................................. 158
Triggering a Sound from an External Signal—the Audio Trigger .......................... 161
Chapter 9: Saving to and Loading from Disk ............................................................... 163
Overview ..................................................................................................................... 164
Saving Files ................................................................................................................ 166
Saving a SEQ File (Single Sequence)............................................................ 166
Saving an ALL File (All Sequences and Songs) ........................................... 167
Saving a SND File (Single Sound) ................................................................ 168
Saving a PGM File (Single Program & Sounds)........................................... 169
Saving an APS File (All Programs and Sounds) .......................................... 170
Saving a PAR File (System Parameters) ...................................................... 172

ix
Loading, Erasing, or Renaming Files........................................................................ 173
Loading a SEQ File (Single Sequence) ......................................................... 175
Loading an ALL File (All Sequences and Songs) ......................................... 177
Loading a SND File (Single Sound) .............................................................. 177
Loading a PGM File (Single Program and Sounds) ..................................... 178
Loading an APS File (All Programs and Sounds) ........................................ 178
Loading an MPC60 Version 1 or 2 SET or ST1 File..................................... 179
Loading a PAR File (System Parameters) .................................................... 182
Files That Automatically Load on Power-Up ............................................... 182
Loading Sample Files From Akai S1000/S3000 Disks ............................................. 184
Formatting a Floppy Disk.......................................................................................... 186
Using a SCSI Hard Disk ............................................................................................ 187
Copying an Entire Floppy Disk ................................................................................. 191
Chapter 10: Syncing to Tape and Other Devices ......................................................... 193
The SYNC Screen....................................................................................................... 194
Syncing to Tape and Other Devices: Examples ........................................................ 201
Syncing to MIDI Clock................................................................................... 201
Syncing to SMPTE ......................................................................................... 201
Syncing to MIDI Time Code .......................................................................... 204
Syncing to FSK24........................................................................................... 204
Syncing to 1/4-note Clicks.............................................................................. 206
Chapter 11: MIDI Functions ............................................................................................. 207
Assigning Pads to Note Numbers.............................................................................. 208
MIDI Receive Channel, Local Mode, Soft Thru, Note Variation Controller
Assign and Sustain Pedal Processing................................................................. 210
MIDI Input Filter ....................................................................................................... 213
Turning All Notes Off................................................................................................. 216
The MIDI Implementation Charts ............................................................................ 217
Appendix ............................................................................................................................... 219
Technical Specifications............................................................................................. 220
Answers to Frequent Questions ................................................................................ 222
Contents of Disk Files ................................................................................................ 225
MPC3000 Options ...................................................................................................... 229
The SMPTE Option........................................................................................ 229
Expanding the Sound Memory...................................................................... 229
The Video Output Option .............................................................................. 230
Index ...................................................................................................................................... 231


Chapter 1: Introduction
Page 1
Chapter 1:
Introduction

Chapter 1: Introduction
Page 2
Welcome!
Since its release in 1988, the MPC60 MIDI Production Center has
earned a reputation not only as the world’s greatest drum machine
but also as a powerful sequencer for those who desire an alternative
to the complexity and confusion of computer sequencers.
But over the years users asked for more: 16-bit stereo sampling,
more sample memory, enhanced sound design features, faster
sequence processing, enhanced sequence recording and editing
features, SCSI, and much more. The MPC3000 fulfills the majority
of the requests we received. And in keeping with the MPC60’s
tradition of ease of use, we have tried our best to implement these
new features in the most intuitive way possible.
Since the advent of sequencers I have tracked their evolution with
great interest and in my view, sequencers have evolved to a point
where they are now a legitimate instrument on their own. Many of
today’s musicians could be better described as sequencer players
than as keyboardists or guitarists. Album credits often read “pro-
gramming by...” to denote a musician who has used a sequencer to
create the backing track for a recording. These new musicians think
and compose in terms of total arrangement as opposed to single
instruments. In many ways, the sequencer’s panel and display
screens are their strings and keys, allowing them to reach heights of
creativity never before possible.
In this light, I like to think of the MPC3000 as the piano or violin of
our time, and of you as an MPC3000ist. In the same way a violinist’s
style is identified by his or her vibrato and phrasing, your MPC3000
virtuosity may be identified by your particular swing settings, your
creative use of Note Repeat, or your real-time use of the Note
Variation feature. As an MPC3000ist, if you find the instrument
useful in your creative process, please let the world know. Next time
you perform on a recording, ask to be credited not with, “Keyboards
played by...” or “Programming by...” but rather with, “MPC3000
played by....”
Thanks for buying the MPC3000. I hope you enjoy using it as much
as we have enjoyed creating it.

Chapter 1: Introduction
Page 3
Features
The following is a summary of some of the advanced features of the
MPC3000.
General
• Large 320-character LCD display (8 lines by 40 characters) with
graphics.
• Built-in 1.44 megabyte disk drive for storing both sequence and
sound data.
• Built-in SCSI interface for storing data to external hard disk.
• Interactive Help function provides a full screen of explanation for
every data field of every function screen.
• Four soft keys provide one-button execution of many functions.
• The contents of many data fields and other settings are retained
while the power is turned off.
• Fast internal 16MHz V53 16-bit microprocessor (equivalent to an
80286) provides accurate timing in complex sequences and fast
response to MIDI.
Sound Generator
• 16-bit, 44.1kHz stereo sampling.
• High capacity sound memory: 2 megabytes standard (21.9 seconds
mono or 10.9 seconds stereo), expandable to 16 megabytes (188.3
seconds mono or 94.1 seconds stereo).
• Digital sampling input for direct recording from digital sources.
• 128 sounds (samples) may be held in memory at one time.
• 32 simultaneous playback voices.
• Dynamic lowpass filter with envelope generator (and resonance!)
for each voice.
• Built-in effects generator for versatile delay effects.
• 10 polyphonic audio outputs, including stereo mix out and 8
individual outputs.
• 24 programs (sets of sound assignments) exist, each having 64
unique sound assignments from a common bank of 128 sounds, and
unique sound modifying parameters for each assignment. Switching
programs instantly changes all sound assignments and sound
parameters.
• Multiple iterations of a single sound may be assigned to use
multiple voices (polyphonic) or the same voice (monophonic), and
may either respond to Note Off messages or not. Also, any sound
may be set to terminate the playing of any two other sounds.
• Extensive sample editing allows any portion of a sound to be
copied or removed and inserted into another sound at any location.
Any portion may also be silenced or reversed.

Chapter 1: Introduction
Page 4
• The Best Start feature automatically finds the point within a
sound at which the drum strike begins, bypassing any dead space at
the beginning of the sound which could cause playback delays.
• Up to three sounds can be assigned to a MIDI note number or pad.
The sounds can either play simultaneously, switch depending on
note velocity, or switch depending on envelope decay (to simulate
the MPC60’s hi-hat decay slider function).
• The stereo and individual output mixers are automated. Any
changes made while recording will be automatically repeated on
playback.
Sequencer
• Both linear and pattern-style (looped) recording are supported.
• Both drum machine and sequencer-oriented features are inte-
grated into one easy-to-use operating system.
• 75,000 note sequencer capacity.
• 99 sequences may be held in memory at once. Each sequence
contains 99 individual tracks, each of which can be output to any
one or two MIDI channels.
• 4 independent MIDI output ports permit 64 simultaneous MIDI
output channels.
• 2 mergeable MIDI inputs.
• The MPC3000 may be slaved to five sync sources: MIDI Clock,
MIDI Time Code, FSK24, sync to any sound playing 1/4-notes, and
SMPTE (optional).
• 2 sequence record modes: Record (erasing existing notes while
recording) and Overdub (merge with existing notes). You can switch
between modes at any time.
• Step Edit feature allows fast viewing, recording, editing, or
deletion of any event within a sequence.
• The Simul Sequence feature allows two sequences, or one se-
quence and one song, to play simultaneously. For example, you could
play a short, looped drum sequence while simultaneously recording
your multitrack keyboard sequence.
• Versatile editing system allows erasing, time shifting, copying,
merging, inserting, and deleting of any sequence data.
• Individual parameters within note events may be changed for
multiple notes globally.
• Each track has an adjustable output level, allowing output veloci-
ties to be scaled in real time while playing.
• All 16 MIDI channels can be recorded simultaneously, allowing
sequences to be transferred to the MPC3000 from an external
sequencer in one pass.
• The Edit Loop feature allows a portion of a sequence to be looped
while overdubbing, and allows changes to be undone.
• Sequences may be transposed, either in real time while playing or
by altering note data.
• The Tap Tempo feature allows the playback tempo to be set by
tapping a key in the time of 1/4-notes.

Chapter 1: Introduction
Page 5
• Programmable tempo changes in mid-sequence or mid-song are
supported.
• Mid-sequence time signature changes are supported.
• Auto Punch feature allows automated punch-in and/or punch-out
at preset times within the sequence.
• Two foot switch inputs allow functions such as Play/Stop and
Punch In/Out to be remotely controlled.
• Swing feature provides a useful method of adjusting the rhythmic
feel of your tracks.
• 16 velocity- and pressure-sensitive front panel drum pads and 4
pad banks provide a total of 64 pad/bank combinations.
• Note Variation feature allows a unique value of tuning, decay,
attack or filter frequency to be recorded with each drum note.
• MIDI sustain pedal messages can be specially processed so that
multiple overdubs on the same track of a sequence can use the
sustain pedal independently, without interaction.

Chapter 1: Introduction
Page 6
What’s Different From the MPC60?
The MPC3000 contains many changes and improvements over the
MPC60. The major changes are listed below.
Sound Generator Changes
• Sampling resolution is increased from 12-bit non-linear to 16-bit
linear.
• Sampling rate is increased from 40 kHz to 44.1 kHz.
• Stereo sampling is supported.
• A digital sampling input is included for direct recording from
digital sources.
• Sound memory is increased: 2 megabytes standard (21.9 seconds
mono or 10.9 seconds stereo), expandable to 16 megabytes (188.3
seconds mono or 94.1 seconds stereo). The maximum sampling time
per sound is no longer limited to 5 seconds, but rather only by
available sound memory.Also, sampling no longer requires erasing
sequence memory.
• Total sound capacity is increased from 34 to 128 sounds.
• Number of playback voices is increased from 16 to 32.
• A dynamic lowpass filter with envelope generator (and resonance)
exists for each playback voice.
• A built-in effects generator permits versatile delay effects.
• The new programs system of sound assignment allows all sound
assignments to be instantly changed merely by changing the active
program number, instead of by loading a new SET file as in the
MPC60. There are 24 programs, each with a unique set of sound
assignments from a common bank of 128 sounds. Unlike Set files,
saving a program to disk only saves assignment and parameter
information; the sounds used by the program are saved as indi-
vidual sound files. This allows multiple programs to be saved to the
same disk without redundantly saving sound data as with SET files.
• Sounds are now assigned to MIDI note numbers instead of to pad
names. This permits simpler operation of the MPC3000 as a MIDI
sound module, eliminating the need to translate MIDI note numbers
into pad names as in the MPC60.
• New Mono Mode parameter causes a voice to restart, terminating
earlier plays. Also, any sound can be set to terminate any two other
sounds.
• Sample files from Akai S1000 & S3000 floppy disks may be loaded.
• Sample editing is enhanced. Now, any portion of a sound may be
copied or removed and then inserted into another sound at any
location. Also, any portion may be silenced or reversed.
• The Echo Mixer has been removed. It is replaced by the Individual
Outputs/Effects Mixer. This new mixer allows any sound to be
routed to any one of the individual outputs or the internal effects
generator, and the volume level of this assignment is adjustable
independently of the stereo volume.
Other manuals for MPC 3000
4
Table of contents
Other Akai Recording Equipment manuals

Akai
Akai APC Mini User manual

Akai
Akai DPS24 User manual

Akai
Akai EA-G90 User manual

Akai
Akai LPD8 mk2 User manual

Akai
Akai MPC Live User manual

Akai
Akai S6000 User manual

Akai
Akai MPC User manual

Akai
Akai Professional MPC 1000 Instruction manual

Akai
Akai Hexacomp C2M User manual

Akai
Akai Professional MPK261 User manual
Popular Recording Equipment manuals by other brands

Joranalogue
Joranalogue Transmit 2 user manual

Mitsubishi Electric
Mitsubishi Electric SEZ-KD NA Series quick start guide

Random*Source
Random*Source SERGE MODULAR AUDIO INTERFACE 2023 user manual

Yamaha
Yamaha DTR2 owner's manual

Directed
Directed XPRESSKIT XKLOADER2 installation guide

Unico
Unico DUAL PLUS 1C Manual of installation and use