There are 5 modes: Video, Photo, Playback, Video Setup and Photo Setup.
VIDEO MODE
Video Mode is the default mode when you turn on the camera.
In Video Mode, press Shutter button, the camera starts recording video.
Press Shutter button again to stop recording video. Tap the Zoom icon on the screen
to adjust the zoom level.
Note: Camera does not record sound when it is in the waterproof case.
PHOTO MODE
Press Mode button or swipe your finger across the screen to switch to Photo Mode
after you turn on camera.
In Photo Mode, press Shutter button to take photos. Tap the Zoom icon on the
screen to adjust the zoom level.
PLAYBACK MODE
You can enter the Playback mode by tapping the Playback on the screen directly.
Or press Mode button twice, then press Shutter button or tap Playback icon to enter
Playback mode after you turn on camera. You can playback your files in this mode.
VIDEO SETUP MODE
Press Mode button three times, then press Shutter button or tap Video Setup icon
to enter Video Setup mode after you turn on camera. You can change video settings
in this mode.
PHOTO SETUP MODE
Press Mode button four times, then press Shutter button or tap Photo Setup icon to
enter Photo Setup mode after you turn on camera. You can change photo settings
in this mode.
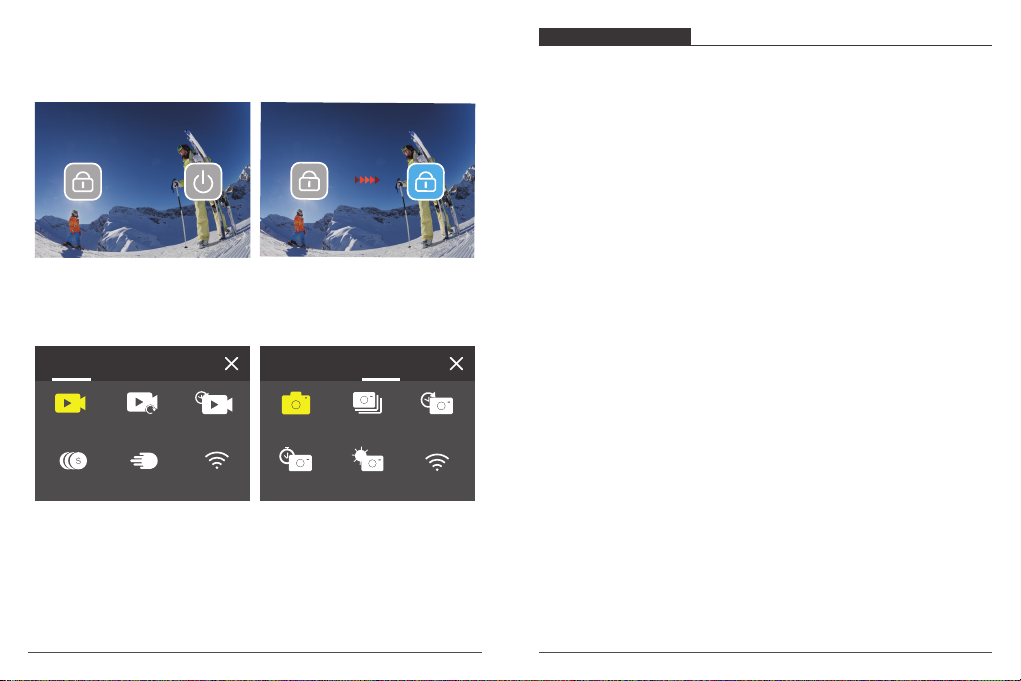
OVERVIEW OF MODES
Video Shortcut Menu
1. Normal Video
Default setting is Normal Video.
2. Loop Record: 1 Min/3 Min/5 Min
Default setting is 1 Min.
Loop recording allows your camera to overwrite old files with new files. Once the
memory card becomes full, the camera will delete the first video file to make room
for the latest file. For example, if the setting for loop recording is “1 Minute”, then the
camera will create video clips of 1 minute in length, and a 1-minute clip will be
deleted when the camera needs more memory.
3. Time Lapse
Time Lapse: 1 Sec/3 Sec/5 Sec/10 Sec/30 Sec/1 Min
Time Lapse Duration: Unlimited/5 Min/10 Min/15 Min/20 Min/30 Min/60 Min
Default setting is 1 Sec and Unlimited.
In Time Lapse Video mode, press Shutter button, the camera records video from
frames captured at specific intervals.
Note: Time Lapse Video is captured without audio.
4. Slow Motion
In Slow Motion Video mode, press Shutter button, the camera records slow motion
video.
5. Fast Motion: 2x/4x/6x/10x/15x
Default setting is 2x.
Action that appears to move faster than normal on the screen, accomplished by
filming the action at less than normal speed in the camera and then projecting it at
normal speed.
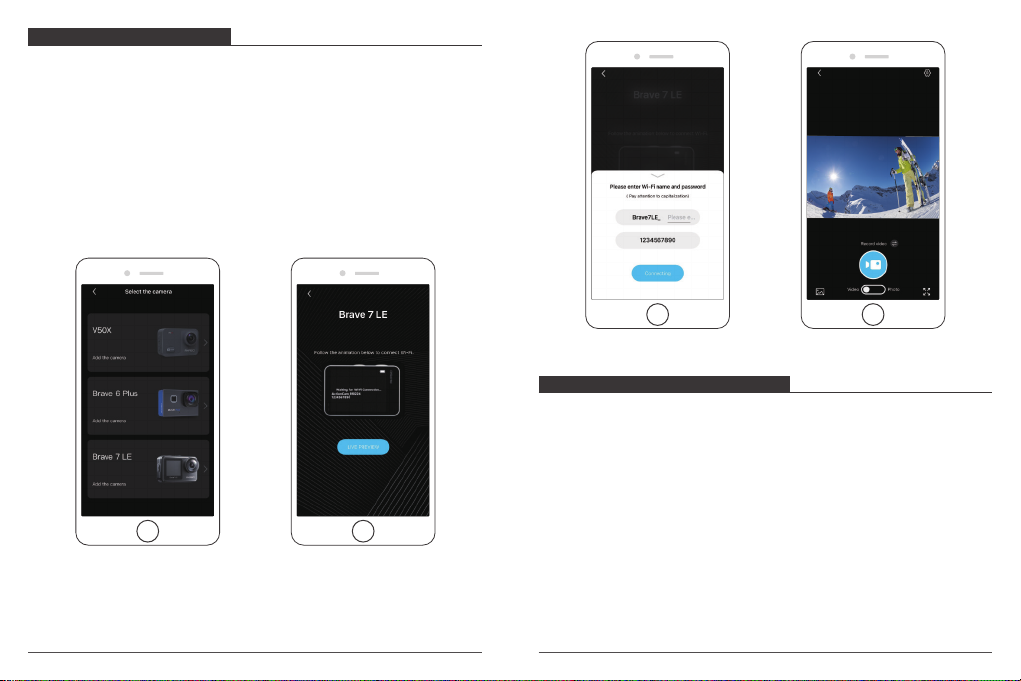
CUSTOMIZING YOUR BRAVE 7 LE
07 08