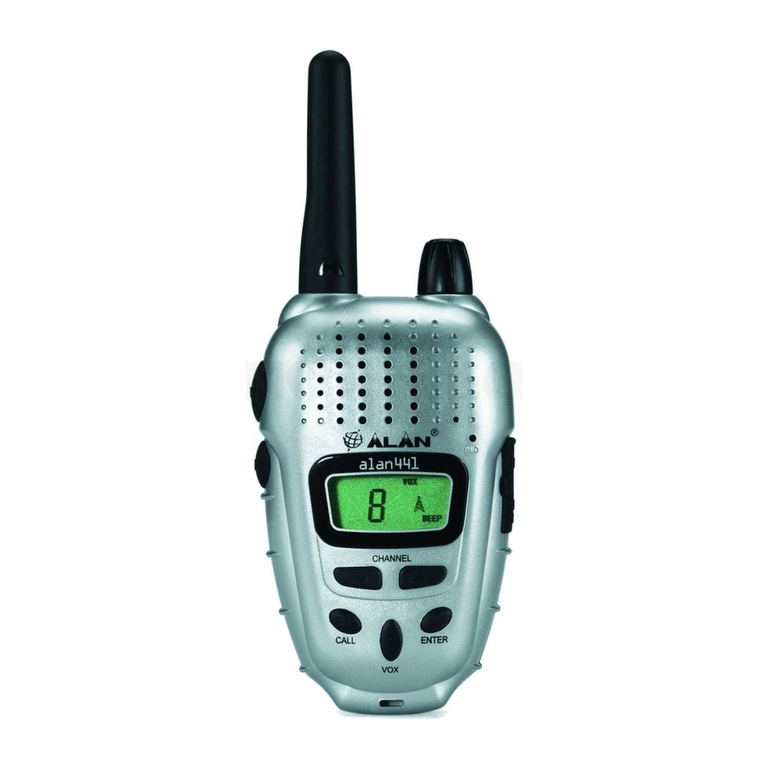
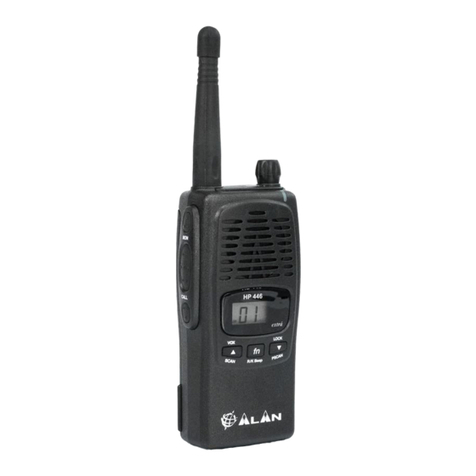
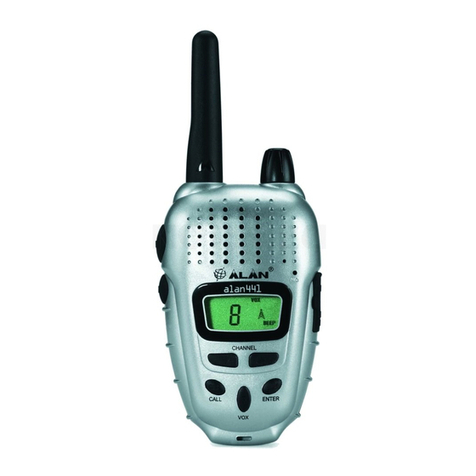
Alan alan456 User manual

pmr
446
pmr446
transceiver
The World in Communication
®
English
GB

English
Index 1
INDEX
Introduction 2
Coverage 2
Batteries 2
Care of optional Ni-Cd rechargeable batteries 2
To enjoy your radio for a long time 3
Accessories 3
Controls and indicators 4
How to use your ALAN 456 8
Voice-controlled transmit mode (VOX) 9
Manual transmit mode (PTT) 10
Main features 10
Roger Beep: end-transmission note 10
Keypad /switching on beep 11
Use of ALAN 456 as Babyphone 11
INTERCOM function 12
SCAN function 12
CTCSS (Continuous Tone Coded Signalling System) 13
DCS (Digital Code Squelch) 14
DW function (Dual Watch) 15
Channels memorisation 15
Power Save 16
Battery level 16
Reset 16
Summary table 17
Technical specifications 18
Restrictions to the use 20

2Introduction
INTRODUCTION
ALAN 456 is a new generation handheld transceiver PMR 446
type. It can be used without license in all countries where
PMR 446 frequencies are authorised.
Coverage
The operating band (446Mhz) allows clear communication,
virtually free from atmospheric interferences and -despite the
low power - will allow you to communicate up to a distance
of 5 km (under optimum conditions).
The only limit to maximum possible range are environmental
factors such as blockage caused by trees, buildings, hills, or
other obstructions. If you find communication is not possible,
many times this can be solved by moving a few meters to a
new location. Range is also reduced while operating in a
vehicle or metal building.
Batteries
The radio uses 3 AA type alkaline (dry) or 3 AA Ni-Cd
rechargeable batteries.
• Do not leave batteries installed over a long period of time
as leakage may occur and this can destroy the radio.
This operation, besides, preserves battery life.
• Never use different batteries from the ones suggested.
Attention: to obtain proper operation, batteries must be in
good condition and fully charged.
Care of optional rechargeable Ni-Cd batteries
The following is meant as general information regarding Ni-
Cd batteries.
• Allow the batteries to fully discharge before recharging.
Full discharge will be indicated by flashing on the
display.
• Always allow the battery to fully charge before using to
prevent the batteries from developing “memory”, which
effectively reduces their capacity.
• It is better to store Ni-Cd batteries that are discharged
rather than charged.
• Never use batteries which differ from the ones
recommended. Do not mix old and new batteries or
rechargeable batteries of different capacities.
English

Accessories
ALAN 456 is equipped with jack for external speaker
microphone, intercom system and charge jack for Ni-Cd
batteries.
To enjoy your radio for a long time
• While ALAN 456 has been designed for many years of
reliable, trouble-free performance, it is a precision piece
of electronic equipment that should not be exposed to
moisture, dust or extreme temperatures.
• Do not connect the unit to a power higher than the working
one.
• To power the radio by the car, do not use a cigarette
lighter adapter: use “AL25” charger only.
• Clean the unit with a damp cloth only; do not use harsh
chemicals.
Introduction 3
English

4Controls and Indicators
CONTROLS AND INDICATORS
1. ON/OFF/Volume Control. With this control you can
switch on or off the ALAN 456 and adjust the volume to
a comfortable level. Turn the knob clockwise to switch
on the unit, counterclockwise to turn it off.
2. SPK MIC (Speaker Microphone Connector). Connect
these jacks to an optional speaker/microphone or an
earphone.
3. Antenna
Top
6
®
4
7
8
5
OFF/VOL
1
2
3
Front
3
English

Channel Frequency
(MHz)
01 446.00625
02 446.01875
03 446.03125
04 446.04375
05 446.05625
06 446.06875
07 446.08125
08 446.09375
5. Speaker and Microphone. This is the speaker and
microphone location. During transmission, keep your
mouth 4/10 cm from the unit and speak with normal
voice level.
6. / keys. With these keys you can select one of
the 8 following channels:
7. (Enter/Lighting) key. By pressing this key, the display
will be lighting up for 6 secs. Keeping it pressed during
the switching on, you can enter in programming mode
(functions will be subsequently described).
8. (Function) button. By pressing this button you can
activate the SCAN, B.SCAN,CTCSS, DCS, DW and
MEMORY functions. They will be better described in their
relative paragraphes.
Controls and Indicators 5
4. Display
1) Channel indicator
2) CTCSS / DCS indicators
3) CTCSS activated
4) DCS activated
5) VOX activated
6) Dual Watch activated
7) Keypad lock
8) TX-RX icon
9) Power Save on
10) Roger Beep
11) Channel memory
12) Memory
13) B.SCAN activated
14) SCAN function on
15) Keypad / switching on beep
16) Battery level icon
1
3456729
10
11
12
13141516
8
English

VOX
PTT
INT
CHG
12
13
14
CALL
PTT
MON
11.1
11
10
9
6Controls and Indicators
9. CALL-Button. By pressing the CALL-Button your ALAN
456 is sending an audio signal to other users on the same
frequency.
10. PTT-Button. By pressing “PTT” button, you can transmit
(the display shows ); by releasing it, you will activate
the receiver (the display shows ).
Attention: To use PTT function, the “PTT/VOX” switch
on the right side of the unit must be in “PTT” position.
11. MON (Monitor) Control. By pressing “MON” control the
automatic squelch or CTCSS/DCS are excluded. With
this operation it is possible to receive low sensitivity
signals or signals without CTCSS/DCS tones. This function
remains operational for 10 secs. about: in case you want
to stop it before, press the “MON” button again for 1 sec.
To lock the keypad, press “MON” for 2 secs. To unlock,
press again for 2 secs.
11.1KEYPAD LOCK. To lock the keypad press “MON” for 2
secs. To unlock, repeat this step.
12. INT Connector (INTERCOM function). The INTERCOM
function permits the internal communication between
motorbike-driver and partner (see paragraph “Intercom
function”).
13. CHG-Connector. External charger connector. Over this
socket batteries can be charged in the device . Recharge
the unit with the apposite charger only. Attention: alkaline
batteries cannot be recharged.
Side (left and right)
English

Controls and Indicators 7
14. PTT/VOX Switch. To select PTT or VOX mode. The VOX
function permits the hands-free use of the radio: ALAN
456 transmission can start when you speak close to the
unit. The VOX sensitivity is programmable, as the delay
of the return in transmission mode.
Back
15. Battery pack. To open the battery compartment, unhook
the battery holder in the lower part of the radio and slide
the cover towards the bottom of the radio. The ALAN
456 has an automatic current economy circuit. If the radio
receives no signal for longer than 6 seconds the “power
save function” will be activated. The battery live will rise
up to 50 %.
16.Belt clip. To hook up the unit to your belt.
17.Wrist belt hole. Hook up the wrist belt.
17
15
16
English

8How to use your ALAN 456
Bottom
18. Load contacts. ALAN 456 is equipped, at the lower
surface, with load contacts which enable a load course
over a desk top charger.
HOW TO USE YOUR ALAN 456
1. Insert 3 AA type alkaline or optional Ni-Cd batteries into
the battery compartment, noting polarity.
2. To turn on the radio, slightly rotate the ON/OFF/Volume
control clockwise until the radio clicks on and adjust the
volume control to the desired listening level. To adjust
the volume, press the ”MON“ button and rotate the knob.
Four successive tones (excludible) are signalling that the
transceiver is turned on. The display makes a “self-test”
for 1 sec., then it switches on the channel 1 and 00
CTCSS. Now the transceiver is ready to receive /transmit
on the last channel used; All permanent settings are
maintained.
3. To transmit ( ), keep pressing PTT button and speak
with a normal voice level 4/10 cm far from the unit.
4. To receive ( ), simply release PTT button.
18
English

How to use your ALAN 456 9
Select the desired VOX level by means of the /
buttons. The VOX sensitivity is now adjusted.
4) Press again the button: the display shows:
With these steps you can select the desired level, so that
the radio switches in RX in the desired delay. 01 level is
the shortest time, 06 level is the longest one.
5) To confirm the operations, press the key or turn off
the radio.
To transmit, speak into the microphone – the voice
automatic control switches ALAN 456 into transmit mode.
Note: In sites with very loud background noise, to set
the switch in position “06” ( select “LE vox 06”) is
recommended.
Voice-controlled transmit mode (VOX)
Your ALAN 456 is equipped with PTT (manual transmit mode)
and VOX (automatic voice control). The VOX can be adjusted
in 6 positions: from 01 (higher sensitivity) to 06 (lower
sensitivity). 01 position is recommended in quiet sites; 06
position is ideal for the operation with microphone/loudspeaker
or for room monitoring with large background noise.
VOX activation and setting
VOX activation
Set the “VOX/PTT” switch, on the right side of ALAN 456, in
“VOX” position.
Sensitivity setting and RX return time
1) Set the ON/OFF volume control on “OFF” position.
2) Turn on the unit keeping pressed the key (when
released, the display shows “BEEP on”):
3) Press the button until the display shows:
oN
LE
-03
English

10 Main Features
Manual Transmit Mode (PTT)
1) Set the “PTT /VOX” switch, on the right side of ALAN
456, in PTT position.
2) To transmit, press now the PTT button on the left side
of the radio.
3) Speak to the microphone keeping a distance of 4/10 cm
approximately.
ALAN 456 will be on transmission until you release the PTT-
button again.
MAIN FEATURES
ROGER BEEP: end transmission tone
Roger Beep function is part of the original ALAN 456 design.
When you finish to transmit (PTT released), a beep confirming
the end transmission is heard from the other user.
To deactivate it , proceed as follows:
1. Switch off ALAN 456.
2. Keep the key pressed and restart the unit.
3. Press the button until the display shows on the right
side:
4. Select “FF” with /buttons.
5. Press key or turn off and on the radio.
6. Roger Beep is now deactivated.
oN
English

Keypad/switching on beep
When switching on the radio, and pressing every key, (except
for CALL,MON,PTT) the radio sends out a beep. To deactivate
it, follow these instructions:
1. Turn on the unit keeping pressed the key.
2. Select “BEEP” and “FF” with /buttons.
3. Press the key or turn off the radio to confirm the
operations.
Use of the ALAN 456 as Babyphone
This system is particularly helpful to take care of the baby
while doing housework at the same time.
To use this unit as Babyphone you need firtst of all two PMRs;
ALAN 456 can be used also with other PMRs models, too:
the most important fact hereby is that both devices are
indicated with the same frequency setting. If using another
ALAN 456 for listening, the PTT/VOX switch must be in “PTT”
position.
Main Features 11
FF
Setting up
1. Set the PTT-VOX switch of the transmitter in PTT position.
2. Turn on the unit keeping pressed the key.
3. Press the button until the display shows:
4. Select the desired sensitivity level by the /keys
(min.01; max 06)
5. Press key: the display shows “bA-by”. “bA-by” will
be flashing after 1 minute (it indicates the function has
been activated), and the RTX will switch in Stand-by
mode. The display stops flashing and the radio switches
in transmission mode when a signal/voice is heard. The
PMR sends out a note -similar to the CALL note- for 2
seconds. This note is heard from the other PMR in RX
mode: the radio switches in TX mode for 10 secs. When
the transmission is ended, the PMR switches in reception
for 10 secs. This operation will be repeated for 3 times.
BABYSITTER function deactivates all other keys except the
PTT and the lighting of the display.
The level sensitivity must be set as to the distance between
the child and the radio and the background noise level.
English

SCAN
To make Scan function operative, it is necessary:
a) turn on the radio by rotate clockwise the ON/OFF volume.
b) Press the button: “SCAN” will be blinking on the
display.
c) Press /buttons.
d) To stop Scan function, press “PTT” or key.
B.SCAN
It monitors the first free channel (without carrier) for 5 secs
amongst the 8 available.
To activate/deactivate it, follow the instructions above
described.
12 Main Features
INTERCOM FUNCTION
Thanks to the INTERCOM-function, this transceiver is especially
suitable for the use on motorbikes. The DUPLEX function
allows simultaneously communications between driver and
partner, as a phone conversation.
Connect the first headset to the Speaker/Microphone-jack at
the top of the transceiver and an optional accessory (throat
activated microphones, etc.) to the INT-jack of ALAN 456. To
use this function, set the PTT/VOX switch in PTT position.
ALAN 456 is now functioning as an Intercom system. To get
in contact with other motorbike drivers (using the same
frequency), the transmit mode can be done manually (PTT-
switch) or by voice controlled system (VOX). In this case, the
“PTT-/VOX” switch must be in “VOX” position. It is also
necessary the use of an appropriate accessory.
SCAN function
The Scan function is used to check the traffic radio on the 8
channels before transmitting.
There are 2 kinds: SCAN and B. SCAN
English

CTCSS: Continuous Tone Coded Signalling System
ALAN 456 can receive in two modalities:
a) open traffic: in this case you will hear any communication
transmitted on the selected channel.
b) group modality CTCSS/DCS: CTCSS and DCS tones
are “access keys” that allow you to receive only messages
coming from parties using same channel and code.
Speaker will remain muted until the correct CTCSS or
DCS tone is received (further details will be explained in
the successive paragraphes).
To activate 38 different CTCSS tones in RX and TX follow
these steps:
1. Turn on the radio.
2. Press button until “CTCSS” blinks on the display.
3. Select the desired tone (01/38) by the /keys.
4. Press to confirm the operations.
Now the radio transmits and receives using the programmed
CTCSS tone.
If you don’t want CTCSS tones, select “00”.
Main Features 13
CTCSS TONE CHART
No Freq.(Hz)
01 67.0
02 71.9
03 74.4
04 77.0
05 79.7
06 82.5
07 85.4
08 88.5
09 91.5
10 94.8
11 97.4
12 100.0
13 103.5
No Freq.(Hz)
14 107.2
15 110.9
16 114.8
17 118.8
18 123.0
19 127.3
20 131.8
21 136.5
22 141.3
23 146.2
24 151.4
25 156.7
26 162.2
No Freq.(Hz)
27 167.9
28 173.8
29 179.9
30 186.2
31 192.8
32 203.5
33 210.7
34 218.1
35 225.7
36 233.6
37 241.8
38 250.3
English

DCS: Digital Code Squelch
To activate the selective squelch, follow the same instructions
of “CTCSS” paragraph, but “DCS” instead of “CTCSS” must
be selected on the display.
Note: A channel can be programmed either with CTCSS or
DCS tones, but not both. DCS tones are 83. Here is the table:
14 Main Features
No
DCS code
01 023
02 025
03 026
04 031
05 032
06 043
07 047
08 051
09 054
10 065
11 071
12 072
13 073
14 074
15 114
16 115
17 116
18 125
19 131
20 132
21 134
22 143
23 152
24 155
25 156
26 162
27 165
28 172
29 174
No
DCS code
30 205
31 223
32 226
33 243
34 244
35 245
36 251
37 261
38 263
39 265
40 271
41 306
42 311
43 315
44 331
45 343
46 346
47 351
48 364
49 365
50 371
51 411
52 412
53 413
54 423
55 431
56 432
57 445
58 464
No
DCS code
59 465
60 466
61 503
62 506
63 516
64 532
65 546
66 565
67 606
68 612
69 624
70 627
71 631
72 632
73 654
74 662
75 664
76 703
77 712
78 723
79 731
80 732
81 734
82 743
83 754
English

Main Features 15
DW: Dual Watch
This function allows to monitor 2 channels at your choice:
1. Turn on the radio.
2. Select the first channel you want to monitor.
3. Press repeatedly the button until ”DW” blinks on the
display.
4. Select the second channel you want to monitor by means
of /keys.
Now the dual watch between the 2 prefixed channels starts
and stops when a carrier is heard on one of the two. Dual
watch restarts when the carrier disappears.
To stop Dual Watch function, press the key or switch
on/off the radio.
Channel storage
With ALAN 456 you can store 9 combinations of channels
with relative CTCSS –DCS tones.
Storing a channel
1. Turn on the unit
2. Press button until “M” with number 1 blinks in the
bottom right side of the display:
3. Select the desired memory (from 1 to 9) using /
keys
4. Press key: now the first number blinks on the left side
of the display
5. Select the desired channel to be stored ( from 1 to 8)
using /keys
6. Press button: you’ll see the flashing on the right of
the channel just stored. CTCSS also blinks in the upper
left side
7. Select the desired CTCSS tone using /keys
English

16 Main Features
If you desire no tone, press key when “CTCSS 00” appears
on display.
To insert a DCS tone:
1. Press button (“DCS” will blink on the display)
2. Select the desired DCS tone using /keys.
If you desire no tone, press key when “DCS 00” appears
on display.
Channel Recall
To recall the stored channel follow these instructions:
1. Press button until a number (from 1 to 9) blinks in
the bottom right side of the display
2. Use the /keys to run the stored channels
3. If a memory is empty, the memory channel blinks; if a
channel has been stored, the number remain fixed.
4. Press key to end the operations.
When turning on /off the radio, the stored channels remain
memorised in your ALAN 456.
Power save
This function allows an automatically save of the power. If you
receive no signals for 5 secs. max the “Power save“ function
is activated reducing at minimum the consumption
extending the battery life.
Battery level
The battery level indicator is visualised on the display. The
number of segments indicates the battery level.
When icon blinks, replace the alkaline batteries or
recharge Ni-Cd batteries.
Reset
If ALAN 456 presents some malfunctionings or you want to
cancel all the setting, you can make a reset by pressing
button for 3 secs during the switching on of the radio.
English

0
1
2
3
4
5
oN
LE
-03
oN
oN
FF
FF
LE
-01
(from 01 to 06
(from 01 to 06
(from 01 to 06
Summary Table 17
SUMMARY TABLE
PROGRAMMABLE FUNCTIONS: SWITCHING ON AND PRESSURE OF BUTTON
Pressure Num. key Display message Description Variation with /keys
Display message Description
Keypad beep activation
Roger Beep active
VOX Level Activation
Return in RX mode at
the end of VOX
transmission
Babysitter function
Return to condition “0”
Keypad beep
deactivation
Roger Beep
Deactivation
Increase/decrease
VOX level
Increase/decrease
of RX return
Increase/decrease
of VOX sensitivity
English

18 Technical Specifications
TECHNICAL SPECIFICATIONS
General
Channels 8
Channel spacing 12,5 KHz
Frequencies CH1:446.00625 MHz
CH2:446.01875 Mhz
CH3:446.03125 Mhz
CH4:446.04375 Mhz
CH5:446.05625 Mhz
CH6:446.06875 Mhz
CH7:446.08125 Mhz
CH8:446.09375 Mhz
Battery 3 x AA 1.5 V alkaline or 1.2 V Ni-Cd
Operating temperature - 20°C to + 55°C
Frequency control PLL synthesiser
Frequency stability ±2.5 PPM
Weight 100 gr. (without batteries)
Dimensions 50 x 95 x 25 mm
Receiver
Sensitivity better than 0.35µV for 12dB SINAD
Squelch automatic
Audio output 0.3 Watts (max)
Frequency response 300 Hz - 3000 Hz
Intermediate frequency 1st IF: 21.4 MHz - 2nd IF: 0.455 MHz
English

Technical Specifications 19
Spurious rejection within legal terms
Image rejection within legal terms
Intermodulation within legal terms
Transmitter
Frequency range CH1:446.00625 MHz
CH2:446.01875 Mhz
CH3:446.03125 Mhz
CH4:446.04375 Mhz
CH5:446.05625 Mhz
CH6:446.06875 Mhz
CH7:446.08125 Mhz
CH8:446.09375 Mhz
Output power 500 mW ERP
Type of modulation FM
Modulation capability ±2.5 Khz (max)
Spurious emission within legal terms
Frequency tolerance ±2.5 PPM (-20°C /+ 55°C)
Current drain < 350 mA @ 4.5V (dry batteries)
Stereo jack for ext. Microphone 2,5 mm
Stereo jack for ext. Speaker 3,5 mm
Stereo jack for ext. Intercom 3,5 mm
Modifications are subject to change without notice.
English
Table of contents
Other Alan Transceiver manuals