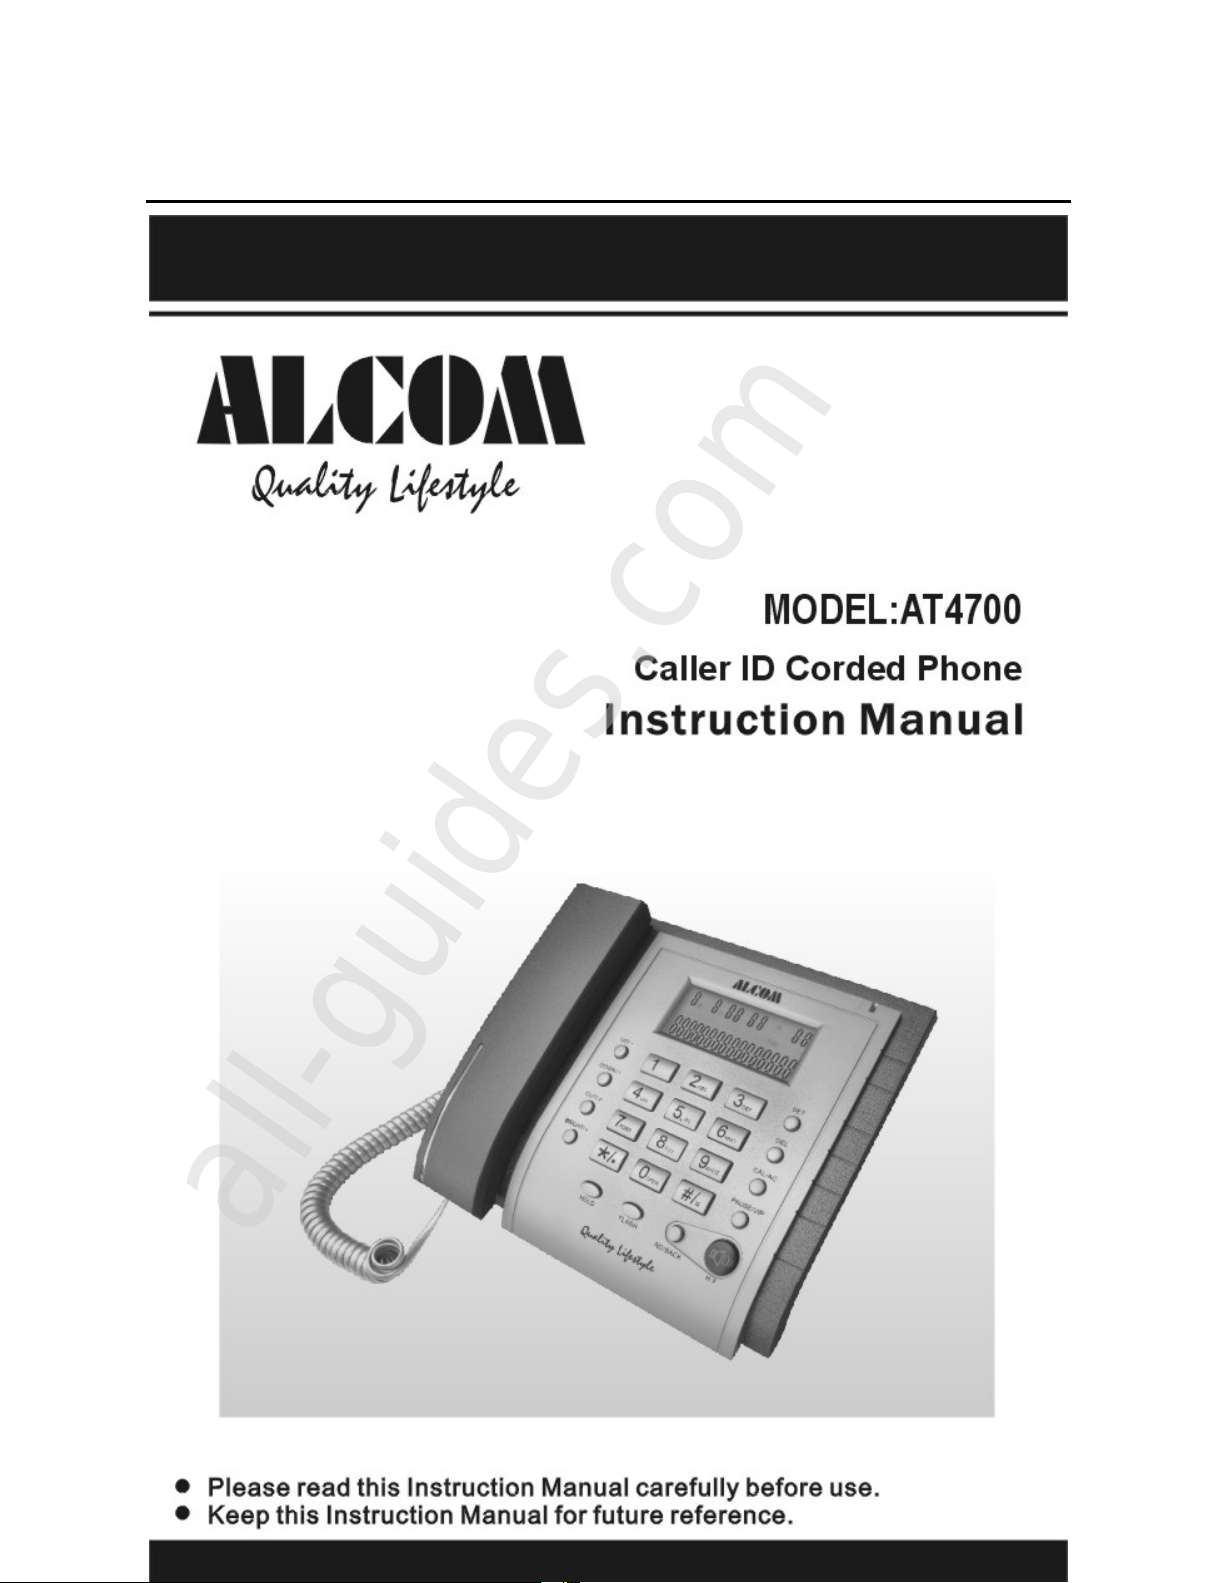
ALcom AT4700 User manual

- 0 -
All manuals and user guides at all-guides.com
all-guides.com

- 1 -
Thank you for purchasing this ALCOM Telephone.
We recommend you to read this manual and familiarize
the functions of this unit before use.
Features
FSK & DTMF caller systems compatible
12 digit 38 groups incoming memories
12 digit 5 groups outgoing memories
38 VIP memories
5 digit local area code
Pre-dial up to 32 digit number
Calculator function
Alarm clock function
Hold on music
Blue light LCD
Auto redial function
Installation Instruction
a) Apply for the Caller ID service
For your caller ID display unit to function, you may apply with
the local Telephone service provider for the Caller ID service ,
otherwise the phone would not be able to display the Caller
ID information.
All manuals and user guides at all-guides.com

- 2 -
b) Installation
Open the battery cover on back of the unit.
Insert 3 x AA batteries (1.5V) according to assigned
direction.
Close the battery cover.
Using the coil cord connect the telephone with handset.
Using the line cord connect the telephone to the
telephone wall socket.
NOTE: Do not mix different types of batteries.
Operation Guide
1.
1.
1.
1.
Basic
Basic
Basic
Basic
Setting
Setting
Setting
Setting
menu
menu
menu
menu
a) Set Date & Time
Note: In FSK Caller ID mode Date & time will auto set for a first incoming
call, however the YEAR has to be set manually.
In On-hook state, press SET
SET
SET
SET
button,
SEt
SEt
SEt
SEt
1
1
1
1
dAtE
dAtE
dAtE
dAtE
shows
in the LCD, press SET
SET
SET
SET
button again to confirm.
The cursor of year will blink, press UP/-
UP/-
UP/-
UP/-
or DOWN/+
DOWN/+
DOWN/+
DOWN/+
button to adjust, press SET
SET
SET
SET
button to confirm and enter
next step.
The cursor of month will blink, press UP/-
UP/-
UP/-
UP/-
or DOWN/+
DOWN/+
DOWN/+
DOWN/+
button to adjust, press SET
SET
SET
SET
button to confirm and enter
next step.
The cursor of day will blink, press UP/-
UP/-
UP/-
UP/-
or DOWN/+
DOWN/+
DOWN/+
DOWN/+
button to adjust, press SET
SET
SET
SET
button to confirm and enter
All manuals and user guides at all-guides.com

- 3 -
next step.
The cursor of hour will blink, press UP/-
UP/-
UP/-
UP/-
or DOWN/+
DOWN/+
DOWN/+
DOWN/+
button to adjust, press SET
SET
SET
SET
button to confirm and enter
next step.
The cursor of minute will blink, press UP/-
UP/-
UP/-
UP/-
or DOWN/+
DOWN/+
DOWN/+
DOWN/+
button to adjust, press SET
SET
SET
SET
button to confirm, then finish
the setting.
After you finish above setting, LCD will show the set
date and time and show the next available menu.
Press DEL
DEL
DEL
DEL
button to exit.
b) Set the local area code (Not applicable for use in Singapore)
On-hook state, press SET
SET
SET
SET
button once,
SEt
SEt
SEt
SEt
1
1
1
1
dAtE
dAtE
dAtE
dAtE
shows in the LCD, press UP/-
UP/-
UP/-
UP/-
button once,
SEt
SEt
SEt
SEt
2
2
2
2
COdE
COdE
COdE
COdE
will show in the LCD.
Press SET
SET
SET
SET
button to confirm,
COdE
COdE
COdE
COdE
------
------
------
------
will display,
and the first cursor
“
“
“
“
-
-
-
-
“
“
“
“
will blink
Note:The previous code will be shown if you had set before.
Press UP/-
UP/-
UP/-
UP/-
or DOWN/+
DOWN/+
DOWN/+
DOWN/+
button to adjust the number from
0 to 9.
Press SET
SET
SET
SET
button to confirm and enter the second digit,
and so on. LCD will show the next available menu.
Press DEL
DEL
DEL
DEL
button to exit.
All manuals and user guides at all-guides.com

- 4 -
c) Set the PABX code
On-hook state, press SET
SET
SET
SET
button once,
SEt
SEt
SEt
SEt
1
1
1
1
dAtE
dAtE
dAtE
dAtE
will
show in the LCD.
press UP/-
UP/-
UP/-
UP/-
button twice,
SEt
SEt
SEt
SEt
3
3
3
3
PCOdE
PCOdE
PCOdE
PCOdE
will show in the
LCD.
Press SET
SET
SET
SET
button to confirm,
PCOdE
PCOdE
PCOdE
PCOdE
-
-
-
-
-
-
-
-
will display,
and the first cursor
“
“
“
“
-
-
-
-
-
-
-
-
“
“
“
“
will blink
Note: The previous PABX code will be shown if you have set before.
Press UP/-
UP/-
UP/-
UP/-
or DOWN/+
DOWN/+
DOWN/+
DOWN/+
button to set the first PABX code
from “–“ or 0 to 9, press SET
SET
SET
SET
button to confirm and enter
the second digit.
Press UP/-
UP/-
UP/-
UP/-
or DOWN/+
DOWN/+
DOWN/+
DOWN/+
button to set the second PABX
code from “–“ or 0 to 9 , press SET
SET
SET
SET
button to confirm.LCD
will show the next available menu.
Press DEL
DEL
DEL
DEL
button to exit.
Example:
To
set your PABX out dial code 9 with pause enter “ 9- “ .
To
set your PABX out dial code 9 without pause enter “ -9 ” .
d) Set the Alarm Clock
In On-hook state, press SET
SET
SET
SET
button once,
SEt
SEt
SEt
SEt
1
1
1
1
dAtE
dAtE
dAtE
dAtE
will show in the LCD.
Press UP/-
UP/-
UP/-
UP/-
button six times,
SEt
SEt
SEt
SEt
7
7
7
7
ALErt
ALErt
ALErt
ALErt
will show in
the LCD.
Press SET
SET
SET
SET
button to confirm,
1
1
1
1
00-00
00-00
00-00
00-00
OFF
OFF
OFF
OFF
will display.
All manuals and user guides at all-guides.com

- 5 -
(1
(1
(1
(1
indicates the first group alarm you can set up to 3 group alarm, 00-00
00-00
00-00
00-00
indicates the alarm time, OFF
OFF
OFF
OFF
indicates ALARM status)
Press UP/-
UP/-
UP/-
UP/-
or DOWN/+
DOWN/+
DOWN/+
DOWN/+
button to choose group then
press SET
SET
SET
SET
button, first digit will blink, choose the digit
by
pressing UP/-
UP/-
UP/-
UP/-
or DOWN/+
DOWN/+
DOWN/+
DOWN/+
button then press SET
SET
SET
SET
to
continue to next digit.
After setting all 4 digits, press SET
SET
SET
SET
button,
OFF
OFF
OFF
OFF
will blink .
Press UP/-
UP/-
UP/-
UP/-
or DOWN/+
DOWN/+
DOWN/+
DOWN/+
button to choose alarm OFF or
ON, then press SET
SET
SET
SET
button to confirm.LCD will show the
next available menu.
Press DEL
DEL
DEL
DEL
button to exit.
2.
2.
2.
2.
Caller
Caller
Caller
Caller
ID
ID
ID
ID
menu
menu
menu
menu
In On-hook status, when there is an incoming call, LCD
shows NEW, incoming Call Log number & phone number.
The LCD shows REP
REP
REP
REP
for a repeat call.
The LCD shows
---P---
---P---
---P---
---P---
for a private call.
The LCD shows
---O---
---O---
---O---
---O---
for a overseas call.
The LCD show the
---E---
---E---
---E---
---E---
for an error call.
Check the incoming calls
On-hook status, press UP/-
UP/-
UP/-
UP/-
or DOWN/+
DOWN/+
DOWN/+
DOWN/+
button to
review the call number, date and time. If you hold
the UP/-
UP/-
UP/-
UP/-
or DOWN/+
DOWN/+
DOWN/+
DOWN/+
button for 3s, it will review
quickly.
All manuals and user guides at all-guides.com
all-guides.com

- 6 -
Press DEL
DEL
DEL
DEL
button once if you need to delete the
current number.
Hold the DEL
DEL
DEL
DEL
button for 4s if you need to delete the
all incoming calls.
Call back an Incoming call
When reviewing the incoming calls if you need to
call the displayed number press RD/BACK
RD/BACK
RD/BACK
RD/BACK
button
once and the phone will dial to that number.
Press RD/BACK
RD/BACK
RD/BACK
RD/BACK
button twice if you need to call the
displayed number with automatically adding “ 0 ” in
front of the phone number for some
Toll
free calls.
Note: Phone must be in unlocked status if you need to dial out Toll
free calls.
3.
3.
3.
3.
Outgoing
Outgoing
Outgoing
Outgoing
numbers
numbers
numbers
numbers
menu
menu
menu
menu
Check the Outgoing calls
On-hook status, press OUT/X
OUT/X
OUT/X
OUT/X
button, press UP/-
UP/-
UP/-
UP/-
button
to review the outgoing call number.
If you hold the UP/-
UP/-
UP/-
UP/-
button for 3s to review quickly.
Press DEL
DEL
DEL
DEL
button once if you need to delete the current
number.
Hold the DEL
DEL
DEL
DEL
button for 3s if you need to delete the all
outgoing calls.
All manuals and user guides at all-guides.com

- 7 -
Call back an Outgoing call
When reviewing the outgoing calls if you need to
call back the displayed number press RD/BACK
RD/BACK
RD/BACK
RD/BACK
button once and the phone will dial to that number.
4.
4.
4.
4.
Pre-dial
Pre-dial
Pre-dial
Pre-dial
Number
Number
Number
Number
Menu
Menu
Menu
Menu
In On-hook state, press the telephone number that
you want to dial.
Press RD/BACK
RD/BACK
RD/BACK
RD/BACK
button to dial out the pre-dial
number.
5.
5.
5.
5.
Hold
Hold
Hold
Hold
on
on
on
on
Music
Music
Music
Music
When you are talking, and you want put the caller
On Hold press HOLD
HOLD
HOLD
HOLD
button once and put back the
handset, the phone will send out the hold on music
to the caller.
Pick up the handset or press H.F
H.F
H.F
H.F
button to stop the
holding music and talk to the caller again.
6.
6.
6.
6.
Calculator
Calculator
Calculator
Calculator
You
can use the calculator function in off-hook or on-hook
State.
In On-hook or in the talking status, press CAL/AC
CAL/AC
CAL/AC
CAL/AC
button to enter the calculator function.
During the calculator mode, press CAL/AC
CAL/AC
CAL/AC
CAL/AC
button
once to clear all data,
Press DEL
DEL
DEL
DEL
button to exit the calculator mode.
All manuals and user guides at all-guides.com

- 8 -
The phone will auto exit the calculator mode if there
is an incoming call and the LCD will show the new
incoming call number.
For example:92 X 86: On-hook or off hook status, press CAL button
to enter the calculator status, input number 92, then press OUT/X
key. Input number 86, then press #/= key , LCD shows number
7912.
7.
7.
7.
7.
VIP
VIP
VIP
VIP
Number
Number
Number
Number
When you are checking the caller ID or outgoing
calls, press PAUSE/VIP
PAUSE/VIP
PAUSE/VIP
PAUSE/VIP
button to set the current
number to VIP number, and a lock symbol will
show in the LCD.
VIP number cannot be deleted when reviewing the
caller ID or outgoing calls, but holding the DEL
DEL
DEL
DEL
button for 3s can delete all caller ID or outgoing
calls including the VIP numbers.
When you review the VIP number, press the
PAUSE/VIP
PAUSE/VIP
PAUSE/VIP
PAUSE/VIP
button to make the VIP number in
unlock state, and the lock symbol will disappear
from the LCD.
All manuals and user guides at all-guides.com

- 9 -
8.
8.
8.
8.
Redial,
Redial,
Redial,
Redial,
Flash
Flash
Flash
Flash
&
&
&
&
Pause
Pause
Pause
Pause
Functions
Functions
Functions
Functions
When you get a busy line, press FLASH
FLASH
FLASH
FLASH
to get a
new dial tone.
Press FLASH
FLASH
FLASH
FLASH
button to answer call waiting line.
(second call) press FLASH
FLASH
FLASH
FLASH
button again to get back to
the first line.
Press RD/BACK
RD/BACK
RD/BACK
RD/BACK
button to redial the last number, or
press another telephone number to make a new call .
During the dialing, press PAUSE/VIP
PAUSE/VIP
PAUSE/VIP
PAUSE/VIP
button to
pause 3.6 second.
9.
9.
9.
9.
Select
Select
Select
Select
LCD
LCD
LCD
LCD
contrast
contrast
contrast
contrast
In On-hook state, press BRIGHT/
BRIGHT/
BRIGHT/
BRIGHT/
÷
÷
÷
÷
button
repeatedly to choose and select 5 LCD contrast
settings.
10.
10.
10.
10.
Dial
Dial
Dial
Dial
Lock
Lock
Lock
Lock
The unit provides Dial lock protection, the user can set the
lock to different settings according to the colour position
and functions as stated below.
Red: No calls can be dialed out.
Green:Telephone numbers starting with “ 0 ” cannot
be dialed out, it means you cannot make an IDD
call starting with “ 0 ” in this case.
Yellow: Allows to make any call (key pad unlocked).
All manuals and user guides at all-guides.com

- 10 -
11.
11.
11.
11.
Auto
Auto
Auto
Auto
redial
redial
redial
redial
function
function
function
function
When dialing, if the line is busy, you could use this function
to auto-redial the number.
Lift the handset or press H.F.
H.F.
H.F.
H.F.
button and dial.
If the line is busy, you could press the RD/BACK
RD/BACK
RD/BACK
RD/BACK
button directly without hanging up the handset or
press H.F
H.F
H.F
H.F
button. Then the phone will auto-redial
the number repeatedly until the other party is
connected.
12.
12.
12.
12.
Advanced
Advanced
Advanced
Advanced
Setting
Setting
Setting
Setting
menu
menu
menu
menu
a)
a)
a)
a)
Tone
Tone
Tone
Tone
/
/
/
/
Pulse
Pulse
Pulse
Pulse
Dial
Dial
Dial
Dial
setting
setting
setting
setting
In On-hook state, press SET
SET
SET
SET
button once,
SEt
SEt
SEt
SEt
1
1
1
1
dAtE
dAtE
dAtE
dAtE
will show in the LCD.
press UP/-
UP/-
UP/-
UP/-
button four times ,
SEt
SEt
SEt
SEt
5
5
5
5
P-
P-
P-
P-
t
t
t
t
will show in the
LCD.
Press set button again and
tONE
tONE
tONE
tONE
will show in the display .
Press UP/-
UP/-
UP/-
UP/-
or DOWN/+
DOWN/+
DOWN/+
DOWN/+
to choose TONE
TONE
TONE
TONE
or PULSE.
PULSE.
PULSE.
PULSE.
Press SET
SET
SET
SET
button to confirm. LCD will show the next
available menu.
Press DEL
DEL
DEL
DEL
button to exit.
All manuals and user guides at all-guides.com
all-guides.com

- 11 -
b)
b)
b)
b)
Set
Set
Set
Set
Anti-parallel
Anti-parallel
Anti-parallel
Anti-parallel
Dial
Dial
Dial
Dial
protection
protection
protection
protection
If this function is set all parallel phones connected with
the same telephone line will not be able to dial out.
This unit will send a dial signal when the parallel phone
is lifted to prevent it from dialing out.
In On-hook state, press SET
SET
SET
SET
button once,
SEt
SEt
SEt
SEt
1
1
1
1
dAtE
dAtE
dAtE
dAtE
will show in the LCD.
press UP/-
UP/-
UP/-
UP/-
button five times,
SEt
SEt
SEt
SEt
6
6
6
6
ALAr
ALAr
ALAr
ALAr
will show in
the LCD.
Press SET
SET
SET
SET
button again and
ALAr
ALAr
ALAr
ALAr
OFF
OFF
OFF
OFF
will show in
the display.
Press UP/-
UP/-
UP/-
UP/-
or DOWN/+
DOWN/+
DOWN/+
DOWN/+
to choose
ALAr
ALAr
ALAr
ALAr
OFF
OFF
OFF
OFF
or
ALAr
ALAr
ALAr
ALAr
ON
ON
ON
ON
.
.
.
.
Press SET
SET
SET
SET
button to confirm.LCD will show the next
available menu.
Press DEL
DEL
DEL
DEL
button to exit.
All manuals and user guides at all-guides.com

- 12 -
FREQUENTLY
FREQUENTLY
FREQUENTLY
FREQUENTLY
ASKED
ASKED
ASKED
ASKED
QUESTIONS
QUESTIONS
QUESTIONS
QUESTIONS
1.
1.
1.
1.
NO
NO
NO
NO
TONE
TONE
TONE
TONE
Please check all the lines connections, and ensure all the
connections are proper.
2.
2.
2.
2.
CAN
CAN
CAN
CAN
NOT
NOT
NOT
NOT
MAKE/DIAL
MAKE/DIAL
MAKE/DIAL
MAKE/DIAL
A
A
A
A
CALL
CALL
CALL
CALL
Please check the lock position and ensure Keys are unlocked.
3.
3.
3.
3.
NOISE
NOISE
NOISE
NOISE
Please check if the line cord or wall plug is moistured.
4.
4.
4.
4.
ONLY
ONLY
ONLY
ONLY
GIVING
GIVING
GIVING
GIVING
ONE
ONE
ONE
ONE
RING
RING
RING
RING
WHILE
WHILE
WHILE
WHILE
STILL
STILL
STILL
STILL
CAN
CAN
CAN
CAN
MAKE
MAKE
MAKE
MAKE
A
A
A
A
CALL
CALL
CALL
CALL
Please check the line connection, check if too many phones are
connected in the same line, or the wall socket or
Tel
Line cord is
moistured.
5.
5.
5.
5.
CANNOT
CANNOT
CANNOT
CANNOT
DISPLAY
DISPLAY
DISPLAY
DISPLAY
CALLER
CALLER
CALLER
CALLER
ID
ID
ID
ID
a. Be sure that you have applied this service from a Telecom
service provider
b. Check if the battery has not drained and it has power.
c.Check if an apparatus is connected between unit and
Telephone line. (Example micro filters used in an ADSL line)
If the unit still does not work properly, disconnect all the
telephone cords, remove the batteries, after 5 minutes, reload
batteries, insert the telephone line. The unit will get a reset.
Start using the unit.
All manuals and user guides at all-guides.com

- 13 -
Note: Due to continuous product development All features and
specifications are subject to change without prior notice
For
For
For
For
more
more
more
more
Information
Information
Information
Information
on
on
on
on
Warranty
Warranty
Warranty
Warranty
and
and
and
and
Product
Product
Product
Product
Support
Support
Support
Support
in
in
in
in
Singapore
Singapore
Singapore
Singapore
please
please
please
please
call
call
call
call
(65)
(65)
(65)
(65)
68412668
68412668
68412668
68412668
or
or
or
or
Fax
Fax
Fax
Fax
to
to
to
to
(65)
(65)
(65)
(65)
68412628.
68412628.
68412628.
68412628.
Email:
Email:
Email:
Email:
support@alcom.com.sg
Website:
Website:
Website:
Website:
www.alcomonline.com
www.alcomonline.com
www.alcomonline.com
www.alcomonline.com
All manuals and user guides at all-guides.com
Other manuals for AT4700
1