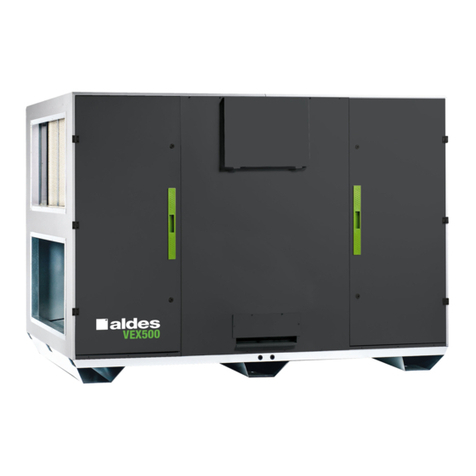
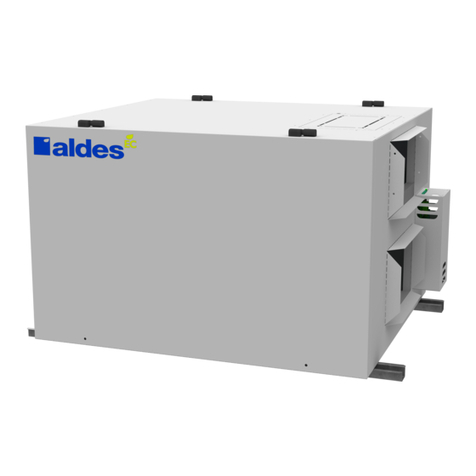
aldes InspirAIR Commercial Series User manual

INSTALLATION AND
OPERATION MANUAL
InspirAIR® Commercial
Series

CAUTION
IMPORTANT –Read this manual before installation
2Warning
CAUTION
2
Always turn off electrical power and verify that the unit is
electrically safe before performing any maintenance on the unit.
This unit contains high-voltage electrical components.
This unit has moving parts. All repairs and maintenance should
be performed by a qualified technician to avoid serious injuries.
Always turn OFF electrical power and verify that the unit is
electrically safe before performing any maintenance on the
unit.
NO modifications shall be made to the unit under any
circumstances. WARRANTY will be immediately voided.
Do not use this device to EXHAUST steam, inflammable or
explosive gases.
Electrical connections shall be made by aQUALIFIED
electrician.
Airflows shall be as per the APPROVED SUBMITTAL in
order for the ventilation system to function properly and the
WARRANTY be honorred.
Installation shall be completed in CONFORMANCE with
LOCAL construction and safety codes.
ALL drawings, photos and diagrams contained in this
document are for REFERENCE purposes only. Units may
differ.
ALDES reserves the RIGHT to MODIFY unit and its
components without prior warning.
Tel. CAN.: 1-800-262-0916 USA.:1-800-255-7749 www.aldes.com

3
Table of Contents
3
Tel. CAN.: 1-800-262-0916 USA.:1-800-255-7749 www.aldes.com
4Warranties and Exclusions
4
Warranty
ALDES products are guaranteed to be defect-free for a period of (2) years from the
date of purchase.
Labor not included.
EC motors are guaranteed for (1) year
Modifications were made by or for the client.
Product was POORLY installed.
Maintenance, cleaning and lubrification were NOT EXECUTED in accordance
with ALDES recommendations.
ALL installation fees and labor relating to product repairs.
ALL fees related to a loss of operations, merchandise, inventory or equipment
due to a defective ALDES product.
Warranty does not apply if:
Warranty Exclusions
Tel. CAN.: 1-800-262-0916 USA.:1-800-255-7749 www.aldes.com

5
Preparing for Installation
5
Unpacking Your Unit
Remove the protective wrapping from the unit including the
foam protection at each corners. Extra care should taken to
not scratch the painted surfaces. Appropriately dispose of
materials accordingly to local and/or project specific
requirement.
Inspecting Your Unit
Visually inspect the unit to ensure that no sheet metal has
been dented or scratched. Verify that the air intake and exaust
hoods have not been damaged in transport.
Warning: Do not remove the shipping attachments until the
unit has been moved to its final location.
Transport Method
Your unit is equipped with anchors for handling purposes only.
Strictly follow Lifting Standards before handling your unit.
Always use ALL anchors points SIMULTANEOUSLY.
Tel. CAN.: 1-800-262-0916 USA.:1-800-255-7749 www.aldes.com
Anchor

6Device Handling
6
Using a Forklift to Move the Unit
Before using a forklift to move your unit, you must follow several safety
rules:
The capacity of the forklift must exceed the weight of the unit.
Raise the device as shown in the diagram below. This is the only
method authorized by ALDES to move the unit using a forklift.
Transportation of the unit must be executed by a qualified forklift
operator.
Ensure that the forklift skids are a minimum of 6 inches longer than
the width of the unit.
Tel. CAN.: 1-800-262-0916 USA.:1-800-255-7749 www.aldes.com

7
Installation
7
Ventilation Unit
Galvanized Steel Flashing
Rigid Insulation (optional)
Building Structure
Roof Covering
Waterproof Seal (not included)
Roof curb Installation (optional)
Install the roof curb as indicated in the accompanying document provided.
Tel. CAN.: 1-800-262-0916 USA.:1-800-255-7749 www.aldes.com
8
Installation
8
Blower Belt tension setting
In order to avoid unusual wear of moving pieces, adjust belt tension at
minimum value to avoid slipping. Belt tension is adjusted by the
adjusting screws as illustrated below.
Tel. CAN.: 1-800-262-0916 USA.:1-800-255-7749 www.aldes.com
Adjustment bolts

9Electrical Connections
DANGER
9
Open the exterior panel using the handles (Picture 1).
You must unlock the handles with the appropriate key in order to
open the panel (Picture 1).
Turn the handles downward as indicated in the Picture 1.
This device contains high-voltage electrical components. All
maintenance shall be done by a qualified technician to prevent
serious injuries and possible death. Installation shall be
completed in conformance with local building and safety codes.
Tel. CAN.: 1-800-262-0916 USA.:1-800-255-7749 www.aldes.com
Picture 1
5/16’’

10
Electrical Connections
10
Connect the unit to the power grid using the disconnect switch. Such
connection shall be made by a certified electrician in accordance with the
applicable electrical code.
DANGER
This device contains high-voltage electrical components. All
maintenance shall be done by a qualified technician to prevent
serious injuries and possible death. Installation shall be
completed in conformance with local building and safety codes.
Tel. CAN.: 1-800-262-0916 USA.:1-800-255-7749 www.aldes.com
*Unit’s specific control panel may differ. For reference only.

11 Set-Up Sequence
11
Make sure the Ground Wire is securely fasten to the appropriate socket.
Such connection shall be made by a certified electrician in accordance
with the applicable electrical code.
DANGER
This device contains high-voltage electrical components. All
maintenance shall be done by a qualified technician to prevent
serious injuries and possible death. Installation shall be
completed in conformance with local building and safety codes.
Tel. CAN.: 1-800-262-0916 USA.:1-800-255-7749 www.aldes.com
* Unit’s specific control panel may differ. For reference only.

12
Set-Up Sequence
12
L1 –L2 : ________________________________
L1 –L3 : ________________________________
L2 –L3 : ________________________________
L1 –G : _________________________________
L2 –G : _________________________________
L3 –G : _________________________________
A maximum deviation of ±5% is acceptable.
Measure the voltage of the main circuit breaker and note
the values(1 Phase or 3 Phases). Such Measurement shall
be made by a certified electrician in accordance with the
applicable electrical code.
Use the Electrical Wiring Diagram (supplied separatly) as a
reference to , close the Start/stop and Occupancy control
Dry contact (optional).
3- Close the main disconect switch, the unit will start
DANGER
This device contains high-voltage electrical components. All
maintenance shall be done by a qualified technician to prevent
serious injuries and possible death. Installation shall be
completed in conformance with local building and safety codes.
Tel. CAN.: 1-800-262-0916 USA.:1-800-255-7749 www.aldes.com
DANGER
This device contains high-voltage electrical components. All
maintenance shall be done by a qualified technician to prevent
serious injuries and possible death. Installation shall be
completed in conformance with local building and safety codes.
WARNING: from this point on, the unit is no longer electrically safe.

13 Device Start-Up
13
DANGER
This device has moving parts. All repairs should be made by a
qualified technician in order to avoid serious injury.
Verify that the motors and blowers are rotating in the
proper direction.
DANGER
This device contains high-voltage electrical components. All
maintenance shall be done by a qualified technician to prevent
serious injuries and possible death. Installation shall be
completed in conformance with local building and safety codes.
Tel. CAN.: 1-800-262-0916 USA.:1-800-255-7749 www.aldes.com
AC Motors EC Motors

14
Device Start-Up
14
RECOMMENDATION
Before turning on your new device, inspect the condition of the
ventilation ducts. Clean the ducts before turning on your device.
If building construction has not yet been completed, we
recommend that you wait until work has been finished before
starting up your device. An abnormal volume of dust in the air
could clog the device filters and cause damage to the motors.
Ensure that all diffusers are opened to their maximum capacity
before turning on your device. It is common to notice a faint
smell of burning upon the first start-up.
CAUTION
This device should be installed and balanced by a specialized
contractor in ventilation services.
WARNING
Electrical currents remain at the capacitors for 5 minutes after
circuits disconnect have been opened. The following electrical
components may not be electrically safe immediately:
Variable Frequency Drive for the blowers motors.
Tel. CAN.: 1-800-262-0916 USA.:1-800-255-7749 www.aldes.com

15 Options Glossary
15
Dirty filters contact :
A dry contact, available at the unit’s terminal board, closes when the
pressure drop accros a specific filter banks reaches its final pressure
drop.
Blowres rotation detection:
Unit stops if rotation if the pressure increase in the supply air blower is null.
End switch on Dampers :
Unit start-up conditionnaly to the dampers openings
BacNet compatible Controler :
Unit is controlled using a BacNet compatible controller. The controller
can communicate with either a:
MS/TP connection or
IP connection
Remote Displays:
Offered with command buttons or with touch screen (Only available with the
BacNet controller).
Control Options
Tel. CAN.: 1-800-262-0916 USA.:1-800-255-7749 www.aldes.com
IMPORTANT
The following options may not be included with your device.
Consult the specifications form provided with your device for
more information.
Low Temperature limit:
Unit will stop if supply air temperature is under set point ( adjustable)
for more than 5 minutes
Programmable Timer
Phase Loss Detection:
Unit will stop when a phase loss occurs, automatic restart (3-phase
power only)

16
Options Glossary
16
Defrost Modes
Built-in self controlled electric preheating coil (SSR-controlled).
The unit preheat the outside air at a given set point at which
no frost will occur. The electric coil is Self controlled and
powered by the unit (single point power connection).
Built-in liquid preheating coil
The unit preheat the outside air at a given set point at which
no frost will occur.A 0 to 10VDC control signal is available to
control external hydronic valves (supplied by others)
Fan defrost.
The unit monitors the exhaust air temperature and when it
drop below a reference temperature, the unit shut off the
supply air blower and close the outside air damper. The
exhaust mode will continue until the exhaust air temperature
reach back the reference temperature.
Recirculation defrost cycles.
The unit monitors the outdoor air and when it reaches below
a specific temperature, the unit start the recirculation cycles.
The exhaust blower will be shut down, the outside air
damper will be closed and the recirculation damper will be
opened.
Tel. CAN.: 1-800-262-0916 USA.:1-800-255-7749 www.aldes.com
IMPORTANT
All of the defrost modes listed below may not be included with
your device. Consult the specifications form provided with your
device for more information.
Defrost Options
Fixed plate exchanger
°C °F Temps
dégivrage Temps échange
T° > T0°C T° > 23°F N/A Continu
-
25°C < T° < -5°
C
-
13°F < T° < 23
°F
7 min 32 min
T° < -25°C T° < -13°F 7 min 20 min
T0= -5°C ForAluminium and Polypropylene cores (HRV).
T0= -10°C For Enthalpy cores (ERV)
T0= -15°C For Enthalpy wheel cores (ERV)

17 Options Glossary
17
MERV13 Filters :
Replacement of the original filters by aHE filters ( Merv 13).
Extruded Aluminum Insulated dampers:
Activated by a servomotor upon admission of fresh or exauhst air.
Non-InsulatedBackdraft Gravity dampers (for evacuation purposes only).
Post-Heating Coil:
Electric or liquid (0-10 VDC signal provided by other components to
maintain air input temperature).
Components Options
Tel. CAN.: 1-800-262-0916 USA.:1-800-255-7749 www.aldes.com
IMPORTANT
The following options may not be included with your device.
Consult the specifications form provided with your device for
more information.

H
J
L
18
Options Glossary
18
Intake and Exhaust Hoods:
Hoods on the intake opening and the exhaust opening to protect from
rain and snow. Comes with bird screen mesh.
Roof curb:
14 inches in height, insulated or non-insulated, in 18-calibre galvanized
steel.
Piping connection (for hydronic coils and drain pan) :
Can be located either at the front of the unit (same side as the doors)
or at the back of the unit (opposite side of the doors).
Always consult a professional plumber to connect the drain pans.
Typical installation uses a properly sized P-Trap. (For outdoor
installation, the P-trap can be removed to avoid frozen condensation).
Unit Features
IMPORTANT
The following options may not be included with your device.
Consult the specifications form provided with your device for
more information.
Tel. CAN.: 1-800-262-0916 USA.:1-800-255-7749 www.aldes.com
Use the submittal sheet as
reference to calculate H, J and L
H = 1’’ for each 1’’ of maximum
negative static pressure + 1’’.
J = Half of H.
L = H + J + Pipe diameter +
Insulation
Negative pressure
P-trap dimensions

19
Options Glossary
19
IMPORTANT
The following options may not be included with your device.
Consult the specifications form provided with your device for
more information.
Tel. CAN.: 1-800-262-0916 USA.:1-800-255-7749 www.aldes.com
Construction : TEFC
Available with AC motorisation
Blowers Motor Options
Two speeds application:
AC motorisation: Preprogrammed VFD for a two speed application
is used. The unit goes into high speed using a dry contact.
EC motorisation : preprogrammed speeds on the motor. The unit
goes into high spped using a dry contact.
Variable speeds :
AC motorisation: A single speed motor is controlled with a VFD.
The unit speed is controlled using a 0-10 VDC signal provided by
others.
EC motorisation : The unit speed is controlled using a 0-10 VDC
signal provided by others.

20 Maintenance
20
CAUTION
Always turn off electrical power before performing device
maintenance. Device contains high-voltage electrical
components.
Every 3 months
Check the condition of the filters and make replacements
if necessary.
Check the condition and tension of belts. Adjust or replace
if necessary.
Check the condition of ventilators and clean if needed.
Check the condition of the wheel. The wheel is normally self-
cleaning due to reversing of cool and contaminated air
currents; however, certain conditions may cause grease build-
up or accumulation of particles. Clean the wheel with water
and mild soap. Note that the desiccant will not be affected
during cleaning operations.
Check the condition of the brushes on the thermal wheel and
make adjustments if necessary.
Check the condition of the belt on the thermal wheel.
Every 12 months
Polypropylene or aluminum cores: remove and clean with
water and mild soap.
Enthalpic cores: clean with compressed air or vacuum
cleaner.
Thoroughly clean the inside of the unit.
Tel. CAN.: 1-800-262-0916 USA.:1-800-255-7749 www.aldes.com
Other aldes Heating System manuals
Popular Heating System manuals by other brands

Schulte
Schulte Heizstab 5 user manual

Midea
Midea CE-HRV-2000 Owners manual and installation manual

Paul
Paul FOCUS 200 Base operating instructions

wirsbo
wirsbo ProMIX 101 Series Installation and operating instructions for the installer

AERMEC
AERMEC TRS 1001DX Unique manual

Navien
Navien COMFORTMATE EQH-20WUS installation instructions

International Thermal Research
International Thermal Research OASIS Chinook Installation and operating manual

Ideal Clima
Ideal Clima KERS 25 User's and installer's manual

Stelpro
Stelpro ASBB Series user guide

Keston
Keston HEAT 45 instructions

Lennox
Lennox CompleteHeat AM30 User's guide & installation instructions

BLAUBERG Ventilatoren
BLAUBERG Ventilatoren HRV H 200 Operation manual