9www.observint.com © 2019 Observint Technologies. All rights reserved.
6. Repeat the above steps to congure other regions. Up to 4 regions can be set. Click Clear button
to clear a pre-dened region.
7. Click Arming Schedule to set the time when this feature will be detected. By default, the
feature is always armed when enabled. To create a custom arming schedule:
—To clear the arming schedule for a day of the week, click on the colored bar for that day,
and then click Delete in the popup menu.
—To set an arming schedule for a period of a day that is clear, drag the cursor across the
period of the day you want to arm, and then click OK in the popup menu.
—To copy the arming schedule for one day of the week to other days, place the cursor over
the day you want to copy, then click the green icon that appears to the right. Select the
days you want to copy the schedule to, and then click OK.
—Click the Save button to retain your settings.
8. Click Linkage Method to select the linkage methods options menu. To congure the Linkage
Methods menu, check the select boxes for the options you want to use.
9. Click the Save button to retain your settings.
Region Exiting Detection Smart Event setup
Region exiting detection feature detects people, vehicle or other objects that leave a pre-dened virtual
region. You can congure the minimum (Min) and maximum (Max) size of the object that leaves
the region. This alarm can trigger actions performed by the camera to report and record the alarm
information.
1. Open the Region Exiting Detection settings menu.
Go to Setup | Event | Smart Event | Region Exiting Detection
2. Check the Enable select box to enable the feature.
3. Select a Region number from the drop-down. You can congure up to four (4) regions.
4. To create a detection region where an alarm is triggered:
a. Click the Detection Area button.
b. Click a point on the screen to set one corner of the detection region, and then click three
more points in a circular fashion to set three other corners of the detection region. A
quadrilateral will appear that is tinted yellow. See above.
c. Drag a corner of the Max box on the screen to change it’s size. Similarly you can change
the size of the Min box. Targets with sizes larger than Max or smaller sizes than Min will
not trigger detection. Also, you can click the Max. Size button and/or Min. Size button
to turn o these features.
d. Set the following options:
Detection Target: Select either Human or Vehicle (or both).
Sensitivity: Range [1-100]. The value of the sensitivity denes the at which an object
can trigger the alarm. When the sensitivity is high, objects are more likely to trigger the
alarm.
5. Click the Save button to retain your settings.
6. Repeat the above steps to congure other regions. Up to 4 regions can be set. Click Clear button
to clear a pre-dened region.
7. Click Arming Schedule to set the time when this feature will be detected. By default, the
feature is always armed when enabled. To create a custom arming schedule:
—To clear the arming schedule for a day of the week, click on the colored bar for that day,
and then click Delete in the popup menu.
—To set an arming schedule for a period of a day that is clear, drag the cursor across the
period of the day you want to arm, and then click OK in the popup menu.
—To copy the arming schedule for one day of the week to other days, place the cursor over
the day you want to copy, then click the green icon that appears to the right. Select the
days you want to copy the schedule to, and then click OK.
—Click the Save button to retain your settings.
8. Click Linkage Method to select the linkage methods options menu. To congure the Linkage
Methods menu, check the select boxes for the options you want to use.
9. Click the Save button to retain your settings.
Specications
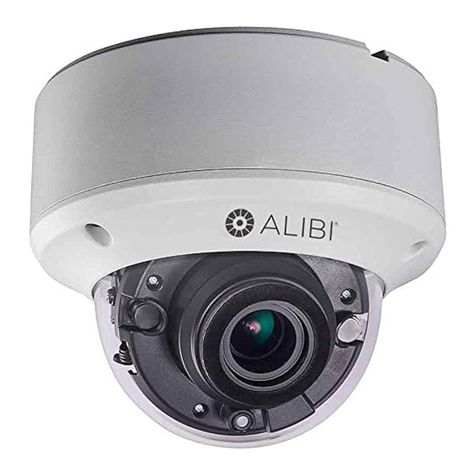
Camera ALI-NS4128R
Image Sensor: 1/2” Progressive Scan CMOS
Min. Illumination: Color: 0.008 Lux @ (F1.2, AGC ON), 0.011 Lux @ (F1.4, AGC ON)
Shutter time: 1/3 s to 1/100,000 s
Slow shutter: Yes
Day and Night IR cut lter
Digital noise reduction: 3D DNR
Wide Dynamic Range: 120 dB
3-Axis Adjustment
Range: Pan: 0° to 360°, tilt: 0° to 90°, rotate: 0° to 360°
Lens
Focal Length 2.8 to 12 mm,
Lens type Motorized
Aperture F1.4
Focus Auto
FOV
Horizontal eld of view: 112° ~ 46°
Vertical eld of view: 60° ~ 26°
Diagonal eld of view: 133° ~ 53°
Lens mount Φ14
IR
IR range 170 ft
Wavelength 850 nm
Compression Standard
Video Compression
Main stream: H.265 / H.264
Sub stream: H.265 / H.264 / MJPEG
Third stream: H.265 / H.264
H.264 Type Main Prole/High Prole
H.264+ Main stream supported
H.265 Type Main Prole
H.265+ Main stream supported
Video bit rate: 32 Kbps~16 Mbps
Smart Feature set
Behavior Analysis Line crossing detection, intrusion detection, unattended baggage detection, object removal
detection
Exception Detection Scene change detection
Face Detection Yes
ROI (Region of Interest) Support 1 xed region for main stream and sub stream separately
Image
Max. Image Resolution: 3840 × 2160
Main Stream: 50 Hz: 20 fps (3840 × 2160), 25 fps (3072 × 1728, 2560 × 1440, 1920 × 1080, 1280 × 720)
60 Hz: 20 fps (3840 × 2160), 30 fps (3072 × 1728, 2560 × 1440, 1920 × 1080, 1280 × 720)
Sub Stream: 50 Hz: 25 fps (640 × 480, 640 × 360, 320 × 240)
60 Hz: 30 fps (640 × 480, 640 × 360, 320 × 240)
Third Stream 50 Hz: 25 fps (1280 × 720, 640 × 360, 352 × 288)
60 Hz: 30 fps (1280 × 720, 640 × 360, 352 × 240)
Image Enhancement: BLC /3 D DNR / HLC
Image Settings: Rotate mode, saturation, brightness, contrast, sharpness, AGC, white balance adjustable by
client software or web browser
Day / Night switch Day / Night / Auto / Schedule
