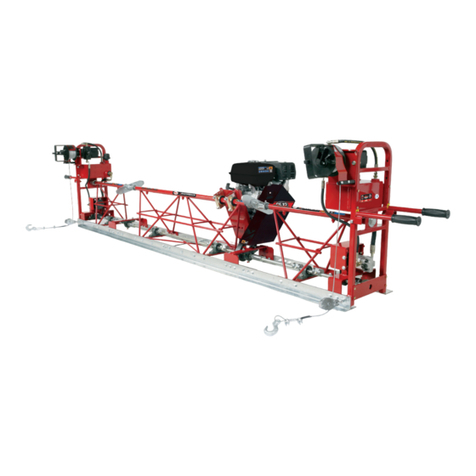
allen WB1824 User manual

SAFETY & PARTS MANUAL
WB1824 - WORK BRIDGE
Manual Part #: 068522 | Revision: -
Language: English | Original Instructions

068522
Page 2
SAFETY & OPERATIONS MANUAL
This manual covers the products listed below:
Part No. Description
- WB1824, Work Bridge
Work Bridge
Copyright © 2019 Allen Engineering Corporation
All rights reserved
All information, specifications, and illustrations in this manual are subject to change without notice and
are based on the latest information at the time of publication. No part of this manual may be reproduced
or transmitted in any form or by any means, electronics or mechanical, for any purpose, without the
express written permission of Allen Engineering Corporation (AEC). AEC assumes no responsibility or
liability for any errors or inaccuracies that may appear in this manual.
Allen Products are covered under one or more of the following patent numbers:
10,100,537; 9,068,301; 9,068,300; 8,360,680; 7,690,864; 7,114,876B1; 6,857,815B2; 6,582,153
With other Patents Pending.
Printed in U.S.A.
This manual, or a copy of it, must be kept with the machine at all times.
There is a manual storage container located on the machine for your convenience.

068522 Page 3
GENERAL
INFORMATION
Allen Engineering Corporation (“Allen”) warrants its products to be free of defects in
material or workmanship for:
TWO YEARS FROM END USER’S DATE OF PURCHASE
Warranty period begins on the date of purchase by the End User of the product. All
warranty is based on the following limited warranty terms and conditions, including the
disclaimer of implied warranties and consequential damages.
1. Allen’s obligation and liability under this warranty is limited to repairing or replacing parts if, after Allen’s
inspection, there is determined to be a defect in material or workmanship. Allen reserves the choice to
repair or replace.
2. If Allen chooses to replace the part, it will be at no cost to the customer and will be made available to the
Allen Distributor, Dealer, or Rental Center from whom the End User purchased the product.
3. Replacement or repair parts, installed in the product, are warranted only for the remainder of warranty
period of the product as though they were the original parts.
4. Allen does not warranty engines or batteries. Engine warranty claims should be made directly to an
authorized factory service center for the particular engine manufacturer. Batteries are not warranted due
to unknown treatment during transport, etc, and any battery claims should be directed to the battery
manufacturer.
5. Allen’s warranty does not cover the normal maintenance of products or its components (such as engine
tuneups and oil & lter changes). The warranty also does not cover normal wear and tear items (such
as belts and consumables).
6. Allen’s warranty will be void if it is determined that the defect resulted from operator abuse, failure to
perform normal maintenance on the product, modication to product, alterations or repairs made to the
product without the written approval of Allen. Allen specically excludes from warranty any damage to
any trowels resulting from an impact to the rotors.
7. Impact damage to gear boxes is not covered under the Allen warranty and is deemed customer abuse.
8. Allen will pay shop labor on warranty items at the Allen Shop Labor Rate in existence on the date of the
warranty claim.An Allen labor chart will determine the time allowed to complete a repair and will govern
the shop labor hours that will be allowed.
9. Allen will pay freight on warranty replacement parts at worldwide standard ground rates. No warranty
replacement parts will be shipped air freight at the expense of Allen. Allen only pays outbound freight
charges when sending warranty replacement parts to the customer via ground service. Allen does not
pay any inbound freight. However, if Allen determines this to be a warranted item, only then will Allen
reimburse the customer for inbound freight at standard ground rates.
10. ALLEN ENGINEERING CORPORATION’S WARRANTY POLICY WILL NOT COVER THE FOLLOWING: TAXES;
SHOP SUPPLIES; ENVIRONMENTAL SURCHARGES; AIR FREIGHT; TRAVEL TIME; LOSS OF TIME; INCON-
VENIENCE; LOSS OF RENTAL REVENUE; RENTAL COSTS OF EQUIPMENT USED TO REPLACE THE PROD-
UCT BEING REPAIRED; LOSS OF USE OF THE PRODUCT; COMMERCIAL LOSS; OR ANY OTHER CHARGES
WHATSOEVER OR ANY LIABILITIES FOR DIRECT, INCIDENTAL, OR CONSEQUENTIAL DAMAGE OR DELAY.
11. ALLEN ENGINEERING CORPORATION MAKES NO OTHER WARRANTY, EXPRESSED OR IMPLIED. THIS LIM-
ITED WARRANTY IS IN LIEU OF THE WARRANTY OF MERCHANTABILITY AND FITNESS. THERE ARE NO
OTHER WARRANTIES THAT EXTEND BEYOND THE DESCRIPTION ON THIS DOCUMENT.
12. No Allen employee or representative is authorized to change this warranty in any way or grant any
other warranty unless such change is made in writing and signed by an ofcer of Allen Engineering
Corporation.
Limited Warranty

GENERAL
INFORMATION
068522
Page 4
Table of Contents
Sect Title Page
- General Information
Limited Warranty ........................................................................................................3
Load Capacity Ratings.................................................................................................5
Information Contained in This Manual.........................................................................6
Dealer Information / Ordering Parts.............................................................................7
Model Number - Serial Number Codes........................................................................8
Technical Specifications..............................................................................................9
1.0 Safety ......................................................................................................................10
Federal / State Warning Regulations .........................................................................11
Manual Tag Safety Detail ..........................................................................................12
Spark Arrestor Notice / Hazard Symbols ...................................................................13
Operating Safety .......................................................................................................14
Engine Safety............................................................................................................15
Service Safety...........................................................................................................16
Lifting Safety.............................................................................................................17
Transportation Safety................................................................................................19
2.0 Assembly.................................................................................................................20
Assembly Instructions ...............................................................................................21
3.0 Parts ........................................................................................................................26
Mainframe Sizes .......................................................................................................27
Mainframe Assembly - 3 Foot...................................................................................28
Mainframe Assembly - 6 Foot...................................................................................29
Mainframe Assembly - 12 Foot.................................................................................30
Mainframe Assembly - Telescoping, 15-25 Foot.......................................................32
Mainframe Assembly - Telescoping, Opposite End, 15-25 Foot.................................34
Adjustable End Frame Bracket ..................................................................................36
Paving Style Wheel Slide Assembly...........................................................................37
Pneumatic Tire Assembly..........................................................................................38
Powered Pneumatic System Assembly.....................................................................39
Pneumatic Wheel, Right Hand Section Assembly ......................................................40
Pneumatic Wheel, Left Hand Section Assembly.........................................................42
Bridge Deck End Bracket Assembly ..........................................................................44
Cup Wheel Tire Assembly .........................................................................................46
Bridge Deck Style Wheel Options ..............................................................................47
Power Wheel Conversion Kit .....................................................................................48
WB Power Wheel, Power Unit....................................................................................50
Cleaning Procedure...................................................................................................52
Revision Detail ..........................................................................................................53

068522 Page 5
GENERAL
INFORMATION
Load Capacity Ratings
Notes on Load Capacity Ratings:
1. Maximum span/rating with 12 ft sections (x8): 97ft @ 1000lbs
• Total span above INCLUDES End Frame and Wheels
• Total span of SECTIONS ONLY: 96 ft
2. All ratings are calculated using the largest sections available to achieve desired length.
• Excluding telescoping sections.
3. Load ratings are calculated using pneumatic tires.
4. Deection should exceed no more than 1.32” with Maximum span/weight applied.
5. Cable Tensioning Kit may be used to increase load capacity on larger workbridges. This is
NOT recomended without consulting an AEC product support specialist or Authorized AEC
dealer FIRST!
6. Calculations are done without factoring weather. Please note that in adverse weather
conditions, capacity ratings need to be decreased.
Please contact Allen Engineering PRODUCT SUPPORT with any questions reguarding load
capacity.
500
1000
1500
2000
2500
3000
3500
45 50 55 60 65 70 75 80 85 90 95 100
RATEDCAPACITY
(inPounds)
SPAN
(inFeet)
WB1824‐ CapacityRatings

GENERAL
INFORMATION
068522
Page 6
This manual provides information and procedures to safely operate and maintain the Allen
Machine.
For your own safety and protection from personal injury, carefully read, understand, and
observe the safety instructions described in this manual. Keep this manual or a copy of it with
the machine at all times.
Always operate this machine in accordance with the instructions described in this manual. A
well maintained piece of equipment will provide many years of trouble free operation.
This manual is divided into the following sections:
Complete any warranty requirements as specified by the engine manufacturer in their instruc-
tions found inside the manual box located on the back of the riding trowel operator’s seat.
Your engine and clutch is not manufactured by Allen Engineering Corporation, Inc, and there-
fore is not covered under Allen Engineering Corporation, Inc warranty.
Your engine manufacturer should be contacted if you wish to purchase a parts manual or a
repair manual for your engine.
Refer to enclosed owners engine manual for complete O&M instructions. See your battery
manufacturer for battery warranty.
SECTION 1
SAFETY
SECTION 2
ASSEMBLY
Information Contained
in this Manual
SECTION 3
PARTS

068522 Page 7
GENERAL
INFORMATION
Dealer Information /
Ordering Parts
Your Dealer has Allen Engineering Corporation trained mechanics and original Allen replace-
ment parts. Always contact the Allen Dealer who sold you this machine for Allen Certified
repairs and replacement parts.
Place Allen Dealer information below for future reference.
Dealer Name:
Dealer Phone #:
( ) - -
Address:
City / State / Zip:
Salesman:
Salesman Phone #:
Addistional Comments:
Follow the instructions below when ordering parts to insure prompt and accurate delivery:
1. All orders for service parts - include the serial number for the machine. Shipment will be
delayed if this information is not available.
2. Include correct description and part number from the “PARTS & DECALS MANUAL”
3. Specify exact shipping instructions, including the preferred routing and complete desti-
nation address.
4. DO NOT return parts to AEC without receiving written authorization from AEC. All autho-
rized returns must be shipped pre-paid.
5. When placing an order, please contact the AEC dealer nearest you.
ALL INFORMATION, SPECIFICATIONS, AND ILLUSTRATIONS IN
THIS MANUAL ARE SUBJECT TO CHANGE WITHOUT NOTICE
AND ARE BASED ON THE LATEST INFORMATION AT THE TIME
OF PUBLICATION.

GENERAL
INFORMATION
068522
Page 8
Model Number / Serial Number
Manufacturer’s Codes:
When ordering parts or requesting service information, you will always be asked
to specify the model and serial numbers of the machine. The legends below spe-
cically denes each signicant character or group of characters of the Model
Number and Serial Number codes.
Model Number
WB 1824
Series
1824 (18” High x 24” Wide)
Work Bridge

068522 Page 9
GENERAL
INFORMATION
Technical Specications
These work bridges are ideal for joint work, applying curing compounds,
bull-oating, applying textures or whenever a suitable platform for doing bridge
work is required. The Allen Work Bridge is an economical workhorse on any job
site.
Work Bridge 1824
Dimensions (H x W x L) 18” x 24”
Section Lengths:
3’
6’
12’
15’-25’ {Telescopic}
Maximum Length (Feet) 95
Minimum Height (in) {Top of Deck} 15
Maximum Height (in) {Top of Deck} 60
Weight
3 FT Section: 82 lbs
-Powered: 90 lbs
6 FT Section: 143 lbs
-Powered: 153 lbs
12 FT Section: 234 lbs
-Powered: 249 lbs
Telescopic Section: 791 lbs
-Powered: 816 lbs
Wheels
Pneumatic
Foam Filled
Flanged Style for Forms
Cupped Style for Pipe Rails

SECTION 1
SAFETY
068522
Page 10
SECTION 1
SAFETY

068522 Page 11
SECTION 1
SAFETY
CALIFORNIA PROPOSITION 65 WARNING
Gasoline engine exhaust from this product contains
chemicals known to the State of California to cause
cancer, birth defects and other reproductive harm.
RESPIRATORY HAZARDS
Grinding/cutting/drilling of masonry,
concrete, metal and other materials can
generate dust, mists and fumes containing
chemicals known to cause serious or
fatal injury or illness, such as respiratory
disease, cancer, birth defects or other
reproductive harm.
SILICOSIS WARNING
Grinding/cutting/drilling of masonry,
concrete, metal and other materials with
silica in their composition may give off dust
or mists containing crystalline silica.
Federal / State Warnings

SECTION 1
SAFETY
068522
Page 12
Safety-Alert Signs
This manual contains Safety-Alert Signs, as defined below, which must
be followed to reduce the possibility of improper service damage to the
equipment or personal injury. Read and follow all Safety-Alert Signs
included in this manual.
NOTE defines an operating procedure, condition,
etc. which is essential to highlight that contains
useful or important information.
EMERGENCY is used for the identification of safety
equipment, first aid, or emergency egress locations.
NOTICE used to convey safety information on labels and signs.
CAUTION is indicative of a potentially hazardous
situation which, if not avoided, may result in minor
or moderate injury.
WARNING Indicative of a potentially hazardous situ-
ations that could result in death or serious injury
DANGER indicates an imminently hazardous situ-
ation which, if not avoided, will result in death or
serious injury
Manual Tag Safety Detail

068522 Page 13
SECTION 1
SAFETY
Spark Arrestor Notice /
Hazard Symbols
Some states require that in certain locations arrestors be used on internal combustion
engines. A spark arrester is a device designed to prevent the discharge of spark or
flames from the engine exhaust. It is often required when operating equipment on for-
ested land to prevent the risk of fires. Consult the engine distributor or local authorities
and make sure that you comply with regulations regarding spark arrestors.
Potential hazards associated
with the operation of this equip-
ment will be referenced with
hazard symbols which may ap-
pear throughout this manual in
conjunction with safety notes.

SECTION 1
SAFETY
068522
Page 14
Operating Safety
Familiarity and proper training are required for the safe operation of this equipment!
Equipment operated improperly or by untrained personnel can be dangerous! Read
the operating instructions contained in both this manual and the engine manual and
familiarize yourself with the location and proper use of all controls.
• NEVER operate this machine in applications for which it is not intended.
• NEVER operate this machine while under the influence of drugs or alcohol.
• NEVER allow anyone to operate this equipment without proper training. People operating
this equipment must be familiar with the risks and hazards associated with it.
• NEVER touch the engine or muffler while the engine is on or immediately after it has
been turned off. These areas get hot and may cause burns.
• NEVER use accessories or attachments that are not recommended by AEC. Damage to
equipment and injury to the user may result.
• NEVER operate the machine with the belt guard missing. Exposed drive belt and pulleys
create potentially dangerous hazards that can cause serious injuries.
• NEVER leave machine running unattended.
• DO NOT run the machine indoors or in an enclosed area such as a deep trench unless
adequate ventilation, through such items as exhaust fans or hoses, is provided. Exhaust
gas from the engine contains poisonous carbon monoxide gas; exposure to carbon mon-
oxide can cause loss of consciousness and may lead to death.
• ALWAYS remain aware of moving parts and keep hands, feet, and loose clothing away
from the moving parts of the equipment.
• ALWAYS keep hands, feet, and loose clothing away from moving parts of the machine.
• ALWAYS read, understand, and follow procedures in the Operator’s Manual before
attempting to operate the equipment.
• ALWAYS be sure operator is familiar with proper safety precautions and operation tech-
niques before using machine.
• ALWAYS close fuel valve on engines equipped with one when machine is not being
operated.
• ALWAYS store the equipment properly when it is not being used. Equipment should be
stored in a clean, dry location out of the reach of children.
• ALWAYS operate the machine with all safety devices and guards in place and in working
order.

068522 Page 15
SECTION 1
SAFETY
Engine Safety
Internal combustion engines present special hazards during operation and fueling.
Read and follow the warning instructions in the engine owner’s manual and the safe-
ty guidelines below. Failure to follow the warnings and safety guidelines could result
in severe injury or death.
• DO NOT run the machine indoors or in an enclosed area such as a deep trench unless
adequate ventilation, through such items as exhaust fans or hoses, is provided. Exhaust
gas from the engine contains poisonous carbon monoxide gas; exposure to carbon mon-
oxide can cause loss of consciousness and may lead to death.
• DO NOT smoke while operating the machine.
• DO NOT smoke when refueling the engine.
• DO NOT use fuel that is more than 90 days old. Use of unmixed, improperly mixed,
or fuel older than 90 days, (stale fuel), may cause hard starting, poor performance, or
severe engine damage and void the product warranty.
• DO NOT refuel a hot or running engine.
• DO NOT refuel the engine near an open flame.
• DO NOT spill fuel when refueling the engine.
• DO NOT run the engine near open flames.
• ALWAYS refill the fuel tank in a well-ventilated area.
• ALWAYS replace the fuel tank cap after refueling.
• ALWAYS keep the area around the muffler free of debris such as leaves, paper, cartons,
etc. A hot muffler could ignite the debris and start a fire.

SECTION 1
SAFETY
068522
Page 16
Service Safety
Poorly maintained equipment can become a safety hazard! In order for the equipment
to operate safely and properly over a long period of time, periodic maintenance and
occasional repairs are necessary.
• ALWAYS disconnect the battery before servicing the equipment.
• DO NOT attempt to clean or service the machine while it is running. Rotating parts can
cause severe injury.
• DO NOT crank a flooded engine with the spark plug removed on gasoline-powered
engines. Fuel trapped in the cylinder will squirt out the spark plug opening.
• DO NOT test for spark on gasoline-powered engines if the engine is flooded or the smell
of gasoline is present. A stray spark could ignite the fumes.
• DO NOT use gasoline or other types of fuels or flammable solvents to clean parts, espe-
cially in enclosed areas. Fumes from fuels and solvents can become explosive.
• ALWAYS turn engine off and remove key from machine before performing maintenance
or making repairs.
• ALWAYS handle blades carefully. The blades can develop sharp edges which can cause
serious cuts.
• ALWAYS keep the area around the muffler free of debris such as leaves, paper, cartons,
etc. A hot muffler could ignite the debris and start a fire.
• ALWAYS replace worn or damaged components with spare parts designed and recom-
mended by AEC Corporation.
• ALWAYS disconnect the spark plug on machines equipped with gasoline engines, before
servicing, to avoid accidental start-up.
• ALWAYS switch off the power supply at the battery disconnect before adjusting or main-
taining the electrical equipment.
• ALWAYS keep the machine clean and labels legible. Replace all missing and hard-to
read labels. Labels provide important operating instructions and warn of dangers and
hazards.

068522 Page 17
SECTION 1
SAFETY
Lifting Safety
ALWAYS DO A THOROUGH INSPECTION OF THE SLINGS, CHAINS,
AND HOOKS BEFORE ATTEMPTING TO LIFT THE MACHINE!
OSHA has set forth guidelines which detail the use of Rigging Equipment for Material
handling. This guideline is found under
OSHA Standard Number: 1926.251
Please read and follow all guidelines found in this standard.
Removal from service.
Synthetic web slings shall be immediately removed from service if any of the
following conditions are present:

SECTION 1
SAFETY
068522
Page 18
Lifting Safety
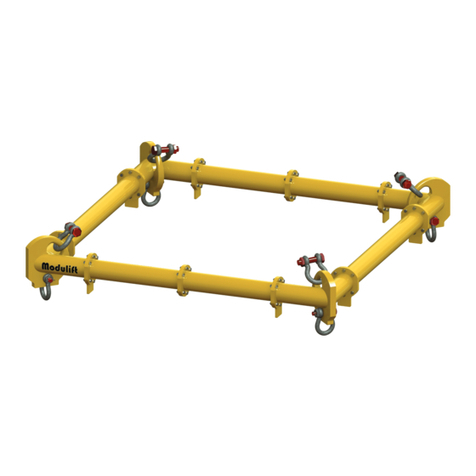
APPX WEIGHT FOR 97' WB - 2538.5 lbs / 1151.5 kg
TO CRANE
SPREADER BEAM EXAMPLE
CHOKER SLING EXAMPLE
LIFTING STRAP EXAMPLE
(ON LONGER WORKBRIDGES, A SPREADER BEAM MAY BE REQUIRED.)
USE A 5,000 lb SHACKLE AS
SHOWN ABOVE TO
ATTACH THE CHOKER SLING TO
THE LIFTING STRAPS
AND ALSO TO THE SPREADER
BEAM IF HOOKS AREN'T
AVAILABLE
PLEASE CONSULT ON-SITE SAFETY COORDINATOR BEFORE ATTEMPTING TO LIFT MACHINE.
IMPROPER RIGGING AND LIFTING CAN RESULT IN INJURY OR DEATH.
BELOW IS AN EXAMPLE OF STRAP PLACEMENT AND LIFTING PROCEDURES, BUT THIS
SHOULD NOT BE USED AS A GUIDE FOR LIFTING THE MACHINE!
USE A CHOKER STRAP ON BOTH
SIDES OF THE FRAMEWORK
45°

068522 Page 19
SECTION 1
SAFETY
Transportation Safety
• Make sure the hitch and coupling of the towing vehicle are rated equal to, or greater than
the trailer “gross vehicle weight rating.”
• ALWAYS inspect the hitch and coupling for wear. Never tow a trailer with defective hitches,
couplings, chains, etc.
• Check the tire air pressure on both towing vehicle and trailer. Trailer tires should be inated
to 50 psi cold. Also check the tire tread wear on both vehicles.
• ALWAYS make sure the trailer is equipped with a safety chain.
• ALWAYS properly attach trailer’s safety chains to towing vehicle.
• ALWAYS make sure the vehicle and trailer directional, backup, brake and trailer lights are
connected and working properly.
• DOT Requirements include the following:
- Connect and test electric brake operation.
- Secure portable power cables in cable tray with tie wraps.
• The maximum speed for highway towing is 55 MPH unless posted otherwise. Recommend-
ed off-road towing is not to exceed 15 MPH or less depending on type of terrain.
• Avoid sudden stops and starts. This can cause skidding, or jack-kning. Smooth, gradual
starts and stops will improve towing.
• Avoid sharp turns to prevent rolling.
• Trailer should be adjusted to a level position at all times when towing.
• Raise and lock trailer wheel stand in up position when towing.
• Place chock blocks underneath wheel to prevent rolling while parked.
• Place support blocks underneath the trailer’s bumper to prevent tipping while parked.
• Use the trailer’s swivel jack to adjust the trailer height to a level position while parked.
• Use tie downs to ensure machine does not move during transportation.

SECTION 2
ASSEMBLY
068522
Page 20
SECTION 2
ASSEMBLY
Table of contents
Other allen Construction Equipment manuals

allen
allen SSE12 Application guide

allen
allen TRTP275 Application guide

allen
allen BDF4836 User manual

allen
allen TRTP75 Guide

allen
allen WB2434 User manual

allen
allen SE12 Application guide

allen
allen TRTP150B Application guide

allen
allen AT14F Application guide

allen
allen BDF6048B Guide

allen
allen RS844 Application guide