ALLO NANO PBX Setup guide

COPYR IG H T
200 9-2010
ALL O.CO M
-
VISIT
US
ONLIN E
AT
W W W. AL LO.C O M
2
Tables of Contents
1.
INTRODUCTION
4
1.1 TYPICAL SETUP OF NANOPBX 4
1.2 NANOPBX TECHNICAL SPECIFICATIONS 5
1.3 HARDWARE SPECIFICATIONS 6
2.
GETTING STARTED WITH THE NANOPBX
7
2.1 INSTALLATION 7
2.2 ACCESSING THE GUI (GRAPHICAL USER INTERFACE) 7
3.
SETTING UP FEATURES
8
3.1 EXTENSIONS 8
3.1.1 CREATE IP EXTENSIONS 9
3.1.2 CREATE ANALOG EXTENSIONS 10
3.1.3 EDITING /DELETING AN EXISTING IP OR ANALOG EXTENSION 11
3.2 VOICE FILES 12
3.2.1 UPLOADING VOICE FILES 12
3.2.2 RECORDING VOICE FILES 13
3.2.3 KEYPRESS FUNCTIONS 13
3.2.4 MOH (MUSIC ON HOLD) 14
3.3 INTERACTIVE VOICE RESPONSE (IVR) 14
3.3.1 CREATE AN IVR 15
3.3.2 IVR SCHEDULES 16
3.4 QUEUES 17
3.4.1 CONFIGURING A QUEUE 18
3.5 VOICEMAIL GROUP 19
3.5.1 CONFIGURING A VOICEMAIL GROUP 19
3.5.2 ACCESSING,RETRIEVING &MANAGING VOICE MAIL 20
4.
SETTINGS
21
4.1 GENERAL 21
4.2 DID ROUTING 22
4.2.1 CONFIGURING DID ROUTING 22
4.3 VOIP SETTINGS 23
4.4 PSTN LINE 25
4.5 DIALOUT RULES 26
4.6 NETWORK SETTINGS 28
4.7 SYSTEM SETTINGS 29
4.8 FIRMWARE UPGRADE 30
4.9 ADVANCE SETTINGS 30
4.9.1 ADVANCE SETTINGS 31
4.9.1.1 STUN SERVER 31

COPYR IG H T
200 9-2010
ALL O.CO M
-
VISIT
US
ONLIN E
AT
W W W. AL LO.C O M
3
4.9.1.2 NAT TRAVERSAL IP 31
4.9.1.3 RTP RANGE 31
4.9.1.4 EXTENSION RING TIME 31
4.9.1.5 DEFAULT EXPIRY 31
4.9.1.6 CID WAIT TIME 31
4.9.1.7 ENABLE T.38 31
4.9.1.8 MESSAGE WAIT INDICATION 31
4.9.1.9 VOICE ACTIVITY DETECTION 32
4.9.2 HARDWARE PROFILE 32
4.9.2.1 PHONE PROFILE 32
4.9.2.2 FXS RINGING PROFILE 32
4.9.2.3 LINE PROFILE 32
4.9.2.4 FXO DIALING PROFILE 32
4.9.3 STACKING NANOPBX 32
4.10 MANAGE SYSTEM 32
4.11 PORT CONFIGURATION 33
5.
STATUS
33
6.
REPORT
35
6.1 DOWNLOAD CDR IN CSV 35
6.2 CDR CLEANUP 35
6.3 CDR CUSTOM SEARCH 36
7.
APPLY CHANGES
36
8.
APPENDIX A: MANAGING & HANDLING NANOPBX FEATURES
36
8.1 ATTENDED TRANSFER 36
8.2 BLIND TRANSFER 37
8.3 3-WAY CONFERENCING 37
8.4 CALL FORWARDING 37
8.5 CALL PARKING 38
8.6 CALL HOLD AND RETRIEVE 38
8.7 BLF (BUSY LAMP FIELD)SUPPORT 38
8.8 HARD RESET 38
8.9 MEMORY CARD HANDLING 38
8.10 NPA DIALING 39
9.
APPENDIX B: PHONES CONFIGURATION REQUIRED FOR NANOPBX INTEROPERABILITY
39
9.1 X-LITE CONFIGURATIONS 39
9.2 SNOM IP PHONE CONFIGURATION 39
9.3 LINKSYS PAP2 ATA 39
10.
APPENDIX C: GLOSSARY OF TERMS
39

COPYR IG H T
200 9-2010
ALL O.CO M
-
VISIT
US
ONLIN E
AT
W W W. AL LO.C O M
4
1. Introduction
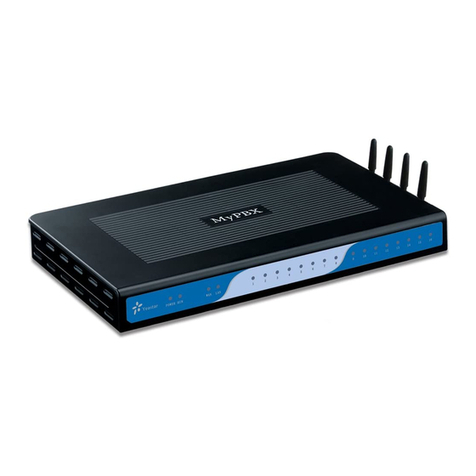
The NanoPBX is a compact system that puts the rich features of a high-end PBX into the reach of small
businesses. Its built-in voicemail, multi-level auto attendants, remote extensions and sophisticated call
handling features help businesses reduce communications costs, hile allo ing employees to stay
connected orld ide. Setting up and configuring the NanoPBX is a breeze ith the user-friendly GUI and
this document ill sho you just ho easy it is!
1.1 Typical setup of NanoPBX
Interconnection Diagram of NanoPBX

COPYR IG H T
200 9-2010
ALL O.CO M
-
VISIT
US
ONLIN E
AT
W W W. AL LO.C O M
5
1.2 NanoPBX Technical Specifications
PBX Features: Codec: G.711 A-la & µ-la , G.723, G.729
Call For arding
Holding and retrieval Fax: T.38, Pass-through
Call Transfer - Attended and Blind
3- ay Conference DTMF: RFC 2833, In-band, SIP Info
Call Parking, Pickup and Retrieval
Remote Voice mail Access System Capacity & Expandability:
Recordable IVR Prompts Supports up to 50 IP Extensions
Multilevel auto attendant ith IVR 8 TDM concurrent calls (6 G729)
Intercom 20 IP concurrent calls
Configurable Call Routing
- Least Cost Routing
- Call Route to Multiple Extensions or Targeted User
- Call Hunting - Sequential, Round Robin, Random
TDM + IP scenarios:
8 TDM + 3 IP
4 TDM + 8 IP
0 TDM + 20 IP
Multiple Music on Hold Stacking: Double the capacity of NanoPBX
Call Queue
Direct In ard Dial (DID) routing Internet:
Caller ID Spoofing DHCP server on the LAN side
Busy Lamp Field (BLF) DHCP client on the WAN side
Regional Caller ID & Country Settings STUN/NAT traversal (RFC 3489)
CDR(Caller ID, Time/Date Incoming, Outgoing,
Missed)
SIPv2 - Session Initiation Protocol Version
2 (RFC 3261, 3262, 3263, 3264)
Voice Features: Host Name Config
Echo cancellation (G.168)
System Management:
VAD ith silence suppression WEB interface accessible from LAN & WAN
CNG Pass ord control
Packet loss concealment Backup and Restore of configuration
Adaptive jitter buffer Soft are Upgrade
Signal discriminator Factory Reset
Attenuation/Gain adjustment Date & Time Configuration

COPYR IG H T
200 9-2010
ALL O.CO M
-
VISIT
US
ONLIN E
AT
W W W. AL LO.C O M
6
1.3 Hardware Specifications
Telephone Interfaces (FXS/FXO)
•Phone 1 – FXS
•Phone 2 – FXS
•Phone 3 – FXS
•Phone 4 – FXS
•Phone 5 – Programmable (FXS / FXO)
•Phone 6 – Programmable (FXS / FXO)
•Line 1 – FXO
•Line 2 – FXO
Net ork Interfaces
One 10/100Mbps WAN Port
One 10/100Mbps LAN Port
System Indicators(LED)
•Po er (Green)
•1 – Phone1 (Orange & Blue)
•2 – Phone2 (Orange & Blue)
•3 – Phone3 (Orange & Blue)
•4 – Phone4 (Orange & Blue)
•5 – Phone 5 (Orange & Blue)
•6 – Phone 6 (Orange & Blue)
•7 & 8 – Reserved for Internal use
•1 & 2 – Reserved for Internal use
RAM: 64 MB
Flash: 8 Mb
Internal/External Memory:
1 GB SD Card Memory
Po er Adapter
Input: 100V – 240V AC / 47 ~ 63 Hz
Output: +12V DC / 2.5 A
Dimension
175mm (W) x 253mm (L) x 34 mm(H)
(6.88” x 9.96” x 1.33”)
Unit Weight
0.55 kg
Operating Temperature
10°C to 40°C (50°F to 104°F)
Operating humidity
10% to 90%, Non-condensing
Storage temperature
0°C to 50°C (32°F to 122°F)
Storage humidity
5% to 95%, Non-condensing

COPYR IG H T
200 9-2010
ALL O.CO M
-
VISIT
US
ONLIN E
AT
W W W. AL LO.C O M
7
2. Getting Started With the NanoPBX
2.1 Installation
Step 1: Plug one end of the RJ45 Ethernet
cable into your Router
Step 2: Plug the other end of the RJ45
Ethernet cable into the WAN port of the
NanoPBX
Step 3: Plug the Po er Adapter included
into an available po er outlet
Step 4: Plug the other end of the Po er
Adapter into the “DC-IN” port of the
NanoPBX
Step 5: The NanoPBX ill po er up, and automatically connect itself to your net ork via DHCP ( hich
you can later configure in the SETTINGS > Net ork Settings section)
Important Note:
•Wait until the POWER and all the six PHONE LED's turn orange and remain stable on the Front Panel
of your NanoPBX.
•Use Straight – through Ethernet cable to connect bet een the NanoPBX to Router/S itch/PC
Step 6: Configure your NanoPBX according to the instructions belo
2.2 Accessing the GUI (Graphical User Interface)
Connect an Analog phone to the any of the FXS ports of the NanoPBX and dial “* *” to get the WAN IP
address of the NanoPBX. And then launch the eb bro ser on the PC hich is connected to the same
net ork to get GUI Login Screen.

COPYR IG H T
200 9-2010
ALL O.CO M
-
VISIT
US
ONLIN E
AT
W W W. AL LO.C O M
8
Or also you can access the GUI of the NanoPBX by connecting a PC to the LAN port of the NanoPBX.
Enable the DHCP option in the Net ork Settings of the PC, and then enter http://192.168.113.1 in the
Web Bro ser Address field. (Where 192.168.113.1 is the default local IP address of the NanoPBX).
On the login screen, the default username and pass ord is “admin/admin”. Press the Login button to
enter the NanoPBX eb panel. To change the pass ord, please refer to the SETTINGS > General section
in the navigation.
After you login, you are brought to an Overvie screen, hich offers information about the NanoPBX,
and help files to assist you in learning about the different features of the system.
Important Note:
Recommended to use Mozilla Firefox or Internet Explorer 6 & above version Web bro ser.
3. Setting up Features
3.1 Extensions
Extensions are the core of the NanoPBX. An extension is a number mapped to a person. So basically,
every employee that is connected to the NanoPBX should have their o n unique extension number, so
that he/she can be reached, and be able to place calls.
The NanoPBX supports 2 types of Extensions: IP Extensions and Analog Extensions.
IP Extensions:
IP extension are devices that have only data net orking connection such as Ethernet and they
communicate ith the NanoPBX using IP based protocol for signaling and Voice, examples are
IP Phone, Soft Phone application. The NanoPBX can support up to 50 IP Extensions
registration.
Analog Extensions:

COPYR IG H T
200 9-2010
ALL O.CO M
-
VISIT
US
ONLIN E
AT
W W W. AL LO.C O M
9
An Analog Extension is used ith a regular telephone system hich can be connected to an
available FXS port on the back of the NanoPBX. The NanoPBX can have up to 6 Analog
Extensions.
All the features are supported by both the Analog and IP extensions. Extensions can be part of other
features, such as: Queues and Voicemail Groups. Also, the extension can have a voicemail of its o n.
3.1.1 Create IP Extensions
Navigation: CREATE > Extensions > Create IP Extensions: This is here you setup your IP extensions
To add a ne IP Extension, fill in the required pieces of information, such as Name, Extension #,
Pass ord, Call For arding (optional) and select if you like to make that extension available for Queue
and Voicemail configuration. You can also configure various Codecs and can also prioritize the active
Codecs using the up and do n arro s.
Once you are done, click the Create Extension button.
Extensions Details
1. Name : Name of the extension
2. Extension #: Unique identifier (i.e.: 7788)
3. Pass ord: The pass ord for the extension (i.e.: 7788)
4. Display Name: To display the name in terminal
5. Call For arding: For ards an incoming call to this extension to any other phone. The for arding
number can be PSTN, Cellular, National or International number (With proper dial out
configuration).
6. Queues: Enable this extension so that it can be visible hen adding members to the Queue.
7. Voicemail: Enable this extension so that it can be visible hen adding members to the Voicemail
Group and Voicemail.

COPYR IG H T
200 9-2010
ALL O.CO M
-
VISIT
US
ONLIN E
AT
W W W. AL LO.C O M
10
3.1.2 Create Analog Extensions
Navigation: CREATE > Extensions > Create Analog Extensions: This is here you setup your Analog
extensions
To add a ne Analog Extension, first select the Name option by choosing from one of the 6 available
Phone lines. If any are being used, this section ill display hat is available. Then, fill in the required
pieces of information, such as Extension #, Pass ord, Call For arding (optional) and select if you’d like
to make that extension available for Queue and Voicemail configuration. You can also configure various
Codecs and Latency / Volume settings. Once you are done, click the Create Extension button.
Extensions Details
1. Name: Select the Analog phone from Phone 1 to Phone 6
2 . Extension #: Unique identifier (i.e.: 1006)
3 . Pass ord: the pass ord for the extension (i.e.: 1006)
4 . Display Name: Display name of the extension
5 . Call For arding: For ards an incoming call to this extension to any other phone. The for arding
number can be PSTN, Cellular, National or International number (With proper dial out
configuration).
6 . Queues: Enable this extension so that it can be visible hen adding members to the Queue.
7 . Voicemail: Enable this extension so that it can be visible hen adding members to the Voicemail
Group and Voicemail.

COPYR IG H T
200 9-2010
ALL O.CO M
-
VISIT
US
ONLIN E
AT
W W W. AL LO.C O M
11
Important Note:
Make sure to click the APPLY CHANGES button in the top navigation bar, after adding / editing / deleting
any Extension. The APPLY CHANGES tab turns red if some changes are made and not saved.
3.1.3 Editing / Deleting an Existing IP or Analog extension
Navigation: CREATE > Extensions. This is here you can edit / delete existing IP Extensions.
On the right side of the page, you can see the list of extensions you have setup. To edit, or delete any
of them, simply click the appropriate icon provided to the right of each account/Extension.
Once you click on the Edit button of an IP Extension then it ill display the information of that particular
IP extension. Here you can change the required details and then click on the Update Extension button to
save the changes made.

COPYR IG H T
200 9-2010
ALL O.CO M
-
VISIT
US
ONLIN E
AT
W W W. AL LO.C O M
12
You can delete an IP extension by clicking on the delete button of the IP extension from the list of
extensions displayed.
Important Note:
1. The Voicemail PIN pass ord ill be same as the pass ord provided to the Extension hile creating an
Extension. This ill applies to both Analog and IP Extension. If you are trying to access or retrieve
Voice Message, use that particular Extension pass ord.
2. If you have done any changes like adding, editing or deleting any option on the NanoPBX, APPLY
CHANGES tab in the top navigation bar ill turns red, indicates that it is necessary to click on APPLY
CHANGES button for the changes to take effect.
3.2 Voice Files
What are Voice Files?
Voice Files are the pre-recorded audio files. This files can be used for IVR Playback (With or ithout
Keypress), or hich can be used for Music on Hold (the music that a user hears hen his call on hold).
These files can be recorded ith any audio recording soft are, through the NanoPBX, or by hiring a
Voice Talent.
Example 1: Voice file without Key press
“Welcome to ACME Corp! If you know your party’s extension, please dial it now.
Example 2: Voice file with Key press
Press 1 for Customer Service
Press 2 for Billing
Press 3 for Shipping”
With the NanoPBX, you can either upload an existing voice file, or record your o n. Accepted formats
are: GSM only.
3.2.1 Uploading Voice Files
Navigation: CREATE > Voice Files > Add Voice Files
To upload a Voice File, enter the Name and Description, and click the Bro se button to select the pre-
recorded file from your computer. The file should be in GSM format. After this, you may enter Keypress
Information if you like (see Keypress section for more info). When done, press the Upload button.

COPYR IG H T
200 9-2010
ALL O.CO M
-
VISIT
US
ONLIN E
AT
W W W. AL LO.C O M
13
3.2.2 Recording Voice Files
Navigation: CREATE > Voice Files > Add Voice Files
Te record a Voice File from NANOPBX, check the Recording Option, and select the extension you ish you
use from the list, then press the Record button, it ill ring the selected extension and allo you to record
your voice through this extension.
After ans ering the call a prompt ill be played indicating you to start recording ith beep sound Once
you have finished recording, press the # button on your telephone and once again it ill prompt for
recording, record the same voice message again, once you have finished your recording then press the #
key. When done, you can leave it like that, or add Keypress Information (see Keypress section for more
info). When you are done, click Upload. The file ill automatically be saved as a GSM file, and be stored
on the SD Card in your NanoPBX.
Repeat the above operation as many times as the number of messages to record.
For Example you can record the voice message as sho in Example 1 of What are voice files section and
store it as Msg1. Example 2 of the same section and store it as Msg2.
Important Note:
•The extension hich is used for recording should have G.711 u-la codec.
•To play the uploaded voice file from NanoPBX Quick Time player is required.
•Voice file name should be unique should not coincide ith IVR / Queue / trunk name.
•Transcoding is not available in NanoPBX; our recommendation is to record voice files through
NanoPBX itself as t ice.
3.2.3 Keypress Functions
Keypress options are available to the caller hen a Voice File is played back through an IVR. Depending
hat your voice File sounds like (see above example2) you can add any number of Keypress Actions by
first selecting a key number, and then the action (Example in the screen shot key press 5 goto
Extension). Then Press the +Add button to continue, then in the keypress action select the extension

COPYR IG H T
200 9-2010
ALL O.CO M
-
VISIT
US
ONLIN E
AT
W W W. AL LO.C O M
14
number to ring repeat the above to continue adding more Keypress Actions, as you desire.
3.2.4 MOH (music on hold)
This is a music file hich ill be played by the NanoPBX hen any of the calling party is kept on hold.
All the voice files / music files hich are added through Add Voice Files option ill be listed in the MOH
selection box. Chose any of the Voice/Music file form the drop do n box and click on Apply Changes tab
to save the changes made.
3.3 Interactive Voice Response (IVR)
What is an IVR?
An IVR is a pre-recorded interactive operator defined by a sequence of actions that provides a customer
ith a better call experience. An IVR can be ‘chained’ ith other IVR’s creating a multi-level IVR system.
Example 1:
“Welcome to ACME Corp! If you know your party’s extension, please dial it
now.
Press 1 for Customer Service
Press 2 for Billing
Press 3 for Shipping”

COPYR IG H T
200 9-2010
ALL O.CO M
-
VISIT
US
ONLIN E
AT
W W W. AL LO.C O M
15
3.3.1 Create an IVR
Navigation: CREATE > IVR > Create IVR: This is here you setup your IVR
To create a ne IVR, enter a Name and create the Sequence (the sequential order of events triggered by
an IVR). When done, click the Create IVR button.
There are different types of Sequences:
Ring Time: Ring for selected number of seconds and Ans er the call.
Allow to Dial Local Extension: Plays any selected Voice File and aits for user to enter the local
Extension/Directory.
Play IVR: Plays voice file ith keypress and performs keypress action (defined hen creating a Voice File)
and Loop to ho many times the IVR need to playback.
Goto: Transfers the call to an Extension, Queue, Voicemail group, Bridge to PSTN / IP etc.
Hangup: To end the call.
Example of an IVR:
To create an IVR as sho n in Example 1
Enter the IVR Name then select the sequences to be follo ed,
Select step as 1 and type as Ring time and click on Add button
Select ring time as 2 so the incoming call rings for 2 seconds before ans ering.
Select step as 2 and type as Allo user to dial Local Extensions and click on Add button
Select the voice file as Msg1 hich as created in Create Voice file section.
Select step as 3 and type as Play IVR and click on Add button
Select the voice file as Msg2 hich as created in Create Voice file section. And select the Loop as 3 so

COPYR IG H T
200 9-2010
ALL O.CO M
-
VISIT
US
ONLIN E
AT
W W W. AL LO.C O M
16
the IVR file plays for 3 times before taking further action.
Select step as 4 and type as GoTo & click on Add button
Select the option here the call has to go if the user does not press any keys. In the above example the
call ill be routed to the extension number 131
Select step as 5 and type as Hangup and click on add button
While creating the IVR by selecting “Allo extension dialing” you can dial any extension till the IVR
completes.
This completes the IVR. Click on Create IVR and then press APPLY CHANGES tab, to save this IVR.
3.3.2 IVR Schedules
Navigation: CREATE > IVR > Create IVR Schedules: This is here you setup IVR Schedules, or
manage existing ones
What is an IVR Schedule?
An IVR Schedule allo s an IVR to be played at a specific time. You can create multiple schedules, and
play different IVR’s based on specific times (i.e.: Morning and Evening schedules).
To create an IVR Schedule, fill in the required details such as Name, Description, IVR Menu selection,
and then Day / Time Range details. You can also see a list of existing schedules, and can edit / delete
them.
When done, click the Create IVR Schedules button.
Create IVR Schedules Details
1. Name: The name of the schedule
2. Description: A short description of the schedule
3. IVR Menu: The IVR to be played.
4. Day / Time Range: The days and start/end time to play the selected IVR

COPYR IG H T
200 9-2010
ALL O.CO M
-
VISIT
US
ONLIN E
AT
W W W. AL LO.C O M
17
3.3.3 Bridging VoIP Line with PSTN & Vice Versa
This can be done by ith belo mentioned steps
Step 1: Creating an IVR and select GOTO option as Bridge to PSTN (Line 1)
Step 2: Give a Bridge Pass ord in VoIP Settings to bridge the incoming VoIP Call to PSTN.
Step 3: Change the Inbound Destination to IVR in VoIP Settings. So that all incoming VoIP Call ill be
redirected to Line 1 and go out through PSTN.
Step 4: Dial a Bridge Pass ord hen it prompts to get a PSTN Dial tone to call out.
Same procedure ill apply for Bridging PSTN Line ith VoIP
3.4 Queues
What is a Queue?
Queues used to distributes incoming calls in the order of arrival to the first available extension in the
queue. The system ans ers each call immediately and, if necessary, holds it in a queue until it can be
directed to the next available extension.
This feature is used to balance the orkload among group of extensions.
Queues ill provide the follo ing functions,
•Incoming calls being placed in the queue
•Extensions that ans er the call in the queue.
•A strategy for ho to handle the calls in the queue and distribute the calls in the queue.
•Music played hile aiting in the queue.

COPYR IG H T
200 9-2010
ALL O.CO M
-
VISIT
US
ONLIN E
AT
W W W. AL LO.C O M
18
3.4.1 Configuring a Queue
Navigation: CREATE > Queues > Create Queue: This is here you setup your Queues.
To create a Queue, simply fill in all the required details including Queue Name, Type, Max Queue Length,
and select the other options. When done, click the Create Queue button.
Queue Details
1. Queue Name: The name of the Queue
2. Queue Extn: Extension number to reach the Queue directly
3. Queue Type:
a. Ring All: Rings all available extensions
b. Round Robin: Takes turns ringing each available extension
c. Least Recent: Rings the extension hich as least recently called by this queue
d. Fe est Calls: Rings the extension ith fe est complete calls from
this queue
e. Random: Rings a random extension
f. Round Robin Memory: Performs a Round Robin remembering here e left off ith the
last ring pass
4. Max Queue Length: The maximum number of callers aiting in queue for an available extension.
5. Queue Timeout: Select the required seconds so that the queue ill get terminated after the given
seconds
Advanced Options
1. Queue retry Time: This is the time delay to ring the queue members again after queue timeout
2. Ring in use: Set this to no if you ant the queue to avoid sending calls to members ho are on
phone (in use state)
3. Wrap-Up Time: After a call is finished, the time it takes an extension to become available again to
become available in the queue

COPYR IG H T
200 9-2010
ALL O.CO M
-
VISIT
US
ONLIN E
AT
W W W. AL LO.C O M
19
List of Available Members
This is the list of available extensions that could be part of this queue
Members
1. Ext#: Refers to the Extension number of the user
2. Username: This is the name of the user
3. Priority: The frequency a member is sought out to ans er the incoming call
3.5 Voicemail Group
What is a Voicemail Group?
A Voicemail Group is a pre-programmed group of voicemail recipients. All the members of this group ill
receive the same voicemail message.
3.5.1 Configuring a Voicemail Group
Navigation: CREATE > Voicemail Group: This is here you setup your Voicemail Groups
To create a Voicemail Group, select a Group Name, choose the users ho ill belong to that Group, and
press the Create Voicemail Group button.
On the right-hand side of the screen, you can see all existing groups, hich are assigned Extension #.
You can also edit or delete groups.
Voicemail Group Details
1. Group Name: the name of the Voicemail Group
2. Available Members: the list of available extensions that could be part of this Voicemail Group
3. Members in Group: the list of extensions that belong to this Voicemail Group

COPYR IG H T
200 9-2010
ALL O.CO M
-
VISIT
US
ONLIN E
AT
W W W. AL LO.C O M
20
3.5.2 Accessing, Retrieving & Managing Voice Mail
The NanoPBX allo s users to manage voicemail through voice messages in their phones. This section ill
summarizes ho to access, retrieve and manage voicemail and other settings.
The default feature code for accessing Voicemail is 800. After dialing this code, you ill enter a basic
voice menu ith the option to listen or for ard messages and configure voicemail options. When
prompted, provide the appropriate Voice Mail number and the pass ord, hich is same as it as
configured in the Create > Extensions i.e. Extension # & Pass ord.
While you listen to the recorded voice message you can use the follo ing keys for navigation.
•1 Read Voice mail Messages
•3 Advanced options
o1 Reply
o3 Hear Message
o5 Leave Message
•4 Play previous message
•5 Repeat current message
•6 Play next message
•7 Delete current message
•8 For ard message to another mailbox
o1 Use Voicemail number
o2 Use Voicemail Directory
•9 Save message in a folder
o0 Save in ne Messages
o1 Save in old Messages
o2 Save in Work Messages
o3 Save in Family Messages
o4 Save in Friends Messages
•* Help; during msg playback: Re ind
•# Exit; during msg playback: Skip for ard
•2 Change folders
•0 S itch to ne Messages
•1 S itch to old Messages
•2 S itch to Work Messages
•3 S itch to Family Messages
•4 S itch to Friends Messages
•3 Advanced options
Table of contents

