NEC UX5000 User manual

Empowered by Innovation
inDepth
Quick Setup Guide
for the UX5000
P/N 0913232
Rev 1, May 2009
Printed in U.S.A.
3.13.100.7
Technical Support Web Site:
htt
p
://ws1.necii.com
(
re
g
istration is re
q
uired
)

This manual has been developed by NEC Unified Solutions, Inc. It is intended for the use of its customers and
service personnel, and should be read in its entirety before attempting to install or program the system. Any
comments or suggestions for improving this manual would be appreciated. Forward your remarks to:
NEC Unified Solutions, Inc.
4 Forest Parkway
Shelton, CT 06484
necunifiedsolutions.com
Nothing contained in this manual shall be deemed to be, and this manual does not constitute, a warranty of, or
representation with respect to, any of the equipment covered. This manual is subject to change without notice and
NEC Unified Solutions, Inc. has no obligation to provide any updates or corrections to this manual. Further, NEC
Unified Solutions, Inc. also reserves the right, without prior notice, to make changes in equipment design or
components as it deems appropriate. No representation is made that this manual is complete or accurate in all
respects and NEC Unified Solutions, Inc. shall not be liable for any errors or omissions. In no event shall NEC Unified
Solutions, Inc. be liable for any incidental or consequential damages in connection with the use of this manual. This
document contains proprietary information that is protected by copyright. All rights are reserved. No part of this
document may be photocopied or reproduced without prior written consent of NEC Unified Solutions, Inc.
©2009 by NEC Unified Solutions, Inc. All Rights Reserved.
Printed in U.S.A.

Table of Contents
inDepth Quick Setup Guide for the UX5000
◆
Table of Contents- 1
Section 1: Programming the UX5000 Communications Server . . . . . . . . . . . . . . . 1
IP Address : Program 10-12 . . . . . . . . . . . . . . . . . . . . . . . . . . . . . . . . . . . . . . . . . . . . . . . . . . . . . . . . . . 1
Ports and Keep Alive Timer : Program 10-20. . . . . . . . . . . . . . . . . . . . . . . . . . . . . . . . . . . . . . . . . . . . . 2
Agent Log In Codes and MIS Connection Ports : Program 41-01 . . . . . . . . . . . . . . . . . . . . . . . . . . . . . 2
Programming the Extension and Agent Groups : Program 11-17 . . . . . . . . . . . . . . . . . . . . . . . . . . . . . 3
Configuring ACD Groups : Program 41-02 . . . . . . . . . . . . . . . . . . . . . . . . . . . . . . . . . . . . . . . . . . . . . . 4
Configuring ACD Log-In Mode : Program 41-17 and 41-18 . . . . . . . . . . . . . . . . . . . . . . . . . . . . . . . . . 5
Section 2: Programming inDepth . . . . . . . . . . . . . . . . . . . . . . . . . . . . . . . . . . . . . . . 7
System Configuration . . . . . . . . . . . . . . . . . . . . . . . . . . . . . . . . . . . . . . . . . . . . . . . . . . . . . . . . . . . . . . . 7
The Configurator . . . . . . . . . . . . . . . . . . . . . . . . . . . . . . . . . . . . . . . . . . . . . . . . . . . . . . . . . . . . . . . . . . . 7
Default Configuration . . . . . . . . . . . . . . . . . . . . . . . . . . . . . . . . . . . . . . . . . . . . . . . . . . . . . . . . . . . . . . . 8
Configuring Devices . . . . . . . . . . . . . . . . . . . . . . . . . . . . . . . . . . . . . . . . . . . . . . . . . . . . . . . . . . . . . . . . 8
Configuring Device Groups . . . . . . . . . . . . . . . . . . . . . . . . . . . . . . . . . . . . . . . . . . . . . . . . . . . . . . . . . . 9
Configuring Device Super Groups . . . . . . . . . . . . . . . . . . . . . . . . . . . . . . . . . . . . . . . . . . . . . . . . . . . . 11
Extensions and Agents Configuration. . . . . . . . . . . . . . . . . . . . . . . . . . . . . . . . . . . . . . . . . . . . . . . . . . 12
Extension and Agent Group Configuration. . . . . . . . . . . . . . . . . . . . . . . . . . . . . . . . . . . . . . . . . . . . . . 13
Voice Mail Ports . . . . . . . . . . . . . . . . . . . . . . . . . . . . . . . . . . . . . . . . . . . . . . . . . . . . . . . . . . . . . . . . . . 14
Shifts . . . . . . . . . . . . . . . . . . . . . . . . . . . . . . . . . . . . . . . . . . . . . . . . . . . . . . . . . . . . . . . . . . . . . . . . . . . 15
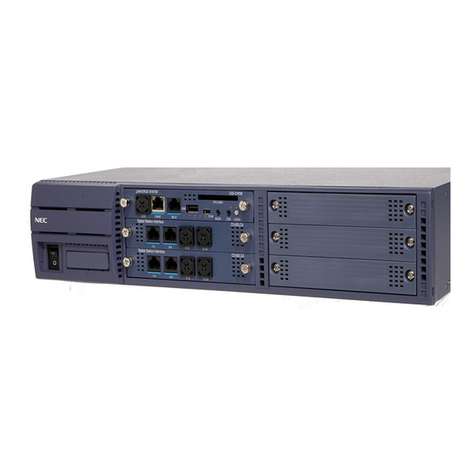
Table of Contents
Table of Contents - 2
◆
inDepth Quick Setup Guide for the UX5000

inDepth Basic Setup Guide
Section 1: Programming the UX5000 Communications Server
inDepth Quick Setup Guide for the UX5000
◆
1
inDepth Basic Setup Guide
Section 1: Programming the UX5000 Communications Server
Section 1: Programming the UX5000 Communications
Server
This is a quick start guide for inDepth and so does not cover ACD Programming. Please refer to UX5000
ACD manual, P/N 0913206, for more details.
Before we can get inDepth to work, there are a few basic programming settings that have to be made in the
UX5000 communications server.
IP Address : Program 10-12
Before the CCPU can be used to collect real time event data, it will need an IP address. It is suggested that
you use an address and subnet mask that is in the “normal” range used by the end user or you might have
issues connecting the inDepth server to both the cCPU and the rest of the PCs on the LAN.
If you are using VoIP terminals you should use the settings in 10.12.09 and not 10.12.01.
PLEASE NOTE ANY CHANGES IN THIS PROGRAM WILL NOT TAKE EFFECT UNTIL THE
UX5000 IS RESET.

inDepth Basic Setup Guide
Section 1: Programming the UX5000 Communications Server
2
◆
inDepth Quick Setup Guide for the UX5000
Ports and Keep Alive Timer : Program 10-20
After we have configured the CCPU with an IP address, you need to define the port that will be used to out-
put data. This port will be also configured within the inDepth setup. In the screen shot below, the port is con-
figured for 28000. The keep alive timer has also been reduced from the default of 30 seconds to 1 second.
This might help if the port on the UX5000 goes to sleep.
Agent Log In Codes and MIS Connection Ports : Program 41-01
The screen shot below is from UX5000 Program 41-01 and shows that the log in code that the agents will
use to log on to the telephone handsets has been configured to a 3-digit code. The UX5000 can handle any-
thing from 0 to 20 digits. Using zero will mean that all agents will effectively be logging on with the same
PIN code and this will generate bad log on alarms and also means that agent reports will not work. If this is
required, only extension-based tracking can be used.
You can also see that the ACD MIS connection port is the CCPU LAN, which means that the data is output
to the inDepth PC using TCP/IP from the CCPU. If this is NOT configured you will not get any data.

inDepth Basic Setup Guide
Section 1: Programming the UX5000 Communications Server
inDepth Quick Setup Guide for the UX5000
◆
3
Programming the Extension and Agent Groups : Program 11-17
The UX5000 routes calls to a group of physical extensions on the basis of the longest waiting call to the long-
est free agent if there is more than one free agent. When you have configured the UX5000, then you must con-
figure both an extension group to match and an agent group with the same number. These should then be
“associated” with each other. See the section
Extensions and Agents Configuration, page 12
. It does NOT
matter about the Master or ACD Group pilot, but the ACD Group does matter. The groups are in the range 1-
64.

inDepth Basic Setup Guide
Section 1: Programming the UX5000 Communications Server
4
◆
inDepth Quick Setup Guide for the UX5000
Configuring ACD Groups : Program 41-02
As stated in the previous section, the physical extensions used to route calls to must be put into an Extension
Group. In the example below, extension 301 is in ACD Group 1.
In the inDepth Extension 301 would be configured in Extension Group 1 and the Agents who would log on to this
and any other extension in the group would be configured in Agent Group 1 and the Extension Group would be
associated with the Agent Group.

inDepth Basic Setup Guide
Section 1: Programming the UX5000 Communications Server
inDepth Quick Setup Guide for the UX5000
◆
5
Configuring ACD Log-In Mode : Program 41-17 and 41-18
The ACD log-in mode for AIC requires inDepth software 3.13.0.2b or higher.
Using the AIC option in the UX5000, an agent can log in to multiple ACD groups using different AIC codes.
For this option in the inDepth, a Queue option has been added to the Real Time windows and reports. The mul-
tiple log-ins are actually tracked by the group into which the agent logged in, and not by the agent themself.
In the UX5000, assign the required agents to log in using the AIC mode in Program 41-17-01 and assign the
agent AIC code in Program 41-18-01.

inDepth Basic Setup Guide
Section 1: Programming the UX5000 Communications Server
6
◆
inDepth Quick Setup Guide for the UX5000
- For Your Notes -

inDepth Basic Setup Guide
Section 2: Programming inDepth
inDepth Quick Setup Guide for the UX5000
◆
7
Section 2: Programming inDepth
There are three components within inDepth that will need configuring:
1. The system configuration which is done via the Configurator
2. The screen layouts
3. The report templates
This Quick Start guide will deal with system configuration, the other two sections are not covered here as
they will be personal to each site and will evolve over time.
System Configuration
The Configurator can be accessed from the Configurator icon on the tool bar (wrench icon) of either the Real
Time client or the Reporter client or from by double-clicking MISCFG.EXE in C:\inDepthUX5000\US on
the server.
The Configurator
When the Configurator loads, you will be presented with a series of “Tabs” representing the following
devices:
1. Lines and DIDs
2. Extensions and Agents
3. Account Codes
4. Miscellaneous

inDepth Basic Setup Guide
Section 2: Programming inDepth
8
◆
inDepth Quick Setup Guide for the UX5000
Default Configuration
In version 3.13 the system defaults will cover:
1. 128 lines in the range 1-128. These lines are offset with a 9 to give 9001 to 9128.
2. Two Line Groups - one for analog lines and one for T1/PRI lines. These can be renamed to cover
whatever the end user prefers.
3. Extensions in the range of 301 upwards.
4. Twelve extension groups; ten in the range 1-10 to cover any ACD Groups you have configured in
Program 11-17, one for All Extensions and one for Voice Mail ports.
5. Eleven ACD Groups in the range 1-10 to match the ten extension groups as above and one for All
Agents.
6. Some DIDs and a DID Group and DID Super Group, both containing All DIDs.
7. Sixteen Queues in the range 10550 - 10565 representing Queues 1-16. These numbers are hard
coded and should not be changed
8. Some Account Codes and an Account Code Group and Super Group containing All Account Codes.
Configuring Devices
The process for configuring devices is similar for all devices. Starting with lines first, click on
Edit Lines
.

inDepth Basic Setup Guide
Section 2: Programming inDepth
inDepth Quick Setup Guide for the UX5000
◆
9
A new dialog box will appear to allow you to add lines, delete lines or edit lines.
Here you can click
Cancel
if you have made no changes or want to cancel any changes. Or, click
OK
if you
want to save changes.
Configuring Device Groups
Click
Edit Groups
will bring you to the Edit Groups dialog box.

inDepth Basic Setup Guide
Section 2: Programming inDepth
10
◆
inDepth Quick Setup Guide for the UX5000
Here you can add new groups, delete groups or edit existing groups. Below you can see the
Line Group
Configuration
dialog box which allows you to add or remove lines from the group as well as make changes
to the alarm thresholds and statistical analysis thresholds. Remember to check the
Default Group for the
above Lines
check box to apply the values to the members of the group.
Here you can click
Cancel
if you have made no changes or want to cancel any changes. Or, click
OK
if you
want to save changes.

inDepth Basic Setup Guide
Section 2: Programming inDepth
inDepth Quick Setup Guide for the UX5000
◆
11
Configuring Device Super Groups
Click
Edit Super Groups
will bring you to the Edit Super Groups dialog box.
Here you can add new super groups, delete super groups or edit existing super groups.
Below you can see the Line Super Group Configuration Dialog Box which allows you to add or remove
groups from the super group.

inDepth Basic Setup Guide
Section 2: Programming inDepth
12
◆
inDepth Quick Setup Guide for the UX5000
Extensions and Agents Configuration
Configuring most devices are similar, so this section will just highlight a few differences. Selecting the
Extensions/Agents
tab will bring you to the Extensions and Agents Configuration section.
The first difference at the Extension and Agent Level is that both of these devices can have a Long Name and
a Short Name. It is recommended that the Long Name should be the First Name and Last Name of the per-
son using the phone or the person using the Log On ID. The names can apply to extensions outside the Call
Center where you might want to track the activities of staff who are not logging on as agents
Another area where configuration is slightly different is that the Extension Groups used for ACD have to be
associated with the Agent Group. See the screen shot on the following page.

inDepth Basic Setup Guide
Section 2: Programming inDepth
inDepth Quick Setup Guide for the UX5000
◆
13
Extension and Agent Group Configuration
Here you can see that Extension Group 2, which is called
Customer Service,
is associated with an Agent
Group by the same name and, if you were to look at the Agent Group Configuration you would see that this
is Agent Group 1 and contains the relevant agents. There is generally no need to name the extensions as well.

inDepth Basic Setup Guide
Section 2: Programming inDepth
14
◆
inDepth Quick Setup Guide for the UX5000
Voice Mail Ports
Voice Mail ports have to be configured differently. As the inDepth is able to track all calls on all devices,
this means that a call answered by a voice mail port is considered answered at that point. As an answered call
can never be abandoned, these calls need to be marked and not considered answered. This is done by creat-
ing a Voice Mail extension group, adding the voice mail ports to the groups and applying a timeout to the
ports. The timeout value should be a time that is slightly longer than the longest greeting. The connect mes-
sage will then be ignored unless a call connects to the port for a time which is greater than the timeout value.
This will then be an answered call. An example here would be a caller that chooses to go to voice mail now
connects for a longer period of time and now would be answered and not abandoned.
Notice in the screen shot above, that the Extension Group 100 is called Voice Mail, the four ports have been
named VM1-VM4, the
Default Group
check box is checked and the
Voice Mail Enabled
check box is
selected and there is a timeout value of 45 seconds.

inDepth Basic Setup Guide
Section 2: Programming inDepth
inDepth Quick Setup Guide for the UX5000
◆
15
Shifts
Shifts control the data that is included or excluded from a report. So running a report from 8:30 AM Monday
until 17:00 on Friday and using the 24-Hour Shift will include all activity between those dates and time
INCLUDING the hours that the business is closed. To resolve this, you would use the Working Day Shift
which must be configured to show the times that business is open.
From the Configurator, select
Miscellaneous
Tab and then
Shifts
.
Select the
Shift to Edit
(or create new ones or delete existing ones) and click Change.

inDepth Basic Setup Guide
Section 2: Programming inDepth
16 ◆inDepth Quick Setup Guide for the UX5000
This dialog box allows you to define the days and times that make up the Working Day. In this example, the
Working Day is Monday through Friday between 08:30 and 18:00.
Each cell can be set individually if the start and finish times vary across the days
These are the basic steps required to get started with the inDepth. For more information, refer to the
inDepth Help File or the inDepth and UX5000 manuals which go into more detail.
Other manuals for UX5000
17
Table of contents
Other NEC PBX manuals

NEC
NEC Univerge SV9300 User manual

NEC
NEC NEAX 2400 IPX Owner's manual

NEC
NEC SL1000 Owner's manual

NEC
NEC DS2000 IntraMail User manual

NEC
NEC ELECTRA ELITE IPK II Owner's manual

NEC
NEC SV8300 Installation instructions

NEC
NEC Univerge SV9100 Quick start guide

NEC
NEC XN120 2OPBOX User manual

NEC
NEC Univerge SV8100 User manual

NEC
NEC SL1100 User manual
Popular PBX manuals by other brands

Panasonic
Panasonic HYBRID IP-PBX KX-TDA100 installation manual

LG-Ericsson
LG-Ericsson iPECS SBG-1000 quick start guide

Matrix
Matrix ETERNITY NE quick start

TransTel Communications
TransTel Communications IP8100C user manual

Nortel
Nortel Meridian Companion Product support bulletin

Auerswald
Auerswald COMpact 4000 Operation guide