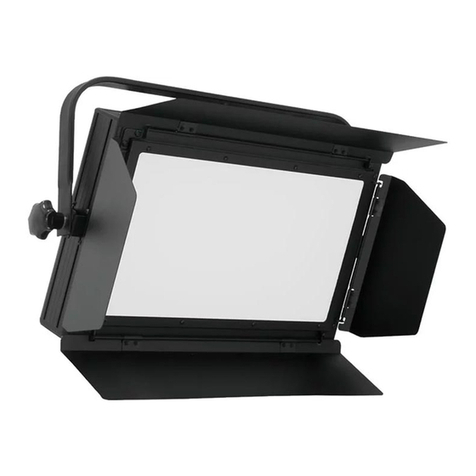
ALPHA LITE FS Series User manual

LED LIGHTING FOR UHD BROADCASTING
EST.2008
USER MANUAL
SPOT LIGHT
FS SERIES

1
1. Do not open or disassemble the cover to reduce the risk of electric shock.
2. Please wear safety equipment such as safety helmet during work.
3. Be sure to fix the safety chain on the product when installing and moving.
4. Please install the signs below for people to bypass
when install the product on high truss.
5. The work should be done under the direction of approved specialist
who is trained in safety and mechanical installations.
6. The brightness and color temperature before and after aging may be different.
Safety Information
WARNING

2
Safety Information 1
Contents 2
[Fixture Information]
Fixture Information 3
FixtureExteriorView 4
Dimensions 5
TechnicalSpecifications 8
PhotometricDiagram 9
[Fixture Installation]
Power Connection 10
DMX Connection 11
[LCD Screen Instruction]
Unlocking 12
Screen Instruction 13
Menu Tree 14
Main Screen by Mode
& Product Information 15
DMX Mode
(Channel Change & Address Setup) 16
User Mode
(Intensity& Color Temperature& TintAdjust) 17
Color Mode
(Not applicable model)
[Extra Function]
Sleep Mode Function 18
Master Function 18
RDM Function 18
Dimming Speed Setup 18
Fixture ID Number Setup 19
Fixture Label Setup 19
[Error Information]
Temperature Sensor 20
Network Connection 20
[Protocols]
DMX Protocols 21
RDM Protocols 23
Contents

3
Fixture Information
FS Series uses a multi-focusing zoom lens based on ALPHA LITE’s unique technology,
and there is no yellowing phenomenon at the boundary of illuminated light
by multi focus LED and color temperature change by chromatic aberration.
FS Series is a single light source with a large capacity, such as a halogen lamp,
and the texture of the light source projected by the lens is very soft.
Also, the boundary of the shadow is formed smoothly without sharpness.
Beam cutting is excellent by adjusting the angle of the barn door.
FS Series is light weight compare to capacity, and designed sturdy housing.
FS Series applies wireless DMX communication method,
so user can set up lighting fixture simply without a signal cable.
The Smart Touch LCD control that includes intuitive manual operation and
address display window was designed with the user’s convenience.
Also, the housing is designed for easy maintenance and repair.

4
Fixture Exterior View
Yoke
Focus Knob
Install Area
Smart Touch
LCD Screen
Handle
Install Area
Connector
Panel
Fixed Knob
Install Area

5
Dimensions (FS1000 / FS1500)
mm
(inch)

6
Dimensions (FS2000)
mm
(inch)

7
Dimensions (FS3000 / FS5000)
mm
(inch)

8
Technical Specifications
FS1000 FS1500 FS2000 FS3000 FS5000
Optical System Focusable Fresnel Lens
Lens Diameter 170mm / 7” 200mm / 8” 250mm / 10”
Beam Angle 15°~ 55°(Half Peak Angle)
Weight (kg/lbs) 8.5 / 18.7 10 / 22 14 / 30.9
Handling Adjusting Sliding Stirrup, High Strength Tilt Lock
Mounting 16mm / 28mm
Tilt Angle ±270°
Power Supply Range AC 100-240V, 50/60Hz
Power Consumption 180W 250W 350W 500W 650W
LED Chip 300W CSP LED 300W CSP LED 400W CSP LED 600W CSP LED 800W CSP LED
White Light (CCT) Full 2,900~6,000K (VCT)
CRI 95~98
Dimming 0~100% 16-bit
Control 5-PIN DMX In and Out, Smart Touch LCD Controller, RDM,
(Option) Wireless DMX512, Wireless RDM
Remote Device Management RDM Setup
Ambient Temperature Operation -20~45°C
IP Rating IP20
Estimated LED Lifetime Over 50,000 hours
▪This specificationdata is based on the aging state of the equipment, and the brightness and color temperature before and after agingmay be different .

9
Photometric Diagram
Source Four 15-55°
Zoom set at 50°(cosine)
ISO-Luminace Diagram
10% 50%
FS1000 (50°)
FS1500 (50°)
FS2000 (50°)
FS3000 (50°)
FS5000 (50°)
844
1395
1983
2947
4130
331
552
773
1163
1620
178
297
408
615
850
110
185
250
391
535
Illuminance(lux)
9

10
Power connection
AC power at 100-240V, 50-60Hz
1. POWER ON/OFF SWITCH
2. POWER IN
3. DMX IN
4. DMX OUT
5. USBPORT(forADMINISTRATORONLY)
(Do not connect USB
without administrator's permission.)
1. Observe the proper voltage range
2. If power is supplied outside the range, noise may be generated from the SMPS.
3. If the operating voltage is out of the proper voltage range,
SMPS function may be degraded or damaged.

11
DMX Connection
1-Shield
2-Signal (-)
3-Signal (+)
4-Not Connected
5-Not Connected
1-Shield
2-Signal (-)
3-Signal (+)
4-Not Connected
5-Not Connected
DMX-INPUT
XLR Mounting-plugs
DMX-OUTPUT
XLR Mounting-sockets
3-pin or 5-pin XLR sockets are equipped for DMX input and output, depending on user needs.
Connect the controller to a lighting, or lighting fixture to other lighting fixture.
If user uses a standard DMX controller, the DMX output of the controller can connect directly
to the DMX input of the first fixture in the DMX chain.
User must use an adapter cable for connect the DMX controller to other XLR output.
Connect the DMX output of the first lighitng fixture in DMX chain to the DMX input of the next fixture, and connect one
output to the input of the next fixture until all fixtures are connected.
In the last lighting fixture, the DMX cable must be end with a terminator(120 Ω resistor)
in DMX output signal (+, -).

12
Unlocking
Main Screen (Locked) Fixture ID Screen (Locked)
When the fixture is turned on, the Smart Touch screen automatically locked.
To unlock the touch screen, touch the finger icon( ) three times.
If you do not touch for 30 seconds, the lock is reset.
A
A
A

13
Screen Instructions
1
Current Mode
Display DMX MODE or USER MODE or COLOR MODE.
2
Current Channel Mode
Display current channel mode (only display on DMX MODE)
3
DMX512 Address
Display current DMX512 Address.
4
Brightness (Intensity)
Displays the brightness value(0~100%) of the equipment.
5
CCT (Correlated Color Temperature)
Displays the color temperature(2900~6000K) of the equipment.
6
Fixture
Current Temperature The current temperature of the instrument is detected and displayed in °C.
7
Activated Function Control Bar
Adjust the selected function among Intensity, Color Temperature and Tint.
8
Home
Return to the main screen
9
DMX512 Mode & Address Setup
Set channel mode and DMX512 address
10
User Mode Setup
Set ‘Intensity’, ‘CCT’, and ‘Tint’ manually
11
ColorModeSetup(
Notapplicablemodel)Set ‘RGB’ lighting color, ‘Saturation’, and ‘Intensity’
12
Setting
Setting or changing the function of the equipment.
13
Fixture ID
Displays numbers for equipment management.
14
Equipment Information
Displays the help that describes the screen.
15
Screen Rotation
LCD screen is rotated 180°for each touch.
16
Sleep Mode Setup
Activate and deactivate LCD Auto off function
17
Master Setup
Activate and deactivate Master function
18
RDM Mode Setup
Activate and deactivate RDM function
19
Dimming Speed Setup
Set dimming speed
1 2
3
4 5
7
8
9
10
11
14
15
12
13
Main Screen (Unlocked)
Setting Screen
16
17
18
6
19

14
Menu Tree
ΘSetting
Sleep mode setup
Master function setup
RDM mode setup
Dimming speed setup
ΘInformation
Description of each function
ΘFixture ID
ΘFixture ID screen
Fixture ID number input
ΘInformation
Description of fixture ID
ΘInformation
Basic equipment information
ΘRotate
ΘHome (Main screen)
ΘDMX512 Mode
DMX mode select
DMX address input
ΘInformation
DMX channel value
ΘUser Mode
Intensity setup
Color temperature setup
ΘInformation
Description of each function
ΘColor Mode (Not applicable model)
RGB color setup
Saturation setup
White setup
ΘFull screen
Individual RGB setup and Preset
ΘInformation
RGBW value

15
Main Screen by Mode & Product Information
The current mode is displayed among DMX mode, user mode and color mode(not applicable model) in the upper left corner of
the main screen, and the DMX address number of the equipment is displayed in the middle with a yellow number.
At the bottom, the current lighting value and fixture temperature are displayed, and some lighting value can be adjusted on the
main screen by touching the value.
User can check information such as manufacturer, product model name, firmware version, UID
number, current temperature of equipment, usage time of equipment, LED usage time, website,
manual download link, etc. by clicking the INFO button on the main screen.
Through each ‘Menu – INFO’ touch, user can check the menu description and functions
Description and
function of each menu
(DMX MODE) (USER MODE) (COLOR MODE)

16
DMX Mode Channel Change & Address Setup
- 1 (1 Ch Mode) : Dimming
- 2 (2 Ch Mode) : Dimming, CCT
Pressing the Info button in DMX512 MODE, displays each channel information and value.
To return to the previous screen, press the Info button again.
*Support channels and features vary by product.
User can move to the DMX channel change screen by selecting ‘DMX512 MODE’ button in main screen.
In DMX512 MODE screen, user can select DMX channel mode on top tap, and input DMX512 address
by pressing the number pad.
- DMX MODE : It is used to adjust by DMX512 signal.

17
User Mode Setup & Intensity / CCT Adjust
User can move to the User Mode change screen by selecting ‘USER MODE’ button
or press ‘Current Intensity’, ‘Current CCT’, ‘Current Tint’ in main screen to activate function control bar.
In USER MODE screen, select the bar user want to change to activate(Orange color),
and can adjust the activated value by dragging.
Drag the activated bar close to the desired value, and then touch to set the exact value.
- USER MODE : It is used when the user directly manipulates the equipment.
Intensity : The number indicates the current brightness value of the fixture and is displayed from 0 to 100%.
CCT : The number indicates the current color temperature value of the fixture and is displayed from 2,900 to 6,000K.
Pressing the Info button in USER MODE, displays description of each function.
To return to the previous screen, press the Info button again.

18
Extra Function –Sleep Mode / Master / RDM / Dimming Speed
Additional settings besides the main icons can be setup
by selecting SETTING button in main screen.
In SETTING, user can set SLEEP MODE, MASTER, RDM, and
DIMMING SPEED features. Each time touch the SLEEP MODE,
MASTER SETUP, RDM MODE user can select On or Off, and
DIMMIN SPEED SETUP can be activated by touching,
and press +, - to adjust the value.
Sleep mode setup(Default=Off) : Set the feature that the screen automatically turn off after 30 seconds,
if there is no touch operation. If Off, it is always on while power is on.
Master setup(Default=Off) : Set the feature that allows user to synchronize and control all fixtures without a console connection.
If Off, the DMX signal will follow.
RDM setup (Default=On) : Set the feature that enables bi-directional wireless communication through RDM equipment.
If Off, this equipment will not be searched on RDM equipment.
Dimming speed setup : The number indicates the current dimming speed value of the fixture and is displayed from 0 to 40.
The higher the value, the slower the dimming speed, and ’15’ is default speed.
Pressing the Info button in SETTING,
displays description of each function.
To return to the previous screen,
press the Info button again.
Ex)
★Master Setting Precautions
1. Remove the DMX IN connection in the Master equipment.
2. In the same network, set only one equipment to master.
3. Set all equipments to the same channel mode as the Master.
4. After setting the master, individual operation of
non-master equipments may cause error.

19
Fixture ID & Label Setup
Ex 1 Ex 2 Ex 3 Ex 4 Ex 5
Input(Device Label in RDM) SPOT123 SPOT1234 SPOT12345 SPOT STUDIO13-23
Fixture Label(in Fixture) SPOT123 SPOT1234 SPOT12345 SPOT STUDIO13-23
ID Number(in Fixture) 123 1234 2345 001 023
User can change the screen to Fixture ID and number
by selecting FIXTURE ID button in main screen.
In FIXTURE ID, touch the large number to switch to the Fixture ID
number(from 1 to 9999) input window.
Press the Enter to set the ID and switch to large number screen.
Press the Home button to go to the main screen.
The label of the device is basically the model name, and it can be changed through RDM
communication, but it can’t be changed through the Smart Touch LCD.
When changing the label of the device through RDM, enter the device name(English) and the
management number in the 'Device Label' field. The entered contents are displayed in the upper left corner.
The fixture ID is automatically displayed in 3 or 4 digits from automatically recognized 4 digits in contents.
If user do not enter any number, the fixture ID is displayed as ‘001’.
Pressing the Info button in FIXTURE ID,
displays description of the function.
It is the number value 001 to 9999 for the
management of the equipment and can be
changed manually or using RDM.
(Main Screen) (Fixture ID Screen) (Fixture ID Input window)
Fixture Label Setup
Other manuals for FS Series
4
This manual suits for next models
5
Table of contents
Other ALPHA LITE Light Fixture manuals

ALPHA LITE
ALPHA LITE A Series User manual

ALPHA LITE
ALPHA LITE A-Plus Series User manual

ALPHA LITE
ALPHA LITE E Series User manual

ALPHA LITE
ALPHA LITE A Series User manual

ALPHA LITE
ALPHA LITE DS-PAD User manual
ALPHA LITE
ALPHA LITE HORI LIGHT CYC Series User manual

ALPHA LITE
ALPHA LITE DL Series User manual

ALPHA LITE
ALPHA LITE HORI LIGHT CYC Series User manual

ALPHA LITE
ALPHA LITE CYC HORI LIGHT User manual

ALPHA LITE
ALPHA LITE E Series User manual