Altana BYK byko-drive S Manual

Measure what you see
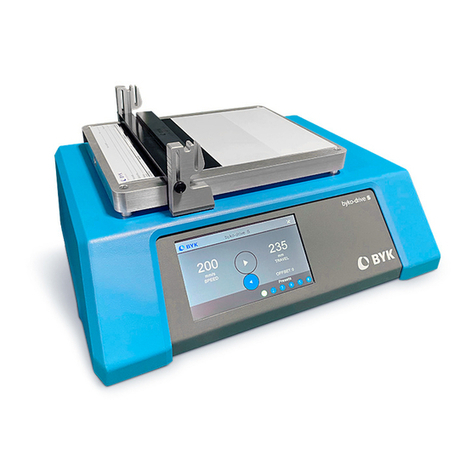
byko-drive S
Automatic Film Applicator
Operating Manual

BYK-Gardner byko-drive S
2 285 025 845 E 2106
© Copyright 2021 BYK-Gardner GmbH
All rights reserved

BYK-Gardner byko-drive S
285 025 845 E 2106 3
Table of Contents
1 Introduction .............................................................................................................. 4
1.1 About this Document .................................................................................................. 4
1.2 Safety Information ...................................................................................................... 5
1.2.1 Safety Instructions ......................................................................................... 5
1.2.2 General Information...................................................................................... 6
1.2.3 Operation Information.................................................................................. 6
1.3 Copyright Information ................................................................................................ 6
2 System Description................................................................................................... 7
3 System Preparation .................................................................................................. 8
3.1 Delivery Content.......................................................................................................... 8
3.2 Control Elements ......................................................................................................... 9
4 System Operation..................................................................................................... 10
4.1 Start Up ........................................................................................................................ 10
4.2 User Interface............................................................................................................... 10
4.2.1 Home Screen .................................................................................................. 10
4.2.2 Set Speed........................................................................................................ 12
4.2.3 Set Length ...................................................................................................... 12
4.2.4 Set Start Point ................................................................................................ 13
4.2.5 Set Units ......................................................................................................... 14
4.2.6 Set Language ................................................................................................. 15
4.2.7 Set Brightness................................................................................................. 15
4.3 Film Application........................................................................................................... 16
5 Maintenance and Repair .......................................................................................... 17
5.1 Exchanging Glass Plate with Vacuum Plate ............................................................... 17
5.2 Exchanging Vacuum Plate with Glass Plate ............................................................... 18
5.3 Cleaning and Routine Maintenance........................................................................... 18
5.4 Service and Spare Parts ............................................................................................... 19
5.5 Ordering Information.................................................................................................. 19
5.5.1 Basic Device.................................................................................................... 19
5.5.2 Accessory Parts............................................................................................... 19
6 Technical Data........................................................................................................... 20
7 Service Points............................................................................................................ 21

byko-drive S BYK-Gardner
4 285 025 845 E 2106
1 Introduction
Dear customer,
thank you for having decided for a BYK-Gardner product. BYK-Gardner is com-
mitted to providing you with quality products and services. We offer complete
system solutions to solve your problems in areas of color, appearance and phys-
ical properties. As the basis of our world-wide business, we strongly believe in
total customer satisfaction.
Therefore, in addition to our products, we offer many VALUE-ADDED services:
• Technical Sales Force
• Technical and Application Support
• Application and Technical Seminars
• Repair and Certification Service
BYK-Gardner is part of Altana AG and a direct subsidiary of BYK-Chemie
GmbH, a leading supplier of additives for coatings and plastics. Together, we
offer complete and unique solutions for you, our customer
Thank your for your trust and confidence. If there is anything we can do better
to serve your needs, do not hesitate to let us know.
Your BYK-Gardner Team
•https://www.byk-instruments.com
1.1 About this Document
This instruction manual is an important part of this instrument. It contains es-
sential information about setting up, placing in service and use. If you pass the
device on to another user, please ensure that the instruction manual is included
with the instrument. The manual must be studied carefully before working
with the equipment. Please contact your regional service office if you have any
questions or require additional information about the device:
•https://www.byk-instruments.com/contact-infos
The technology and fittings are based on state-of-the art optic and electronic
technology. New developments and innovations are constantly being inte-
grated into the equipment. Thus, the diagrams, dimensions, and technical data
used in this manual may have changed as a result of adapting the device to
new information and improvements.

BYK-Gardner byko-drive S
285 025 845 E 2106 5
1.2 Safety Information
1.2.1 Safety Instructions
Caution!
Read this instruction manual completely before using the instrument.
Warning!
This manual cannot address all of the safety considerations associated with its
use. It is the responsibility of the user to consult this manual and establish ap-
propriate safety practices for use with this equipment and the individual mate-
rial being tested.
Warning!
The byko-drive S Automatic Film Applicator is designed and intended for the
use described in this manual. Using the Automatic Film Applicator for other
purposes for which it was not designed may reduce or eliminate the protection
offered by the features of the applicator. Serious injury may result.
Warning!
Never defeat the ground conductor or operate the equipment in the absence
of a suitably installed ground conductor. Contact the appropriate electrical in-
spection authority or an electrician if you are uncertain that suitable grounding
is available.
Warning!
Ultimate disposal of this product should be handled according to all national
laws and regulations.
Attention
The byko-drive S Automatic Film Applicator works with a moving traverse car-
riage. No parts of the carriage may be touched or held during operation. Once
the Forward key is pressed no work should be carried out within the travel
area of the carriage.

byko-drive S BYK-Gardner
6 285 025 845 E 2106
1.2.2 General Information
Please note the following points for handling the device:
• Please unpack the device carefully.
• Retain the packaging in case you want to ship the device at a later date.
• It is a stationary device - it must not be transported or moved during oper-
ation.
1.2.3 Operation Information
Please note the following points for operating the device:
• During the film application process the applicator is driven from left to
right.
• Familiarize yourself with the layout and operation of the controls.
• During movement, pressing anywhere on the screen will immediately stop
the carriage at any point of its travel.
• Ensure the operator has no loose clothing or jewelry which could become
caught in the moving parts.
1.3 Copyright Information
No portion of the software, documentation or other accompanying materials
may be translated, modified, reproduced, copied or other-wise duplicated
(with the exception of a backup copy), or distributed to a third party, without
prior written authorization from BYK-Gardner.
In any cases, this requires the prior written consent of BYK-Gardner.
BYK-Gardner offers no guarantee that the software will function without error
or that the functions incorporated therein can be executed on all applications
and combinations selected by you.
No liability other than as provided by law as assumed for direct or indirect
damage sustained in association with the use of the instrument, the software
or documentation.
BYK-Gardner reserves the right to update the software and written documen-
tation without prior notice.
© Copyright 2021 BYK-Gardner
All rights reserved

BYK-Gardner byko-drive S
285 025 845 E 2106 7
2 System Description
The byko-drive S is an automatic film applicator. It is designed to assist the
user in achieving consistent film application by maintaining a consistent speed
and drawdown pressure. Manual drawdowns are often inconsistent, especially
between operators. This makes test comparisons between samples either diffi-
cult or unreliable.
Some of the factors affecting the drawdown are the shear rate and the pres-
sure placed on the applicator tool. The byko-drive S employs a precise speed
control along with a consistent weight to suit the particular material being ap-
plied.
The byko-drive S is compatible with most applicators, both bar and wire
types. The applicator is placed in front of the pushbar so that the applicator is
pushed along the test surface once the byko-drive S is started. With both the
speed and weight controlled, a consistent and uniform film is produced.
The byko-drive S is equipped with either a vacuum plate or a glass plate with
clamp. The vacuum plate requires an external vacuum pump to hold a test sam-
ple in place. The glass plate model uses a spring-loaded clamp to hold the sam-
ple.
A wide variation in speeds is available, from 2 mm/sec to 200 mm/sec (0.5 inch/
sec to 7.9 inch/sec). The micro-controller electronics of the byko-drive S en-
sures accurate speed control under all operating conditions.
The start and length of drawdown may be modified by the operator to speed
repetitive drawdowns that use smaller sizes test samples.
Notice
The vacuum pump is available as an accessories - see for example:
https://www.byk-instruments.com/p/3877.

byko-drive S BYK-Gardner
8 285 025 845 E 2106
3 System Preparation
3.1 Delivery Content
Unpack the unit being careful to check all packaging for items. Some acces-
sories may be found in a separate box within the main box. Within the package
are the following standard items.
Quantity Description
1 Applicator unit byko-drive S with:
• Vacuum plate or
• Glass plate
1 Power supply
1 Power cord
1 Weight 500 g
1 Drip pan
1 Safety instructions
1 Short instructions
Locate a suitable location free from obstructions and clutter. The byko-drive S
should be at a convenient height for the operator.
Plug the power supply into the DC input jack on the rear side, next to the
power switch. A power cord appropriate for your area’s power connector is
supplied to connect the power supply with AC power. The system will operate
on power from 100 - 240 V AC ~ at 50 - 60 Hz.
Place the drip pan in the provided indentation on the right of the vacuum
plate.
The 500 g weight is used to provide additional pressure on an applicator or
hold a wire-wound rod is the proper position. If needed, place the weight in
the slots of the pusher bar.

BYK-Gardner byko-drive S
285 025 845 E 2106 9
3.2 Control Elements
1
2
3
4
56
7
8
1 Push-bar 2 Weight guide slot
3 Wire rod clearance slot 4 Push-bar weight 500g / 1.1 lbs
5 Vacuum plate 6 Drip pan
7 Touchscreen display 8 Adjustable feet (underneath)

byko-drive S BYK-Gardner
10 285 025 845 E 2106
4 System Operation
4.1 Start Up
Plug the external power supply into the connector on the rear of the instru-
ment near the power switch. Plug the other end into an appropriate electrical
outlet as described in section System Preparation [}8].
Turn on the power switch. The power switch is located on the rear of the in-
strument, near the power cord.
The display will turn on and if not already there, the carriage will move to the
start point; the instrument is now ready to operate.
4.2 User Interface
All user functions are operated through a touchscreen interface.
4.2.1 Home Screen
The large Play button in the center starts the carriage moving with the speed,
travel and offset options as indicated on the display. The settings may be
changed by pressing the Setup icon in the upper right corner.
The six Presets buttons allow saving of six different setup combinations. The
settings are first changed within the Setup screen and then saved by pressing
and holding the Presets button where you would like to store the settings.
There are six setups stored from the factory, press each of the buttons to re-
view the settings before changing them.

BYK-Gardner byko-drive S
285 025 845 E 2106 11
The factory stored settings are as follows:
1. Speed - 100mm/sec, Length - 235mm, Offset - 0mm
2. Speed - 200mm/sec, Length - 215mm, Offset - 20mm
3. Speed - 450mm/hr, Length - 235mm, Offset - 0mm
(drying time setup)
4. Speed - 1.0 in/sec, Length - 9.2 in, Offset - 0 in
5. Speed - 7.9 in/sec, Length - 9.2 in, Offset - 0 in
6. Speed - 5.0 in/sec, Length - 8.5 in, Offset - 0.7 in
System Setup
Press the Tool icon in the upper right corner of the home screen to access the
Setup screen. Note the current settings. Press the band you wish to change and
it will turn blue. Press once more to access the screen to change the setting.
Note that once you start making changes to the settings, the Preset you are
changing will change from yellow to blue with a white ring. This is to remind
you of the preset that is being changed. You do not have to save the changes if
you want to make a temporary change. If not saved, the changes made will be
lost if the unit is turned off or another preset is selected. To save the changes,
press and hold the button where you would like to store the settings for at
least 3 seconds. When you release the button it will be yellow and the settings
will be stored and able to be recalled on the run screen by pressing the appro-
priate Preset button.

byko-drive S BYK-Gardner
12 285 025 845 E 2106
4.2.2 Set Speed
Adjusts the speed that the carriage will move. Press the appropriate Up or
Down arrow to adjust each digit. The first press will turn the button blue and
subsequent press will increase or decrease the number. The settings here are
also dependent on the selections made on the Units screen. The instrument
may be set to operate between 2 and 200 mm per second for standard mode
Application. Speeds from 50 to 3600 mm per hour may be selected in mode
Drying Time. Once the desired speed is set, press the Save icon in the lower
right of the screen to return to the Setup screen. The Close icon in the lower
left will exit the screen with no changes saved.
4.2.3 Set Length
Adjusts the length of carriage travel. This is the length the carriage will move
from the Start Point. Press the appropriate Up or Down arrow to adjust each
digit. The first press will turn the button blue and subsequent press will in-
crease or decrease the number. The instrument may be set to operate between
0 and 235 mm.

BYK-Gardner byko-drive S
285 025 845 E 2106 13
Note that the maximum travel TOTAL is 235 mm. If you set a start point at
somewhere other than 0 the length will be reduced by the start point setting.
An example would be if you set the start point to 20 mm, the maximum draw-
down length would be 215 mm (235 - 20 = 215). Once the desired length is set,
press the Save icon in the lower right of the screen to return to the Setup
screen. The Close icon in the lower left will exit the screen with no changes
saved.
4.2.4 Set Start Point
Adjusts the place the carriage will begin the drawdown. Press the appropriate
Up or Down arrow to adjust each digit. The first press will turn the button
blue and subsequent press will increase or decrease the number. The instru-
ment may be set to start from 0 and 225 mm.
Note that the maximum travel TOTAL is 235 mm. If you set a start point at
somewhere other than 0 the length will be reduced by the start point setting.
An example would be if you set the start point to 20 mm, the maximum draw-
down length would be 215 mm (235 - 20 = 215). Once the desired start point is
set, press the Save icon in the lower right of the screen to return to the Setup
screen. The Close icon in the lower left will exit the screen with no changes
saved.

byko-drive S BYK-Gardner
14 285 025 845 E 2106
4.2.5 Set Units
Changes the units in which the system operates. This also sets the instrument
into mode Drying Time if desired. The drying time accessory can be ordered
separately - see Accessory Parts [}19]. Press the button to the left of the de-
sired units to turn it blue. Selecting units from the left column sets units for
standard mode Application speed in units/second. Selecting from the right
column with the Drying indication sets units for mode Drying Time speed in
units/hour. Screens for Length, Start Point and Speed will display in the units
selected. Once the desired units are selected, press the Save icon in the lower
right of the screen to return to the Setup screen. The Close icon in the lower
left will exit the screen with no changes saved.
Note that it is possible to save both application setups and drying setups to dif-
ferent radio buttons. For example, save a drawdown setup in mm/sec to radio
button 1 and a drying time setup in mm/hour to radio button 2. Then select ra-
dio button 1 to make the drawdown, follow the process for a drawdown and
when finished, press the Reverse button, select radio button 2 and start the
drying time process without removing the drawdown.

BYK-Gardner byko-drive S
285 025 845 E 2106 15
4.2.6 Set Language
Changes the language for all screens. Press the appropriate Up or Down arrow
to adjust each digit. Press the button to the left of the desired language to turn
it blue. Once the desired language is selected, press the Save icon in the lower
right of the screen to return to the Setup screen. The Close icon in the lower
left will exit the screen with no changes saved.
4.2.7 Set Brightness
Adjusts the brightness of the screen. Press the appropriate Up or Down arrow
to adjust each digit. The first press will turn the button blue and subsequent
press will increase or decrease the number. The brightness may be set between
0 and 10. Once the desired brightness is set, press the Save icon in the lower
right of the screen to return to the Setup screen. The Close icon in the lower
left will exit the screen with no changes saved.

byko-drive S BYK-Gardner
16 285 025 845 E 2106
4.3 Film Application
There are two different plates available to hold the drawdown substrates. For
vacuum plate models the chart or substrate is held in place with vacuum. Vac-
uum must be provided from an external source. The fitting for the vacuum line
is attached on the left side of the plate.
Place a chart that will be used on the vacuum plate. If any holes are uncovered
they must covered with paper or tape to allow the vacuum to properly secure
the chart. Post-it® brand Labeling & Cover-up Tape (part number 658) has been
shown to work effectively for this purpose and can easily be removed without
leaving residue on the vacuum plate. *
Place a test chart or other substrate material on the vacuum plate. Turn on the
vacuum source. (For models with the glass plate, simply place the substrate on
the glass, under the sample clamp.)
Once the substrate is held in place, position an appropriate Bird applicator,
wire rod, square applicator or other applicator bar in front of the push-bar.
Note that the push-bar is adjustable to the height needed for different applica-
tors. Adjust the height by loosening the two thumbscrews and move the bar to
the appropriate height for your applicator. To keep wire rods from rotating
and when additional weight is needed for other applicators, set the Weight
into the slots of the push-bar allowing the rubber strips to hold the applicator
in place. Most rods may be accommodated, as longer rods will extend through
the notches provided in the push-bar.
Apply an appropriate amount of coating immediately in front of the applica-
tor. Press the Forward button and the application will begin.
At the end of the travel, the applicator will stop automatically. Remove the ap-
plicator for cleaning and press the Reverse button. Once the carriage has re-
turned to the start position, turn off the vacuum and remove the coated sub-
strate.
* Post-it® brand is a registered trademark of 3M.

BYK-Gardner byko-drive S
285 025 845 E 2106 17
5 Maintenance and Repair
5.1 Exchanging Glass Plate with Vacuum Plate
The factory installed glass plate may be replaced in the field with an optional
vacuum plate (accessory #3876, see “Accessory Parts [}19]”).
To exchange the plates follow these instructions:
1. Remove the glass by lifting on the right-hand edge. It will release with
firm, even force.
2. Remove the weight and the push-bar.
3. There are 4 screws, one at each corner of the glass plate support. Remove
these screws. These same screws will be used with the new plate.
4. Lift off the glass plate support. Note the position of the 4 aluminum spac-
ers.
5. The vacuum plate accessory comes with 2 vacuum fittings. Select a fitting
appropriate to the size of the tubing that will be used.
6. Set the glass plate support on the spacers.
7. Install the 4 screws to hold the plate. Start each screw in the threads, then
tighten all four.
8. Reinstall the weight and the push-bar.
9. Set the removed plate and glass aside. Be sure to protect the glass from
breakage.
Notice
Installing a vacuum plate requires an external vacuum source - see “Accessory
Parts [}19]”.

byko-drive S BYK-Gardner
18 285 025 845 E 2106
5.2 Exchanging Vacuum Plate with Glass Plate
The factory installed vacuum plate may be replaced in the field with an op-
tional glass plate (accessory #2127, see “Accessory Parts [}19]”).
To exchange the plates follow these instructions:
1. Remove the weight and the push-bar.
2. There are 4 screws, one at each corner of the plate. Remove these screws.
These same screws will be used with the new plate.
3. Lift off the plate. Note the position of the 4 aluminum spacers.
4. Set the glass plate support on the spacers.
5. Install the 4 screws to hold the plate. Start each screw in the threads, then
tighten all four.
6. For the glass plate support, make sure the corner pads are clean of dirt and
dust, then place the glass in position under the paper clamp.
7. Reinstall the weight and the push-bar.
8. Set the other plate aside. Store the plate is such a way as to protect the
surface of the plate.
5.3 Cleaning and Routine Maintenance
Care should be taken to avoid letting coating materials into the vacuum plate
holes. If cleaning is needed the holes can be cleaned with a solvent appropriate
for the coating material and a wooden toothpick.
Metal tools should be avoided as they may damage the aluminum vacuum
plate. Clean the rest of the instrument with a mild commercial cleaning solu-
tion or plain soapy water.
Avoid solvents on the cover and the keyboard area as they may be discolored
or otherwise damaged by strong solvents.

BYK-Gardner byko-drive S
285 025 845 E 2106 19
5.4 Service and Spare Parts
For all service and spare parts requirements, please contact your local BYK-
Gardner office. You can find your nearest service point in section “Service
Points [}21]” and on our webpage:
https://www.byk-instruments.com/contact-infos
5.5 Ordering Information
For the byko-drive S the following components can be ordered separately.
5.5.1 Basic Device
Catalog No. Description
2139 Automatic film applicator byko-drive S with vacuum plate
2140 Automatic film applicator byko-drive S with glass plate
5.5.2 Accessory Parts
Catalog No. Description
2124 Power supply with adapters
2125 Drip pan, small
2127 Glass plate accessory (replaces vacuum plate)
2141 Drying time accessory
2142 Push-bar weight, 500 g / 1 lbs (one is included with device)
2143 Push-bar weight, 1000 g / 2 lbs
3875 Vacuum pump, 230 V (UK plug)
3876 Vacuum plate accessory (replaces glass plate)
3877 Vacuum pump, 230 V (Schuko plug)
3879 Vacuum pump, 115 V

byko-drive S BYK-Gardner
20 285 025 845 E 2106
6 Technical Data
Drawdown speed 2 - 200 mm / sec (0.8 - 7.9 in / sec)
Drawdown length 25 - 235 mm (1.0 - 9.2 in)
Starting point offset 0 - 210 mm (0 - 8.2 in)
Units Metric (mm) / Inch (in)
Languages Chinese, English, French, German, Italian, Japanese,
Russian, Spanish
Display brightness 0 - 10
Presets 1 - 6
Temperature range 1° C to 38° C (35° F to 100° F) for operation
-18° C to 66° C (0° F to 150° F) for storage
Relative humidity Up to 85% non-condensing at 35° C (95° F)
Operation altitude Up to 2000 m (6561 ft)
Dimensions (LxWxH) 470 x 356 x 203 mm (18.5 x 14.0 x 8.0 in)
Weight 13.2 kg (29 lbs)
Power supply device Input: 24 V ; max. 3.75 A
External power supply Input: 100 - 240 V ; 50 - 60 Hz ; max. 1.3 A
Output: 24 V ; max. 3.75 A
Other manuals for BYK byko-drive S
1
This manual suits for next models
4
Table of contents
Other Altana Laboratory Equipment manuals
Popular Laboratory Equipment manuals by other brands

Thermo Scientific
Thermo Scientific Heraeus Multifuge 4KR instruction manual

Air Science
Air Science UV-BOX UVB-15 User's operation manual

Kubota
Kubota 2420 Nstruction and service manual

Agilent Technologies
Agilent Technologies 4150 TapeStation system System manual

Imlab
Imlab IKA ULTRA-TURRAX T 10 basic manual

Optics11 Life
Optics11 Life PAVONE user manual