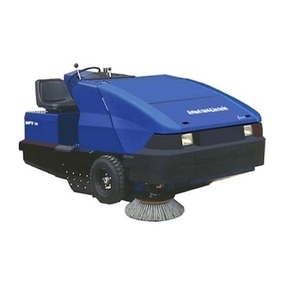
Alto 3366XP Installation and operation manual

American-Lincoln 1-1
3366XP
AMERICAN-LINCOLN
TECHNOLOGY
Beginning with Serial No. 586039
All directions given in this book are as seen from the operator's position at the rear of the machine.
READ THIS BOOK
This book has important information for the use and safe operation of this machine. Failure
to read this book prior to operating or attempting any service or maintenance procedure to
your machine could result in injury to you or to other personnel; damage to the machine or to
other property could occur as well. you must have training in the operation of this machine
before using it. If you or your operator (s) cannot read English, have this manual explained
fully before attempting to operate this machine.
Part No. 2004 American-Lincoln Printed in the U.S.A.
UL
®
ISO 9001
FILE A2287
#
OPERATOR'S
MANUAL &
PARTS LIST
3366XP
POWER
SWEEPER

1-2 American-Lincoln
3366XP
TABLE OF CONTENTS
MACHINE SPECIFICATIONS .......................................................................................................... 1-5
MACHINE DIMENSIONS ................................................................................................................. 1-7
STANDARD HARDWARE & TORQUE VALUES ............................................................................... 1-8
HYDRAULIC TORQUE REQUIREMENTS ........................................................................................ 1-9
DECIMAL-METRIC CONVERSION TABLE ...................................................................................... 1-10
MACHINE OPERATION ................................................................................................................... 1-11
SAFETY INSTRUCTIONS ................................................................................................................ 1-12
OPERATION OF CONTROLS AND GAUGES .................................................................................. 1-13
WATER TEMPERATURE GAUGE ........................................................................................... 1-13
HOUR METER ......................................................................................................................... 1-13
FUEL GAUGE.......................................................................................................................... 1-13
OIL PRESSURE GAUGE ......................................................................................................... 1-13
VOLT METER .......................................................................................................................... 1-13
HYDRAULIC FLUID SIGHT GLASS .......................................................................................... 1-14
BROOM & FAN SWITCH ......................................................................................................... 1-14
SHAKER MOTOR SWITCH...................................................................................................... 1-14
TIMED SHAKER MOTOR SWITCH (OPTION) .......................................................................... 1-14
RIGHT SIDE BROOM LIFTAND POWER CONTROL ............................................................... 1-15
IGNITION SWITCH ................................................................................................................... 1-15
WET-SWEEP BYPASS SWITCH - (OPTIONS) ........................................................................ 1-15
TURN SIGNALS - 4 WAY (OPTIONS) ...................................................................................... 1-15
FOOT BRAKE.......................................................................................................................... 1-16
ACCELERATOR and DIRECTIONAL CONTROL PEDAL .......................................................... 1-16
BACKUPALARM (OPTION) ..................................................................................................... 1-16
SEAT CONTROL ...................................................................................................................... 1-16
PARKING BRAKE .................................................................................................................... 1-17
CIRCUIT BREAKERS ............................................................................................................... 1-17
GLOW PLUG (DIESEL) ........................................................................................................... 1-17
HOPPER LIFT/SIDE BROOM LEVER ...................................................................................... 1-18
HOPPER DUMP/RETURN CONTROL LEVER ......................................................................... 1-18
THROTTLE CONTROL ............................................................................................................. 1-18
CHECK ENGINE LIGHT ........................................................................................................... 1-19
MAIN BROOM LIFT.................................................................................................................. 1-19
WORK LIGHT SWITCH - (OPTIONS) ....................................................................................... 1-19
LIGHT SWITCH - (OPTIONS) ................................................................................................... 1-19
HORN BUTTON ....................................................................................................................... 1-19
CAB - (OPTIONS) - NOT SHOWN............................................................................................ 1-19
LOW OIL SHUT DOWN ........................................................................................................... 1-19
OPERATING INSTRUCTIONS ......................................................................................................... 1-20
PRE-START CHECK LIST ........................................................................................................ 1-20
TO START ENGINE .................................................................................................................. 1-20
TO OPERATE SWEEPER ....................................................................................................... 1-20
TO STOP SWEEPER .............................................................................................................. 1-20
POST-OPERATION CHECK LIST ............................................................................................. 1-21
TO EMPTY DEBRIS HOPPER ................................................................................................. 1-21
TOWING INSTRUCTIONS ........................................................................................................ 1-22
DUST FILTERS ........................................................................................................................ 1-22
DUST CONTROL SYSTEM ...................................................................................................... 1-22
LP-POWERED MACHINES .............................................................................................................. 1-23
SAFETY REQUIREMENTS ...................................................................................................... 1-23
LP CHECK LIST ....................................................................................................................... 1-23
LP VAPOR WITHDRAWAL SYSTEM....................................................................................... 1-24
LP VAPORIZER/REGULATOR QUICK CHECK ........................................................................ 1-24
LP FUEL TANKS...................................................................................................................... 1-25
USE & CARE OF LP TANKS ................................................................................................... 1-25
CHANGING MACHINE LP TANKS ........................................................................................... 1-25
STORAGE OF LP FUEL TANK ................................................................................................ 1-25
MAINTENANCE SERVICE CHART FOR 3366XP ............................................................................. 1-26
HOW TO SWEEP ............................................................................................................................ 1-28
GENERAL MACHINE MAINTENANCE ............................................................................................. 1-29
LUBRICATION .......................................................................................................................... 1-29

American-Lincoln 1-3
3366XP
TABLE OF CONTENTS
HOW TO OPEN THE ENGINE COVER.................................................................................... 1-29
HYDRAULICS .......................................................................................................................... 1-30
HOW TO FILL THE HYDRAULIC RESERVOIR ........................................................................ 1-30
THE HYDRAULIC OIL COOLER ............................................................................................... 1-30
HOW TO CLEAN THE HYDRAULIC SYSTEM ......................................................................... 1-31
HOW TO CLEAN THE HYDRAULIC SUCTION STRAINER ....................................................... 1-31
HOW TO REPLACE THE RETURN FILTER ELEMENT ............................................................ 1-31
HOW TO REPLACE THE MAIN BROOM ................................................................................. 1-32
MAIN BROOM LEVELADJUSTMENT ...................................................................................... 1-32
HOW TO ADJUST MAIN BROOM WEAR PATTERN ................................................................ 1-33
SIDE BROOM LEVELADJUSTMENT ...................................................................................... 1-33
SIDE BROOM REPLACEMENT ............................................................................................... 1-33
BROOM FLAPS ....................................................................................................................... 1-33
ENGINE AIR INTAKE SYSTEM ................................................................................................ 1-34
AIR FILTER .............................................................................................................................. 1-34
TO REPLACEAIR FILTER ELEMENT ...................................................................................... 1-34
BRAKEADJUSTMENT ............................................................................................................ 1-36
BRAKE DRUMADJUSTMENT ................................................................................................. 1-36
PNEUMATIC WHEELS ............................................................................................................ 1-36
COOLING SYSTEM ................................................................................................................. 1-37
COOLANT LEVEL .................................................................................................................... 1-37
RADIATOR ............................................................................................................................... 1-37
DRIVE BELTS .......................................................................................................................... 1-38
BATTERY ................................................................................................................................. 1-38
GAS TANK ............................................................................................................................... 1-39
HOPPERADJUSTMENT .......................................................................................................... 1-39
STEERINGADJUSTMENT ....................................................................................................... 1-39
CHECK ENGINE LIGHT CODES ...................................................................................................... 1-40
HARDWARE ABBREVIATIONS ....................................................................................................... 1-43
ORDERING PARTS ......................................................................................................................... 1-44
PARTS LIST CHAPTER 2
Driver Compartment ................................................................................................................................. 2-2
Frame, Broom Door, & Flaps ................................................................................................................... 2-4
Control Panel & Horn .............................................................................................................................. 2-6
Hopper Lid & Filter System ..................................................................................................................... 2-8
Hopper Lift System (Variable Dump) ........................................................................................................ 2-10
Hopper Lift System (Low Dump) .............................................................................................................. 2-12
Steering Gear & Rear Drive System ........................................................................................................ 2-14
Forward/Reverse Control ......................................................................................................................... 2-16
Brake & Front Wheel Assembly .............................................................................................................. 2-18
Brake Control Linkage ............................................................................................................................. 2-20
Main Broom Lift Mechanism .................................................................................................................... 2-22
Main Broom ............................................................................................................................................ 2-24
Side Broom ............................................................................................................................................. 2-26
Auxiliary Pump & Fittings ....................................................................................................................... 2-28
Main Pump & Fittings ............................................................................................................................. 2-29
Impeller & Fittings ................................................................................................................................... 2-30
Control Valve & Fittings (Variable Dump) ................................................................................................. 2-32
Control Valve & Fittings (Low Dump) ....................................................................................................... 2-33
Rear Drive Motor & Fittings ..................................................................................................................... 2-34
Main Broom Motor & Fittings .................................................................................................................. 2-35
Side Broom Motor & Fittings ................................................................................................................... 2-36
Lift, Rotation & Dump Cylinders w/ Fittings (Variable Dump).................................................................... 2-37
Dump Cylinders w/ Fittings ..................................................................................................................... 2-38
Lift Cylinder Lock-out Valve & Fittings ..................................................................................................... 2-39
Auxiliary Manifold & Fittings .................................................................................................................... 2-40
Return ManifoldAssembly (Variable Dump) ............................................................................................. 2-41
Return Manifold Assembly (Low Dump) ................................................................................................... 2-42
Hydraulic Oil Cooler ................................................................................................................................ 2-43
Hydraulic Reservoir & Fittings ................................................................................................................. 2-44
1-4 American-Lincoln
3366XP
TABLE OF CONTENTS
Engine Cover ........................................................................................................................................... 2-46
Ford 425EFI Gas/LP Engine (Fan, Mounts, Brackets) ............................................................................. 2-48
Ford 425EFI Gas/LP Engine (Exhaust Systems) .................................................................................... 2-50
Ford 425EFI GAS Engine (Fuel System) ................................................................................................. 2-52
Ford 425EFI GAS Engine (Fuel System continued) ................................................................................. 2-54
Ford 425EFI LP Engine (Fuel System) .................................................................................................... 2-56
Ford 425EFI LP Engine (Fuel System continued) .................................................................................... 2-58
LPTank System ...................................................................................................................................... 2-62
Air Cleaner Assembly (all models) ........................................................................................................... 2-64
Mitsubishi S4Q2 Diesel Engine (Fan, Brackets, Throttle) ........................................................................ 2-66
Mitsubishi S4Q2 Diesel Engine (Exhaust System) .................................................................................. 2-68
Mitsubishi S4Q2 Diesel Engine (Fuel System) ........................................................................................ 2-70
Radiator & Shroud (Gas/LP) .................................................................................................................... 2-71
Radiator & Shroud (Diesel) ...................................................................................................................... 2-72
Fuel Tank (Gas/Diesel) ............................................................................................................................ 2-73
CE Kit .................................................................................................................................................. 2-74
Decals .................................................................................................................................................. 2-76
Instrument Panel ..................................................................................................................................... 2-78
Hydraulic Hose System (Variable Dump) ................................................................................................. 2-80
Hydraulic Hose System (Common to Variable & Low Dumps) ................................................................. 2-82
Hydraulic Hose System (Low Dump) ....................................................................................................... 2-84
Hydraulic Schematic (Variable Dump) ..................................................................................................... 2-88
Hydraulic Schematic (Low Dump) ........................................................................................................... 2-86
Machine Harness Routing ....................................................................................................................... 2-88
Ford 425EFI (Frame Side) Harness Routing ............................................................................................ 2-90
Mitsubishi S4Q2 (Frame Side) Harness Routing ..................................................................................... 2-91
Electrical Schematic (Gas/LP/Diesel) ..................................................................................................... 2-92
Connection Diagram (Gas/LP/Diesel) ...................................................................................................... 2-93
CHAPTER 3 OPTIONS
Safety Air Cleaner ................................................................................................................................... 3-2
Broom Options ........................................................................................................................................ 3-3
Back-up Alarm ........................................................................................................................................ 3-4
Blower Attachment .................................................................................................................................. 3-6
Tire Options ............................................................................................................................................ 3-7
Fire Extinguisher ..................................................................................................................................... 3-8
Flame Arresting Gas Cap ........................................................................................................................ 3-9
Lights Option........................................................................................................................................... 3-10
Turn Signal & Brake Light Options .......................................................................................................... 3-12
Turn Signal & Brake Light (con’t) ............................................................................................................. 3-14
Side Broom Light .................................................................................................................................... 3-16
Warning Light Option .............................................................................................................................. 3-18
Warning Light Option w/ Overhead Guard ................................................................................................ 3-20
Overhead Guard ...................................................................................................................................... 3-22
Work Light Option ................................................................................................................................... 3-23
Suspension Seat Option ......................................................................................................................... 3-24
Timed Shaker Motors .............................................................................................................................. 3-25
Left Side Broom Option ........................................................................................................................... 3-26
Vacuum Side Brooms Option .................................................................................................................. 3-28
Vacuum Wand Option ............................................................................................................................. 3-30
Wet Sweep Bypass Option ..................................................................................................................... 3-32
Filter Warning System Option ................................................................................................................. 3-34
Pulse - Air³ .............................................................................................................................................. 3-36
Pulse – Air³ - Electrical Schematic .......................................................................................................... 3-38
Pulse – Air³ - Hydraulics.......................................................................................................................... 3-40
Engine Service Parts - Ford 425EFI Gas/LP ............................................................................................ 3-41
Engine Service Parts - Mitsubishi S4Q2 Diesel ....................................................................................... 3-42

American-Lincoln 1-5
3366XP
MACHINE SPECIFICATIONS
DIMENSIONS
Length 97.0 inches (246.4 cm.)
Width 70.5 inches (179.1 cm.)
Wheel Base 45.2 inches (114.8 cm.)
Height 59.5 inches (151.1 cm.)
DRIVES
Propelling Variable Displacement Pump
Hydraulic Drive Motor
Sweeping (2) Hydraulic Motors
Vacuum (1) Hydraulic Motor
Multi Level Dump (4) Hydraulic Cylinders
HYDRAULIC CONTROLS
Single foot pedal controls forward, neutral, reverse and dynamic braking.
Switch controlled broom and vacuum fan on/off.
Steering wheel controls maneuverability to the right and left. Power steering system translates
steering wheel rotation to rear wheel angle.
MECHANICAL SYSTEMS
Brakes Foot-operated with hand-operated locking drum brakes
Brooms
Main Lift and height adjustment
Side Lift
SWEEPING SYSTEM
Type Direct throw
Hopper 27 cubic feet 1500 lbs. (680 Kg.)
Filter Area 170 square feet
Main Broom
Length 50 inches (127 cm.)
Diameter 16 inches (40.6 cm.)
Bristle length 4.25 inches (10.8 cm.)
Features broom lift and adjustable broom height for wear compensation, standard proex and wire broom and quick
change system.
Side Broom
Diameter 23 inches (58.5 cm.)
Features side broom lift, independent broom angle and height adjustment for wear compensation and
nylon fiber broom.
Dust Control System
Twin quick change treated pleated paper type panel air filters (85 square feet or 7.9 square meters)
with a 9 inch (22.9 cm.) hydraulically driven vacuum impeller.
SYSTEM FLUID CAPACITIES
Engine Cooling System
Radiator and Hoses 4.0 quarts (3.8 liters)
Gas/LP System total 8.0 Quarts (7.6 l.)
Diesel system total 8.0 Quarts (7.6 l.)
Fuel Tank
Gas, Diesel Fuel 9.2 gallons (34.8 liters)
LP Fuel 33 lbs. (15 kg.)
Hydraulic System 7 gallons (26.5 liters)
SPECIFICATIONS

1-6 American-Lincoln
3366XP
GENERAL MACHINE PERFORMANCE
Sweeping Width 66 inches (167.6 cm.)
Speed
Maximum Travel 8.0 MPH (12.9 Km/Hr)
Recommended Sweeping Speed 3.0 MPH( 4.8 Km/Hr)
Turning Radius
Left 68 inches (172.5 cm.)
Right 110 inches (279.4 cm.)
Minimum aisle width for 180° turn 120 inches (304.8 cm.)
WEIGHT
3366 Gas Variable Dump 3700 lbs. (1678 Kg.)
3366 Gas Variable Dump w/Crate 4200 lbs. (1905 Kg.)
ENGINE DATA
Ford LRG425 EFI
Bore and Stroke 3.78” x 3.40” (96.0 mm x 86.3 mm)
Oil Capacity 4.5 quarts (4.3 liters) (including filter)
Displacement 4 cylinders (2.5 liters) (153 CID)
Fuel 87 A.K.I. (Standard Unleaded Gasoline)
HD-5 for LP versions
Mitsubishi S4Q2 Diesel
Bore and Stroke 3.46" x 4.06” (88 mm x 103 mm)
Oil Capacity 7.2 quarts (7 liters) -Oil pan /
8.4 quarts (8 liters) - Complete system
Displacement 4 cylinders (2.5 Liters) (153 cu. in.) (122 CID)
Fuel ASTM No. 2-D
High temperature/low pressure sensors with engine shutdown are standard on both the Ford 425EFI and
Mitsubishi S4Q2.
WHEELS
Diameter 21 inches
Tire Pneumatic (6.90/6.00 x 9)
Rim 9 in. (22.86 cm), 5 bolts
WARRANTY
Our general conditions of business are applicable with regard to the guarantee. Subject to change as a
result of technical advances. The guarantee is invalidated if the machine is not operated in accordance
with these instructions or otherwise abused. The guarantee is invalidated if the machine is not serviced as
described.
MACHINE DATA
SPECIFICATIONS
IP X3
MODEL
MACHINE NAME
DATE / SERIAL NUMBER
WEIGHT
RATED POWER
MAX OPERATING SLOPE
L
WA
B
R

American-Lincoln 1-7
3366XP
59.5"
151.1 cm
45.2"
114.8 cm
35.8"
90.9 cm
97.0"
246.4 cm
120.0" max.
304.8 cm
63.0"
160.0 cm
30.2"
76.7 cm
30.2"
76.7 cm
70.5"
179.1 cm
C-0100
MACHINE DIMENSIONS

1-8 American-Lincoln
3366XP
SAE - Grade 5 SAE - Grade 8
Screw
Size
Grade
5
Plated
Grade
8
Plated
410H
Stainless
Brass Type
F&T
&BT
Type
B, AB
*6
*8
*10
*1/4
5/16
3/8
7/16
1/2
9/16
5/8
3/4
7/8
1
14
27
39
86
15
28
44
68
98
135
239
387
579
15
28
43
108
17
31
49
76
110
153
267
-
-
-
-
-
130
22
40
63
95
138
191
338
545
818
-
-
-
151
24
44
70
108
155
216
378
-
-
18
33
47
114
19
34
55
85
-
-
-
-
-
20
35
54
132
22
39
62
95
-
-
-
-
-
5
9
13
32
6
10
16
-
-
-
-
-
-
20
37
49
120
-
-
-
-
-
-
-
-
-
23
41
64
156
-
-
-
-
-
-
-
-
-
21
34
49
120
-
-
-
-
-
-
-
-
-
C
CCC
FFF F
C = Coarse Thread
F = Fine Thread
* = Torque values for #6 through 1/4 are lb./in. All others are lb./ft.
NOTE
Decrease the torque by 20% when using thread lubricant
The torque tolerance is ± on torque values.
C2000/9905
STANDARD HARDWARE & TORQUE VALUES

American-Lincoln 1-9
3366XP
HYDRAULIC TORQUE REQUIREMENTS
Nominal
SAE
Dash
Size
O-ring Face Seal End SAE O-ringBoss End
Thread
Size
Inch
Swivel Nut
Torque
Thread
Size
Inch
Str. Fitting or
Locknut
Torque
LB-FT LB-FT
-3 * * 3/8-24 8-10
-4 9/16-18 10-12 7-16-20 14-16
-5 * * 1/2-20 18-20
-6 11/16-16 18-20 9/16-18 24-25
-8 13/16-16 32-35 3/4-16 50-60
-10 1-14 46-50 7/8-14 72-80
-12 1 3/16-12 65-70 1 1/16-12 125-135
-14 1 3/16-12 65-70 1 3/16-12 160-180
-16 1 7-16-12 92-100 1 5/16-12 200-220
-20 1 11/16-12 125-140 1 5/8-12 210-280
-24 2-12 150-165 1 7/8-12 270-360
* O-Ring Face Seal Not Defined for this tube size.
NOTE
Parts must be lightly oiled with hydraulic fluid.
O-RING SIZE CHART
Part Number
2-00-04962
2-00-04963
2-00-04964
O.D.
0.441
0.629
0.879
I.D.
0.301+0.005
0.489+0.005
0.739+0.005
Width
0.07
0.07
0.07
Description
O-ring Seal Tube Size 4
O-ring Seal Tube Size 8
O-ring Seal Tube Size 12
HYDRAULIC TORQUE REQUIREMENTS

1-10 American-Lincoln
3366XP
DECIMAL-METRIC CONVERSION TABLE
Fraction Decimal Millimeter Fraction Decimal Millimeter
1 0.015625 0.3969 33 0.515625 13.0969
64 64
1 0.03125 0.7938 17 0.53125 13.4938
32 32
3 0.046875 1.1906 35 0.546875 13.8906
64 64
1 0.0625 1.5875 9 0.5625 14.2875
16 16
5 0.078125 1.9844 37 0.578125 14.6844
64 64
3 0.09375 2.3813 19 0.59375 15.0813
32 32
7 0.109375 2.7781 39 0.609375 15.4781
64 64
1 0.125 3.1750 5 0.625 15.8750
8 8
9 0.140625 3.5719 41 0.640625 16.2719
64 64
5 0.15625 3.9688 21 0.65625 16.6688
32 32
11 0.171875 4.3656 43 0.671875 17.0656
64 64
3 0.1875 4.7625 11 0.6875 17.4625
16 16
13 0.203125 5.1594 45 0.703125 17.8594
64 64
7 0.21875 5.5563 23 0.71875 18.2563
32 32
15 0.234375 5.9531 47 0.734375 18.6531
64 64
1 0.25 6.3500 3 0.75 19.0500
4 4
17 0.265625 6.7469 49 0.765625 19.4469
64 64
9 0.28125 7.1438 25 0.78125 19.8438
32 32
19 0.296875 7.5406 51 0.796875 20.2406
64 64
5 0.3125 7.9375 13 0.8125 20.6375
16 16
21 0.328125 8.3344 53 0.828125 21.0344
64 64
11 0.34375 8.7313 27 0.84375 21.4313
32 32
23 0.359375 9.1281 55 0.859375 21.8281
64 64
3 0.375 9.5250 7 0.875 22.2250
8 8
25 0.390625 9.9219 57 0.890625 22.6219
64 64
13 0.40625 10.3188 29 0.90625 23.0188
32 32
27 0.421875 10.7156 59 0.921875 23.4156
64 64
7 0.4375 11.1125 15 0.9375 23.8125
16 16
29 0.453125 11.5094 61 0.953125 24.2094
64 64
15 0.46875 11.9063 31 0.96875 24.6063
32 32
31 0.484375 12.3031 63 0.984375 25.0031
64 64
1 0.5 12.7000 1 1.0000 25.4000
2
C-2001

American-Lincoln 1-11
3366XP
Unpacking and Preparing the Machine for Operation
YOUR MODEL 3366XP POWER SWEEPER HAS BEEN SHIPPED COMPLETE, BUT DO NOTATTEMPT TO
OPERATE WITHOUT READING THE FOLLOWING INSTRUCTIONS.
1. Uncrate the machine and carefully remove from skid to prevent damage.
2. Connect and tighten battery cables.
3. Fill tank with UNLEADED gasoline or Diesel Fuel.
WARNING
Never fill fuel tank while the engine is running. Always be sure gasoline container and sweeper are electrically
connected before pouring gas. This can be easily done by providing an insulated wire (permanently attached to
the container) with battery clip on the other end.
4. Check engine crankcase oil level. Although properly lubricated at factory, check before starting
engine. No special break-in oil is used and recommended number of operating hours before the
initial oil change is the same as normal. See Maintenance chart.
5. Check radiator coolant level. Permanent type antifreeze is added at the factory to provide protection
to approximately -35° F (-37° C). To retain this protection level, always add 1/2 part water to 1/2 part
antifreeze.
6. Check oil level in the hydraulic reservoir located at center of machine beside the engine. The
hydraulic reservoir is full, if oil can be seen in the sight glass with the hopper in “DOWN” position.
If oil is required, add HYDRAULIC FLUID ONLY, automatic transmission fluid FORD type “F” ATF.
NOTE
After the first 50 operating hours, service must be performed on your engine to insure future high performance
and trouble free operation. See Maintenance.
MACHINE OPERATION
C1033 FIGURE 1

1-12 American-Lincoln
3366XP
WARNING
FOR SAFETY, OBSERVE THE FOLLOWING WARNINGS. FAILURE TO COMPLY MAY CREATE A SERIOUS RISK OF INJURY TO
YOURSELF AND OTHERS. THIS MACHINE SHOULD NOT BE USED IN HAZARDOUS LOCATIONS INCLUDING AREAS OF
VOLATILE DUST OR VAPOR CONCENTRATIONS.
1. To avoid possible injury or property damage, read the operator’s manual before using the machine.
2. Fire hazard. Fine dust, fuels solvents and thinner can explode and cause severe burns.
3. Do not use with/ or near flammable materials or vapors. Use only with good ventilation.
4. Heavy machinery, Improper use can cause personal injury.
5. Operate only from the designated operators position. Keep inside the body of the machine. Keep
hands and feet on the designated controls. Always operate in well lighted areas.
6. Do not leave the machine on a ramp or dock. After stopping the machine, turn all the switches off.
7. Do not dump the hopper over an open pit or dock. Do not dump the hopper when positioned on a grade (ramp).
The machine must be level (horizontal).
8. Operate only when lids, doors, and access panels are securely closed.
9. Never travel with the hopper in the raised position.
10. The operator must exhibit extreme caution when negotiating, turning and traveling across grades or ramps.
11. Start, stop, change direction, travel and brake smoothly. Slow down when turning. Avoid uneven
surfaces and loose materials.
12. Watch out for obstructions, especially overhead.
13. Carry no passengers on the machine.
14. Set parking brake when leaving the machine. Chock (block) the wheels if the machine is to be parked
on a grade (ramp), or is to be worked on.
15. Never leave the operator’s seat with the engine running.
16. Report damage or faulty operation immediately. Do not operate the machine until repairs have been completed.
17. Maintenance and repairs must be done by authorized personnel only.
18. Never manually depress the electrical switch on the left lift arm when the hopper is raised.
WARNING
TO MAINTAIN THE STABILITY OF THIS SWEEPER IN NORMAL OPERATION, THE COUNTER-WEIGHTS, OVER-HEAD GUARD,
REAR BUMPER GUARD, OR ANY SIMILAR EQUIPMENT, INSTALLED BY THE MANUFACTURER AS ORIGINAL EQUIPMENT,
SHOULD NEVER BE REMOVED. IF IT BECOMES NECESSARY TO REMOVE SUCH EQUIPMENT FOR REPAIR OR MAINTE-
NANCE. THIS EQUIPMENT MUST BE REINSTALLED BEFORE THE SWEEPER IS PLACED BACK IN OPERATION.
WARNING
WHEEL ASSEMBLY MAY EXPLODE CAUSING SERIOUS PERSONAL INJURY OR DEATH. WHEEL ASSEMBLY MUST BE
SERVICED BY PROPERLY TRAINED AND QUALIFIED PERSONNEL IN ACCORDANCE WITH FEDERAL OSHA STANDARD 29
CFR PART 1910.177.<D>
WARNING
DO NOT ADD AIR TO TIRE AND RIM ASSEMBLIES THAT HAVE BEEN OPERATED
IN A SERIOUS UNDERINFLATED OR FLAT CONDITION.
THE TIRE AND RIM COMPONENTS CAN EXPLODE CAUSING SERIOUS OR FATAL INJURIES.
-Always deflate a tire and wheel assembly completely before removing it from the vehicle for servicing.
-An underinflated tire is one inflated to 80% or less of recommended air pressure.
-Never use mismatched tire/rim components.
SAFETY INSTRUCTIONS
ENGLISH
WEEE Symbol Information
Correct Disposal of This Product (Waste Electrical & Electronic Equipment)
(Applicable in the European Union and other European countries with separate
collection systems)
This marking, shown on the product or its literature, indicates that it should not be
disposed with other household wastes at the end of its working life. To prevent possible
harm to the environment or human health from uncontrolled waste disposal, please
separate this from other types of wastes and recycle it responsibly to promote the
sustainable reuse of material resources. Household users should contact either the
retailer where they purchased this product, or their local government office, for details
of where and how they can take this item for environmentally safe recycling. Business
users should contact their supplier and check the terms and conditions of the purchase
contract. This product should not be mixed with other commercial wastes for disposal.

American-Lincoln 1-13
3366XP
WATER TEMPERATURE GAUGE (See Figure 2)
The water temperature gauge is located on the instrument panel to the left of the fuel gauge. The gauge is
activated by a sender in the engine. It displays the engine water temperature in °F.
HOUR METER (See Figure 2)
This meter is located to the left of the oil pressure gauge on the instrument console. This meter is activated
when the engine begins running. The meter indicates actual “run” time of the machine. The meter can be used
to indicate when maintenance should be done to the machine.
FUEL GAUGE (See Figure 2)
The fuel gauge is located between the water temperature gauge and the volt meter on the instrument panel,
and indicates the level of fuel contained in the fuel tank.
OIL PRESSURE GAUGE (See Figure 2)
The oil pressure gauge is located on the instrument panel to the right of the hour meter. The gauge is
mechanical and activated by a sender in the engine. It displays the engine oil pressure in PSI.
VOLT METER (See Figure 2)
The volt meter is located on the control panel to the left of the fuel gauge. The meter indicates the charging
or discharging of the battery. When the key is in the accessory position the gauge will register approx. 12
volts. The meter will indicate approx. 13 to 14.5 volts when the engine is running. This indicates that the
alternator is working correctly.
WATER TEMPERATURE GAUGE
HOUR METER
FUEL GAUGE
OIL GAUGE
VOLT METER
BROOM & FAN SWITCH
SHAKER MOTOR SWITCH
RIGHT SIDE
BROOM LIFT
WET SWEEP BYPASS
(OPTION)
IGNITION SWITCH
TURN SIGNAL (OPTION)
FOOT BRAKE
ACCELERATOR &
DIRECTIONAL
CONTROL PEDAL
BACKUP ALARM SWITCH
(OPTION)
SEAT ADJUSTMENT
HORN
LIGHT SWITCH
(OPTION)
WORK LIGHT
SWITCH (OPTION)
MAIN BROOM LIFT
LEFT SIDE BROOM
LIFT (OPTION)
CHECK ENGINE LIGHT (GAS/LP)
THROTTLE CONTROL GAS/LP
DIESEL
HOPPER ROTATE
& DUMP
HOPPER LIFT
CIRCUIT BREAKERS
PARKING BRAKE
GLOW PLUG (DIESEL)
P4586ecp FIGURE 2
OPERATION OF CONTROLS AND GAUGES

1-14 American-Lincoln
3366XP
HYDRAULIC FLUID SIGHT GLASS (See Figure 3)
The sight glass is located on the side of the hydraulic oil reservoir.
The sight glass indicates the level of the hydraulic oil in the reservoir.
Fluid level must be visible in the sight glass when the hopper is in the down position. If the sight glass is
completely full, then there is too much fluid in the reservoir.
BROOM & FAN SWITCH (See Figure 2)
The broom and fan switch is located to the left of the right side broom lever. This switch “powers” the
brooms and the vacuum fan system. It has on-off positioning.
SHAKER MOTOR SWITCH (See Figure 2)
The shaker motor switch is located below the broom and fan switch. This is a momentary switch that will
activate the filter shaker motors. Hold the switch for 20 to 30 seconds to activate the shaker motors. When
the shaker motors have been activated, the brooms and impeller fan will stop. The shaker motors will only
operate with the hopper in the “SWEEP” position. The switch is not on the control panel if the machine is
equipped with the CDC Dust Control Filter Option.
TIMED SHAKER MOTOR SWITCH (OPTION) (See Figure 2)
The shaker motor switch is located below the broom and fan switch. This is a momentary switch that will
activate the filter shaker motors for 20 to 30 seconds after it has been pushed. When the shaker motors
have been activated, the brooms and impeller fan will stop. The shaker motors will only operate with the
hopper in the “SWEEP” position.
OPERATION OF CONTROLS AND GAUGES
HYDRAULIC
SIGHT GLASS
P4696a FIGURE 3

American-Lincoln 1-15
3366XP
RIGHT SIDE BROOM LIFT AND POWER CONTROL (See Figure 4)
The right side broom lift and power control is located on the right side of the instrument panel. To raise and stop
the side broom, grasp the lever and push the lever to the locking notch, marked “UP”. To lower the side broom,
grasp the lever, push it up and to the left, away from the locking notch. Let the lever lower -until it rests by the
“DOWN” mark. The broom will automatically begin rotating as it is lowered. To turn “ON” the side brooms,
move the Hopper Lift/Side Broom Lever forward to the “ON” position (See Figure 9).
IGNITION SWITCH (See Figure 5)
The keyed ignition switch is located to the right of the steering column on the instrument panel. It has four
positions.
1. The key turned to the center “OFF” position will shut of the engine. The following items can be activated
in the “OFF” position.
a. Horn
b. Filter Shaker Motors
c. Light Options
2. The key turned to the left “ACCESSORY” position will allow the following additional items to be activated:
a. Turn Signals
b. Instrument Gauges
3. The key turned to the right “IGN/ON” position will allow all the items listed above to be activated. This
position will not start the engine.
4. The key turned to the far right “START” position will start the engine. This position is a momentary
position. The key will revert to the “IGN/ON” position when it is released.
WET-SWEEP BYPASS SWITCH (OPTION) (See Figure 2)
The wet-sweep bypass switch is located to the right of the steering wheel under the shaker motor switch.
The switch activated will shut off the vacuum motor. This will keep the dust filters from being ruined by the
water pickup from sweeping water.
4-WAY TURN SIGNALS (OPTION) (See Figure 2)
The turn signal option is located on the steering column and works as automotive turn signals work, forward
on the lever for right and back on the lever for left. The 4 way flasher will activate when the turn signal lever
is pulled out.
OPERATION OF CONTROLS AND GAUGES
UP
DOWN
RIGHT SIDE
BROOM LIFT
OFF
IGNITION
START
A
CC
P4687 FIGURE 4 P4385 FIGURE 5

1-16 American-Lincoln
3366XP
FOOT BRAKE (See Figure 6)
The foot brake pedal is located to the right of the steering column on the floor of the driver compartment.
The foot brake on front wheels is a mechanical system actuated by the brake pedal.
ACCELERATOR & DIRECTIONAL CONTROL PEDAL (See Figure 7)
The accelerator and directional control pedal is located on the floor of the operator’s area, to the right of the
brake pedal. The accelerator and directional control pedal controls the machine direction and travel speed.
1. Put foot pressure on the upper portion of the pedal. The machine will move forward.
2. Increase the foot pressure on the upper portion of the pedal to increase the forward speed.
3. Put foot pressure on the lower portion of the pedal. The machine will move in reverse.
4. Increase the foot pressure on the lower portion of the pedal to increase the reverse speed.
5. To stop the machine, put light foot pressure on the opposite end of the accelerator and directional control
pedal. If the machine is moving forward, put light foot pressure on the lower portion of the pedal. If the
machine is moving in reverse, put light foot pressure on the upper portion of the pedal.
BACK UP ALARM (OPTION) (See Figure 2)
The back up alarm is operated by a switch that is located under the lower section of the Accelerator and
directional control pedal. The alarm makes a loud audible noise when the machine is being driven in
reverse.
SEAT ADJUSTMENT (See Figure 2)
This lever is located on the right of the seat. This lever allows the seat to be adjusted forward or back when
the lever is moved.
OPERATION OF CONTROLS AND GAUGES
FOOT BRAKE
REVERSE
NEUTRAL
NEUTRAL
FORWARD
P4689 FIGURE 6 P4066 FIGURE 7

American-Lincoln 1-17
3366XP
PARKING BRAKE (See Figure 8)
The parking brake lever is located in the left side of the
driver compartment floor. This lever when raised to the
upright position will “lock” the foot brake pedal in the down
position.
CIRCUIT BREAKERS (See Figure 2)
The circuit breakers are located to the left of the steering wheel. When a circuit breaker “pops” out, this is an
indication of an electrical problem that must be corrected before the breaker can be reset.
There can be up to seven circuit breakers in the row. They control the following circuits, beginning with number
1 on the left:
CB-1 = Filter shaker motors
CB-2 = Horn
CB-3 = Starter relay
CB-4 = Ignition
CB-5 = Accessory
CB-6 = Options
CB-7 = Cab Options
GLOW PLUG (DIESEL)
WARNING
It is advised that in no circumstances should either or any other unauthorized starting aids be used at the same
time as the Glow Plugs.
To operate the glow plugs, the following procedure should be adopted.
1. Before operating he starter motor, press the “GLOW PLUG” button for approximately 20 to 30 seconds.
2. With the “GLOW PLUG” button still depressed, engage the starter motor until the engine starts.
3. Continue to press the “GLOW PLUG” button for a few seconds after the engine has started until even
running has been obtained.
4. If the engine does not start, disengage the starter motor but keep the “GLOW PLUG” button depressed
for a further 10 to 15 seconds. When a further attempt is made to start the engine, keep the glow plugs
energized while starting and for a few seconds after the engine has fired until it is running smoothly.
PARKING
BRAKE
LOCKED
POSITION
OPERATION OF CONTROLS AND GAUGES
P4691 FIGURE 8

1-18 American-Lincoln
3366XP
HOPPER LIFT / SIDE BROOM LEVER (See Figure 9)
The Hopper Lift/Side Broom lever is located to the left side of
the drive compartment. The lever is a three position control
that operates the hopper lift, side broom and optional left side
broom.
NOTE
The Hopper Lift lever will not function until the hopper has
been rotated to clear the body of the sweeper.
The lever is spring centered from the rear position. The center
position turns OFF the side broom (or brooms) and is the
HOLD position when dumping the hopper. The lever is
detonated in the forward position. Move the lever forward to
turn ON the side broom when sweeping or to LOWER the
hopper when dumping the hopper. Move the lever back to
RAISE the hopper when dumping. Release the lever when the
hopper has reached the desired height. The lever will return to
the center HOLD position.
HOPPER DUMP/RETURN CONTROL LEVER (See Figure 9)
The Hopper Dump/Return lever is located to the left of the drive compartment. The lever is a two position control
that operates the hopper dump system. The lever is spring loaded to the center position which “STOPS” rotation
of the hopper. To rotate the hopper, move the lever forward to the dump position and hold. Release the lever
when the hopper reaches the desired position. The return the hopper after dumping, move the lever back to the
RETURN position. The hopper will rotate back and the hopper will lower to the seated position. Release the
lever once the hopper has been seated in the body of the sweeper.
WARNING
Never turn off the engine with the hopper in the lifted position.
THROTTLE CONTROL (Figures 10 & 10a)
The throttle control is located on the left side console. Gas and LP equipment have a throttle switch. Diesel
versions have a lever. Both have 3 throttle speed positions - IDLE, 1, and 2. To operate the diesel, grasp the
lever and push up and right to desired locking
notch. To reduce to idle, grasp the lever and push
up and to the left (away from both locking notches).
Let the lever lower until it rests at the bottom of the
slot. For the Gas/LP switch, the bottom position is
idle, the top position is top RPMs (2450 “no load”),
and the middle is lower speed (2050 “no load”
RPMs). “Load” (brooms and/or brushes and/or
dust control operating) and “No Load” (brooms,
brushes & dust control off) RPMs are the same for
gas and LP equipment; there will be a slight drop
between “Load” and “No Load” RPMs with diesels.
Always return the throttle lever to the idle position
before turning off the key to stop the engine.
OPERATION OF CONTROLS AND GAUGES
LOWER DUMP
RETURN
RAISE
HOPPER CONTROLS
HOPPER
ROTATE &
DUMP
HOPPER
LIFT
P4686 FIGURE 9
UP
UP
DOWN
DOWN
UP
UP
SWEEP
SWEEP
FLOAT
FLOAT
LEFT SIDE
BROOM
LIFT
(OPTION)
LEFT SIDE
BROOM
LIFT
(OPTION)
MAIN
BROOM
LIFT
MAIN
BROOM
LIFT
THROTTLE LEVER
THROTTLE SYMBOL
THROTTLE
SWITCH
THROTTLE
SYMBOL
CHECK
ENGINE
LIGHT
CHECK
ENGINE
LIGHT
SYMBOL
!
P4688ecp FIGURE 10 FIGURE 10a
MACHINE RPMs
IDLE “NO LOAD”
SWEEPER/ Gas/LP 950 2050
SCRUBBER Diesel 950 2150
(1 speed level)
SWEEPER Gas/LP 1st 950 2050
(2 speed levels) 2nd 950 2450
Diesel 1st 950 2150
2nd 950 2550

American-Lincoln 1-19
3366XP
CHECK ENGINE LIGHT (Gas, LP Only) (See Figure 10a)
The check engine light is located on the left side console. If the light comes on, it indicates a problem with the
engine. Flip the switch located on/near the air cleaner bracket in the engine compartment and count the number
of times the panel light flashes, then go to the “Check Engine Light Codes” page at the end of this chapter to
determine the problem.
LEFT SIDE BROOM LIFT AND POWER CONTROL (OPTION) (See Figure 10)
The left side broom lift control is located on the left side of the instrument panel. To raise and stop the side
broom, grasp the lever and push the lever to the locking notch marked “UP”. To lower the side broom, grasp the
lever and push it up to the right away from the locking notch. Let the lever lower until it rests by the “DOWN”
mark. To turn “ON” the side brooms, move the Hopper Lift/Side Broom Lever forward to the “ON” position.
MAIN BROOM LIFT (See Figure 10)
The main broom lift control is located to the left of the driver’s seat. To lower the main broom, grasp the lever
and push up and to the left to clear the locking notch. Move the lever down to the first or second notch in the
elongated slot. The first notch, “SWEEP”, is for normal sweeper (2 to 3 in. or 5 to 8 cm. broom pattern).
The second notch, “FLOAT”, is for heavy sweeping (4 to 5 in. or 10 to 13 cm. broom pattern), To raise the
main broom, push the lever up and slide into the locking notch in the “UP” position. You may operate the
main broom in either the “SWEEP” or “FLOAT” position. However, the “SWEEP” position should be used for
normal sweeping and will result in increased broom life. The “FLOAT” position should be used only when
sweeping in extremely uneven areas.
WORK LIGHT SWITCH (OPTION)
The work light switch is located under the light switch to the left side of the steering wheel. It allows the
operator to work the rear work light option when the headlights are on.
LIGHT SWITCH (OPTION)
The light switch is located under the horn to the left side of the steering wheel. It will work various light
options that are available for this machine, such as:
* Head Lights
* Tail Lights
* Side Broom Lights
* Instrument Lights
All gauges with the exception of the hour meter can have an option internal instrument light.
HORN BUTTON
The horn button is located to the left of the steering column. The horn button is always active. Push the horn
button to sound the horn.
CAB (OPTION)
The all weather cab is available for this machine along with several “cab only” options:
* Heater
* Windshield Wipers
* Defroster Fan
* Interior Light
Pressurizer
These options have their controls located on the cab.
LOW OIL SHUTDOWN
This engine is equipped with a low oil pressure shutdown. If the engine oil pressure drops too low, the engine
will shut down. Add engine oil until the oil is brought up to the correct level.
OPERATION OF CONTROLS AND GAUGES

1-20 American-Lincoln
3366XP
NOTE
Before starting the engine, perform these pre-start checks.
PRE-START CHECK LIST
1. Check engine air filter element indicator.
2. Check engine oil level.
3. Check radiator coolant level.
4. Check hydraulic fluid level.
5. Check fuel level.
6. Check all systems for leaks.
7. Check brakes and controls for proper operation.
8. Check broom patterns
BEFORE STARTING ENGINE
1. Set Parking Brake.
2. Make sure all controls are in the “Off” position.
TO START ENGINE
1. Be sure accelerator and directional control pedal is in neutral.
2. Turn key to “On” position & release.
3. If engine fails to start after following the above procedures, refer to Engine Manual Section.
NOTE
When machine has been stored in below-freezing temperatures, run engine at not over 1/2 throttle with machine
standing still for 5 to 10 minutes to warm engine and hydraulic oil.
TO OPERATE SWEEPER
1. Make sure parking brake is released.
2. Lower the side and main broom to the floor. (The main broom control may be placed in either the
“FLOAT” or “SWEEP” position.)
3. Turn Broom Fan Switch on.
4. Pull engine throttle to “UP” position. (Engine must always be operated at full governed speed while
sweeping to obtain recommended brush speed and dust control).
5. Push forward on directional control pedal to place machine in motion.
6. Vary your foot pressure on the directional control pedal to obtain desired travel speed.
TO STOP SWEEPER
1. Allow directional control pedal to return to neutral (centered) position. (Pedal will automatically return to
neutral when foot pressure is released.) FOR NORMAL OPERATION, DEPRESS DIRECTIONAL
CONTROL PEDAL WITH HEEL INTO NEUTRAL.
2. Depress the foot brake.
3. Turn Broom Fan Switch off.
4. Put the broom controls (Side and Main) in the “UP” position.
5. Push engine throttle down. Turn key to “OFF.”
6. Set parking brake.
OPERATING INSTRUCTIONS
Table of contents
Other Alto Floor Machine manuals

Alto
Alto IMAGE 26B User manual

Alto
Alto American-Lincoln 6150 Installation and operation manual

Alto
Alto FM-1500HD User manual

Alto
Alto 3DS User manual

Alto
Alto Bext-100 User manual

Alto
Alto SSB 400 W User manual

Alto
Alto FLOORTEC 380M User manual

Alto
Alto FLOORTEC R 570 P User manual

Alto
Alto Clarke IMAGE 14 User manual

Alto
Alto AMX-220MKII User manual

Alto
Alto SSB 430 User manual

Alto
Alto Vision 17E Operating and maintenance manual

Alto
Alto ALTO 1700HD Quick start guide

Alto
Alto TW 300 CAR Operating instructions

Alto
Alto 1700 User manual

Alto
Alto L-20 Quick start guide

Alto
Alto ENCORE R User manual

Alto
Alto ENCORE S2426 User manual

Alto
Alto Vision 21i User manual

Alto
Alto ATS 46 User manual