Altrex SHUTTLE User manual

Instruction manual NL x EN x FR x DE
739539-A-1020
SHUTTLE
1. NL Nederlands
2. EN English
3. FR Français
4. DE Deutsch

2www.altrex.com
2www.altrex.com
1. Inleiding
Deze handleiding is uitsluitend van toepassing op de Shuttle zoals omschreven in deze handleiding opbouw en gebruik, hierna
te noemen handleiding. Voordat u met de opbouw van de Shuttle begint, dient u deze handleiding zorgvuldig door te lezen. De
Shuttle dient volgens deze handleiding te worden opgebouwd en gebruikt. Alle aanwijzingen in deze handleiding dienen strikt
te worden opgevolgd. Indien de aanwijzingen in deze handleiding niet worden opgevolgd, zal dat gemakkelijk kunnen leiden
tot ernstige ongevallen. Altrex kan niet aansprakelijk worden gesteld voor schade als gevolg van het niet conform handlei-
ding opbouwen en gebruiken van de Shuttle. De werkgever, toezichthouder en gebruiker zijn verantwoordelijk voor de juiste
toepassing van de steiger volgens deze handleiding en zij dienen ervoor te zorgen dat deze handleiding te allen tijde bij de
werkzaamheden met de steiger op de werkplek aanwezig is. Extra exemplaren van deze handleiding kunnen bij Altrex worden
besteld. De Shuttle mag alléén worden gebruikt in combinatie met de brede Altrex rolsteigers uit de RS TOWER 52 serie en
die voldoen aan de meest actuele versie van de Europese richtlijnen en regelgevingen. Mochten er nog onduidelijkheden in
opbouw en gebruik van de Shuttle zijn neem dan direct contact op met uw dealer voor advies.
Naast deze handleiding dient voor de opbouw en het gebruik van de rolsteiger gebruik te worden gemaakt van de handleiding
RS TOWER 5 (760285) of RS TOWER 5 met Safe-Quick Guardrail (760284)
Lokale wet- en regelgeving kan aanvullende maatregelen bevatten op deze handleiding.
Altrex BV - Mindenstraat 7 - 8028 PK Zwolle - Tel.: +31(0)38 455 7733 - Email: [email protected] - www.altrex.com
2. Veiligheidsvoorschriften
Om ongevallen te voorkomen tijdens het opbouwen, afbreken en gebruik van de Shuttle moeten de volgende
veiligheidsvoorschriften strikt opgevolgd worden.
1. Bouw de steiger altijd op conform de handleiding welke is geleverd bij de steiger.
2. Belast de Shuttle nooit zwaarder dan 30 kg.
3. Het is niet toegestaan om mensen en/of dieren met de Shuttle te hijsen.
4. Controleer de hijsband vooraf zorgvuldig of deze vrij is van scheuren, rafels/gaten, vervormingen of andere
beschadigingen.
5. Vervang de hijsband elke 5 jaar ook indien de band nog volledig intact lijkt.
6. Plaats de steiger in combinatie met de Shuttle altijd op een vlakke, horizontaal en stevige ondergrond.
7. Controleer of er geen obstakels zijn die in de baan van de Shuttle liggen.
8. Gebruik de Shuttle nooit bij een windsnelheid die hoger is dan 10.7 m/s (max. 5 Beaufort).
9. De maximale platformhoogte voor buiten gebruik is 8.20 m en voor binnen gebruik 12.20 m
10. Gebruik een boormachine/schroefmachine met een minimaal (continu/nominaal) vermogen van 600 Watt om de lier te
bedienen.
11. Laat de machine linksom draaien om te hijsen en rechtsom om de last te laten zakken.
12. Laat nooit voorwerpen buiten de Shuttle uitsteken
Let bij het gebruik van de hijslier op de volgende punten:
13. De hijsband moet vlak lopen tussen lier en console; zorg ervoor dat de band vrij is van draaiing.
14. Laat de lier niet aanlopen, dit bevordert levensduur van de lier.
15. Gebruik altijd de grendel op de lier om de lier te blokkeren. Voorkom beknelling en houdt afstand:
16. De last die je met de Shuttle hijst beweegt verticaal langs de steiger. Voorkom beknelling. Zorg ervoor dat je voldoende
afstand houdt van de last – ook binnen de steiger.
17. Houd een veilige afstand tot de steiger wanneer er een last gehesen wordt of zich op een hogere positie bevindt;
zorg ervoor dat de last die je hijst niet uit de drager kan vallen.
18. Zet het gebied rondom de steiger af wanneer er personen onder de last door kunnen lopen
3. Onderdelen
Zie voor een overzicht van de onderdelen bijlage A1.

3
www.altrex.com
NL
4. Opbouw Shuttle
De Shuttle kent twee uitvoeringen:
- Shuttle Carrier om kleine goederen met de kunststof bak naar boven te
transporteren.
- Shuttle Solar om zonnepanelen naar boven te transporteren.
In dit laatste geval wordt gebruik gemaakt van één Solar eindframe om de
panelen eenvoudig op het werkplatform te krijgen.
Even werkhoogte Bouw de steiger op conform stap A1 uit de handleiding
van de steiger.
Oneven werkhoogte Bouw de steiger op conform stap A2 uit de handleiding
van de steiger.
1. Monteer het basisproel (onderdeel B) waterpas aan het opbouw-
frame en zet deze stevig vast met de klemmen.
2. Indien het solar frame (onderdeel A) als eind frame gebruikt wordt
moeten de klemmen op 75 cm vanaf de staander
gemonteerd.
3. Schuif de console (Onderdeel F / I) vanaf de bovenzijde over het
proel en laat hem zakken tot op de demper.
Tip! Markeer de positie van de klemmen na de eerste keer op het
opbouwframe zodat het opbouwen van de steiger in combinatie met
het solar frame de volgende sneller gaat.
4. Bouw de steiger verder op conform stap B1 / B2 uit de
handleiding van de steiger.
5. Monteer na elke herhaling van stap B1/B2 van de steiger het
volgende proel (Onderdeel D) en zet deze vast met de
klemmen.
6. Controleer of de proelen recht / waterpas boven elkaar zijn
geplaatst.
7. Plaats voor het gebruik van de Shuttle Solar, wanneer de
werkhoogte wordt bereikt, het solar frame (onderdeel A) aan
dezelfde zijde als het geleidingsproel.
8. Monteer het laatste proel (onderdeel D) en zet deze vast met
de klemmen.
9. Plaats de kantplank, zie stap C uit de handleiding van de
steiger.
10. Plaats de lier op het laatste geleidingsproel met de
koppeling en remplaat richting de steiger en draai deze vast
op het proel.
11. Ontgrendel de slipkoppeling door de grendelstang naar links
te plaatsen.
12. Laat de hijsband zakken met de boor/schroefmachine in
combinatie met dopsleutel M10.
13. Bevestig het hijsoog van de hijsband. Let op dat dat de
hijsband netjes vlak en recht hangt en vermijd draaiingen in
de band.

4www.altrex.com
NL
5. Gebruik van de Shuttle
Hijsen met de Shuttle
1. Plaats de carrier (onderdeel G / J) aan de console
2. Plaats de last
• Shuttle Carrier: plaats de last in de krat. Let op dat de last niet buiten de krat steekt.
• Shuttle Solar: plaats het zonnepaneel op de Solar drager en zet deze vast.
3. Plaats het dopsleutel-bit op de slipkoppeling.
4. Hijs de wagen naar boven door de boor/schroefmachine in combinatie met dopsleutel M10 naar links te laten draaien.
5. Vergrendel de lier wanneer de carrier boven is.
6. Ontgrendel het solar frame, draai de carrier 90 graden en schuif het zonnepaneel op de steiger.
7. Gebruik de windband van het solar frame om het vast te zetten. Gebruik van de windband is onder alle omstandigheden
verplicht.
Let bij het gebruik van het solar frame en solar carrier op de volgende punten:
• Zet het zonnepaneel altijd goed vast.
• Zorg ervoor dat de solar carrier tijdens het hijsen in vergrendelde positie staat zodat deze niet kan opendraaien.
• Zet de carrier na het draaien altijd vast met de windband.
6. Gebruik van de windband
Plaats het oog van de windband over de kraagbuis van de steiger zoals aangegeven in onderstaande afbeelding.

5
www.altrex.com
NL
7. Afbouw van de Shuttle
De Shuttle dient in omgekeerde volgorde te worden gedemonteerd, zoals omschreven in de opbouwmethode.
8. Inspectie, zorg en onderhoud
1. Shuttle onderdelen dienen met zorg te worden gehanteerd en vervoerd, zodat beschadiging wordt voorkomen.
2. Opslag dient zodanig te zijn georganiseerd dat uitsluitend onbeschadigde delen in de juiste aantallen beschikbaar komen
voor de opbouw van de Shuttle.
3. Controleer alle delen op vervuiling. Maak vervuilde delen schoon.
4. Controleer alle bewegende delen op correcte werking.
5. Controleer de slipkoppeling van de lier. Dit kan eenvoudig door een last te hijsen die zwaarder is dan 30 kilogram. De slip-
koppeling moet dan doorslaan.
6. Controleer alle onderdelen op beschadiging. Beschadigde, versleten of verkeerde onderdelen mogen niet worden gebruikt.
Vervang deze uitsluitend door originele Altrex onderdelen. Deze moeten op dezelfde wijze gemonteerd worden als het te
vervangen onderdeel, om ongevallen te voorkomen. Montage (bevestiging) en/of reparatie geschiedt voor eigen rekening
en risico. Altrex is niet aansprakelijk voor schades veroorzaakt door foutieve montage en/of reparatie.
7. De Shuttle moet periodiek worden gekeurd door een deskundige.
9. Garantiebepalingen
Ga voor de Altrex garantiebepalingen naar www.altrex.com/warranty

6www.altrex.com
6www.altrex.com
1. Introduction
This manual applies exclusively to the Shuttle as described in this assembly & user manual (hereinafter: ‘the manual’). Prior to
starting to assemble the Shuttle, you should carefully read this manual. The required tower should be assembled and used in
accordance with this manual. All instructions in this manual have to be followed strictly. Not following the instructions contained
in this manual can easily result in serious accidents. Altrex cannot be held liable for any loss resulting from the assembly or
use of the Shuttle that is not in compliance with the manual. The employer, supervisor and user are responsible for the correct
use of the Shuttle in accordance with this manual and they must ensure that this manual is available at all times when work is
being carried out using the Shuttle. Additional copies of the manual can be ordered from Altrex.
In addition to this manual, use the RS TOWER 5 (760285) or RS TOWER 5 with Safe-Quick Guardrail (760284) manual to
assemble and use the mobile scaold tower.
Local legislation and regulations might encompass measures in addition to those stated in this manual.
Altrex BV – Mindenstraat 7 – 8028PK Zwolle – Tel.: +31 (0)38 455 7700 – Email: [email protected] – Internet: www.altrex.com
2. Safety instructions
To prevent accidents during assembly, disassembly and operation of the Shuttle, the following safety regulations must be
strictly adhered to.
1. Always erect the scaold in accordance with the instructions supplied with the scaold.
2. Never place loads heavier than 30 kg on the Shuttle.
3. It is forbidden to hoist people and/or animals using the Shuttle.
4. Check the hoisting strop carefully beforehand to ensure that it is free of tears, frayed edges / holes, deformations or other
damage.
5. Replace the hoisting strop every 5 years, even if it still seems completely intact.
6. Always position the scaolding in combination with the Shuttle on a at, horizontal and rm surface.
7. Make sure there are no obstacles in the Shuttle’s path.
8. Never use the Shuttle at wind speeds greater than 10.7 m/s (max. 5 Beaufort).
9. The maximum platform height for outside use is 8.20 m and 12.20 m for inside use
10. Use a portable drill (powertool) with a minimum (continuous/nominal) power of 600 Watts to operate the winch.
11. Turn the machine counter-clockwise to hoist the load and clockwise to lower it.
12. Never allow objects to protrude outside the Shuttle.
Pay attention to the following points when using the hoist:
13. The hoisting strop must run at between winch and console, ensuring that the belt is free of twists.
14. To increase the longevity of the winch, avoid running once the highest hoisting position has been reached.
15. Always use the winch lock to secure the winch.
Avoid getting crushed and keep your distance:
16. The load you hoist with the Shuttle moves vertically up and down the scaolding. Avoid getting crushed. Make sure you
keep enough distance from the load – also when within the scaolding.
17. Keep a safe distance from the scaolding when hoisting a load or when it is in a higher position, ensuring that the load you
are hoisting cannot fall out of the carrier.
18. Cordon o the area around the scaolding if people can walk under the load
3. Parts
For an overview of the components, see Appendix A1.

7
www.altrex.com
EN
4. Assembling the Shuttle
The Shuttle has two versions:
- Shuttle Carrier for transporting small goods with the plastic container upwards.
- Shuttle Solar to transport solar panels upwards.
In the latter case, one Solar end frame is used to easily get the panels onto the
work platform.
Even working height Assemble the scaold according to step A1 in the
scaold tower operating instructions.
Uneven working height Assemble the scaold according to step A2 in the
scaold tower operating instructions.
1. Mount the basic prole (Part B) level to the mounting frame and
secure it rmly with the clamps.
2. If the solar frame (Part A) is used as an end frame, the clamps
must be mounted 75 cm.
3. Slide the console (Part F / I) over the prole from the top and
lower it to the travel stop.
Tip! Mark the position of the clamps after the rst time they are
mounted on the scaolding frame so that assembly of the scaolding
in combination with the solar frame will be faster next time.
4. Continue assembly of the scaold as per steps B1/B2 in the scaf-
fold tower operating instructions.
5. After each repetition of step B1/B2 of the scaolding, assemble
the next prole (Part D) and secure it with the clamps.
6. Check that the proles are placed straight/level above each
other.
7. When the working height is reached, place, for using the
Shuttle Solar, the solar frame (Part A) on the same side as the
guide prole.
8. Mount the last prole (Part D) and secure it with the clamps.
9. Mount the edging board (see step C of the scaolding
manual).
10. Mount the winch on the last guide prole with the clutch and
brake plate towards the scaolding, and tighten it to the pro-
le.
11. Unlock the safety clutch by positioning the locking bar to the
left.
12. Lower the hoisting strop with the portable drill (powertool) in
combination with socket wrench M10.
13. Attach the lifting eye of the hoisting strop. Make sure that the
hoisting strop hangs neatly at and straight and avoid twists.

8www.altrex.com
EN
5. Using the Shuttle
Hoisting with the Shuttle
1. Mount the correct console (Part G / J) to the Shuttle.
2. Place the load.
• Shuttle Carrier: place the load in the crate. Make sure that the load does not protrude outside the crate.
• Shuttle Solar: place the solar panel on the Solar carrier and x it
3. Place the socket wrench adapter on the safety clutch.
4. Hoist the carriage by turning the portable drill (powertool) to the left in combination with socket wrench M10.
5. Lock the winch when the carrier is in its highest position.
6. Unlock the solar frame, turn the carrier 90 degrees and slide the solar panel on the scaolding.
7. Use the wind strap of the solar frame to secure the carrier. The wind strap must be used under all circumstances.
Pay attention to the following points when using the solar frame and solar carrier:
• Always fasten the solar panel securely.
• Make sure the solar carrier is in its locked position during lifting so that it does not open by accident.
• Always secure the carrier with the wind strap after use.
6. Use of the wind strap
Place the ring of the wind strap over the collar tube as shown in the picture below.

9
www.altrex.com
EN
7. Disassembling the Shuttle
The Shuttle should be disassembled in reverse order, as described in the assembly instructions.
8. Inspection, care and maintenance
1. Shuttle parts must be handled and transported with care in order to avoid damage.
2. Storage should be organised in such a way that only undamaged parts, in the correct amounts, are available for assembly
of the Shuttle.
3. Check all parts for contamination. Clean contaminated parts.
4. Check all moving parts for correct functioning and check that these are not lthy.
5. Check the safety clutch of the winch. This is done easily by hoisting a load that is heavier than 30 kilograms. The safety
clutch should then start slipping.
6. Check all parts for damage. Damaged, worn-out or incorrect parts may not be used. Replace these parts only with original
Altrex parts. To prevent accidents, these parts must be mounted in the same way as the part that is replaced. Mounting
(fastening) and/or repair are at your own expense and risk. Altrex shall not be liable for damage resulting from erroneous
mounting and/or repair.
7. The Shuttle must be inspected periodically by an expert.
9. Warranty conditions
Please visit www.altrex.com/warranty to view the clauses of the Altrex warranty.

10 www.altrex.com
10 www.altrex.com
1. Introduction
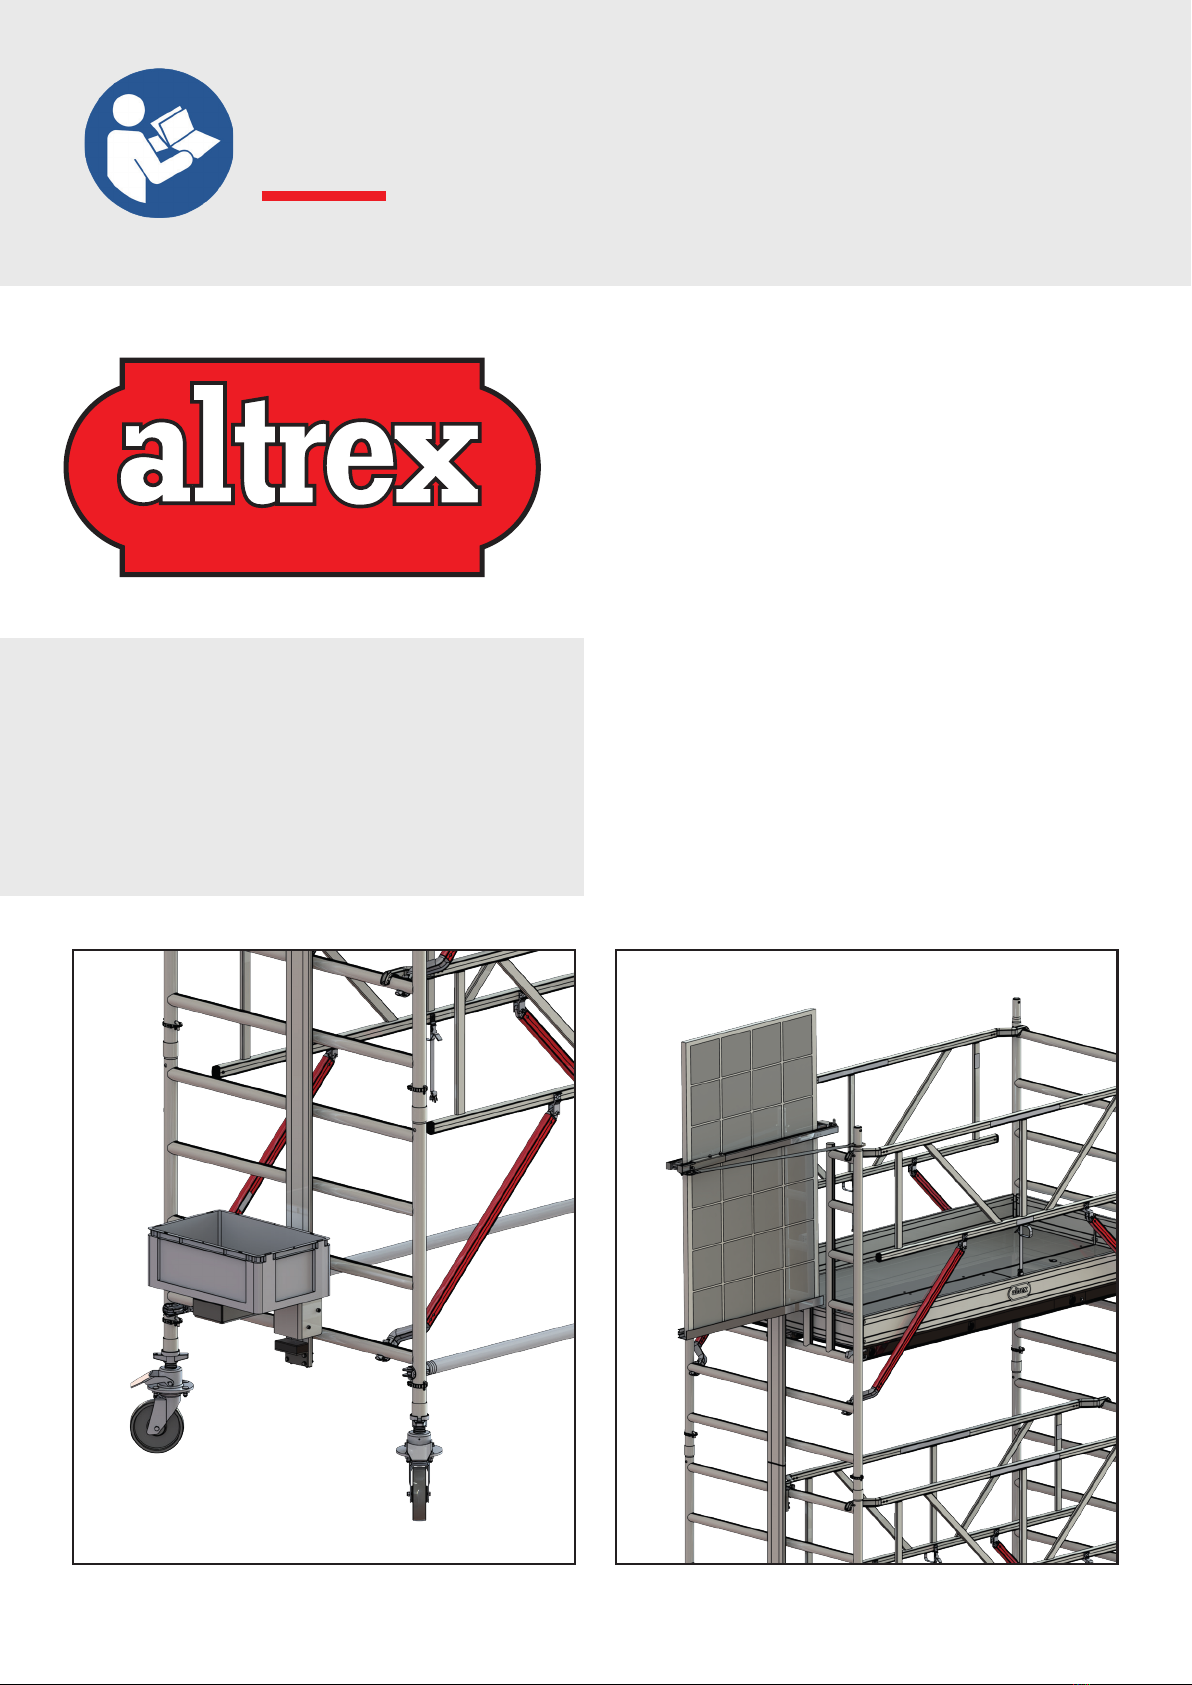
Le présent manuel s’applique exclusivement au plateau élévateur Shuttle, comme décrit dans le présent manuel de montage
et d’utilisation, nommé ci-après manuel. Avant de commencer le montage du plateau élévateur Shuttle, lisez attentivement le
présent manuel. Le plateau élévateur Shuttle doit être monté et utilisé conformément au présent manuel. Toutes les indications
dans le présent manuel doivent être suivies scrupuleusement. Le non-respect des indications dans le présent manuel peut en-
traîner des accidents. Altrex ne peut être tenue pour responsable de dommages consécutifs au montage et à l’utilisation non
conformes au manuel Altrex. L’employeur, le surveillant et l’utilisateur sont responsables de l’utilisation appropriée du plateau
élévateur Shuttle selon le présent manuel et doivent veiller à ce que le présent manuel soit toujours présent sur le site. Des
exemplaires supplémentaires du manuel peuvent être obtenus auprès d’Altrex.
Outre le présent manuel, le manuel RS TOWER 5 (760285) ou RS TOWER 5 avec Garde-corps Safe-Quick (760284) doit être
utilisé pour la construction et l’utilisation de l’échafaudage roulant.
La législation et la réglementation locales peuvent contenir des mesures complémentaires au présent manuel.
Altrex BV - Mindenstraat 7 - 8028 PK Zwolle - Pays-Bas - Tél. : +31 38 455 7733 - E-mail : [email protected] - www.altrex.
com
2. Consignes de sécurité
Les consignes de sécurité suivantes doivent être suivies scrupuleusement pour éviter tout accident pendant la construction, le
démontage et l’utilisation du plateau élévateur Shuttle :
1. Construisez toujours l’échafaudage selon le manuel fourni avec l’échafaudage.
2. Ne chargez jamais le plateau élévateur Shuttle avec un poids supérieur à 30 kg.
3. Il n’est pas permis de lever des personnes et/ou des animaux avec le plateau élévateur Shuttle.
4. Contrôlez soigneusement l’élingue au préalable pour vérier la présence éventuelle de déchirures, d’elochages/de
trous ou d’autres dommages.
5. Remplacez l’élingue tous les 5 ans, même si elle semble encore parfaitement intacte.
6. Placez l’échafaudage en combinaison avec le plateau élévateur Shuttle toujours sur un support plat, horizontal et
stable.
7. Contrôlez s’il n’y pas d’obstacles dans le passage du plateau élévateur Shuttle.
8. N’utilisez jamais le plateau élévateur Shuttle si la vitesse du vent est supérieure à 10,7 m/s. (max. 5 Beaufort).
9. La hauteur de plate-forme pour utilisation à l’extérieur est de 8.20 m et de 12.20 m à l’intérieur
10. Utilisez une perceuse/visseuse d’une puissance (continue/nominale) d’au moins 600 Watts pour commander le treuil.
11. Laissez tourner la machine dans le sens antihoraire pour lever la charge et dans le sens horaire pour la descendre.
12. Ne laissez jamais des objets dépasser du plateau élévateur Shuttle.
Soyez particulièrement attentif aux points suivants en utilisant le treuil de levage :
13. L’élingue doit être placée à plat entre le treuil et le chariot ; veillez à ce qu’il n’y ait aucune torsion au niveau de l’élin-
gue.
14. Évitez tout choc au niveau du treuil en atteignant la position de levage la plus haute, car cela prolonge la durée de vie
du treuil.
15. Utilisez toujours le verrou de treuil pour bloquer le treuil et arrimer le chariot avec la charge en hauteur.
Évitez de vous coincer et gardez vos distances :
16. La charge que vous levez avec le plateau élévateur Shuttle se déplace à la verticale le long de l’échafaudage. Évitez
de vous coincer. Veillez à rester à une distance susante de la charge, même à l’intérieur de l’échafaudage.
17. Tenez-vous à une distance sûre de l’échafaudage lorsqu’une charge est levée ou se trouve à une position plus haute
; veillez à ce que la charge que vous levez ne puisse tomber du support.
18. Sécurisez le lieu autour de l’échafaudage pour éviter le passage de personnes sous la charge
3. Pièces
Pour une vue d’ensemble des pièces, voir l’annexe A1.

11
www.altrex.com
FR
4. Construction du plateau élévateur Shuttle
Il y a 2 versions :
- le plateau élévateur Shuttle Carrier pour transporter de petits objets dans une
caisse en plastique.
- le plateau élévateur Shuttle Solar pour transporter des panneaux solaires
Dans ce dernier cas il y a un cadre solaire pour placer les panneaux solaires
sur le plateau élévateur Shuttle.
Hauteur de travail paire : Construisez l’échafaudage selon l’étape A1 du
manuel de l’échafaudage
Hauteur de travail impaire : Construisez l’échafaudage selon l’étape A2
du manuel de l’échafaudage
1. Montez le prolé de base (Pièce B) de niveau sur le cadre de
l’échafaudage et attachez-le solidement avec les pinces.
2. En cas d’utilisation du cadre solaire (Pièce A), les pinces doivent
être montées à 75 cm.
3. Glissez le chariot (Pièce F / I) à partir du haut sur le prolé et
descendez-le jusqu’à ce qu’il touche l’absorbeur.
Conseil ! Marquez la position des pinces sur le cadre de l’échafauda-
ge après la première fois pour construire plus rapidement l’échafau-
dage en combinaison avec le cadre solaire la prochaine fois.
4. Continuez à construire l’échafaudage selon l’étape B1/B2 du
manuel de l’échafaudage.
5. Après chaque répétition de l’étape B1/B2 de l’échafaudage,
montez le prolé (Pièce D) et attachez-le avec les pinces.
6. Contrôlez si les prolés sont placés droits/de niveau les uns
au-dessus des autres.
7. Lorsque la hauteur de travail est atteinte, placez le cadre
solaire (Pièce A) du même côté que le prolé de guidage.
8. Montez le dernier prolé (Pièce D) et attachez-le avec les
pinces.
9. Placez la plinthe, voir l’étape C du manuel de l’échafaudage.
10. Placez le treuil sur le dernier prolé de guidage avec le rac-
cord et la plaque de freinage en direction de l’échafaudage et
vissez-le sur le prolé.
11. Débloquez l’embrayage à friction en plaçant la barre de bloca-
ge à gauche.
12. Descendez l’élingue avec la perceuse/visseuse en combinai-
son avec la clé à douille M10.
13. Fixez l’œillet de levage de l’élingue avec le fermoir. Veillez
à ce que l’élingue tombe bien à plat et droite et évitez toute
torsion au niveau de l’élingue.

12 www.altrex.com
FR
5. Utilisation du plateau élévateur Shuttle
Levage avec le plateau élévateur Shuttle
1. Montez le support approprié sur le chariot (Pièce G / J).
2. Placez la charge.
• plateau élévateur Shuttle Carrier : placez la charge dans la caisse. Attention à ce que la charge ne dépasse pas la
caisse.
• plateau élévateur Shuttle Solar : placez et attachez le panneau solaire sur le cadre solaire
3. Placez la douille de la clé à douille sur l’embrayage à friction.
4. Levez le chariot en tournant la perceuse/visseuse en combinaison avec la clé à douille M10 vers la gauche.
5. Bloquez le treuil lorsque le chariot est en haut.
6. Débloquez le cadre solaire, tournez le support à 90 degrés et glissez le panneau solaire sur l’échafaudage.
7. Utilisez la bande de protection contre le vent du cadre solaire pour attacher le support. L’utilisation de la bande de protection
contre le vent est obligatoire en toutes circonstances.
Soyez particulièrement attentif aux points suivants en utilisant le cadre solaire et le support solaire :
• Attachez toujours solidement le panneau solaire.
• Pendant le levage, veillez à ce que le support solaire se trouve dans la position bloquée pour éviter qu’il ne s’ouvre.
• Après la rotation, attachez toujours le support avec la bande de protection contre le vent.
6. Utilisation de la bande de protection contre le vent
Placez l’œillet de la bande de protection contre le vent sur la broche de montage de l’échafaudage, comme indiqué sur l’image
ci-dessous.

13
www.altrex.com
FR
7. Démontage du plateau élévateur Shuttle
Le plateau élévateur Shuttle doit être démonté dans l’ordre inverse, comme décrit dans la méthode de construction.
8. Inspection, nettoyage et entretien
1. Les pièces du plateau élévateur Shuttle doivent être manipulées et transportées avec soin pour éviter de les endommager.
2. Le stockage doit être organisé de manière telle, que seules des pièces intactes et le nombre nécessaires pour le montage
de plateau élévateur Shuttle, soient disponibles.
3. Contrôlez la propreté et le bon fonctionnement de toutes les pièces mobiles.
4. Vériez le bon fonctionnement de toutes les pièces mobiles.
5. Contrôlez l’embrayage à friction du treuil. Il sut de lever une charge supérieure à 30 kilos. L’embrayage à friction doit alors
patiner.
6. Contrôlez la présence éventuelle de dommages sur toutes les pièces. Des pièces endommagées, usées ou incorrectes ne
peuvent être utilisées. Remplacez-les exclusivement par des pièces d’origine Altrex. Celles-ci doivent être montées de la
même manière que la pièce à remplacer pour éviter des accidents. Le montage (xation) et/ou la réparation sont à la char-
ge et aux risques du client. Altrex décline toute responsabilité en cas de dommages résultant d’une réparation et/ou d’un
montage incorrects.
7. Le plateau élévateur Shuttle doit être contrôlé périodiquement par un spécialiste.
9. Conditions de garantie
Pour les conditions de garantie Altrex consultez www.altrex.com/warranty

14 www.altrex.com
14 www.altrex.com
1. Allgemeines
Diese Anleitung ist nur für den Shuttle vorgesehen, der in dieser Aufbau- und Verwendungsanleitung beschrieben wird. Lesen
Sie diese Anleitung sorgfältig durch, bevor Sie mit dem Aufbau des Shuttle beginnen. Alle Anweisungen in dieser Anleitung
sind genau zu befolgen. Das Nichtbeachten der Anweisungen in dieser Anleitung kann zu Unfällen führen. Altrex haftet nicht
für Schäden, die als Folge eines nicht gemäß der Anleitung aufgebauten und benutzten Shuttle entstanden sind. Arbeitgeber,
Aufsichtspersonal und Benutzer sind für die richtige Anwendung des Shuttle entsprechend dieser Anleitung verantwortlich und
sie müssen dafür Sorge tragen, dass diese Anleitung bei den Arbeiten mit dem Shuttle am Arbeitsplatz vorliegt.
Bei Montage und Gebrauch des Fahrgerüstes ist zusätzlich zu diesem Handbuch auch das Handbuch RS TOWER 5 (760285)
oder RS TOWER 5 mit Safe-Quick Geländer (760284) zu verwenden.
Lokale gesetzliche Anforderungen und Vorschriften können ergänzende Maßnahmen zu dieser Anleitung enthalten.
Altrex BV - Mindenstraat 7 - 8028 PK Zwolle - P.: +31 38 455 7700 - Mail: [email protected] - www.altrex.com
2. Sicherheitsvorschriften
Um Unfälle während des Auf- und Abbaus sowie des Betriebs des Shuttle-Systems zu vermeiden, sind folgende Sicherheits-
vorschriften strikt einzuhalten.
1. Gerüst stets in Übereinstimmung mit der mitgelieferten Aufbauanleitung aufbauen.
2. Den Shuttle niemals schwerer als mit 30 kg beladen.
3. Es ist nicht gestattet, Personen und/oder Tiere mit dem Shuttle zu befördern.
4. Das Hebeband vor Gebrauch sorgfältig überprüfen, um sicherzustellen, dass es keine Risse, Ausfransung/Löcher,
Verformungen oder andere Schäden aufweist.
5. Hebeband alle 5 Jahre austauschen, auch wenn das Band noch völlig intakt zu sein scheint.
6. Gerüst in Kombination mit dem Shuttle-System immer auf einem ebenen, horizontalen und festen Untergrund auf-
bauen.
7. Sicherstellen, dass sich keine Hindernisse im Aktionsradius des Shuttle-Systems benden.
8. Shuttle niemals bei einer Windgeschwindigkeit von mehr als 10,7 m/s (max. 5 Beaufort) einsetzen.
9. Die maximale Plattformhöhe für den Gebrauch im Außenbereich beträgt 8.20 m und für den Gebrauch im Innenbe-
reich 12.20 m
10. Zum Betrieb der Winde ist eine Bohrmaschine/Akkubohrer mit einer (Dauer-/Nenn-)Mindestleistung von 600 Watt zu
verwenden.
11. Bohrmaschine/Akkubohrer zum Heben der Last gegen den Uhrzeigersinn und zum Senken der Last im Uhrzeigersinn
drehen lassen.
12. Niemals Gegenstände aus dem Shuttle herausragen lassen. Bei Gebrauch der Winde ist Folgendes zu beachten:
13. Das Hebeband muss ach zwischen Winde und Schlitten durchgeführt werden. Sicherstellen, dass das Hebeband
nicht verdreht ist.
14. Anlaufen der Winde bei Erreichen der höchsten Hebeposition vermeiden; dies fördert die Langlebigkeit der Winde.
15. Immer den Arretierbolzen der Winde verwenden, um die Winde zu arretieren und den Laufwagen mit Last in der
Höhe zu sichern.
Einklemmen vermeiden und Abstand halten:
16. Die mit dem Shuttle-System zu hebende Last bewegt sich vertikal entlang des Gerüstes. Einklemmen vermeiden. Auf
ausreichenden Abstand zur Last achten – auch an der Innenseite des Gerüstes.
17. Sicherheitsabstand zum Gerüst einhalten, wenn eine Last gehoben wird oder wenn sich diese in einer höheren Posi-
tion bendet. Sicherstellen, dass die zu hebende Last nicht aus dem Träger herausfallen kann.
3. Komponenten
Für eine Übersicht über die Komponenten siehe Anlage A1.

15
www.altrex.com
DE
4. Montage des Shuttle-Systems
Es gibt zwei Ausführungen des Shuttle-Systems
- Shuttle Carrier: um kleinere Güter mittels einer Ablagebox in die Höhe zu
transportieren
- Shuttle Solar: um Solarpaneele in die Höhe zu transportieren. In diesem
Fall wird ein sogenannter Solar-Paneelrahmen / Solar-Paneelträger ver-
wendet.
Ebene Arbeitshöhe Gerüst gemäß Schritt A1 im Gerüsthandbuch aufbauen.
Unebene Arbeitshöhe Gerüst gemäß Schritt A2 im Gerüsthandbuch auf-
bauen.
1. Grundschiene (Teil B) waagerecht am Rahmen befestigen und
mit den Klemmen sicher xieren.
2. Wird der Solarrahmen (Teil A) als Endrahmen verwendet, sind
die Klemmen in einem Abstand von 75 cm zu den, der Fassade
am nächstgelegenen Holmen zu montieren.
3. Laufwagen (Teil F / I) von oben über das Prol schieben und bis
zum Dämpfer herunterfahren.
Tipp! Beim ersten Mal die Position der Klemmen auf dem Rahmen
markieren, sodass die Montage des Gerüstes in Kombination mit
dem Solarrahmen beim nächsten Mal schneller geht.
4. Fortfahren mit dem Aufbau des Gerüstes gemäß Schritt B1 / B2
im Gerüsthandbuch.
5. Nach jeder Wiederholung von Schritt B1 / B2 des Gerüstes das
nächste Prol (Teil D) montieren und mit den Klemmen sichern.
6. Überprüfen, ob die Prole gerade / waagerecht übereinander
angeordnet sind.
7. Wenn die Arbeitshöhe einmal erreicht ist, Solarrahmen (Teil A)
auf der gleichen Seite anbringen wie die Prole.
8. Letzte Prole (Teil D) montieren und mit den Klemmen si-
chern.
9. Bordbretter-Satz montieren, siehe Schritt C im Gerüsthand-
buch.
10. Winde an der letzten Führungsschiene mit der Kupplung und
der Bremsplatte in Richtung des Gerüstes anbringen und an
der Schiene befestigen.
11. Rutschkupplung entriegeln, indem der Arretierbolzen nach
links gestellt wird.
12. Hebeband mit der Bohrmaschine/Akkubohrer in Kombination
mit dem Steckschlüssel M10 absenken.
13. Hebeöse des Hebebandes verwenden. Sicherstellen, dass
das Hebeband ach und gerade hängt, und ein Verdrehen des
Bandes vermeiden.

16 www.altrex.com
DE
5. Betrieb des Shuttle-Systems
Heben mit dem Shuttle-System
1. Passenden Träger am Laufwagen (Teil G / J) befestigen.
2. Last anschlagen / festzurren.
• Shuttle Carrier: legen Sie das Fördergut in die Box. Achten Sie darauf das nichts aus der Box heraus ragt.
• Shuttle Solar: Setzen Sie das Solarpaneel auf den dafür vorgesehenen Träger und befestigen Sie dieses entsprechend
der Anleitung.
3. Steckschlüssel auf die Rutschkupplung setzen.
4. Laufwagen nach oben laufen lassen, indem man die Bohrmaschine / den Akkubohrer in Kombination mit dem M10-Steck-
schlüssel nach links drehen lässt.
5. Winde arretieren, sobald der Laufwagen oben angekommen ist.
6. Solarrahmen entriegeln, den Träger um 90 Grad drehen und das Solarmodul auf das Gerüst schieben.
7. Windschutzgurt des Solarrahmens verwenden, um den Träger zu arretieren. Die Benutzung des Windschutzgurtes ist unter
allen Umständen erforderlich.
Bei Gebrauch des Solarrahmens und des Solarträgers ist folgendes zu beachten:
• Solarmodul immer sorgfältig sichern.
• Sicherstellen, dass sich der Solarträger während des Hubvorgangs in arretierter Position bendet, sodass dieser sich
nicht drehen kann.
• Träger nach dem Drehen immer mit dem Windschutzgurt sichern.
6. Gebrauch des Windschutzgurts
Öse des Windschutzgurts über den vertikalen Holm des Gerüsts schieben, wie in der Abbildung unten dargestellt.

17
www.altrex.com
DE
7. Abbau des Shuttle-Systems
Das Shuttle-System ist – entsprechend der Aufbauanleitung – jedoch in umgekehrter Reihenfolge abzubauen.
8. Inspektion, Pege und Wartung
1. Bauteile sind mit Sorgfalt zu handhaben und zu transportieren, um Beschädigungen zu vermeiden.
2. Bei der Lagerung ist darauf zu achten, dass nur unbeschädigte Bauteile in der richtigen Anzahl für den Aufbau des Shuttle
zur Verfügung stehen.
3. Alle Komponenten auf Verschmutzung überprüfen. Verschmutzte Komponenten reinigen.
4. Alle beweglichen Teile auf korrekte Funktion prüfen.
5. Rutschkupplung der Winde kontrollieren. Am einfachsten ist es, dazu eine Last von über 30 kg zu heben. Die Rutschkup-
plung muss dann einsetzen.
6. Prüfen Sie alle Bauteile auf Beschädigungen. Beschädigte oder falsche Bauteile dürfen nicht verwendet werden. Ersetzen
Sie diese ausschließlich durch Originalbauteile von Altrex. Diese müssen exakt wie die auszutauschenden Teile montiert
werden, um Unfälle zu vermeiden. Die Montage(Befestigung) und/oder Reparatur erfolgt auf eigene Gefahr. Altrex haftet
nicht für Schäden, die durch eine fehlerhafte Montage und/oder Reparatur entstehen.
7. Den Shuttle regelmäßig durch einen Sachverständigen überprüfen lassen.
9. Garantiebestimmungen
Die Garantiebestimmungen von Altrex nden Sie unter www.altrex.com/warranty

18 www.altrex.com
18 www.altrex.com
A1.
A 307041 7.8 NL Solarframe 135 RS52
EN Solar frame 135 RS52
FR Cadre solaire 135 RS52
DE Solarrahmen 135 RS52
B 520100 6.5 NL Shuttle basis prole
EN Shuttle base prole
FR Prolé de base plateau élévateur
DE Shuttle Basisprol
C 520101 3.2 NL Shuttle proel kort
EN Shuttle short prole
FR Prolé court plateau élévateur
DE Shuttle Prol Kurz
D 520102 5.1 NL Shuttle proel lang
EN Shuttle long prole
FR Prolé long plateau élévateur
DE Shuttle Prol Lang
E 520103 9.0 NL Shuttle lier
EN Shuttle winch
FR Treuil plateau élévateur
DE Shuttle Winde
F 520104 0.9 NL Shuttle carrier console
EN Shuttle carrier console
FR Console support plateau élévateur
DE Shuttle Carrier konsole
G 520105 2.1 NL Shuttle kratdrager
EN Shuttle crate carrier
FR Chariot plateau élévateur
DE Shuttle Carrier Box-Träger
H 520106 0.9 NL Krat
EN Crate
FR Caisse
DE Transport-Box
I 520108 3.0 NL Shuttle solar console
EN Shuttle solar console
FR onsole cadre solaire
DE Shuttle Solar Konsole
KG

19
www.altrex.com 19
www.altrex.com
J 520109 4.8 NL Shuttle Solar panel
EN Shuttle solar panel
FR Cadre solaire plateau élévateur
DE Shuttle Solar Paneelträger
KG

20 www.altrex.com
20 www.altrex.com
Copyright Altrex B.V. © 2020
Altrex B.V.
Mindenstraat 7
8028 PK Zwolle
The Netherlands
+31(0)38 455 77 00
www.altrex.com
Table of contents
Languages:
Other Altrex Construction Equipment manuals
Popular Construction Equipment manuals by other brands

Strongarm
Strongarm 218 operating instructions

HIKOKI
HIKOKI VB 3616DA Handling instructions

Harford Attachments
Harford Attachments Pro-lok Installation & operation manual

Endurance
Endurance E500 instruction & operation manual

Schwamborn
Schwamborn BEG 180 operating instructions

Altrad
Altrad Guy Noel BET GN 134 instruction manual

General
General 300 Series maintenance

New Holland
New Holland E115SR Workshop manual

HADEF
HADEF 320/01 Installation, Operating and Maintenance Instructions for the Installer and the User

New Holland
New Holland W170 Workshop manual

Manitowoc
Manitowoc Grove RT530E-2 Service and maintenance manual

RoadHog
RoadHog RH48200 manual