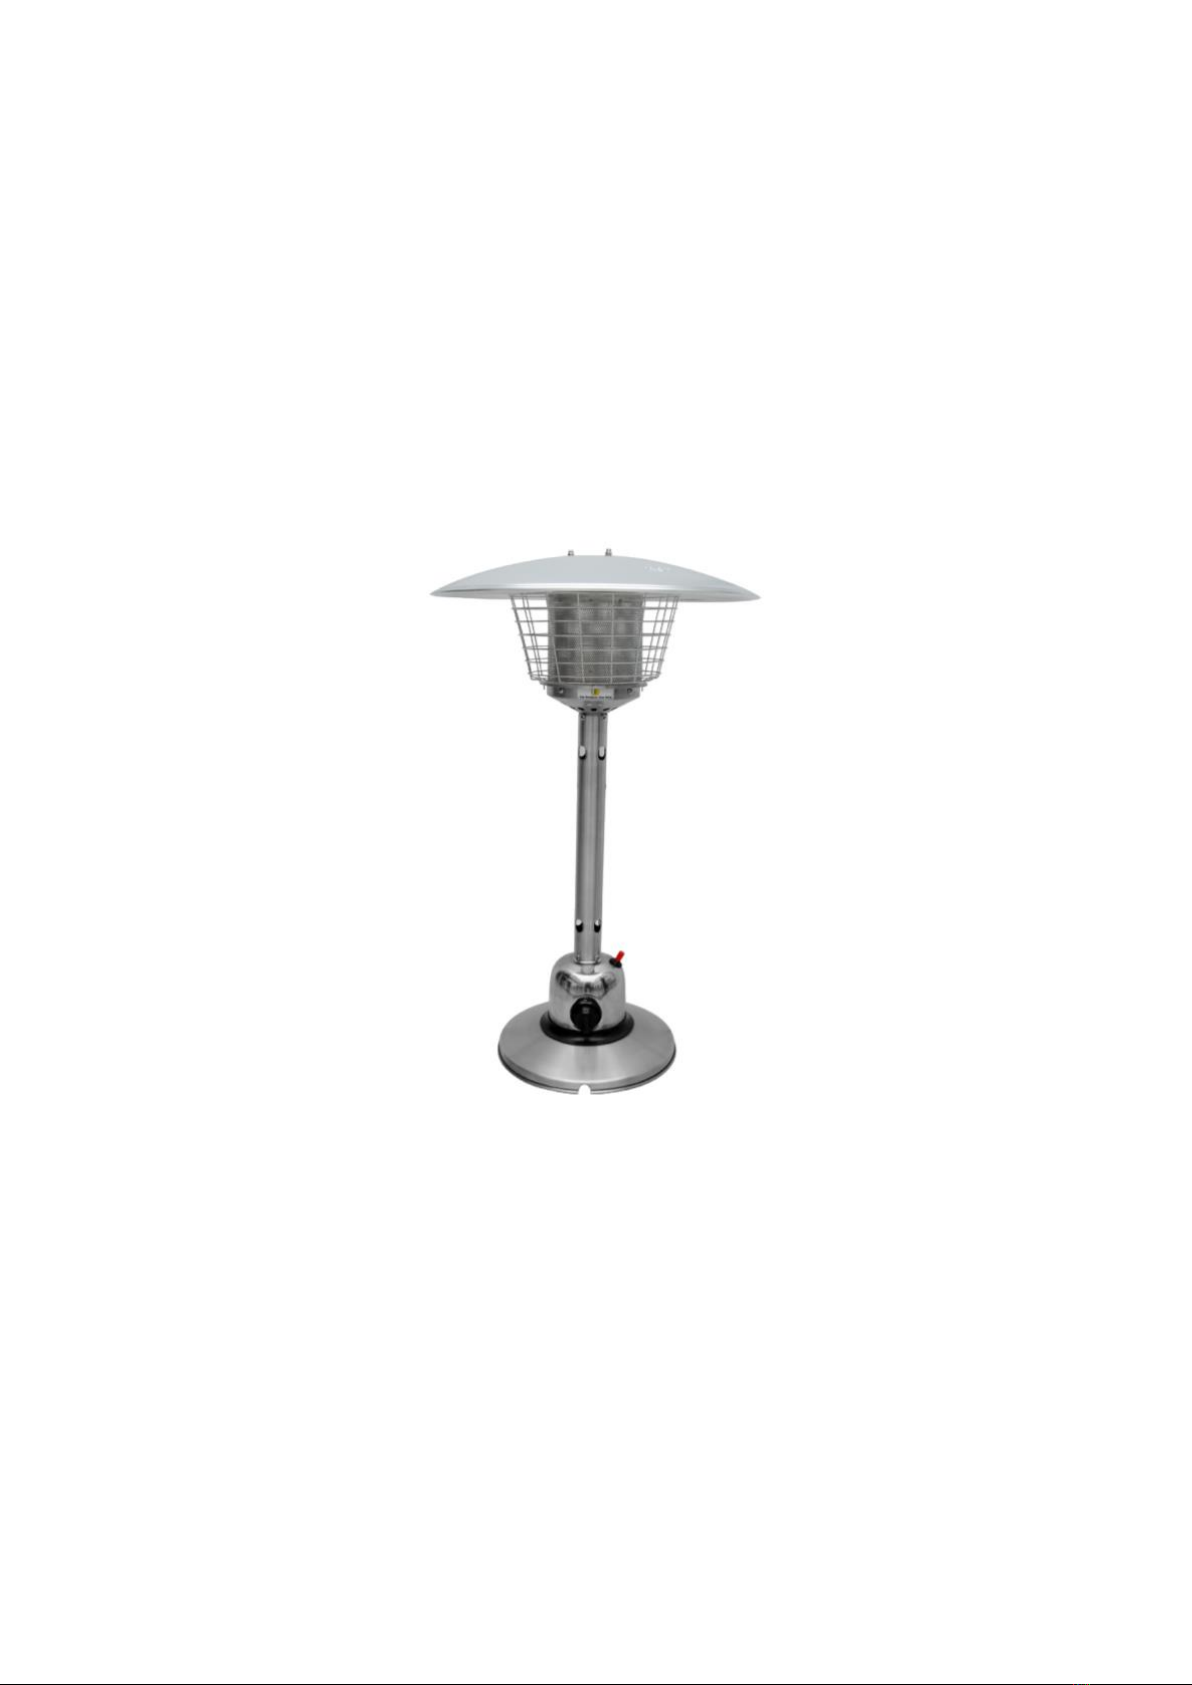
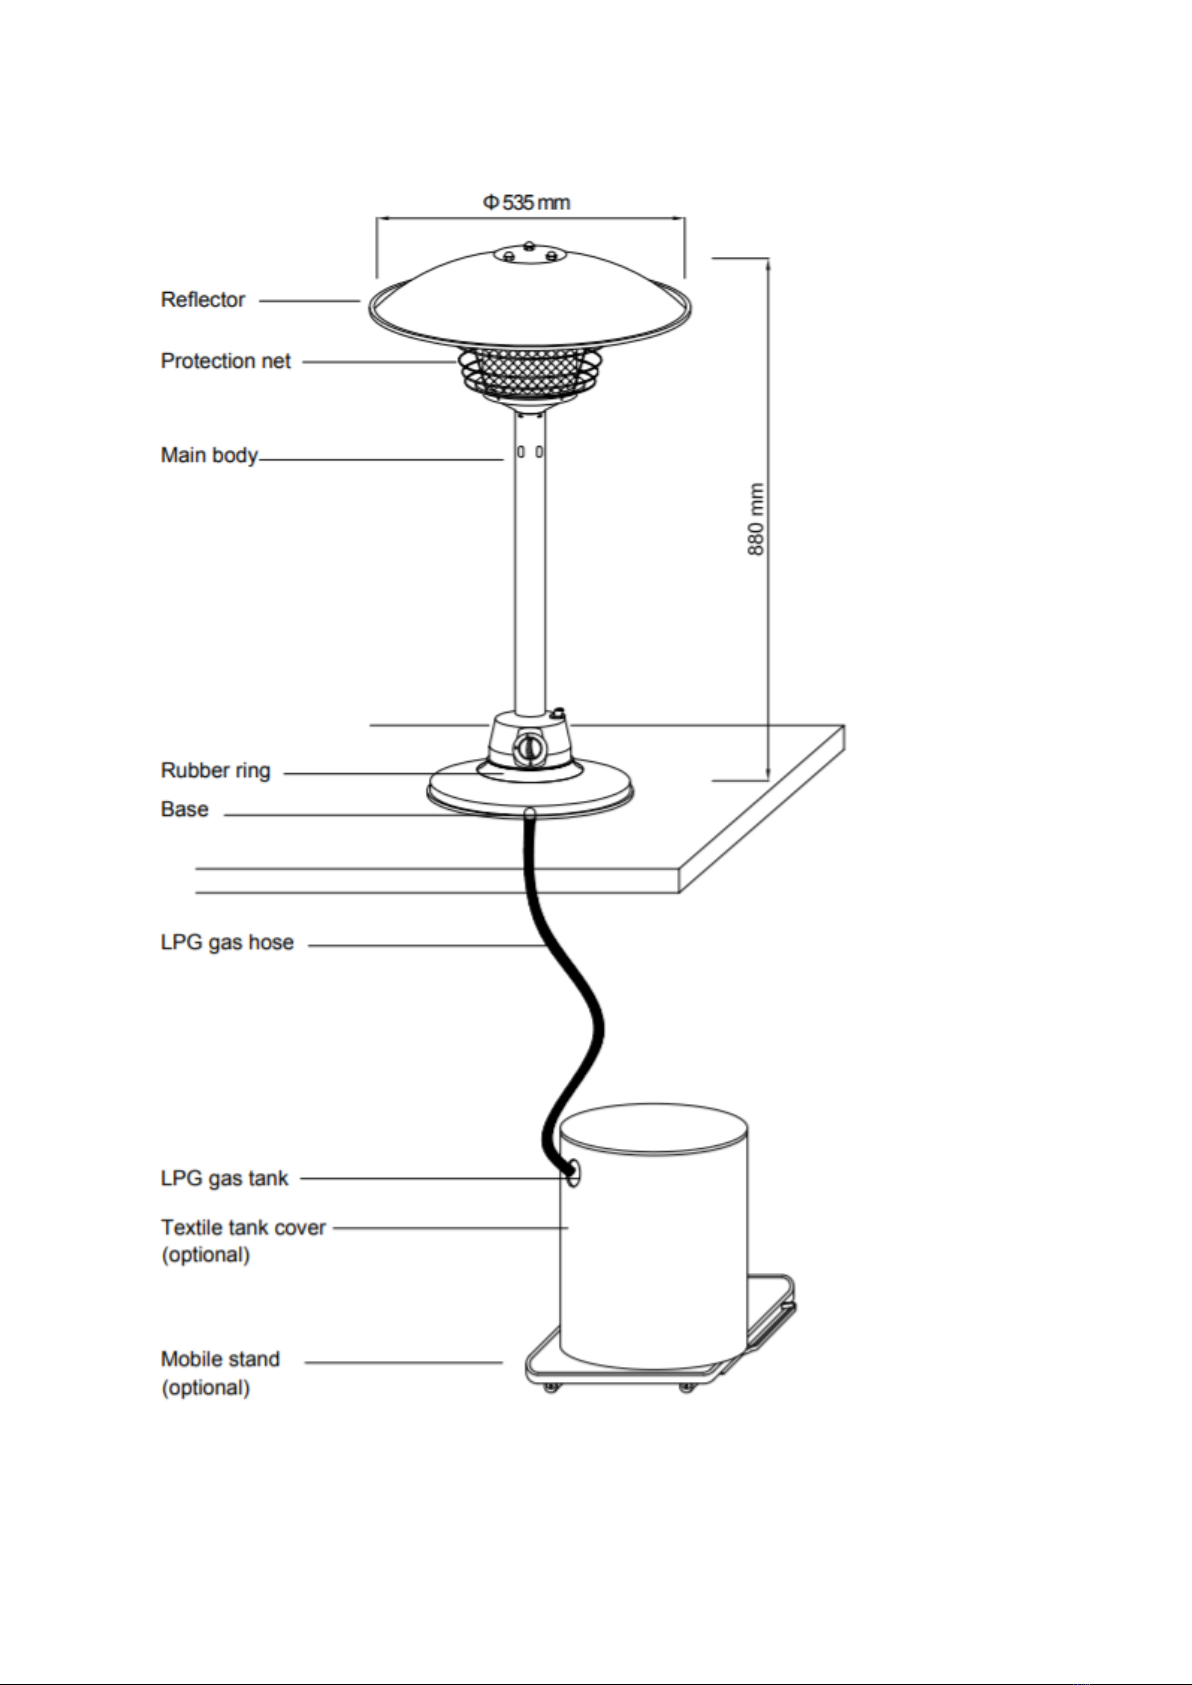
ALZA HPS-B User manual

Table Top Patio Heater HPS-B
USER MANUAL

2
•Certified by international recognized standards.
•Equipped with infra-red with heat wave outdoor heater.
•Variable control gas valve with electric push igniter.
•Steel with powder coated or stainless steel.
•880 mm free table top.
•Cover with extended warming area.
Dear customer,
Thank you for purchasing our product. Please read the following instructions carefully
before using for the first time and keep this user manual for future reference. Pay
particular attention to the safety instructions. If you have any questions or comments
about the device, please contact the customer line. Customer line, availability 24 hours a
day: +44 (0)203 514 4411, www.alza.co.uk.
Importer: Alza.cz a.s. Jankovcova 1522/53, Holešovice 170 00 Prague 7 www.alza.cz
SAFETY WARNINGS
Read these safety rules before operating the product!
If you smell gas:
•Shut off the gas in the appliance.
•Extinguish any open flame.
•If the odor persists, contact your gas supplier or fire department immediately.
For your safety:
1) Do not store or use gasoline or other flammable liquids and vapors near this or
any other equipment.
2) An LP bottle that is not connected for use must not be stored near this or any
other device.
WARNING
1) The product is intended for use outdoors use only.
2) Improper installation, adjustment, modification, service, or maintenance can
cause injury or property damage. Read the installation, operation, and
maintenance instructions carefully before installing or servicing this equipment.

3
Read the following instructions before installation and use
•The installation must conform with local codes or, in the absence of local codes,
with either the National Fuel Gas Code, or the Propane Installation Code.
•This outdoor gas appliance is not intended to be installed in or on recreational
vehicles and/or boats.
•Maintain proper clearances from combustibles.
•Inspect the hose before each use of the outdoor gas appliance. If it is evident
there is excessive abrasion or wear out, or the hose is cut, it must be replaced
prior to this outdoor gas appliance being put into operation. The replacement
hose shall be the same length and the equivalent quality.
•Properly locating the gas hose, including locating the hose out of pathways where
people may trip over it or in areas where the hose may be subject to accidental
damage.
•Maintenance Instructions:
oKeep the outdoor gas appliance area clear and free from combustible
materials, gasoline and other flammable vapors and liquids.
oMake sure that nothing is obstructing the flow of combustion and
ventilation air.
oKeep the ventilation opening(s) of the cylinder enclosure free and clear
from debris.
oVisually check the burner flames.
oClean this outdoor gas appliance, including special surfaces, with
recommended cleaning agents, if necessary.
oCheck and clean burner tubes for insects and insect nests, A clogged tube
can lead to a fire beneath the grill.
•Maintain adequate clearance around air openings into the combustion chamber,
clearances from combustible material, provisions accessibility and for
combustion and ventilating air supply.
•Certain materials or items, when stored under the appliance, will be subjected to
radiant heat and could be seriously damaged.
•Do not move the appliance when in operation.
•Shut off the valve at the gas cylinder or the regulator before moving the
appliance.
•The tubing or the flexible hose must be changed within the prescribed intervals.
•Use only the type of gas and the type of cylinder specified by the manufacturer.
•In case of violent wind, particular attention must be taken against tilting of the
appliance.
•For use outdoors or in amply ventilated areas.
•An amply ventilated area must have a minimum of 25% of the surface area open.

4
•The surface is the sum of the walls surface.
WARNING
•Children and adults should be alerted to the hazards of high surface temperatures,
and should stay away to avoid burns or clothing ignition.
•Young children should be carefully supervised when they are in the area of the
heater.
•Clothing or other flammable materials should not be hung from the heater, or
placed on or near the heater.
•Any guard or other protective device removed for servicing, the appliance must be
replaced prior to operating.
•Installation and repair should be done by a qualified service person. The heater
should be inspected before use and at least annually by a qualified service person.
More frequent cleaning may be required as necessary. It is imperative that control
compartment, burners and circulating air passageway of the appliance be kept clean.
•Use of this product in closed premises is DANGEROUS and FORBIDDEN.
SAFETY RULES FOR OUTDOOR GAS APPLIANCE
•This outdoor gas appliance shall be used only outdoors and shall not be used in a
building, garage or any other enclosed area. When used in indoor or enclosed area, it
may cause personal injury or property damage.
•If this outdoor gas appliance is not use, the gas must be turned off at the supply
cylinder.
oStorage of this outdoor gas appliance indoors is permissible only if the
cylinder is disconnected and removed from the outdoor cooking gas
appliance.
oCylinders must be stored outdoors in a well-ventilated area out of the reach
of children. Disconnected cylinders must have threaded valve plugs tightly
installed and must not be stored in a building, garage or any other enclosed
area. This appliance must be installed and the gas cylinder stored in
accordance with the regulations in force.
•The pressure regulator and hose assembly supplied with the outdoor gas appliance
must be used. Replacement pressure regulators and hose assemblies must be those
specified by the manufacturer.
•The cylinder supply system must be arranged for vapor withdrawal.

5
•The cylinder used must include a collar to protect the
cylinder valve.
PORTABLE HEATER STAND AND LOCATION
•The garden table heater is primarily for outdoor use
only.Always ensure that adequate fresh air ventilation is
provided.
•Always maintain proper clearance to combustible
materials, i.e. top 45 cm and sides 60 cm minimum.
•Garden table heater must be fixed on a stable and
strong table made of non-flammable materials such as
wood, stone, glass, metal, etc. Height of the table must
be 80cm in minimum.
•Never operate heater in an explosive atmosphere like in areas where gasoline or
other flammable liquids or vapors are stored. Distance between gas cylinder and out
door gas appliance must be 1m in minimum.
GAS REQUIREMENTS
•Use propane or butane gas only.
•Maximum inlet pressure of propane regulator must not exceed 100 mbar.
•A minimum supply pressure of 28 mbar is required for the purpose of input
adjustment for propane gas.
•The pressure regulator and hose assembly to be used must conform to local
standard codes.
•The installation must conform to local codes, or in the absence of local codes, with
the standard for the storage and handling of liquid petroleum gases.
•A dented, rusted or damaged propane tank may be hazardous and should be
checked by your tank supplier. Never use a propane tank with a damaged valve
connection.
•The propane tank must be arranged to provide for vapor withdrawal from the
operating cylinder.
•Never connect an unregulated propane tank to the heater. To change the gas
cylinder in a amply ventilated area, away from any ignition source (candle, cigarettes
etc.).

6
PROCEDURE FOR LEAKAGE TEST
NEVER CONNECT AN UNREGULATED GAS SUPPLY TO THE APPLIANCE.
•Periodically check the whole gas system for leaks.
•Immediately check for leaks if smell of gas is detected.
•Extinguish all open flames during leakage test or when smell of gas is detected.
•Never smoke while performing a leak test.
•If you cannot stop a leak, turn off the gas supply immediately and contact the dealer
where you bought your heater unit, or your gas supplier.
•The appliance must be checked with a full gas tank. DO NOT use the heater until you
have performed leak test on all the connections and verified that your unit does not
leak.
•Use only parts recommended by the manufacturer. Substitution can void the
warranty.
TESTING FOR LEAKAGE
Gas connections on the appliance are leak tested at the factory prior to shipment.
Possible mishandling of the appliance during the shipment might contribute to product
integrity as a whole. A complete gas leakage test must be performed again at the
installation site. Please follow the procedure below for leakage test.
•Make a soap solution of one part liquid detergent and one part water. The soap
solution can be applied with spray bottle, brush or rag. Soap bubbles will appear
where a leak is present.
•Make sure the safety control valve is in the “OFF” position.
•Turn ON the gas supply and check for bubbles from the hoses and connections.
Presents of bubble means that a leak path is present.
•If a leak is present, turn OFF the gas supply immediately, tighten any leaking fitting,
turn gas supply ON and recheck. Check that the regulator seal is correctly fitted
before use.
VISUALLY CHECKING BURNER FLAMES
The flame pattern at the emitter grid should be visually checked whenever the appliance
is operated. Under the following conditions the appliance should be turned off
immediately and NOT operated again until repair are made:
•When the pilot flame extends more than 1/2 inch beyond surface of the emitter grid.
•When black soot accumulates on the emitter grid.

7
OPERATION AND STORAGE
TO TURN ON THE HEATER
1. Turn on the valve on the gas supply cylinder completely.
2. Firmly press down on the variable control knob for approximately 20 seconds.
3. While holding down on the control knob, Turn the variable control knob to
horizontal position. Press the igniter button serveral times until the pilot flame
lights. Release the control knob when the pilot flame comes on.
4. If the pilot does not light, repeat step 2 to 3.
NOTE:
•If a new tank has just been connected, please allow at least one minute for the air in
the gas pipeline to purge out through the pilot hole.
5. After the pilot flame lights up, turn the variable control knob to maximum position
and leave it there for 5 minutes before turning the knob to the desired temperature
position.
TO TURN THE HEATER AND PILOT OFF
1. Turn the variable control knob to PILOT position.
2. Press down lightly and turn to “OFF” position..
3. Turn the gas tank off completely.
STORAGE
1. Wipe off tarnished surfaces with soft, moist rag.
2. Do not use harsh chemical or abrasives to clean the heater housing. If necessary, use
mild detergent.
Improper Lighting Procedures May Cause Personal Injury Or Property Damage.

8
PARTS AND SPECIFICATIONS

9
A. Construction and characteristics
Gas heater for garden table.
Textile tank cover (optional).
Gas hose connections with metal loop (screw caps for Germany).
Stainless steel flame screen.
Heat emission from reflector reflector.
B. SPECIFICATIONS
For outdoor use only.
Use propane,butane or their mixtures gas only.
Max. wattage: 4000 watts
Weight: 8.5 kgs
Height: 880 mm approx
Consumption:
APPLIANCE
CATEGORY:
I3B/P(30)
TYPES OF GAS:
Butane, propane or their mixtures
GAS PRESSURE:
30 mbar
OUTLET
PRESSURE OF
REGULATOR:
30 mbar
With CE certificates
Destination
Countries:CZ/SK/HU

10
C. TABLE OF INJECTOR
APPLIANCE
CATEGORY:
I3B/P(30)
TYPES OF GAS:
Butane, propane or their mixtures
GAS PRESSURE:
30 mbar
TOTAL HEAT
INPUT
(Hs) : (Qn)
4kW (G30:290g/h; G31:286g/h)
INJECTOR SIZE:
1,00 mm for main burner
0,18 mm for pilot burner
The marking, for example, 1.00 on the injector,
indicates that the size of injector is 1.00mm
The hose and regulator assembly must conform to local standard codes.
Regulator outlet pressure should meet the corresponding gas category in the table
of injector.
The appliance requires approved hose in 2m length.
Destination
Countries:CZ/SK/HU

11
ASSEMBLY PARTS
Tools needed:
•Adjustable opening wrench (2) 20 cm long
•Slip joint pliers 23 cm long
•Philips screwdriver w/ medium blade
•Teflon plumbing tape for joints
•Spray bottle of soap solution for leakage test
Other Parts Supplied:
•3 pcs M6 castle nuts
•4 pcs M4×8 mm bolts
•4 pcs M6×16mm bolts
•Reflector Φ 535 x (D)100 mm
•Textile tank cover Φ 320 x (H)600 mm (optional)
•9 pcs Φ 6 mm washers
•PVC mobile stand (L)375 x (W)334 x (H)53 mm (optional)
ASSEMBLY PROCEDURES
STEP 1
1-1. Put the base and cast iron piece under the
main body in the picture.
1-2. Use 4 pcs M6×20 mm bolts to join the base &
cast iron piece and the main body.
1-3. Tighten each of the bolts.
STEP 2
2-1. Join 3pcs supporting bolts & 3pcs washers to the
flame screen.
2-2. Put the flame screen into net base.
2-3. Use 4 pcs M4×8 mm stainless steel bolts to join
the flame screen and net base as shown.
2-4. Tighten each of the bolts.

12
STEP 3
3-1. Put the protection net cover the net base, aim at
4-Ø3mm holes around the base as shown.
STEP 4
4-1. Set 3 pcs washers above the 3 pcs supporting
bolts.
4-2. Put reflector canopy onto the top of flame screen
aligning through the 3 pcs supporting bolts.
STEP 5:
5-1. Place 3 pcs castle nuts & 3 pcs washers on each
reflector supporting bolts.
5-2. Tighten each of the castle nuts.

13
STEP 6:
6-1. Connect the LPG gas hose (not included) to the table
heater gas inlet connector with a loop.
6-2. Tighten the loop.
STEP 7:
7-1. Connect the regulator to the LPG gas tank and
tighten it by adjustable wrench.
7-2. Connect the end thread of inlet gas hose to the
regulator as shown.
7-3. Put the LPG gas tank on mobile stand.

14
STEP 8:
8-1. Adjust the gas tank to advisable position (push the
mobile stand ), for example under the table.
PROBLEM CHECK LIST
PROBLEM
PROBABLE CAUSE
SOLUTION
Pilot will not light
•Gas valve may be OFF
•Tank fuel empty
•Opening blocked
•Air in supply system
•Loose connections
•Turn the gas valve ON
•Refill LPG tank
•Clean or replace
opening
•Purge air from lines
•Check all fittings
Pilot will not stay
on
•Debris around pilot
•Loose connections
•Thermocouple bad
•Gas leak in line
•Lack of fuel pressure
•Clean dirty area
•Tighten connection
•Replace thermocouple
•Check connections
•Tank near empty. Refill
LPG tank.
Burner will not light
•Pressure is low
•Opening blocked
•Control not ON
•Thermocouple bad
•Pilot light assembly bent
•Not in correct location
•Tank near empty. Refill
LPG tank.
•Remove and clean
•Turn valve to ON
•Replace thermocouple
•Place pilot properly
•Position properly and
retry
If the appliance is in case of any defaults or problems of assembly or use, please don’t
try to modify it by yourself, contact your supplier or distributor to solve it.

15
WARRANTY CONDITIONS
A new product purchased in the Alza.cz sales network is guaranteed for 2 years. If you
need repair or other services during the warranty period, contact the product seller
directly, you must provide the original proof of purchase with the date of purchase..
The following are considered to be a conflict with the warranty conditions, for
which the claimed claim may not be recognized:
•Using the product for any purpose other than that for which the product is intended
or failing to follow the instructions for maintenance, operation and service of the
product.
•Damage to the product by a natural disaster, the intervention of an unauthorized
person or mechanically through the fault of the buyer (eg during transport, cleaning
by inappropriate means, etc.).
•Natural wear and aging of consumables or components during use (such as
batteries, etc.).
•Exposure to adverse external influences, such as sunlight and other radiation or
electromagnetic fields, fluid intrusion, object intrusion, mains overvoltage,
electrostatic discharge voltage (including lightning), faulty supply or input voltage and
inappropriate polarity of this voltage, chemical processes such as used power
supplies, etc.
•If anyone has made modifications, modifications, alterations to the design or
adaptation to change or extend the functions of the product compared to the
purchased design or use of non-original components.

16
EU DECLARATION OF CONFORMITY
Identification data of the manufacturer's / importer's authorized representative:
Importer: Alza.cz a.s.
Registered office: Jankovcova 1522/53, Holešovice, 170 00 Prague 7
IČO: 27082440
Subject of the declaration:
Title: Gas Heater
Model / Type: HPS-B
The above product has been tested in accordance with the standard (s) used to
demonstrate compliance with the essential requirements laid down in the
Directive (s):
Directive No. (EU) 2016/426
Reference to harmonized standards:
EN 14543: 2017
Prague, 7/23/2020
All rights reserved. ©2020 alza.cz

STOLNÍ OHŘÍVAČ HPS-B
UŽIVATELSKÝ MANUÁL

2
•Certifikováno mezinárodně uznávanými standardy.
•Vybaveno infračerveným ohřevem venkovních topných těles.
•Regulační plynový ventil s elektrickým zapalováním.
•Ocel s práškovou barvou nebo nerezová ocel.
•880 mm volná deska stolu.
•Kryt s rozšířenou oblastí oteplování.
Vážený zákazníku,
děkujeme Vám za zakoupení našeho produktu. Prosíme, pečlivě si přečtěte následující
instrukce před prvním použitím a uživatelskou příručku si uschovejte pro pozdější užití.
Zejména dbejte na bezpečnostní pokyny. Pokud máte jakékoliv dotazy či připomínky
ohledně přístroje, prosíme, obraťte se na zákaznickou linku. Zákaznická linka,
dostupnost 24 hodin denně 225 340 111, ww.alza.cz
Dovozce: Alza.cz a.s. Jankovcova 1522/53, Holešovice 170 00 Praha 7 www.alza.cz
BEZPEČNOSTNÍ VAROVÁNÍ
Než začnete produkt používat, přečtěte si následující bezpečnostní pravidla!
Pokud cítíte plyn:
•Vypněte přívod plynu.
•Uhaste všechny otevřené ohně.
•Pokud zápach přetrvává, okamžitě kontaktujte dodavatele plynu nebo hasiče.
Pro vaši bezpečnost
1) Neskladujte ani nepoužívejte benzín nebo jiné hořlavé kapaliny v blízkosti tohoto
nebo jiného podobného zařízení.
2) Plynová láhev, která není připojena k použití nesmí být skladována v blízkosti
tohoto nebo jiného podobného zařízení.
VAROVÁNÍ
1) Produkt je určený pouze pro použití venku.
2) Nesprávná instalace, seřízení, úpravy, servis nebo údržba mohou způsobit
zranění nebo poškození majetku. Před instalací nebo údržbou tohoto zařízení si
pečlivě přečtěte pokyny k instalaci, provozu a údržbě.

3
Před použitím a instalací si přečtěte následující pokyny
•Tento spotřebič musí být nainstalován a plynová láhev musí být skladována v
souladu s předpisy.
•Tento ohřívač není určený pro použití v rekreačních vozidlech nebo na lodi.
•Udržujte správnou vůli od hořlavých látek.
•Před každým použitím zkontrolujte hadici. Pokud je zřejmé, že dochází k
nadměrnému opotřebení nebo je hadice přerušena, musí být před uvedením
tohoto spotřebiče do provozu vyměněna. Náhradní hadice musí mít stejnou
délku a stejnou kvalitu.
•Hadici nedávejte na místa, kde o ní mohou lidé zakopnout nebo mimo místa, kde
může být hadice náhodně poškozena.
•Pokyny k údržbě:
oUdržujte zařízení čisté a bez nečistot z hořlavých materiálů, benzínu a
jiných hořlavých kapalin a par.
oZajistěte, že nic nebrání toku spalovacího a ventilačního vzduchu.
oUdržujte ventilační otvory láhve čisté.
oVizuálně kontrolujte plameny hořáku.
oV případě potřeby očistěte tento spotřebič doporučenými čisticími
prostředky.
oKontrolujte a čistěte trubky hořáku od hmyzu. V případě ucpání může dojít
k požáru.
•Udržujte dostatečný volný prostor kolem vzduchových otvorů ve spalovací
komoře, vůlí od hořlavých materiálu, dostupnost opatření a průchod spalovacího
a ventilačního vzduchu.
•Některé materiály nebo předměty, které budou skladovány pod spotřebičem
nebo v jeho okolí mohou být vážně poškozeny díky produkovanému teplu.
•Nepohybujte se spotřebičem za chodu.
•Před přesunutím spotřebiče uzavřete ventil na plynové lahvi.
•Hadice se musí měnit v předepsaných intervalech.
•Používejte pouze typ plynu a láhve doporučený výrobcem.
•V případě silného větru je třeba věnovat pozornost naklopení zařízení.
•Pro použití venku nebo na dobře větraných místech.
•Za dostatečně větrané místo se považuje takové, kde je alespoň 25 % plochy
otevřené a větrané.
•Plocha povrchu je součtem povrchů stěn.

4
VAROVÁNÍ
•Dospělí a děti by se měli vyhýbat povrchům s vysokou teplotou, aby nedošlo k
popálení nebo vznícení oblečení.
•Malé děti, které se pohybují kolem spotřebiče by měly být pod neustálým dohledem.
•Oblečení nebo jiné hořlavé materiály by neměly být zavěšeny na ohřívači ani
umístěny v jeho blízkosti.
•Před zahájením provozu ohřívače je nutné vrátit jakýkoli ochranný kryt nebo jiné
ochranné zařízení, které bylo odstraněno při údržbě.
•Instalaci a opravy by měl provádět kvalifikovaný personál. Ohřívač by měl být
kontrolován vždy před použitím a minimálně jednou ročně kvalifikovanou osobou.
Podle potřeby může být nutné častější čištění. Je bezpodmínečně nutné udržovat
čistotu ovládacího prostoru, hořáku a průchodu cirkulujícího vzduchu.
BEZPEČNOSTNÍ PRAVIDLA PRO VNĚJŠÍ PLYNOVÝ SPOTŘEBIČ
•Tento venkovní plynový spotřebič je určený pouze pro venkovní použití a nesmí se
používat v budovách, garážích ani v jiných uzavřených prostorách. Při použití uvnitř
může dojít ke zranění osob nebo poškození majetku.
•Pokud spotřebič není používán, je nutné vypnout přívod plynu na plynové láhvi.
oSkladování tohoto plynového spotřebiče uvnitř je přípustné, pouze pokud je z
něj láhev odpojena a vyjmuta.
oLahve musí být skladovány venku na dobře větraném místě mimo dosah dětí.
Odpojené láhve musí mít pevně nainstalované závitové ventilové zátky a
nesmějí být skladovány v budovách, garážích nebo jiných uzavřených
prostorách. Tento spotřebič musí být nainstalován a plynová láhev
skladována v souladu s předpisy.
•Je nutné použití přibaleného regulátoru tlaku a hadicové soupravy. Náhradní
regulátory a hadice musí odpovídat požadavkům výrobce.
•Systém přívodu plynu musí být uspořádán pro odsávání par.
•Použitá lahev musí obsahovat manžetu pro ochranu jejího ventilu.
•Používání tohoto spotřebiče v uzavřených prostorech je NEBEZPEČNÉ A ZAKÁZÁNO.
Table of contents
Languages:
Other ALZA Patio Heater manuals
Popular Patio Heater manuals by other brands

Andersen & Stokke
Andersen & Stokke Woven 966688 Assembly and operation instructions

HP SCHOU
HP SCHOU 09HW-P-PC instruction manual

Calcana
Calcana PH-40HO Installation, operation and service manual

Endless Summer
Endless Summer 200209 owner's manual

Jocel
Jocel JAT011893 instruction manual

Endless Summer
Endless Summer GWU501E owner's manual