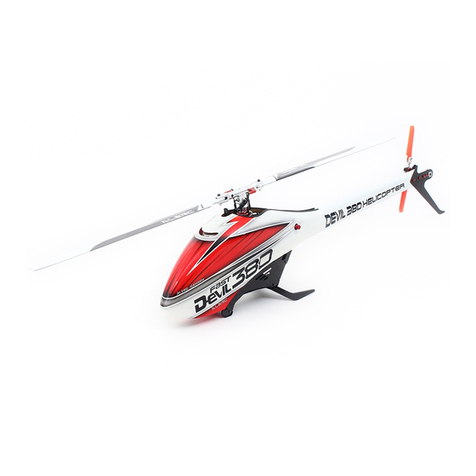
ALZRC DEVIL 380 FAST User manual

INSTRUCTION MANUAL
组装手册
RC HELICOPTERS

1
Devil 380 FAST 组装手册
发布日期:2016-10
版本信息:201610A
您可以到官网网站下载最新的版本:
www.alzrc.com
您需要更多的帮助也可以电邮给我们:
感谢您选用ALZRC系列产品,谨表谢意。选入遥控世界之前必须告诉您许多相关的知识与注意事项,以确保您能够在学习的过程中得心应手。在开始
操作之前,请务必详阅本说明书,相信一定能够给您带来相当大的帮助,也请您妥善保管这本说明书,以作为日后参考。
Thanks for choosing ALZRC, there’s some matters need attention and knowledge you need to know, then just enjoy flying with remote control
helicopter. Before you begin, please read this manual very carefully for your safety and also keep this manual properly for reference.
版本 EDITION
前言 INTRODUCTION
目录 CONTENTS
版本/前言/目录
EDITION/INTRODUCTION/CONTENTS
1
版本 EDITION/INTRODUCTION/CONTENTS/前言/目录
规格说明/重要声明
Specification/IMPORTANT NOTES
2
Devil 380 FAST Manual
Realease Date: 2016-10
Version: 201610A
You can download the latest version from our official website: www.alzrc.com
If you would like to ask a question about any of our products or services, please send us a email. We
will get back to you as soon as possible.
E-mail: [email protected]
安全注意事项
SAFETY NOTES
3
自备设备
Equipment required for assembly
4
组装说明
ASSEMBLY SECTION
5 - 36

130mm
2规格说明/重要声明 SPECIFICATION/IMPORTANT NOTES
规格说明 SPECIFICATION
224mm
785mm
重要声明 IMPORTANT NOTES
主旋翼直径:856mm
主旋翼长度:380mm
尾旋翼直径:196mm
尾旋翼长度:75mm
主轴直径:8mm
尾旋翼主轴直径:5mm
主轴直径:5mm
电机尺寸:最大直径41mm,最大高度41mm
电池:44x44x130mm
Main Rotor Diameter : 856mm
Main Blade Length : 380mm
Tail Rotor Diameter : 196mm
Tail Blade Length : 75mm
Main Shaft Diameter : 8mm
Tail Shaft Diameter : 5mm
Spindle Diameter : 5mm
Motor Size: Maximum 41mm diameter, maximum height 41mm
Battery Compartment: 44x44x130mm
遥控直升机并非玩具,它是结合了许多高科技产品所设计出来的休闲用品,所以商品的使用不当或不熟悉都可能会造成严重伤害甚至死亡,使用之前
请务必详读本说明书,勿轻忽并注意自身安全。注意!任何遥控直升机的使用,制造商和经销商是无法对使用者于零件使用的损耗异常或组装不当所发生
之意外负任何责任,本产品是提供给有操作过模型直升机经验的成人或有相当技术的人员在旁指导于当地合法遥控飞行场飞行,以确保安全无误下操作使
用,产品售出后本公司将不负任何操作和使用控制上的任何性能与安全责任。
RC helicopter is not a toy, it is used for leisure activities combinated with many high-tech things , so it may cause serious injury or even death
under inappropriate operations.Do read this instructions carefully before operating it and pay more attentions to the security. Warning! In the use of
remote control helicopters, manufacturers and dealers are not in any responsibilities for the accidents caused by the loss of the parts in the abnormal
operation or improperly assembling of the helicopter ,this product is available for the experienced adults who have operated the helicopters before
and the operators who have the substantial technical staff standing by in the local legitimate remote control flying field to ensure the safty . After the
sale of the products ,ALZRC shall have no responsibilities in the performance and security issues causing in the operations and uses.
模型商品属于需高操作技术且为消耗性之商品,如经拆装使用后,会造成不等情况零件损耗,任何使用情况所造成商品不良或不满意,将无法于保固
条件内更换新产品或退货。
RC-model requires a certain degree of skill to operate, and is a consumer item. Any damage or dissatisfaction as a result of accidents or
modifications are not covered by any warrantee and cannot be returned for repair or replacement.
ALZRC直升机公司及其代理机构皆对此产品的组装、维护及使用不具有任何控制力。因此,任何责任皆无法被回溯至本产品的制造者。您由此同意不
向ALZRC直升机公司追究任何在使用本产品过程中所产生的责任。
Neither ALZRC Helicopter Division nor its agents have any control over the assembly, maintenance and use of this product. Therefore, no
responsibility can be traced back to the manufacturer. You hereby agree to release ALZRC Helicopter Division from any responsibility or liability arising
from the use of this product.

3安全注意事项 SAFETY NOTES
安全注意事项 SAFETY NOTES
● 遥控直升机属高危险性商品,飞行时务必远离人群,人为组装不当或机件损坏,电子控制设备不良,以及操控上的不熟悉,都有可能导致飞行失控损伤
等不可预期的意外,请飞行者务必注意飞行安全,并需了解自负疏忽所造成任何意外之责任。
● 遥控直升机内部也是由许多精密的电子零组件组成,所以必须绝对的防治潮湿或水气,避免在浴室或雨天时使用,防止水气进入机身内部而导致机件及
电子零件故障而引发不可预期的意外。
● 在组装这架遥控直升机前,必须认真阅读本组装手册及各个设备商的使用手册。
● 初接触遥控直升机的人员,必须有专业人员陪同。
● 所有操作这架遥控直升机的人员,都必须采取适当的安全措施。
● 直升机飞行是具有一定的速度,相对的也潜在着危险性,场地的选择也相对的重要,请需遵守当地法规到合法遥控飞行场地飞行,必须注意周遭有没有
人、高楼、建筑物、高压电线、树木等等。避免操控的不当造成自己与他人财产的损坏。初次练习时。务必选择在空旷合法专属飞行场地并适当搭配练
习架练习飞行,这对飞行失误所造成的损伤将会大幅的降低。请勿在下雨、打雷等恶劣天气下操作,以确保本身及机身的安全。
● 操作遥控直升机可能有意想不到的危险行为发生,所以操作遥控直升机是非常危险的。
● 遥控直升机必须定期维护。
● Fly only in safe areas,away from other people.Do not operate R/C aircraft within the vicinity of homes or crowds of people. R/C aircraft are prone to
accidents, failures ,and crashes due to a variety of reasons inciuding,lack of maintenance ,pilot error,and radio interference. Pilots are responsible for
their actions and damage or injury occurring during the operation or as of a result of R/C aircraft models.
● R\C models are composed of many precision electrical components. It is critical to keep the model and associated equipment away from moisture
and other contaminants.The introduction or exposure to water or moisture in any form can cause the model to maifunction resulting in loss of use,
or a crash.Do not operate or expose to rain or moisture.
● This radio controlled helicopter must be built following these instructions. This manual provides the necessary information to correctly assemble the
model. It is necessary to carefully follow all the instructions.
● Inexperienced pilots must be monitored by expert pilots.
● All operators must wear safety glasses and take appropriate safety precautions.
● R\C helicopters fly at high speed,thus posing a certain degree of potential danger.Choose an a legal flying field consisting of fiat,smooth ground
withort obstacles.Do not fly near bulldings,high voltage cables,or trees to ensure the safety of yourself,others and your model.For the first practice,
please choose a legal flying field and can use a training skid to fly for reducing the damage.Do not fly your model in inclement weather,such as
rain, wind,snow or darkness.
● A radio controlled helicopter can behave in an unexpected manner, causing loss of control of the model, making it very dangerous.
● Lack of care with assembly or maintenance can result in an unreliable and dangerous model.
实机飞行前请严格执行飞行前检查义务 CAREFULLY INSPECT BEFORE REAL FLIGHT
● 每次飞行前应先确认所使用的遥控发射频率是否会干扰他人,以确保你自身与他人的安全。
● 每次飞行前确定您遥控器与接收器电池的电量是在足够飞行的状态。
● 开机前确认遥控器油门摇杆是否位于最低点,熄火降落开关,定速开关(IDLE)是否于关闭位置。
● 关机时必须遵守电源开关机的程序,开机时应先开启遥控器后,再插上接收器电源;关机时应先拔出接收器电源后,再关闭遥控器。不正确的开关程序
可能会造成失控的现象,影响自身与他人的安全,请养成正确的习惯。
● 开机请先确认遥控直升机的各个动作是否顺畅及方向是否正确,并检测舵机的动作是否有干涉或崩齿的情况,使用故障的舵机将导致不可预期的危险。
● 飞行前确认没有缺少或松脱的螺丝与螺帽,确认没有组装不完整或损毁的零件,仔细检测主旋翼是否有损坏,特别是接近主旋翼夹座的部位。损坏或组
装不完整的零件不仅影响飞行,更会造成不可预期的危险。注意:对损耗,有裂痕零件更新及定期保养检测的重要性。
● 检查所有的连杆头是否有松脱的情形,过松的连杆头应先更新,否则将造成直升机无法操控的危险。
● 确认电池及电源插头是否固定牢靠,飞行中的震动或激烈的飞行,可能造成电源插头松脱而造成失控的危险。
● Before flying, please check to make sure no one else is operating on the same frequency for the safety.
● Before flight, please check if the batteries of transmitter and receiver are enough for the flight.
● Before turn on the transmitter, please check if the throttle stick is in the lowest position. IDLE switch is OFF.
● When turn off the unit, please follow the power on/off procedure. Power ON-please turn on the transmitter first, and then turn on receiver. Power
OFF-Please turn off the receiver first and then turn off the transmitter. Improper procedure may cause out of control, so please to have this correct
habit.
● Before operation, check every movement is smooth and directions are correct. Carefully inspect servos for interference and broken gear.
● Check for missing or loose screws and nuts. See if there is any cracked and incomplete assembly of parts. Carefully check main rotor blades and
rotor holders. Broken and premature failures of parts possibly cause resulting in a dangerous situation.
● Check all ball links to avoid excess play and replace as needed. Failure to do so will result in poor flight stability.
● Check the battery and power plug are fastened. Vibration and violent flight may cause the plug loose and result out of control.
标符注释 LEGEND
在组装过程中,如果出现以下标符,请
认真执行每个标符的操作。
It is necessary to pay attention to the
symbols listed below.
注意
CAUTION
因为疏忽这些操作说明,
可能造成不必要的麻烦。
而安装错误可能造成危险。
Mishandling due to failure
to follow these instructions
may result in danger.
螺丝胶
THREAD LOCK
使用螺丝胶固定。
Apply Thread Lock to fix.
24
3
轴承胶
ANAEROBICS RETAIN
使用金属管状固定缺氧胶固定。
Apply Anaerobics Retain to fix.
6
48
润滑油
GREASE
涂上润滑油。
Apply grease.
瞬间胶
CA GLUE
使用瞬间胶固定。
Apply CA glue to fix.
CA
Glue
已经完成组装
AIready Assembled
螺丝胶涂于螺丝的螺纹上。
长度约1mm。
Glue width: approx.1mm
轴承胶涂于轴承的外圈。
Glue width: approx.1mm

4自备设备 EQUIPMENT REQUIRED FOR ASSEMBLY
自备遥控及电子设备 RADIO TRANSMITTER AND ELECTRONIC EQUIPMENT REQUIRED FOR ASSEMBLY
● 遥控器 (六通道以上直升机模式遥控器)
● 接收器 (六通道以上)
● 数字螺距规
● 锂电池 (1500~2600mAh 22.2V 6S Li-Po) 宽高尺寸限制在 43x43mm 以内。
● 无刷马达 (1000KV 5.0mm 6S) /标准版配备 高级套装版配备
● 无刷电调 (50~80A) /标准版配备 高级套装版配备
● 倾斜盘舵机 x 3 (建议使用扭力 3KG*cm 以上舵机) 高级套装版配备
● 锁尾舵机 ( ) 建议使用扭力 4Kg*cm 以上、速度 0.06~0.04秒舵机 高级套装版配备
● 无副翼陀螺系统 高级套装版配备
● Transmitter (6-channel or more, helicopter system)
● Receiver (6-channel or more)
● Digital Pitch Gauge
● Li-Po Battery (1500~2600mAh 22.2V 6S ) With the size within 43x43mm.
● Brushless Motor (1000kv 6S 5mm spindle) Combo/Super Combo
● Brushless ESC (50~80A) Combo/Super Combo
● Swashplate Servos x 3 (Recommend to use 3KG*cm or higher torque servo) Super Combo
● Locked Rudder Servo ( ) Recommend to use above 4kg*cm torsion and with speed of 0.06~0.04s servo Super Combo
● 3-Axis Gyro System Super Combo
自备工具 ADDITIONAL TOOLS REQUIRED FOR ASSEMBLY
● 内六角螺丝刀 (1.5mm/2.0mm/2.5mm)
● 内六角套筒 (5.5mm/7.0mm)
● 243 螺丝胶
● 648 轴承胶
● Grease 润滑油
● CA 瞬间胶
● Hexagon Screw Driver (1.5mm/2.0mm/2.5mm)
● Hex Fork Wrench (5.5mm/7.0mm)
● 243 Thread Lock
● 648 Anaerobics Retain
● Grease
● CA Glue
● 剪刀
● 刀子
● 斜口钳
● 尖嘴钳
● 砂纸
● 焊接工具
● Scissors
● Cutter Knife
● Diangonal Cutting Pliers
● Needle Nose Pliers
● Sand Paper
● Soldering Equipment
包装说明 PACKAGE ILLUSTRATION

5
D380F-G-1碳纤机身侧板-右
Carbon Fiber Main Frame-R
Chapter 1
D380F-H-2
碳纤机身侧板
Carbon Fiber Main Frame
1.5mm
金属电池卡扣
Metal Battery Clips
半圆头内六角螺丝
Socket Button Head
Collar Screw
M2x5mm
2
4
3
金属电池卡扣需安装于侧板右侧,安装完成后此侧板定
为右侧版,另一侧板无需再安装。
Metal battery clips need install on the right side of
the carbon fiber main frame. After this step, this main
frame as the right main frame. The left main frame
doesn’t need install the clips.
塑料机身电池支架
Plastic Battery Support
Chapter 2
D380F-F-1D380F-N-3
塑料机身电池支架
Plastic Battery Support 螺丝垫片-红
Screw Washer - Red
M2.5
圆头内六角螺丝
Socket Button
Head Screw
M2.5x6mm
24
3
圆头内六角螺丝
Socket Button
Head Screw
M2.5x6mm
24
3
圆头内六角螺丝
Socket Button
Head Screw
M2.5x6mm
24
3
螺丝垫片-红
Screw Washer - Red
M2.5
螺丝垫片-红
Screw Washer - Red
M2.5
此侧板为上一步组装的右侧板。
This frame is the right side,
assembled in last step.
第1步组装完成
Assembled in Chapter 1
碳纤配件的制造工艺会导致边缘非常锋利,为了
不损伤电缆,我们建议用砂纸打磨边缘。
The manufacturing process of the carbon fiber
parts often leaves micro-burrs edges. We
recommend de-burring the edges with sand
paper to minimized the risks of cable cuts.
禁止过度拧紧。
Do not over tighten.
组装说明 ASSEMBLY SECTION

6
D380F-G-1
塑料脚架
Plastic Landing Skid
Chapter 4
D380F-F-2D380F-N-3
碳纤机身侧板-左
Carbon Fiber Main Frame-L
Chapter 3
D380F-N-3
碳纤机身侧板
Carbon Fiber Main Frame
1.5mm
圆头内六角螺丝
Socket Button
Head Screw
M2.5x6mm
2
4
3
螺丝垫片-红
Screw Washer - Red
M2.5
螺丝垫片-红
Screw Washer - Red
M2.5
圆头内六角螺丝
Socket Button
Head Screw
M2.5x6mm
2
4
3
塑料脚架
Plastic Landing Skid
圆头内六角螺丝
Socket Button Head Screw
M2.5x10mm
2
43
螺丝垫片-红
Screw Washer - Red
M2.5
螺丝垫片-红
Screw Washer - Red
M2.5
第2步组装完成
Assembled in Chapter 2
第3步组装完成
Assembled in Chapter 3
组装说明 ASSEMBLY SECTION

7
机身主板
Main Structure
Chapter 7
D380F-D-1D380F-C-1
D380F-D-1主轴固定座
Main Shaft Bearing Block
Chapter 5
主轴
Main Shaft
Chapter 6
D380F-D-1
主轴固定座
Main Shaft Bearing Block
轴承
Bearing
Φ8xΦ16x5mm
64
8
已经完成组装
AIready Assembled
主轴
Main Shaft
Φ8x116mm
机身主板
Main Structure
轴承
Bearing
Φ8xΦ16x5mm
64
8
已经完成组装
AIready Assembled
垫片
Washer
Φ8xΦ12x0.1mm
拧紧主轴固定座三颗M2.5螺丝,拧紧后检查主轴间隙,可以
通过加垫片的方式来减少间隙。
Tighten the three M2.5 screw. After tightening, check the
axial play of the main shaft. It is possible to reduce any
axial play by adding washer.
注意:请认真检查,以确保主轴能顺滑转动,如果不顺滑,
可以减少一片垫片,直到主轴确保顺滑。
Note: Check the main shaft carefully to make sure you can
rotate the main shaft smoothly. If you feel too much
friction, you have to remove a washer until the shaft
can rotate smoothly.
出厂零件包装如果是已组装品,请务必确认各部件是否
锁紧上胶。
For original manufactory package, If the product is
already assembled by Factory, please check again if
parts are firmly secured and applled with some glue.
出厂零件包装如果是已组装品,请务必确认各部件是否
锁紧上胶。
For original manufactory package, If the product is
already assembled by Factory, please check again if
parts are firmly secured and applled with some glue.
第5步组装完成
Assembled in Chapter 5
第6步组装完成
Assembled in Chapter 6
组装说明 ASSEMBLY SECTION

8
D380F-C-3金属舵机固定座 x 3
Metal Servo Mount x 3
Chapter 8
金属舵机固定座
Metal Servo Mount
圆头内六角螺丝
Socket Button Head Screw
M2.5x8mm
2
43
圆头内六角螺丝
Socket Button Head Screw
M2.5x8mm
2
43
圆头内六角轴套螺丝
Socket Collar Screw
M2.5x19mm
2
4
3
D380F-N-3机架组件
Main Frame Assembly
Chapter 9
螺丝垫片-红
Screw Washer
Red
M2.5
圆头内六角螺丝
Socket Button
Head Screw
M2.5x6mm
2
4
3
螺丝垫片-红
Screw Washer - Red
M2.5
第7步组装完成
Assembled in Chapter 7
第4步组装完成
Assembled in Chapter 4
第8步组装完成
Assembled in Chapter 8
螺丝垫片-红
Screw Washer - Red
M2.5
圆头内六角螺丝
Socket Button
Head Screw
M2.5x6mm
2
43
圆头内六角螺丝
Socket Button
Head Screw
M2.5x6mm
24
3
组装说明 ASSEMBLY SECTION

9
D380F-N-2倾斜盘舵机
Swashplate Servos
Chapter 10
D380F-N-2
圆头内六角螺丝
Socket Button Head Screw
M2.5x6mm
球头 M2
Linkage Ball M2
Φ4.75x9.3mm
螺帽 M2
Nut M2
舵机臂
Servo Arm
微型数字金属舵机
Micro Digital Metal Servo
建议使用扭力 3Kg*cm 以上舵机。
Recommend to use 3Kg*cm or higher torque
servo.
20mm
22mm
23mm
32mm
28mm
12mm 7mm
舵机尺寸参考
Reference Size for Servo
13-15mm
舵机臂球头与螺丝中心距约:13-15mm。
The distance between the central of
linkage ball and servo arm screw about
13-15mm.
倾斜盘舵机安装
Installation Of Swashplate Servos
Chapter 11
倾斜盘舵机 - 1
Swashplate Servo - 1
第10步组装完成
Assembled in Chapter 10
倾斜盘舵机 - 2
Swashplate Servo - 2
倾斜盘舵机 - 3
Swashplate Servo - 3
圆头内六角螺丝
Socket Button Head Screw
M2x6mm
2
4
3
2
43
圆头内六角螺丝
Socket Button
Head Screw
M2x6mm
24
3
垫片
Washer
Φ2xΦ4.5x0.5mm
第9步组装完成
Assembled in Chapter 9
2
43
固定方式一
Fixed Way 1
固定方式二
Fixed Way 2
组装说明 ASSEMBLY SECTION
禁止过度拧紧。
Do not over tighten.

10
倾斜盘总成
CCPM Metal Swashplate Assembly
Chapter 12
D380F-B-1
倾斜盘舵机安装
Installation Of Swashplate Servos
倾斜盘舵机 - 1
Swashplate Servo - 1
倾斜盘舵机 - 3
Swashplate Servo - 3
倾斜盘舵机 - 2
Swashplate Servo - 2
圆头内六角螺丝
Socket Button
Head Screw
M2x8mm
2
4
3
倾斜盘零件 A
Swashplate Part A
万向球轴承
Spherical Bearing
Φ12xΦ22x7mm
6
48
倾斜盘零件 B
Swashplate Part B
轴承
Bearing
Φ25xΦ32x4mm
半圆头内六角螺丝
Socket Button Head
Collar Screw
M2x5mm
2
4
3
倾斜盘零件 C
Swashplate Part C
半圆头内六角螺丝
Socket Button Head
Collar Screw
M2x5mm
已经完成组装
AIready Assembled
球头 M2
Linkage Ball M2
Φ4.75x9.3mm
2
4
3
球头 M2
Linkage Ball M2
Φ4.75x9.3mm
24
3
倾斜盘长球头 M2
SwashplateLinkage
Ball M2
Φ4.75x24mm
64
8
2
4
3
2
43
出厂零件包装如果是已组装品,请务必确认各部件是否
锁紧上胶。
For original manufactory package, If the product is
already assembled by Factory, please check again if
parts are firmly secured and applled with some glue.
第11步组装完成
Assembled in Chapter 11
组装说明 ASSEMBLY SECTION

11
D380F-B-2倾斜盘舵机拉杆 x 3
Swashplate Servo Pull Rod x 3
Chapter 13
碳纤十字盘导板
Carbon Fiber Anti-Rotation Bracket
Chapter 14
D380F-C-2
倾斜盘舵机拉杆
Swashplate Servo
Pull Rod
碳纤十字盘导板
Carbon Fiber Anti-Rotation
Bracket
2.0mm
圆头内六角螺丝
Socket Button Head Screw
M2.5x6mm
24
3
第11步组装完成
Assembled in Chapter 11
第12步组装完成
Assembled in Chapter 12
第13步组装完成
Assembled in Chapter 13
组装说明 ASSEMBLY SECTION

12
D380F-I-1120T 塑料皮带轮
120T Platic Main Pulley
Chapter 15
前尾驱动皮带轮
Front Tail Pulley
Chapter 16
D380F-I-2
皮带轮中心座
Main Pulley Case
120T 塑料皮带轮
120T Platic Main Pulley
圆头内六角螺丝
Socket Button
Head Screw
M2x5mm
243
圆头内六角螺丝
Socket Button
Head Screw
M2x5mm
243
出厂零件包装如果是已组装品,请务必确认各部件是否
锁紧上胶。
For original manufactory package, If the product is
already assembled by Factory, please check again if
parts are firmly secured and applled with some glue.
法兰轴承
Flange Bearing
Φ8xΦ12x3.5mm
6
48
皮带轮中心座
Main Pulley Case
单向轴承
One-Way Bearing
Φ8xΦ12x12mm
6
48
法兰轴承
Flange Bearing
Φ8xΦ12x3.5mm
6
4
8
已经完成组装
AIready Assembled
前尾驱动皮带轮
Front Tail Pulley
圆头内六角螺丝
Socket Button
Head Screw
M2x8mm
2
4
3
螺丝必须安装至此面。
Screw must install in this side.
前尾驱动皮带轮零件
Front Tail Pulley Parts
前尾驱动皮带轮零件
Front Tail Pulley Parts
组装说明 ASSEMBLY SECTION

13
齿轮组总成安装
Installation Of Main Pulley Set
Chapter 17
马达固定座
Motor Mount
Chapter 18
D380F-E-1D380F-N-2
D380F-I-2
第14步组装完成
Assembled in Chapter 14
第16步组装完成
Assembled in Chapter 16
第15步组装完成
Assembled in Chapter 15
圆头内六角轴套螺丝
Socket Collar Screw
M2.5x16mm
2
4
3
垫片
Washer
Φ8xΦ14x0.2mm
适当增加或移除垫片,留出
0.2~0.4mm 间隙。
Add or remove washer to
leave about 0.2-0.4mm gap.
ALZRC - 无刷马达
ALZRC - Brushless Motor
3120 - 1000KV
马达固定座
Motor Mount
平头内六角螺丝
Flat Head Hex Socket Screw
M3x6mm
24
3
安装后,马达线的正确位置。
Correct position for the motor wires.
止泄螺丝
Set Screw
M4x12mm
2
4
3
已经完成组装
AIready Assembled
组装说明 ASSEMBLY SECTION

14
D380F-E-221T 马达皮带轮
21T Motor Pulley
Chapter 19
马达固定座总成安装
Installation Of Motor Mount
Chapter 20
D380F-N-3
第18步组装完成
Assembled in Chapter 18
止泄螺丝
Set Screw
M3x6mm
2
4
3
21T 马达皮带轮
21T Motor Pulley 为了预留更多的电池安装空间,建议使用马达轴较短的马达。请参考
下图尺寸。此外,请确保马达轴有适合安装止泄螺丝的固定位。
To maximize space for the battery, it is advisable to chose a motor
with short shaft. Follow the dimensions given in this figure as
refrenece. Always make sure the motor shaft has an appropriate
'flat' the set screw.
22mm
8mm
18.5mm
第17步组装完成
Assembled in Chapter 17
圆头内六角螺丝
Socket Button
Head Screw
M2.5x8mm
24
3
圆头内六角螺丝
Socket Button
Head Screw
M2.5x8mm
2
43
螺丝垫片-红
Screw Washer - Red
M2.5
螺丝垫片-红
Screw Washer - Red
M2.5
防松螺帽
Locking Nut
M4
垫片
Washer
Φ4.1xΦ9.5x0.5mm
未安装马达传动皮带之前,请
不要拧紧螺丝。
Don't tighten the screw
before install the driven belt.
第19步组装完成
Assembled in Chapter 19
已经完成组装
AIready Assembled
组装说明 ASSEMBLY SECTION

15
D380F-E-2马达传动皮带
Performance Motor Belt
Chapter 21 第19步组装完成
Assembled in Chapter 19
马达传动皮带
Performance Motor Belt
304-2GT-09
马达传动皮带安装到齿轮以后,马达固定座
需往外拉紧,用手将电机旋转几次,再拧紧
马达固定座的螺丝。
Pull motor mount and rotate the motor
after install the driven belt. And then
tighten the screw to adjust the proper
tension on belt.
注意:马达传动皮带必须非常紧。
Note: The driven belt must be really
tightened.
0.75mm
0.75mm
用手转动马达,检查马达传动皮带的垂直情况,皮带与皮带轮必须正确对齐(视下图),上下间距0.75mm。
如果转动后,皮带并非对齐,请检查马达皮带轮,皮带向上偏移,马达皮带轮向下调,皮带向下偏移,马达皮带轮向上调。
Check for vertical alignment of the motor pulley. To do this, simply turn the motor several times by hand and check to you see if the belt is
aligned properly with the big pulley (one way bearing pulley).
If the belt is riding too high, simply loosen up the motor pulley and drop it just a little bit, if it is riding too low, loosen up the
motor pulley and raise it a bit.
组装说明 ASSEMBLY SECTION

16
D380F-L-1金属尾旋翼夹座总成
Metal Tail Rotor Holder Set
Chapter 22
尾旋翼控制组滑块
Tail Pitch Slider Set
Chapter 23
D380F-L-3
金属尾旋翼夹
Metal Tail Rotor Holder
尾旋翼T型座
Tail Rotor Hub
轴承
Bearing
Φ4xΦ7x2.5mm
6
48
已经完成组装
AIready Assembled
金属尾旋翼夹
Metal Tail Rotor Holder
轴承
Bearing
Φ3xΦ6x2.5mm
648
已经完成组装
AIready Assembled
垫片
Washer
Φ4.5xΦ5.9x0.5mm
推力轴承
Thrust Bearing
Φ3xΦ6x2.8mm
垫片
Washer
Φ2xΦ4.5x0.5mm
圆头内六角螺丝
Socket Button Head Screw
M2x6mm
24
3
出厂零件包装如果是已组装品,请务必确认各部件是否
锁紧上胶。
For original manufactory package, If the product is
already assembled by Factory, please check again if
parts are firmly secured and applled with some glue.
内孔较大在里面
Larger ID Inside
组装时,确保尾夹座顺滑,些微干涉将可能导致飞行时
尾动作不顺畅。
Care must be taken during assembly to ensure tail
grips operate smoothly without binding.Any slight
binding may affect tail action during flight.
定期检查更换。
Periodic inspection
and replacement.
无需拧紧螺丝,确保 。顺畅
Don't over tighten the screw.
尾轴滑套
Tail Shaft Slide
Bushing
6
48
法兰轴承
Flange Bearing
Φ7xΦ11x3mm
尾旋翼控制组滑块变距环
Tail Pitch Control Ring
金属尾T型控制臂
Metal T Type Arm
圆头内六角螺丝
Socket Button Head Screw
M2x6mm
铜套
Collar
Φ2xΦ3x3.4mm
金属尾旋翼控制组拉杆
Metal Control Link
出厂零件包装如果是已组装品,请务必确认各部件是否
锁紧上胶。
For original manufactory package, If the product is
already assembled by Factory, please check again if
parts are firmly secured and applled with some glue.
已经完成组装
AIready Assembled
请确保摇摆顺畅
Ensure it can swing
smoothly
请确保旋转顺畅
Ensure it can rotate
smoothly
请确认安装方向正确。
Ensure the installation
direction is correct.
2
4
3
24
3
组装说明 ASSEMBLY SECTION

17
D380F-L-2尾旋翼主轴
Tail Rotor Shaft
Chapter 24
尾旋翼总成
Tail Rotor Assemly
Chapter 25
D380F-L-1
第24步组装完成
Assembled in Chapter 24
尾旋翼主轴
Tail Rotor Shaft
Φ5x67mm
止泄螺丝
Set Screw
M3x3mm
2
43
第23步组装完成
Assembled in Chapter 23
圆头内六角轴套螺丝
Socket Collar Screw
M2x9mm
铜套
Collar
Φ2xΦ3x5.5mm
铜套
Collar
Φ2xΦ3x5.5mm
圆头内六角轴套螺丝
Socket Collar Screw
M2x9mm
2
43
金属尾旋翼控制组摇臂
Metal Bell Crank Lever
Chapter 26
尾旋翼总成
Tail Rotor Assemly
D380F-L-3
用手上下推动数次,确保摇摆和推动
顺畅。如果感觉些微干涉,请调整拉
杆螺丝松紧,直到 为止。顺畅
Push several times with hand to
ensure it swing smooth.If it feels
slightly interference, please adjust
the tightness of screw rod, until
smooth.
法兰轴承
Flange Bearing
Φ2.5xΦ6x2.5mm
64
8
变距环螺丝
Tail Pin Screw
垫片
Washer
Φ3xΦ4.8x0.5mm
变距环螺丝
Tail Pin Screw
铜套
Collar
Φ2.5xΦ4x6.3mm
金属尾旋翼控制组摇臂
Metal Bell Crank Lever
法兰轴承
Flange Bearing
Φ2.5xΦ6x2.5mm
648
球头 M2
Linkage Ball M2
Φ4.75x9.3mm
24
3
已经完成组装
AIready Assembled
第25步组装完成
Assembled in Chapter 25
2
43
组装说明 ASSEMBLY SECTION

18
D380F-K-2尾齿箱侧板
Tail Side Plate
Chapter 27
21T 尾皮带轮
21T Tail Pulley
Chapter 28
D380F-L-2D380F-L-3
D380F-K-3
尾齿箱连接固定件
Tail Group Spacer
尾齿箱侧板
Tail Side Plate
法兰轴承
Flange Bearing
Φ5xΦ13x4mm
6
4
8
已经完成组装
AIready Assembled
圆头内六角螺丝
Socket Button Head Screw
M2.5x6mm
24
3
出厂零件包装如果是已组装品,请务必确认各部件是否
锁紧上胶。
For original manufactory package, If the product is
already assembled by Factory, please check again if
parts are firmly secured and applled with some glue.
第27步组装完成
Assembled in Chapter 27
第25步组装完成
Assembled in Chapter 25
第26步组装完成
Assembled in Chapter 26
止泄螺丝
Set Screw
M3x6mm
24
3
21T 尾皮带轮
21T Tail Pulley
圆头内六角轴套螺丝
Socket Collar Screw
M2.5x19mm
2
43
出厂零件包装如果是已组装品,请务必确认各部件是否
锁紧上胶。
For original manufactory package, If the product is
already assembled by Factory, please check again if
parts are firmly secured and applled with some glue.
止泄螺丝需对准尾旋翼主轴的
凹孔。
The set screw should align
with the hole in the tail shaft.
已经完成组装
AIready Assembled
组装说明 ASSEMBLY SECTION

19
D380F-L-4碳纤垂直尾翼
Carbon Fiber Vertical Stabilizer
Chapter 29
第28步组装完成
Assembled in Chapter 28
尾齿传动皮带
Performance Tail Drive Gear Belt
1140-HTD-2
碳纤垂直尾翼
Carbon Fiber Vertical
Stabilizer
1.5mm
螺丝垫片-红
Screw Washer - Red
M2.5
圆头内六角螺丝
Socket Button Head Screw
M2.5x6mm
24
3
法兰轴承
Flange Bearing
Φ5xΦ13x4mm
CA
Glue
已经完成组装
AIready Assembled
垫片
Washer
Φ5xΦ7x0.1mm
装好螺丝后,如果感觉尾皮带
齿左右有移动虚位,您可以增
加1~2片垫片。
After fixed the screw, if there
still with a gap or movement
of left and right for the Tail
Pulley, you can increase 1 to
2 washer for it.
D380F-K-1 D380F-K-3 D380F-N-3
出厂零件包装如果是已组装品,请务必确认各部件是否
锁紧上胶。
For original manufactory package, If the product is
already assembled by Factory, please check again if
parts are firmly secured and applled with some glue.
未安装碳纤尾管之前,螺丝不要
拧紧。
Do not tighten the screw
before install the tail boom.
D380F-J-1尾管固定配件-B x 2
Tail Boom Spare Part-B x 2
Chapter 30
D380F-J-1
我们建议用砂纸打磨黏贴表面。
We suggest to clean the sticking
surface with sand paper.
尾管固定配件-B
Tail Boom Spare Part-B
固定配件双面胶-B
Boom Support Double Side Tape-B
防松螺帽
Locking Nut
M2.5
CA Glue
尾管固定配件-A
Tail Boom Spare Part-A
Chapter 31
我们建议用砂纸打磨黏贴表面。
We suggest to clean the sticking
surface with sand paper.
尼龙螺帽
Nylon Nut
M8
尾管固定配件-A
Tail Boom Spare Part-A
固定配件双面胶-A
Boom Support Double Side Tape-A
CA
Glue
注意螺帽正反面。
Pay attention to the flat and
chamfered side of plastic nut.
全新的尾旋翼总成会感觉干涩,飞行
2-5个起落后,将会变得更加顺畅。
It is normal for the tail system to
feel a bit tight after initial assembly
when the helicopter is brand new.
The system will become smooth
after 2-5 flights.
组装说明 ASSEMBLY SECTION
Other manuals for DEVIL 380 FAST
2
Other ALZRC Toy manuals
Popular Toy manuals by other brands

Eduard
Eduard Zoom JAS-39D quick start guide

Eduard
Eduard F4F-4 Wildcat 1/48 quick start guide

Tiger Electronics
Tiger Electronics Mutsu 59870 instruction manual

Viessmann
Viessmann H0 4720 manual

VTech Baby
VTech Baby Snooze & Soothe Elephant Parents' guide

Hacker
Hacker RT SUPER SIRIUS Mounting and operation manual

Heli-Professional
Heli-Professional REVOLUTION 500E Assembly instruction and manual

Hasbro
Hasbro TIGER ELECTRONIC MONSTERS SCREAM FACTORY... user manual

Fisher-Price
Fisher-Price V2758 instruction sheet

Aosom
Aosom Qaba 350-144V00 Assembly instruction

Oreon
Oreon SmartGlobe Explorer AR SG338R manual

Educational Insights
Educational Insights GeoSafari Jr EI-5112-P manual