ALZRC RIDER/R-100 User manual

Manual
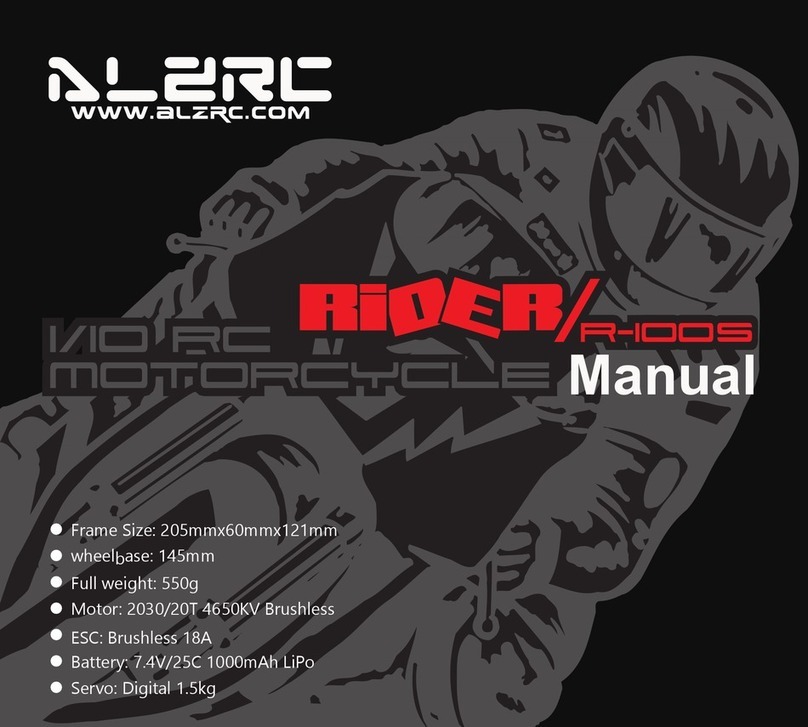
Frame Size: 205mmx60mmx121mm
wheelbase: 145mm
Full weight: 510g
Motor: Brushed 280
ESC: Brushed 25A
Battery: 7.4V/20C 680 mAh LiPo
Servo: Digital 1.5kg

Thank you for purchasing ALZRC Rider R-100. We believe that this new motorcycle will bring you infinite happiness.
Before use, please read the manual carefully and safe keeping. Accidents arecaused by illegal use, the company
doesn't undertake any responsibility.
Rider R-100 is a high performance mini RC motorcycle. This product has like the real motorcycle setting, the perfect
design of the front wheels inverted shock absorber and rear wheel pendulum arm suspension, achieves reliable grip
performance.The rear wheels using a gyro, in order to exert the performance, for maximum enjoyment of this
product,please read this manual carefully.
We will have strict testing and debugging before exiting the facility. We promise to customers. Products issue without
any material and process problems. We will free for customers to repair within 90 days from the date of purchase.
The warranty doesn't cover crash damage,modification,failure to maintenance, or the damaged caused by improper use.
The warranty doesn't cover any result which caused by the final user's assembly or the materialused for final user's
assembly.
感谢您购买ALZRC的Rider R-100摩托车,相信这一全新产品会给您带来无限欢乐。在使用产品前请您认真阅读产品使用指南,并妥善保管。
因违反本手册中的安全注意事项及使用事项而导致的事故,本公司不承担任何责任。
Rider R-100是一款高性能小型遥控(R/C)摩托车模型。本产品拥有像真摩托车的设置,前轮倒立式避震和后轮单摆臂悬架的结构,实现
可靠的抓地性能。后轮带陀螺仪更加容易操控。为了更加充分的发挥这些性能,更好的体会其中乐趣,请在使用前仔细阅读说明书 。
每辆摩托车出厂前都经过严格的测试与调试,我司保证,客户购买的产品打开包装后,无任何材料及工艺方面的问题。购买之日起90 天内,我
司将免费为客户维修。
由于碰撞,翻车,用户自行更改配置,属于保养或者任何不当使用引起的损坏,将不在保修范围内。
由终端用户自行安装或自行安装所适用的材料引起的任何问题,亦不属于保修范围。

【Safety Precautions / 安全说明】
1. The specification of the logo 关于本说明书中使用标识
Caution: this symbol indicates where caution is essential to avoid injury to yourself or others.
Note: this symbol indicates where give you a tip in use.
注意:此标识提醒您注意避免伤害到自己及其他人。
提示:此标识是作为一个小提示供使用过程中一个参考。
2. The use of power 关于产品使用的电源
· The product use lithium Polymer battery 7.4V/20C/680mAh.
· Never disassemble the polarity required for installation. This may lead to damage and leakage.
· While charging,the Lithium Polymer battery and charger become hot. Do not charge on top of inflammable materials as
this may cause fire.
· Do not operate the DC Peak Charger in direct sunlight or in high temperatures. Continually monitor the charger while charging
is in progress.
· Short circuit may cause fire or accident so never disassemble or modify the Lithium Polymer battery .
· Lithium Polymer batteries contain toxic metals. An exploding battery is extremely dangerous so never put in fire.
· 本产品使用7.4V/20C/680毫安的锂电池。
· 请注意电池的正负极, 以确保安装正确,错误的安装可能导致电池的损害及毒性物质泄露。
· 充电时,锂电池及充电器会变热,请不要在易燃材料上充电,否则可能会导致火灾事故等情况发生。
· 请不要在直射阳光下等高温场所进行充电。充电时,请不要长时间在充电附近。
· 短路可能会导致火灾,请不要分解或更改锂电池。
· 锂电池中含有害重金属,如破裂会非常危险,请勿投入火中。
3. The safety of Children 关于儿童安全
· This model is not a toy. It is designed for users over 15 yeas of age.
· As the product includes small and sharp parts, assemble and store this product only in places out of the reach of children.
· 此模型不是玩具。它为15岁及以上年龄设计。
· 此产品含有微小、尖锐部分,请在组装,使用及保存时避免婴幼儿触及。
4. The safety of User
· It's highly recommended that first-time enthusiasts seek the advice of an experienced modeler before operating this vehicle.
· Cutters,wire cutter and screwdrivers need careful handling.
· Do not touch moving gears. They can cause injury.
· During and after operation,the motor and batteries will be hot. Do not touch them until they have had time to cool down.
· 强烈推荐初次接触者在有经验者的指导下组装及操作此产品。
· 请小心使用剪刀,线钳及螺丝刀等。
· 请勿触及转动的齿轮。它们会导致受伤。
· 在模型运行中及运行后一段时间,电机和电池处于极热状态。在其冷却前请勿触及。
关于使用者的人身安全

模型禁止在泥沙地,尘土飞扬地,潮湿地,长毛地毯上行驶。在此类表面行驶可导致零部件损坏。
请勿在公路,拥挤地区及儿童附近操纵模型,可能会导致危险情况发生。
请勿在飞机、自动门或报警器等自动控制机器附近、医院和电子医疗器械周边等场所内使用,本产品发出的电波信号可能会对上述机器 产生影响,造成失误。
关于产品的使用范围
5. The range of use
Do not run your car in sandy,dusty,wet conditions,on long wool carpet. Such surfaces can damage its operating parts.
Do not operate the model on public roads, in crowded places or near infants. It may cause accidents or injury.
This product emits electrical waves so do not operate: Inside an aircraft. Near automatic devices such as automatic doors
and fire alarms. Inside hospitals or medical equipment. Operating may cause accidents.
· Do not store this model in a high-temperature/humidity area or in direct sunlight.
· Do not use water,alcohol, or thinner to clean your car's body.
· Simply wipe it down with a clean,soft cloth.
· 请避免将模型放置在高温、潮湿及阳光直晒处。
· 请勿使用水、溶剂等清洗车壳.。
· 请用清洁软布擦拭。
关于产品的维护与保养
6. The maintenance of product
骑士
外壳(上)
排气管
后轮
波箱盖
防倾杆
前轮
外壳(下)
固定架
前轮挡泥板
【Illustration of Main Parts / 】
产品主要部件图示
·
·
·
·
·
·
Rider
Body Lower Shell
Body Upper Shell
Side Slider Set
Front Fender
Transmission
Front Wheel
Bike Stand
Exhaust Pipe
Rear Wheel

车架
前减震器固定板组
转向杆
防倾杆组 排烟管 R扣垫片 机米
3x3
自攻杯头螺丝
M2x6
杯头螺丝
M1.6x10
滚轮 7字小扳手
1pc 11pc
Side Slider
Arm Slider Roller R-clip Spacer Grains
M3x3
Socket Head
Self-tapping
M2x6
Socket Head
ScrewM1.6x10
2pcs 2pcs
pcs pc 2pcs
6
Exhaust Pipe
2set
Hexagon Socket
Screw Keys
固定架 骑士 配件包 说明书 贴纸 充电器
摩托车
Bike Stand Rider Accessories Manual Sticker Battery Charger
1pc 1set 1package 1pc
1pc
2pcs
Motorcycle
1set
遥控器
Remote Control
1set
【Ready To Run Preparation / 跑前准备工作 】
Step1. Check all the parts in the box.
When you open the box, you will find follow parts
Accessories Package
检查包装里的部件
打开包装盒,有以下部件:
配件包明细:
Equipment Required:
4-Cell AA Battery for Remote Control,
Silicone Oil, Screw Glue, Tire Rubber.
以下配件客户需要单独购买
4节5号电池用于遥控器 ,
润滑油,螺丝胶,轮胎胶 。
Belt
Tail Frame
Rear Fender
Shock Absorber
Steering Linkage Set
Handle Arm
Steering Triple
Servo
Main Frame
Oil Damped FR Fork
Front Brake Caliper
Battery
Brushed Motor
Front Brake Disc
皮带
车架尾兜
后轮挡泥板
减震器
车头扶手
舵机
前避震器
前刹车碟
前刹车卡钳
锂电池
有刷马达
10pcs
Screw

Tool Required:
Hex screwdriver,Cross Wrench,Cross Screwdrive,Tweezers,Hex Wrench.
以下工具在操作中有可能会使用到
内六角螺丝刀,车用小十字扳手,十字螺丝刀,镊子,内六角扳手。
Step 2. Remove the R-Clip and the body shell. 将车壳和车尾壳底部的R扣拆下并取出上下壳
Step 3. Connect the battery with the ESC 连接电池与电子调速器的接线
the ESC in off state.Do not reverse the positive and
negative charges.
注意:电池连接电调前,请保持电 调 处 于关闭状态接线时不要接反
将车壳和车尾壳底部的R扣拆下并取出上下壳
安装遥控器电池并检查遥控系统是否正常工作
检查全车电子件的连接线是否有松动,如有松动需连接回去
Step 5. Install the remote control battery and check the remote control is working properly or not.
Note: Calibration is necessary for the first use of theESC, orwhenever used with a new/different the remote control.
Different the remotoe control’s signals for full throttle, full brake and neutral varies. You must calibrate your ESC so
that it will operate more effectively with you transmitter.Please refer to the manual of the ESC.
警告:第一次使用电子调速器或者使用新的/不同的遥控器时,都必须对电子调速器进行重新校准。不同遥控器油门的正反方向 ,刹车油门中立点
的信号也不同。为了使电子调速器能有效的工作 , 建议你在使用前 , 重新校准。具体的校准方式请参考电子调速器的说明书。
Step 4. Double check all the power systrem is connecting
* Transimitter and Receiver Diagrams
发射机和接收机的图解 *
手柄
Grip
Throttle Trim knob(CH2) 油门(CH2)中立点微调旋钮
CH2 EPA 油门(CH2) 行程大小调整旋钮
Battery Compartment 电池盒盖
Channel 3Aux Switch 第三动作开关
Antenna(Built in) 内置天线
Throttle Trigger(CH2) 油门扳机(CH2)
SteeringWheel(CH1) 转向轮(CH1)
Power/Bind indicator 配对及电源指示灯
Reverse(CH1/CH2) 反向开关(CH1.CH2)
Steering Dual Rate Knob(D/R) 转向轮(CH1) 行程大小(D/R)调整旋钮
Steering Trim Knob(CH1) 转向轮(CH1)中立点微调旋钮
电源开关
配对按钮
Bind Button
Power Switch
P.P.M. Output
Charging Jack
模拟器信号输出
充电插口
①①
②②
③
③
④
④
⑤
⑤
⑥
⑥
⑦
⑦
⑧
⑧
⑨
⑨
⑩
⑩
11
11
13
13
14
14
15
15
16
16
12
12

*Transmitter Adjustment
发射机教准*
A.Throttle trigger
Brake/Speed down
Neutral
Neutral
Forward
/Speed up
B.Steering Wheel
Left Right
1.Push the trigger forward to slow down or brake.
2.Pull the trigger backward to accelerate.
1.Turn the steering wheel counterclockwise to turn right.
2.Turn the steering wheel clockwise to turn left.
油门扳机 转向轮
中位
左右
前进/加速
刹车/减速
中位
油门扳机向前推可减速或刹车
油门扳机向后拉可加速
转向轮逆时针操作车子向右转
转向轮顺时针操作车子向左转
*
Transimitter and Receiver Binding
发射机和接收机的配对
*
Turn thetransmitter ON.The Power Indicator on the transmitter will
illuminate solid red.Press and hold the receiver setup button, then
turn the power switch on the ON position. The receiver LED will
flash quickly. Releasethesetup button after 1second. Press and hold
thebinding button onthe transmitter for 2second until the LED ON
the receiver is continuously lit.
先把发射机的电源打开,按住接收机上的配对/设置按键后再打开接收机的电源,此时
接收机上的LED灯开始快速闪烁,在10秒内按下发射机上的配对按键持续达2秒以上
(发射机上的LED灯开始快速闪烁),直到接收机的LED灯不再闪烁为止。
Pair/Setup Button
配对/设置按键
Bind Button
配对按钮
Power Switch
电源开关
通道
天线
LED指示灯
Antenna Wire
LED Indicator Pair/Setup Button
配对/设置按键
*Transmitter Battery Installation 发射机电池安装*
打开滑动盖 安装电池 关闭滑动盖
Install Batteries To close slide coverTo open slide cover
Channel “1”: Steering(CH1) 转向
“2”: Throttle(CH2) 油门
“3”: Aux(CH3) 第三动作
“B”: Power 电源

失控保护的设定只容许在发射机与接收机连接的状态下进行,其他状态不执行此功能。当发射机与接收机连接上时(接收机LED灯亮)先将CH1~CH3的位置
切到欲设定的位置后,按住接收机上的配对/设置按键超过2秒以上即进入失控保护的设定模式(LED慢速闪烁),之后在5秒内再按住按键超过1秒以上(超过
5秒以上未按按键即回到正常模式不进行失控保护的设 定)即存入设定值,此时LED快速闪烁,完成后回到正常接收模式。如欲取消失控保护的功能,只要将发
射机及接收机重新配对即可。
安装摩托车的防倾杆滚轮组、公仔与外壳
In order to avoid thedamage in the transportation process, we pack the side slider set.When open the package,find
the parts,install and fix well.
为避免运输过程中受损,在包装时已将两边的防倾杆滚轮组、公仔拆除另外包装。用户打开包装后,找到防倾杆滚轮组、公仔并与外壳重新安装
固定好。
Step 6. Install the side slider set,toy and shell.
1) Take out the side slider set form accessories package,and the n put theside slider set into the side slider arm post lock
each of the grains.
2) Install the rider in the body upper shell, fix the tail of thebody upper shell with R-clip.
3) Install the body lower shell on the main frame,fix the bodyshell post with the R-clip.
从配件包里拿出防倾杆滚轮组,然后将防倾杆滚轮安装到车架的插孔位置,并将每个插孔上的机米锁紧。
将公仔安装在车壳(上),车尾壳的底部的用R扣固定住。
将车壳(下)安装上车架,车壳柱穿过车壳并用R扣固定住。
*Fall Safe Setup
失控保护的设定方法*
Please note thesetup must based on pair procedure well.
1. Turn thepower switch onthe transmitter & receiver to the ON position, the LED ontransmitter & receiver are continuously lit.
2. Move the steering wheel or throttle trigger to the position where you want the servo to move, press and hold the receiver
setup button for 2 second until the red LED on the receiver flash slowly, then press and hold the receiver setup button again
within 5seconds(Note: after 5seconds F/S setup will reset, you have to start over at step one above)until the receiver LED is
continuously lit, that’s mean the F/S function has been correctly set.
3. Verify if thefailsafefunction has been correctly set. Turn off the transmitter, then check if theservos moves to theposition
that you set.
4. Any new binding(pair procedure)will clear the preset Fail-Safe.

【Steering Setup / 正确行驶的技术要领】
To return the motorcycle froma leaning posture to and upright posture,turn the steering in the opposite
direction to the lean. 使摩托车从倾斜位置到直立位置时,请反方面调节。
注意:遥控摩托车的操作系统是反向的,遥控器的操控轮与摩托车前轮的方向相反。
【Steering Setup / 正确行驶的技术要领】
Basic Controls: 基本操作
Caution : RC Motorcycle comes with a Counter-Steering System. It means the direction between thetransmitter steering
wheel and the motorcycle front wheel are opposite.
Left Neutral Right

Steering Wire :
转向金属钢丝:
如果在调整转向微调后摩托车仍然不能直线行驶或者转向正确的方面,很有可能是因为转向金属钢丝
弯曲了,这种情况,请在不操作转向的状态下,通过工具,将转向金属钢丝向中心位置调整。
If the motorcycle does not run straight even after adjusting the steering trim or
steering movement is not responding properly. It is possible the steering arm is
bent. In this case, please use the include tweezers to gradually, while not operating
the steering.
To make a rightturn,turn the
steering wheel to the right. The
motorcycle should lean to the
right.
If the balance bar touches the ground,
the motorcycle will not turn well. Turn
steering left to return to upright posture.
When upright,straighten(neutral)
steering.
向右倾斜时,摩托车右转。
当防倾斜杆接触地面时,车子会走得不顺畅;
请右调方向轮,摩托车回到直立位置。
当直立位置时,方向轮在中立位置。

【P1-1】
【P1-2】
FP/M2x5
A#60+A#62
11
Ø7xØ3x1
A#99
安装注意 : 为保护零配件,可以将所有的零配件放入容器中。
M2(S)
107
106
111
11
11
105
105
BL/Ø8xØ5x2.5
109
113
114
108
116
11011
B/M2x5
B/M2x5
P/M2x5
29
JM/M2x3 B/M1.6x6A#22
【
Instal lat ion Inst ruct ions / 安装说明
】
Install Note:To prevent parts from rolling off and protect the working surface,you could put all the small parts into a container.
【P2-1】 B/M1.6x6
B/M1.6x6
A#98
23-R
42-E
BL/Ø7xØ4x2.5
BL/Ø7xØ4x2.5
28
78-B
78-B
30
28
23-L
Note:Please secure the rim and the tire with
tire rubber after finishing assembly.
提 示:安装完成后请将轮毂与轮胎用轮胎胶固定。
?

【P2-2】
Note:Apply gear silicone oil#10000 on the
shaft and the spring.
?
?
提示:管身和弹簧涂
上#10000号专
用波箱润滑油。
【P3-1】 【P3-2】
FB/M2x5 05-L
B/M2X5
B/M2X5
37-B
JM/M3x12 41
36-A 45
37-C 37-A
36-B
33
B/M1.6x4
81
FB/M2x12
FB/M2x5
05-R
FB/M2x8
35
【P3-3】 【P3-4】 FB/M2x20
BL/Ø7xØ3x3
01
BL/Ø6xØ3x2.5
FP/M2x10
04
FP/M2x5
FB/M2x8
97-1
07
100
B/M1.6x4
Note:These three frame posts is individuallyon the
metal transmission, should use the socket
head screw M2x12(2pcs)&M2x20(1pc)
screwing down the metal transmission.
提示:使用金属波箱时此3根车架柱为独立的,需用杯头
螺丝M2x12(2个)和M2x20(1个)锁紧波箱。

【P3-5】
【P3-6】
【P3-7】 【P3-8】 64-R
74
03-R
SM2.5
FP/M2x5
R/M3x20
FB/M2x5
FB/M2x20
39-D
BL/Ø6xØ3x2.5
JM/M3x3
39-B
20
91
R/M3x20
38
102
R/M2.5x4
JM/M3x3
68
15
BL(F)/Ø6xØ3x2.5
02
FB/M2x6
FB/M2x15
117
Note: Before locking round head screw M2.5x4, pls use a spacer. Use the
metal transmission and the metal transmission cover, it should be
use R/M2x4,R/M2x12&B/M2x5.
Caution: The space between the two gears should be the same thickness as
one piece of A4 paper. We can put one piece of A4 paper between
the two gears before assembly and take it away after finish.
?
注意: 两个齿轮之间的空隙应为一张A4纸的厚度, 安装之前我们可以在齿轮之间放一张A4纸,
安装完成之后,再将A4 纸从齿轮间抽掉。
提示: 锁R/M2.5x4螺丝时先垫上垫片,金属波箱盖时自攻杯头螺丝M2x6和M2x15分别改用圆
头螺丝M2x4,M2x12T和杯头螺丝M2x5.
FP/M2x5
08
06
FR/M2x6

【P3-9】
【P3-8】
【P4-1】
B/M1.6x4 10
40-B
BL/Ø6xØ3x2.5
BL/Ø6xØ3x2.5
44
B/M2x14
17
82
【P4-2】
用户可根据实际路况使用垫片调节后减震强度。
Note: The suer could adjust the effect of the rear suspension according to different
racing ground by installing shock body spacer.
?
提示:
80
71
FB/M2x8
R/M1.6x4
JM/M3x3
42-A
64-L
74 FP/M2x5
SM2.5
03-L
【P4-3】 【P4-4】
42-D
27
27
16
14
JMxM3x3
B/M2x5
A#64+A#70+A#73 P/M3X10
Ø3*2.5*2
R/M3x20
FB/M2x5
FB/M2x20
76
FB/M2x4

【P4-5】 【P4-6】
99
95
103
【P4-7】 【P4-8】
【P4-9】
62-B
70
B/M1.6x6
77
R/M1.6x4
87
34
FR/M2x5
26
72
21
JM/M2x3
JM/M3x3
JM/M3x3
85
73
86
65
53
?
提示:在尾兜部分预留了LED灯与排烟管的位置,客户可根据个人喜好安装。
Note:Factory have made sp for the LED light and exhaust pipe on the tail frame part, the
user can according to personal preference to install.
66
ESC Switch 电调开关
FB/M2x6

【P4-10】 【P4-11】
90
79-R
79-L
69-B
52
FB/M2x5
34
67-B
69-B
89
69-B
注意:摩托车通电之前,请确认固定架底座没有放在金属或者易导电材质的桌面上,以免短路
烧坏电调。
P/M2X5
A#72
A#71-L
A#71-R
Caution: Before you power on the motorcycle,please make sure the bike stand of the
motorcycle is not on metal or conductive surface, unless it may cause short
circuit and the ESC may get burnt.

Rider/R-100 Parts List 零件表
Ref.No./图号 Part Name 零件名称 Qty/数量
01 Transmission 波箱 1
02 Transmission Cover 波箱盖 1
03-L Frame Side Plate 车架侧板 1
03-R Frame Side Plate 车架侧板 1
04 Tail Frame 车架尾兜 1
05-L Main Frame L 车架 1
05-R Main Frame R 车架 1
06 Battery Frame 电池固定板 1
07 ESC Frame 电调固定板 1
08 Battery Fixed Hook 电池固定钩 1
10 Rubber O-ring O型橡胶圈 2
11 Washer 平垫圈 4
14 38T Spur Gear 38T波箱减带齿 1
15 Spur Gear 马达减速齿 1
16 Driver Chain 皮带 1
17 Rear Swing Arm 后摇臂 1
20 Buffer Spring 缓冲弹簧 1
21 Cable Post 钢丝定位 2
23-L Front Left Brake Caliper 假前左刹车卡钳 1
23-R Front Right Brake Caliper 假前右刹车卡钳 1
26
Round Shoulder Screw
限位螺丝Ø2.5xØ1.5xM2x4
Ø2.5x Ø1.5xM2x4
1
27 E Clip E扣2
28 Front Brake Disc 前刹车碟 2
29 Rear Brake Disc 后刹车盘 1
30 Front Rim 前轮轮辋 1
33 Steering Triple 减震器固定板 2
34 Spacer 垫片Ø6xØ5x2.5
Ø6xØ5x2.5 2
35 Fork Bottom 前油压脚 2
36-A Fork Spring Post 前油压弹簧定位 2
36-B Fork Shock Inner Shaft 前油压芯轴 2
37-A Fork Upper Plug 前油压盖(顶) 2
Ref.No./ 图号 Part Name 零件名称 Qty/数量
37-B Fork Bottom Plug 前油压盖(底) 2
37-C Fork body 前油压管身 2
38 SteeringPivot 转向臂 1
39-B Frame Post 车架支柱 1
39-D Frame Post 车架支柱 1
40-B Shock Absorber Post 后减震固定柱 1
41 Fork Shock Shaft 前油压芯套 2
42 Front Wheel Shaft 前轮轴 1
42-A Steering Shaft 转向固定柱 1
42-D Swing Arm Shaft 波箱轴 1
44 Shock Absorber 后减震 1
45 Fork Spring 前油压弹簧 2
52 Rider 骑士 1
53 Exhaust Pipe 排烟管 1
62-B Steering Rod Gasket 转向推杆 1
64-L Body Shell Post 车壳固定座 1
64-R Body Shell Post 车壳固定座 1
65 Slider Roller Post 防倾杆滚轮定位 2
66 ESC Switch Cover 电调开关盖 1
67 Servo tray 舵机固定片(薄) 4
67-B Body Shell Post 车壳柱 1
68 17T Gear 17T马达齿 1
69-B R Clip R扣6
70 Steering Slide 转向推杆配件 1
71 ExhaustPipe Fixed Mount 排气管固定座 1
72 SteeringArm 转向拉杆 1
73 Side SliderArm 防倾杆 2
74 Side Slider Arm Post 防倾杆固定座 2
76 Side Frame Plate Post 车架侧板定位柱 2
77 SteeringSpring 转向拉杆弹簧 2
78-B Brake Disc Holder 刹车碟托 2
79-L Handle 把手 1
79-R Handle 把手 1
80 Exhaust Pipe 排气管 1

Ref.No./ 图号 Part Name Qty/ 数量
81 Front Fender 1
82 Rear Fender 1
85 Handle Arm 1
86 Slider Roller 2
87 Steering Spring 1
89 Body Lower Shell 1
90 Body Upper Shell 1
91 Plastic Spacer 1
95 Battery 1
97-1 Steering Servo 1
99 Receiver 1
A#22 Rear Brake Caliper 1
A#60 Belt Pulley 25 Sprocket 1
A#62 Belt Pulley 25 Sprocket 1
A#64 Belt Pulley 10 Sprocket 1
A#70 Belt Pulley 10 Sprocket 1
A#73 Belt Pulley 10 Sprocket 1
A#71 -L Bike Stand 1
A#71 -R Bike Stand 1
A#72 Bike Stand 1
A#98 Front Tire 1
A#99 Rear Tire 1
100 Servo Arm 1
102 Motor 1
103 ESC 1
105 Gyro Spacer 2
106 Gyro Flywheel 1
107 Gyro Upper Cover 1
108 Gyro Upper Cover 1
109 Gyro Gear Cover 1
110 Gyro Centre Shaft 1
111 Gyro Clutch 1
113 Gyro Sprocket 3
114 Gyro Inner Gear 1
零件名称
前挡泥板
后轮挡泥板
把手杆
滚轮
转向推杆弹簧
车壳(下)
车壳(上)
塑胶垫片
电池
方向舵机
接收机
假后刹车卡钳
皮带轮25齿
皮带轮25齿
皮带轮10齿
皮带轮10齿
皮带轮10齿
起步架左侧板
起步架右侧板
起步架底板
前轮轮胎
前轮胎
舵机摇摆臂
马达
电调
陀螺垫片
陀螺钢錘
陀螺上盖
陀螺下盖
陀螺齿轮盖
陀螺仪中轴
陀螺离合器
陀螺连接齿
陀螺内齿
Ref.No./ 图号 Part Name Qty/ 数量
116 Gyro Pin 1
117 Motor Post 1
B/M1.6x4 Socket Head ScrewM1.6x4 11
B/M1.6x6 Socket Head ScrewM1.6x6 4
B/M2x5 Socket Head ScrewM2x5 12
B/M2x14 Socket Head ScrewM2x4 1
BL (F)/Ø 6x Ø3x2.5 Flanged Bearing Ø6x Ø3x2.5 1
BL/ Ø6x Ø3x2.5 Bearing Ø6x Ø3x2.5 5
BL/ Ø7x Ø3x3 Bearing Ø7x Ø3x3 2
BL/ Ø7x Ø4x2.5 Bearing Ø7x Ø4x2.5 2
BL/ Ø8x Ø5x2.5 Bearing Ø8x Ø5x2.5 6
FB/M2x4
Socket Head Self- tapping ScrewM2x4
1
FB/M2x5
Socket Head Self- tapping ScrewM2x5
10
FB/M2x6
Socket Head Self- tapping ScrewM2x6
5
FB/M2x8
Socket Head Self- tapping ScrewM2x8
6
FB/M2x12
Socket Head Self- tapping ScrewM2x12
4
FB/M2x15
Socket Head Self- tapping ScrewM2x15
1
FB/M2x20
Socket Head Self- tapping ScrewM2x20
3
FP/M2x5
Socket Head Self- tapping ScrewM2x5
13
FP/M2x10
Socket Head Self- tapping ScrewM2x10
1
FR/M2x5
Round head Self- tapping ScrewM2x6
1
FR/M2x6
Round head Self- tapping ScrewM2x5
3
JM/M2x3 grainsM2x3 5
JM/M3x3 grainsM3x3 10
JM/M3x12 grainsM3x12 2
M2 (S)Nut M2 6
Ø3*2.5*2 Spacer3x2.5x2 2
Ø5x Ø2.5x0.5 SpacerØ5x Ø2.5x0.5 2
Ø7x Ø3x1 Spacer 1
P/M2x5 Flat head screwM2x5 13
P/M3x10 Flat head screwM3x10 2
R/M2.5x4 Round Head ScrewM2.5x4 2
R/M3x20 Round Head ScrewM3x20 3
SM2.5 Non-slip Nut 2
零件名称
陀螺内齿管销
马达垫块
杯头螺丝M1.6x4
杯头螺丝M1.6x6
杯头螺丝M2x5
杯头螺丝M2x5
法兰轴承Ø6xØ3x2.5
轴承Ø6xØ3x2.5
轴承Ø7xØ3x3
轴承BLØ7xØ4x2.5
轴承Ø8xØ5x2.5
自攻杯头螺丝M2x4
自攻杯头螺丝M2x5
自攻杯头螺丝M2x6
自攻杯头螺丝M2x8
自攻杯头螺丝M2x12
自攻杯头螺丝M2x15
自攻杯头螺丝M2x20
自攻平头螺丝M2x5
自攻平头螺丝M2x10
自攻圆头螺丝M2x5
自攻圆头螺丝M2x6
机米M2x3
机米M3x3
机米M3x12
丝母M2
沉头介子3x2.5x2
垫片Ø5xØ2.5x0.5
金属垫片
平头螺丝M2x5
平头螺丝P/M3x10
圆头螺丝M2.5x4
圆头螺丝M3x20
防滑丝母

【Trouble Shooting /常见故障排除】
Trouble
Battery in motorcycle or
transmission is no power.
Motor may be broken.
ESC does not work.
The setting of transmitter
or ESC may be wrong.
The motorcycle does
not move
The motorcycle is out of
control Short run time Poor performance of
the motorcycle
故障现象 摩托车没有动力 摩托车不受控制 摩托车跑动时间短 摩托车性能低
遥控器或天线损坏;
摩托车跑出遥控控制范围;
遥控器没电或电池电量不足。
电池可能损坏;
电池未充满。
避震缓冲功能存在问题;
舵机损坏;
摩托车链条过松或过紧;
车身的螺丝松脱。
原因分析
摩托车电池或遥控器损坏;
马达损坏;
电调不工作;
遥控器或电调设置错误;
电池,马达和接收机没正确
接线。
Transmitter or antenna
may be broken.
The motorcycle may be
out of range from trans-
mitter.
Power of the transmitter
is weak or dead.
Suspension may not run
freely.
The steering may be
damaged.
Chain may be too loose
or too tight.
The screw of frame may
be loose.
Battery maby be
damaged.
Charger maby be
damaged.
Battery is not with
full power.
Possible
Reasons

Table of contents
Languages:
Other ALZRC Toy manuals
Popular Toy manuals by other brands

Mattel
Mattel JURASSIC WORLD JEEP WRANGLER RAPTOR ATTACK... instructions

Radio Shack
Radio Shack Mini Tiger I Tank user manual

Mattel
Mattel HotWheels COLOR SHIFTERS CITY OCTO BATTLE... instructions

REVELL
REVELL F-86D SABRE DOG Assembly manual

VTech Baby
VTech Baby Push and Ride Alphabet Train user manual

Eduard
Eduard C-27J S.A. Assembly instructions