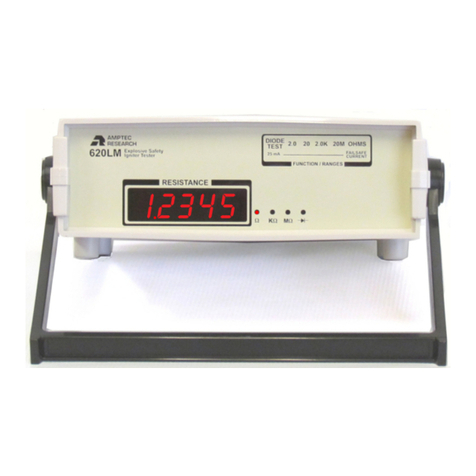
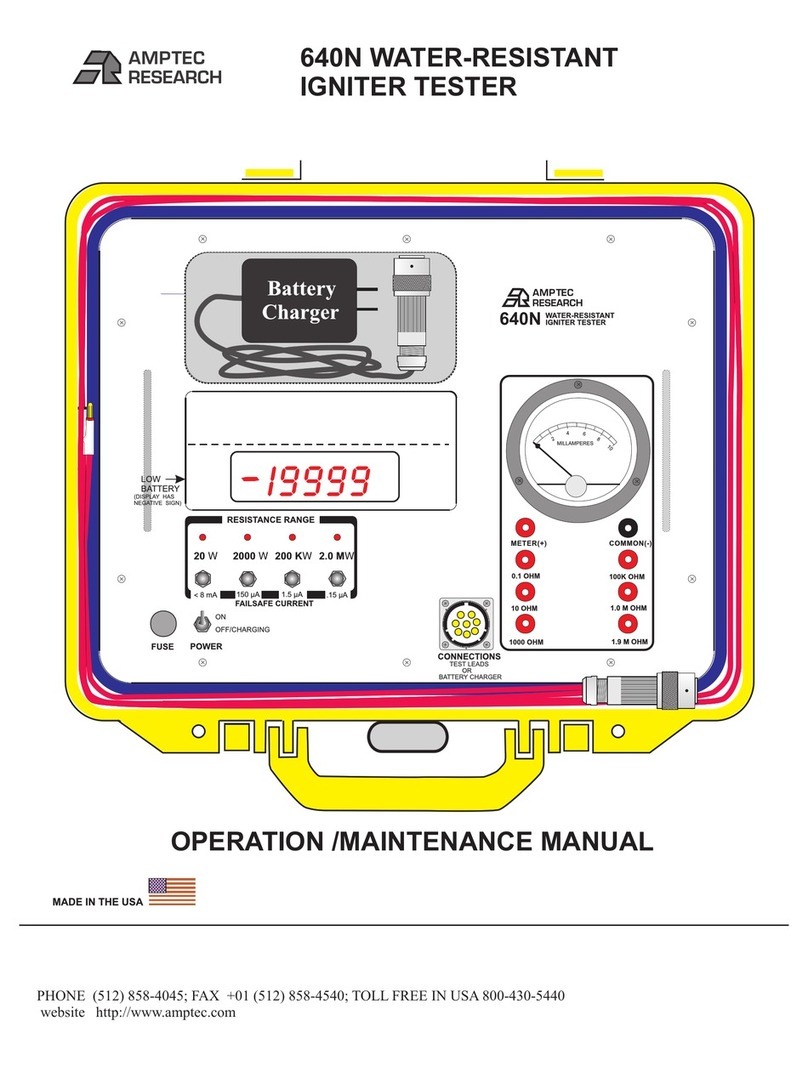
Amptec Research 620A 4R User manual

MODEL 620A 4R
WATER-RESISTANT IGNITER TESTER
OPERATION/MAINTENANCE MANUAL
AUSTIN, TEXAS 78737 USA CAGE CODE 1CRL2
PHONE (512) 858-4045 or 1-800-350-5105 (from the USA) e-mail - [email protected]
FAX (512) 858-4340 or 1-800-430-5440 (from the USA) website http://www.amptec.com
620A 4R
Battery
Charger
VHI
VOLTAGE
VLO
HI
CURRENT
LO
STORAGE AREA
FOR BATTERY CHARGER

A MESSAGE FROM THE PRESIDENT
______________________________________________________
We at AMPTEC RESEARCH would like to thank you, our customer, for selecting our
Failsafe Igniter Tester/ Digital Ohmmeter. Over the past 36 years our experienced
engineering staff have designed, manufactured and supplied earlier versions similar to
the Model 620 and 630 Series Igniter Testers to the U.S. NAVY for the “TOMAHAWK CRUISE
MISSILE”, the U.S. ARMY for the “STANDARD MISSILE”, the U.S.A.F. for the AIM-9 “
SIDEWINDER”, AIM-7 “SPARROW” and AIM-120 “AMRAAM” just to name just a few. We value the
trust our customers have placed with us, and are looking forward to supporting any new requirement you
may have ....
Kerry Clark - President AMPTEC RESEARCH
U.S. N.I.ST. CALIBRATION CERTIFICATE
______________________________________________________
AMPTEC RESEARCH, Inc. certifies that this instrument has been completely tested
and inspected and found to meet published specifications as found in this manual on
the date stated on the attached N.I.S.T. Certificate. AMPTEC RESEARCH, Corporation further certifies
that its calibration measurements are traceable to the U.S. National Institute of Standards and Technology.
620 SERIES (620xx) IGNITER TESTER WARRANTY
________________________________________________________
Permission and a return authorization (RMA) number must be obtained directly from
AMPTEC’s customer service department (via phone, FAX, or email) for repairs
(warranty or otherwise). We need to issue you an RMA number so we can keep track of the instrument and
it’s owner (i.e. who to contact). The warranty period for this instrument is 1 year from when it was first
shipped. AMPTEC RESEARCH will repair or replace the instrument during the warranty period provided
it is returned to AMPTEC RESEARCH, freight prepaid. No other warranty is expressed or implied. We
are not liable for consequential damages. No liability will be accepted if returned without such permission.
Some AMPTEC products may have their design frozen, and no changes will be made without prior notice to
the proper approving authority. Through out this manual, there is reference made using to the generic model
630 series Igniter Testers. There are any versions of the 620 Igniter Tester specifically developed to meet
our customers requirements. The specification, operation, drawing and schematic sections of this manual
contain the unique detail that define the 620XX. Due to continuing product refinement, due to possible parts
going obsolete and other component manufacturer changes, AMPTEC RESEARCH reserves the right on
rare occasions to change any of its products specifications.
R M A

TABLE OF CONTENTS
_______________________________________________________________
CHAPTER A: RECEIVING AND INITIAL INSPECTION
A-1 Introduction to the AMPTEC 620A 4R
A-2 Receiving, Unpacking and Initial Inspection
A-3 Opening the 620A 4R Ohmmeter and Removal of the Lid
A-4 AC Adaptor/ Battery Charger- Power Requirements
A-5 Setup and Use
CHAPTER B: 620A 4R FAILSAFE OHMMETER SPECIFICATIONS
Table B-2. Specifications
CHAPTER C: REPLACEMENT, OPTIONAL AND ACCESSORY ITEMS
C-1 Available Accessories and Options
C-2 Test Lead Sets
CHAPTER D: OPERATION, FUNCTIONAL SELF-TEST AND USE
D-1 General
D-2 Front Panel Features and Operation
D-3 Complete 620A 4R Front Panel Diagram
D-4 Fuse Holder
D-5 4-Wire Resistance Measurement
D-6 Connections
D-7 Failsafe Operation
D-8 Battery Monitoring Circuitry

CHAPTER E: GENERAL OPERATION AND DESIGN
E-1 General
E-2 Troubleshooting
E-3 Circuit Descriptions
E-4 Analog-to-Digital Converter
E-5 Ohms-to-DC Converter
E-6 Failsafe Design
E-7 Ultra-Safe Power Supply Scheme
Figure E-1. Model 620A 4R Block Diagram
Figure E-1B Analog-to-Digital Converter Timing Diagram
Figure E-2 Analog Section of IC1 and IC2
Figure E-3. Constant Current Source Diagram (Simplified)
Figure E-4. LED Display Pin Functions
E-8 Relay Board
CHAPTER F: ROUTINE MAINTENANCE
F-1 General
F-2 Required Test Equipment
F-3 Calibration Procedure
F-4 Battery Replacement Instructions
CHAPTER G: COMPONENT PARTS LISTS
620-400 Parts/Assembly list
CHAPTER H: SCHEMATICS AND DIAGRAMS
620A 4R Main PCB Silkscreen - Reference Designator Map
Drawing 620-070 620A 4R Main Board Electrical Schematic
(Revision D) (620-070 DVM1 and 620N-070 Current (I source) Source
Drawing 620-601-2 620A 4R Display Board Assembly
Drawing 620-075 620A 4R Cable Drawing - (Test Leads and Battery Charger)
Drawing 620-077 620A 4R Relay Board Schematic
Drawing 620-078 620A 4R Front Range Switch Schematic
CHAPTER I: UPDATES, MODIFICATIONS AND ADDENDUMS

A-1. Introduction to the AMPTEC 620A-4R
The AMPTEC 620A and the 630 Series Igniter
Testers/Failsafe Ohmmeters are becoming the
standard in the Safety Igniter Circuit Test
industry, and are designed to provide extremely
safe and reliable resistance testing of explosive
or volatile devices. Safety Approvals from
various Safety Boards include, the U.S. Air
Force ( 620A-4) for generic use on Non-Nuclear
munitions and the US NAVAL ORDNANCE
CENTER (630AN and other versions pending).
Some of the devices the 620A 4R Failsafe
Ohmmeter may be used on include: fuses,
squibs, igniters, explosive bolts, rocket motor
squibs, automobile air-bag initiators and many
others.
The AMPTEC 620A 4R is a 4-wire failsafe
digital ohmmeter which has been designed to
reliably use very low test currents for its
resistance measurement. Failsafe Output
Circuitry proprietary to AMPTEC RESEARCH
ensures that test current levels do not exceed the
specified "failsafe current" even in a worst-case
component failure situation. The failsafe feature
is tested in every instrument before shipment.
Thru out this manual reference is made to both
620A-4 and 620A-4R (ruggedized) essentially
water resistant packaging being the major
difference.
The 620A-4 and the newer 620A-4R represent
the latest in ultra-safe Igniter Tester
measurements. The 620A 4R uses the same main
printed circuit board (PCB) as the AMPTEC
620A Igniter Tester. The 620A 4R has been
made water-resistant and has many features
which make it useful in a variety of applications.
Please check the last chapter of this manual for
addendums that may apply to any differences
between new 620A 4Rs and 620A-4 Igniter
Testers. Should the rechargeable batteries reach
a low charge level a negative sign will appear on
the display. The 620A 4R has a battery
monitoring circuit that indicates it is time to
plug in the battery charger.
A-2. Receiving, Unpacking, and Initial
Inspection
Should the AMPTEC shipping box appear
damaged upon arrival, request that the carrier's
agent (i.e. UPS) be present when the unit is
unpacked. If the 620A 4R appears damaged, the
carrier's agent should authorize repairs before
the unit is returned to the factory. Even if the
instrument appears undamaged, it may have
suffered internal damage in transit that may not
be evident until the unit is operated or tested to
verify conformance with its specifications. You
may refer to the Functional Test section of
Section D of this manual to help identify the
problem (i.e Test leads etc.)
The 620A 4R has a set of test
resistors built-in the
Functional Test Section that
can quickly help the user
figure out where the
problem is most of the time.
If the unit fails to operate or
fails to meet the performance specifications of
Section B, notify the carrier's agent and the
nearest AMPTEC Sales Office. Retain the
shipping carton for the carrier's inspection. DO
NOT return equipment to AMPTEC
RESEARCH or any of its sales offices without
first obtaining an (RMA) Return Material
Authorization number. We need to know who to
contact and how to contact (i.e. phone number
and FAX number) in order to properly
coordinate the return of the repaired AMPTEC
product.
By calling AMPTEC RESEARCH first, prior
to just returning the 620A 4R, we can often
troubleshoot (based on the symptoms you
describe) and identify the problem over the
phone (i.e battery loose in the battery holder).
We may possibly be able to fix the problem over
the phone and prevent you from having to return
the unit to AMPTEC for repair.
R M A
SECTION A - RECEIVING AND INITIAL INSPECTION

A-3. Opening the 620A 4R Igniter Tester
and removal of the Lid
When closed, the 620A 4R Ohmmeter has two
large O-rings that provide a very water resistant
and on occasion even an air tight seal. By
pressing down with your palm as diagramed
above you compress the O-ring in the lid of the
620A 4R. This makes it easier to flip up the
release latch. Repeat the palm press step on the
other corner of the 620A 4R while flipping up
the release latch. At this point the 620A 4R lid
will normally be able to be raised, and placed in
an open lid state.
If the 620A 4R doesn’t open after flipping up
the release latches, a change in atmospheric
pressure since the unit was last closed may be
the culprit. Turn the Air Pressure Equalization
or “Purge Valve” counter-clockwise. Once air-
pressure is equalized, the 620A 4R can be
opened. If the Purge Valve was opened, return
the valve to the closed state (tighten =
clockwise) once the 620A 4R lid is open.
The 620A 4R has a way to remove it’s lid
completely, for example when used in an indoor
laboratory environment. With the 620A 4R
open, remove the units two hinge pins (hex
type) by twisting them. The lid should come
free at the hinge. Once the lid is removed
replace the hinge pins in the hole they were
pulled out of.
A-4. AC/DC Battery Charger - Power
Requirements
The AMPTEC 620A 4R is powered by an
internal rechargeable heavy-duty nickel-
cadmium battery pack (4 ea D cell - 5.7 AHr).
Replacement batteries may be purchased,
contact the sale department at AMPTEC
RESEARCH.
The battery charger is an external AC/DC
converter that plugs into a standard 115VAC
receptacle. The AC adapter provides 9VDC @
1.1amperes. The AC Adapter Battery Charger is
configured with a notched connector that plugs
into the “mating” notched “J1” connector on the
620A 4R front panel.
620A 4R
Press Down with Palm here
While opening release Latch A
Press Down with Palm here
While opening release Latch B
Remove both hinge pins (hex type)
with lid open to remove lid from its hinge
A. Release Latch B. Release Latch
C. Air Pressure Equalization (Purge Valve)

For safety reasons, the battery charger will only
recharge the units NICAD batteries when the
charger is plugged into the charging jack and
the 620A-4R main power switch is in the “off”
position. In this way the 620A-4R user can not
ever make a measurement while the unit is
charging. The 620A 4R is power “On/Off”
switch design makes it impossible to be
powered (in operating - measurement mode)
directly from the AC line adapter. As an
additional note, the 620A 4R main power switch
must also be in the “Off/Charging” mode in
order for the connected battery charger to
recharge the 620A 4R’s batteries.
A fully charged battery pack typically powers
the 620A 4R for approximately 8 hours before
requiring a recharge. AMPTEC installs a quality
set of 4 each Heavy Duty (5700 mAHr) Ni-Cad
batteries. The 620A 4R will also operate on a
4000 mAhr D cell Ni-Cads with a shortened
operating time between charges. Recharge time
is typically twice the “Power On” time. An
“Overnight” charge usually restores the 620A
4R to a “Fully Charged” ready to use state.
The “Power” switch has two separate modes.
The “ON” position supplies internal battery
isolated power to operate the 620A 4R when
they are charged. If you turn on the 620A 4R,
and the display does not come on, it may
indicate the batteries need charging. The “OFF/
CHARGING” power switch position is for use
when the batteries need charging or the 620A
4R is not in use. As mentioned earlier of
course the AC/DC Battery Charger must be
plugged into the 620A 4R’s notched connector
to facilitate charging the batteries.
As mentioned earlier of course the AC/DC
Battery Charger must be plugged into the 620A
4R’s notched connector to facilitate charging the
batteries.
Although the batteries are fully charged prior to
shipment, it may be desirable to refresh the
charge for 24 hours before use. As a rule of
thumb, the 620A 4R requires twice as much
time to fully recharge as the amount of
discharge time. For example, if the instrument
was used continuously for 2 hours, the AC
adapter must be connected for 4 hours in order
to fully restore the charge. If you need a
replacement AC/DC Battery Charger for the
630, contact the AMPTEC customer service
department and request an option “630DC”
Battery Charger.
When the 620A 4R is first turned on, the unit
draws more internal power to heat up the unit’s
ovenized zener voltage reference. If the “Low
Battery” Indicator only comes on for a few (i.e
10 to 15 seconds) seconds when the 620A 4R is
first turned on then goes out, the battery levels
are starting to indicate the charge level is low.
A-5. Setup and Use
The AMPTEC 620A 4R Igniter Tester may be
setup to operate without the unit’s lid intact. By
removing the hinge pins the lid may be removed
(i.e. for indoor lab bench use). Typically a test
procedure will have the 620A 4R user test the
620A 4R with the units “Functional Test
Section” to determine it is functioning properly
and ready for use.
Once the AMPTEC 620A 4R has had it’s
batteries charged for 12 to 24 hours it is ready
for use. The 620A 4R consumes little power and
generates virtually no heat. Consequently, it
may be used in any area where the environment
does not exceed the specifications of Table B-2.
Avoid exposing the 620A 4R to extremes of
temperature which will affect accuracy and
shorten battery life-span.

CHAPTER B - 620A 4R TESTER SPECIFICATIONS
______________________________________________________________
Actual fail-safe currents vary with each instrument and may be ±20% from the typical value.
Table B-2. Specifications
Accuracy: (for 1 year @25°C ± 10°C)
20 ohms through 2.0 KOhm ranges . . . . . . . . . . . . . . . . ±0.02% of reading ±0.02% of range
20 Kohms range . . . . . . . . . . . . . . . . . . . . . . . . . . . ±0.02% of reading ±0.02% of range
Temperature Range
Operating 0°C to 50°C
Storage -10°C to 70°C
Temperature Coefficient
20 ohms through 20 Kohms ranges ±0.002% per °C (from 0°C-15EC and 35°C-50°C)
Instrument Display . . (20,000 count) 4½ digit Super Bright Light Emitting Diodes (LED)
Over-Range Indication . . . . . . . . . . . . . . . . ( select next higher range) 620A 4R Display flashes
Measurement Update Rate . . . . . Approximately 300ms
Voltage Protection - Maximum Input . . . . 250VDC or AC without damage
peak
Open Circuit Current Source Compliance Voltage . . . . . clamped at ~1.6 volts
Power . . . . (4 "D" 5.7AHr Heavy Duty) 1.2V rechargeable nickel-cadmium batteries
AC/DC Battery Charger (Option 630DC) provides 6 VDC at ~ 0.5 amperes nominal
Dimensions . . . . . . . . . . . . . . . . . . . . . . . . . . . . 13.5" (34.3cm) W x 12" (30.5cm) D x 6"(15.2cm) H
Water Resistance . . . . . . . . . . . . . To a 3 foot depth underwater - case closed with purge valve shut
Weight . . . . . . . . . . . . . . . . . . . . . . . . . . . . . . 12 lbs net; 15 lbs shipping
SECTION C - REPLACEMENT, OPTIONAL AND ACCESSORY ITEMS
_____________________________________________________
C-1. Available Accessories and Options
This preliminary manual does not list all possible accessories that AMPTEC RESEARCH is willing to provide as a support items for the 620A 4R Failsafe
Ohmmeter. Contact the sales department at AMPTEC if you have a request for an item that is not described here. Listed below are the options available for use
with the AMPTEC 620A 4R Igniter Tester/FailSafe Ohmmeter.
Option 630DC: Battery Charger
Option "630DC" is an AC/DC converter that converts 115VAC line voltage to 9VDC at 1.1A. One charger is provided as a standard accessory with every 620A
4R Ohmmeter.
Replacement Batteries
The rechargeable NICAD batteries installed in the 620A 4R should provide years of trouble-free operation. Replacement, however, will eventually be necessary.
The 620A 4R uses four 1.2V cells (5.7 AHr recommended) installed in a reusable battery box. The batteries are held in place by a metal retaining plate. When
ordering replacement batteries, please specify AMPTEC Stock #0E-10117, quantity four (4).
C-2. Test Lead Sets
Option 630-305: Two Single Banana Cable
Option "630-305" is a 48" long replacement cable set normally supplied as part of the U.S. NAVY 620A 4R
Ohmmeter package. The Option “630-305 has twin single banana plugs (meter and common) terminated
with the 620A 4R style keyed connector. One banana plug is red (Voltage high and Current High) and one
banana plug lead end is black (Voltage low and Current low) . The 4-wire configuration is maintained up to
the point of the banana plug, eliminating most cable resistance effects.
You may also contact the sales department at AMPTEC RESEARCH if you have need for a special probe,
adapter, lead set or custom option not listed in this manual.
.
620A 4R RESISTANCE RANGE/DISPLAY RESOLUTION TABLE

C-1. Available Accessories and Options
This manual does not list all possible
accessories that AMPTEC RESEARCH is
willing to provide as a support items for the
620A 4R Igniter Tester. Contact the sales
department at AMPTEC if you have a request
for an item that is not described here. Listed
below are the options available for use with the
AMPTEC 620A 4R Igniter Tester.
Option 620A4DC: Battery Charger
Option "620A4RDC" is an AC/DC converter
that converts 115VAC line voltage to 9VDC at
1.1A. The units battery charger is fitted with
the mating plug that connects to the unit’s
charging jack connector. One charger is
provided as a standard accessory with every
620A 4R Ohmmeter.
Replacement Batteries
The rechargeable NICAD batteries installed in
the 620A 4R should provide trouble-free
operation. Replacement, however, will
eventually be necessary. The 620A 4R uses four
1.2V cells (5.0 AHr recommended) installed in a
reusable battery box. The batteries are held in
place by a metal retaining plate. When
ordering replacement batteries, please specify
AMPTEC Stock #05-10117, quantity four (4).
Replacement AMPTEC 620A 4R NICAD
batteries come with an inspection sticker that
verifies each individual replacement battery
voltage (charge level), inspector signature,
along with the inspection date.
CHAPTER C - REPLACEMENT,
OPTIONAL AND ACCESSORY ITEMS
3-2. Test Lead Sets and Probes
Option “290" Alligator Clip Lead Set
Option "290" is the recommended general
purpose Alligator Clip lead set (red and black) .
Option “290" is supplied as a standard item with
all 620A-4R Igniter Testers/Ohmmeters as part
of the standard package. Option “290" is a 48"
long cable set with dual banana plugs at one
end. The other end is terminated with an
alligator clip ( red and black) . These alligator
clips will measure (2 wire method) properly
with either upper or lower jaw connected to the
conductive socket center of plastic test panel
jacks. Kelvin Clips (using the 4 wire method)
may have connection difficulty because both
jaws (both upper and lower) must make
electrical contact with the EED .
Option 300: 4-Wire Kelvin Lead Set
Recommended for Calibration - Option "300" is
a gold plated four wire Kelvin lead set for all
AMPTEC 620A4 Ohmmeters. Option 300 is a
shielded 48" lead set terminat-ing in ½" opening
gold plated copper Kelvin clips. The option
"300" can clip easily to wires, pins, and medium
size (up to ½" diameter conductors). The dual
banana plugs terminations connect directly to
the 620A's front panel input terminals. (see
Option "320" for a diagram of the clip ends)

Option "401" is partially a 4-wire lead set (up
to the probe tip, 2 and 2 style) terminated
with single handheld probe test points. The
“401” also has the standard 620A 4R dual
banana lead plugs that connect directly to the
main 620A 4R measurement panel mount
banana jacks (red and white). The 4-wire
config-uration is maintained up to the point of
the probe, eliminating most cable resistance
Option “300” - Gold Plated 4 Wire Kelvin
Clip Test Lead Set - shown above
Option 305: Banana-to-Banana Cable
Option "305" is a 48" shielded cable termi-
nated in dual banana plugs at both ends.
Option 320: Kelvin Clips
Option "320" are the gold plated kelvin clips
used on the Option "300" cable set . These
clips may be used when making custom cables
or when repairing Option "300". (see photo on
previous page)
Option 360: Heavy-Duty Clips
Option "360" are Gold-plated jumper cable
(large jaws) type clips used on the Option
"350" cable. They are still Kelvin Clips
because the insulated upper and lower jaw
integrity is maintained. These may be used
when making custom cables or when repairing
Option "350".
Option "403"Kelvin
Mini-Probe
Test Lead Set
Magnified Tip Close-up
Option "403" 4 Terminal Kelvin Mini-
probes - (photo shown above)
Each probe has two spring loaded, gold
plated, steel tips with 0.18" separation. (one
red and one black handheld probe). Excellent
general purpose 4 Wire Kelvin Mini-Probe,
and along with the Option "300" Kelvin Clip
Leads easily fit inside the AMPTEC 620A4R
Test Lead Storage Area in the units lid.).
Option 401: Handheld Single Probe Leads
Option "401" is a 620A handheld probe (one black
probe & one red probe ) lead set terminated in sin-
gle points. The OP401 handheld probes allow for
easy access to connector socket wiring (i.e. drone
parachute squib sockets), recessed surfaces, and
parts (i.e. flares) that alligator clip leads simply
would not work well with.
Option 620ISO - Isolated Analog Output
for automated resistance measurements
This front panel mounted isolated analog
output provides an Isolated Analog DC
Voltage output signal that is directly
proportional to 620A ohm display
measurement. (i.e. 0.5 VDC for 5.000 ohms, 1
VDC for 10.000 Ohms). Option 500 is useful
for tracking 620A Igniter Tester
measurements for datalogging purposes with
an external device (i.e. chart recorder, or
system DMM or DVM with GPIB). The
isolation (OP500) provided is rated @2000
Volts peak, to insure that any datalogging
instrument connected to OP500 has virtually
no danger of effecting or impacting the 620A
Failsafe Ohmmeter’s safety.

When the AMPTEC 620A4R is measuring 1.2345
Ohms the Option “620ISO” outputs 123.45 mV
DC. The operator can connect any system DVM
(i.e HP , Fluke etc,) with a GPIB interface which
can be directly connected to a PC for automated
measurements.
Option 430 4000-ITS Mating Connector
AMPTEC offers an adapter connector that
provides equivalent circular socket con-nections
found on SIMPSON 4000 ITStm, and Alinco 101
series Circuit Igniter Testers.
The diagram below shows that the backside of
the OP430 connector adapter has an acrylic tube
filled with an insulating casting resin. The
hardened tube provides additional mechanical
support while handling and connecting the
mating connector.
The Safety Board (U.S.A.F. Non-Nuclear
Munitions ) approved adapter (OP430) has dual
banana leads which provide a 4 wire Kelvin
connection from the adapter to the 620A
Ohmmeter (No lead resistance errors). In some
applications (i.e. AIM-7 Missile harnesses)
regular alligator clip leads cannot properly
connect to ( screw on ring collar type
connectors) the small recessed electrical
sockets inside a connector harness that
normally mates with the SIMPSON 4000ITS or
Alinco 101 series Igniter Tester(s). The OP430
Adapter mimics the older 4000ITS Ohmmeter
(pin into socket) connection. The “OP430” has
the AMPTEC 620A Ohmmeter act as a 2- wire
ohmmeter from the OP430 connector out to the
resistance under test, just as the 4000ITS
Ohmmeter or Alinco 101 series Igniter Testers
would perform.
This for the most recent information regarding
this adapter and related probes and accessories
please refer to the accessories section of
AMPTEC’s website found at
“http://www.amptec.com” .
Refer to the previous page for information on
“Option 620ISO” Isolated Analog Output.

D-1. General Operation
A diagram and description of the front panel
controls, connection instructions, and the theory
behind resistance measurement is discussed in
this section. This section of the manual contains
complete operating instructions for the
AMPTEC 620A 4R Igniter Tester.
D-2. Front Panel Features and Operation
Power Switch
When the front panel power switch is placed in
the OFF/CHARGE position, all circuitry is
removed from the Igniter Testers panel mount
banana jacks, and the battery pack is connected
to the charging circuit. The battery charger may
then be connected to the 620A-4R charging
jack, in order to facilitate charging the batteries.
For Safety reasons/purposes, when the power
switch is placed in the “ON” position, the
battery pack circuitry is disconnected from the
charging circuit and the front panel charging
jack.
Range Switches
The AMPTEC 620A 4R input range is selected
by depressing the desired range switch
(protected with the given silicone rubber boot
for water resistance) on the front panel. Just
above each resistance range switch (silicone
rubber boot covered) is a red L.E.D. which
illuminates when any one of the four given
ranges is selected. The pushbutton for the (20
Ohm ) lowest resistance range is just below the
display on the left, (see item 11 of the 620A 4R
Front Panel Diagram.). When a given range is
selected an indicator LED informs the user. Also
note that a resistance range must be selected
after first powering up the 620A 4R in order to
place it in an operational mode, that is when
first turned on a range must first be selected. If
no range is selected upon first “powering up”
the instrument may randomly set itself to a
range that may not be desired until the operator
selects the desired range.
Calibration Access Screws
Around the perimeter of the 620A 4R front
panel you will note there are 10 screws (phillips
head type) that are used for calibration access.
These screws are meant to remain intact and
should only be removed by authorized
personnel (i.e. Calibration Lab staff).
A 0.1 ohm resistor can be used to check the
620A 4R’s zero offset. The AMPTEC 620A
4R’s zero offset can be adjusted while the test
leads are connected to the 0.1 ohm resistor. The
620A 4R zero offset can be adjusted until the
620A 4R display shows 0.1 ohms. (see the
calibration chapter)
Refer the AMPTEC 620A 4R to qualified
service personnel (i.e Calibration Lab) if you
suspect (i.e large error) the 620A 4R
measurement display readings don’t agree with
a test resistors value. Do not attempt to repair
the 620A 4R unless you are qualified.
See Next Page for a Detailed
620A-4R Front Panel Diagram
CHAPTER D - OPERATION, FUNCTIONAL
SELF- TEST AND USE

(i.e. linearity) of a given 620A 4R resistance
range.
D-3. AMPTEC 620A 4R Front Panel
Diagram
1. Calibration/Maintenance access screws,
also can be easily protected with a tamper proof
calibration sticker or seal.
2. Purge Valve provides air pressure
equalization to open the 620A 4R case after a
transit involving an altitude change if unit will
not easily open.
3. Handles for lifting front plate, once the
access screws have been removed, for
calibration access.
4. Test Lead Connection Panel Jacks - The
48” long dual banana Alligator Test Leads plug
directly into the Voltage High and Voltage low ,
and Current high and Current low panel jacks.
The spacing of the panel jacks only allows
vertical connection of the dual banana jack test
leads to prevent mis-connection.
5. Battery Charger Jack - When the low
battery indicator (negative sign in the front of
the display) comes on , plug in the mating jack
11
8
1
1
1
1
1
1
2
3
3
4
6
-
7
12
9
10
13
10
620A 4R WATER-RESISTANT
IGNITER TESTER
Battery
Charger
VHI
VOLTAGE
VLO
HI
CURRENT
LO
5

IGNITER TESTER
Figure D1 - Igniter Tester Kelvin Block Diagram
*
* contact resistance
*
4.8 VDC BATTERY
HIGH IMPEDANCE
VOLTMETER
COMPLIANCE
VOLTAGE
LIMITED
CONSTANT
CURRENT
SOURCE
IGNITER
LEAD RESISTANCE
LEAD RESISTANCE
P
O
O
L
T
N
E
R
R
U
C
DC to DC ISOLATOR
DC to DC ISOLATOR
from the AC line powered battery charger. Also
the main power switch of the 620A-4R must be
in the “OFF” position, in order to switch the
unit into charging mode..
6. Low Battery Indicator - Negative sign at
the front of the digital display indicates “low
battery level” time to recharge.
7. Fuse Access required for general operation -
2 ampere slow blow type.
8. Battery Charger Storage Area -Press
Battery Charger’s Velcrotm against Velcrotm on
the surface to attached/store the charger , cord
and its mating connector. The 620 must also
have the main power switch in the “off”
(charging) position while charging the unit’s
batteries.
9. Water Resistant O-ring seal(s) in lid and
under the edge of the front plate.
10. Tight Squeeze Flip Latch Area - pro-vides
a water resistant seal when closed. While
pressing down with palm on corner of case, flip
latch up to open.
11. Resistance Ranges 20ohms, 200ohms, 2.0
Kohms and 20.0 Kohms silicone rubber switch
boots provide water resistance.
12. Power On or Off/Charging Switch
13. Beveled Display Hood with Super Bright
LED s (five times brighter than normal LEDs).
D-4. Fuseholder and Charging System
Fuseholder
The fuseholder is mounted on the front panel
and contains a 2 amp in-line fuse (see item #7
of the 620A-4R Diagram.). The fuse protects
internal batteries from excessive charging
currents. Replace blown fuses with the same
type and rating only!
The Charging System
The slimline AC to DC battery charger with
connector is a connector that mates
with the battery jack labeled “Battery
Charger”). The connection is made on the front
panel (see item # 5 of the 620 Series Igniter
Tester Front Panel Diagram shown earlier). The
power switch (item #12) must also be in the
“Off/Charging” mode while the battery charger
is connected to recharge the batteries.
The measurement test leads (dual banana style)
connect to the Vhi, Vlow and other lead
connects to the Current (IHi) and Current (Ilo)
low 620A-4R panel banana jacks. The charging
requirements supplied to the internal battery
pack are internally stepped down from the
9VDC @1.1A supplied by the charger. The
correct charging voltage is supplied by the
adapter included with the instrument.
Additional AC/DC Battery Chargers are
available as Option "620A-4RDC". An
overnight charge (16 hours) will provide about
an 6 to 8 hours continuous powered up life for
the 620A 4R. The 620A 4R has an internal
ovenized voltage reference the draws a
considerable amount of battery power when
first turned on. If you know you will be using
the 620A 4R again in 10 to 15 minutes, you
actually conserve battery power by not turning
it off.
D-5. 4-Wire Resistance Measurement
The four-terminal configuration of the 620A 4R
eliminates errors normally caused by in series
test lead resistance and contact resistances. In
many applications the contact resistance and
can exceed the value of the test resistance by
several orders of magnitude. The 620A 4R
overcomes

this potential error source by providing two
terminals of constant current and an additional
two terminals for high impedance voltage
measurement. The result is a fast, accurate
resistance measurement of the test resistance,
independent of the resistance of the current
carrying leads.
Figure D-1 illustrates the 4-wire principle
eliminates lead, wire and contact resistances as
potential error sources. The internal constant
current source inherently overcomes all series
resistance (within compliance voltage limits)
and delivers a precise constant current.
Separate DC to DC isolation circuitry provides
independent circuit voltage supplies for both
polarities of the constant current source
circuit. The internal high-impedance Digital
Voltmeter (DVM) senses the voltage drop
across the test resistance (i.e. squib or
detonator). There is negligible contact and lead
resistance error created by the voltage
measurement because the high input impedance
of the DVM limits current flow in the voltage
(Vhi and Vlow) leads.
D-6. Connections
Connections are made to the front panel
terminals using a 4-wire configuration as
described in section D-5. Use only AMPTEC
test leads supplied with the 620A 4R Failsafe
Ohmmeter. When using AMPTEC test leads,
plug the test leads vertically into the 620A-4R
banana jacks (they can’t plug in horizontally) .
of the 620A 4R. AMPTEC 620A 4R leads have
the 4 wire current high, current low as well as
the voltage sense high and voltage sense low
routed to the end of the leads. The last tip or jaw
part of the alligator leads becomes a 2 wire
connection typically adding only 1 to 2
milliohms worth of in-series resistance to the
measurement. One banana plug (red) for current
and voltage high, and another banana plug
(black) for current and voltage low.
For 620A 4R leads other than those terminated
with banana plugs, RG-58 Shielded Coax
Cabling is used. Maintaining the four wire
Kelvin measurement, the current is in the
largest conductor and the voltage input is
shielded.
In addition, custom probes and test lead sets are
optionally available for customized wiring
connections , kelvin clips, cables terminated
with spade lugs, and special banana jacks.
All AMPTEC ohmmeters use a high impedance
voltmeter as part of the resistance measurement
process. This voltmeter is a highly accurate and
stable 4½ digit analog-to-digital converter (A to
D). The unit’s high impedance DVM (digital
voltmeter) must receive a voltage input signal or
drop in order to display the proper value. When
the DVM is not receiving a definite input
signal, the output reading from the Analog to
Digital Convertor can appear random and
wandering. The display may indicate a
randomly wandering number or it may indicate
an overrange (flashing) condition. This
unpredictable display (No input to the DVM)
condition may make it seem to appear that the
instrument is experiencing some sort of
malfunction. It is not a malfunction, in fact, just
a characteristic of the high impedance voltmeter
circuit and should not be mistaken for a fault in
the instrument - As this condition is simply a
state of an “open circuit” or “nothing
connected” to the DVM circuitry. A flashing
display (on and off usually all zeros) indicates
an over-range condition whenever the terminals
are open, or the resistance under test is a higher
value than the selected 620 series Igniter Tester
resistance range. By using a 4-wire Kelvin type
lead set or by shorting the V and I terminals
HI HI
together and V and I terminals together
low low
the instrument is in the 2 wire resistance mode.
All wiring including harness wires from the two
wire test connection out - are in series with the
test squib resistance and become part of the
actual two wire measurement (another potential
source of measurement error if not compensated
for) . Many Ordnance test procedures have the
620 series Igniter Tester user short their wiring
harnesses at the very end (by the squib) and
record the resistance value or offset. Then when
the 620 series Igniter Tester leads, including the
in-series harness wiring resistance, is connected
to the test squib, the squib test resistance can be
calculated (via subtraction of the 2 wire harness
offset).

That is the 2 wire lead length shorted offset
resistance (without the squib resistance) can be
subtracted for the total resistance (including the
squib resistance) to determine the actual squib
(test) resistance.
The display should indicate a stable reading
when the test leads are securely attached to the
device under test. If the display appears to be
erroneous when connected to the resistance
under test, recheck the test leads for integrity
and cleanliness. If all external items appear to
be functioning properly, the next step in
problem isolation and diagnosis envolves
general trouble-shooting principles. If a
measurement problem appears on the 20 Ohm
range of the meter, test for a zero offset problem
first. Plug the 620A-4R with test leads into a
0.10 test resistor. If the meter doesn’t display a
value close to 0.1 Ohms adjust the zero (see
calibration procedure chapter). The zero
adjustment trimpot only has enough span to zero
out the 620 series test leads. The meter’s zero
adjustment pot wasn’t designed to zero out a
100 feet of 2 wire harness.
A 10.0 Ohm test resistor can be used for testing
mid-scale performance of the 20 Ohm range.
Performing a similar Functional Test with the
620A-4R across the 10.0 Ohm test resistor you
should get a reading close to 10.0 Ohms (i.e
9.995 Ohms is OK). If the 620 Series Igniter
Tester appears OK after checking a test resistor
then the connection problem must be outside of
the 620 series meter (i.e your wiring harness or
the actual device under test connection.) If the
620 series meter doesn’t agree with the test
resistors, then the meter or it’s test leads are
most likely broken. If this case, please contact
your local AMPTEC RESEARCH Service
Office, or call 1-800-350-5105 or (512) 447-
7456 (International Overseas) or FAX (512)
447-7455, email [email protected]
D-7. Failsafe Operation
The AMPTEC 620 Series of Igniter Testers or
failsafe ohmmeters incorporate a constant
current source design that renders them
incapable of delivering excessive voltage or
current to the device under test. The typical
fail-safe current for each range is indicated
under the corresponding range switch on the
620 series meter front panel. Please refer to
section E-6 for a technical description of the
failsafe circuitry specifics.
As a further precaution the 620 Series Igniter
Tester is isolated from the AC line whenever the
POWER switch is in the ON position.
The 620 series igniter tester receives its power
from an internal rechargeable battery pack (4
“D” Cell Ni-Cad batteries). The 620 series
igniter tester “main power” switch (see item 12
of the Front Panel Diagram) must be in the
OFF/CHARGING position in order to charge
the batteries. Of course, the battery charger must
also be plugged into the unit’s keyed single
access connector. As mentioned earlier, the 620
tester’s AC line powered slim-line battery
charger must be connected to the front panel
charging jack. This “main power switch” must
be switched to “OFF” to charge safety feature
electrically (mechanically also) prevents any
possibility of the operator measuring with the
620 series igniter tester test leads while also
connected to an AC line powered battery
charger.
D-8. Battery Monitoring Circuitry
The 620 series igniter tester display has a ±
polarity display indicator preceding the unit’s
regular 4 ½ digit numeric display. The negative
polarity display LED (see item 6 of the 620
series igniter tester Front Panel Diagram) is
used as a Low Battery indicator.
If the low battery LED is illuminated, 620
Series Igniter Tester readings should not be
trusted. An overnight recharge should be
performed before using the 620 series igniter
tester for critical testing.

It is possible for the user to receive a low battery
indication on a single range only (particularly
the 20 ohm range), while the 620 series igniter
tester remains well within operating limits on
other ranges. Unless the user observes a
continuous low battery indication during
measurement, readings are still valid.
Notice for Cal Lab: The variable trimpot RV3
is factory adjusted to have the low battery
indicator come on at 4.50 VDC. To make this
adjustment, first remove the fuse from the
fuseholder. With an adjustable DC power
supply, set the power supply output to be 4.50
VDC. Be sure to observe power supply polarity.
Connect the power supply to the test points
labeled “MAIN” + pos. and - neg. located in
the rear section of the MAIN PCB. (i.e + power
supply output to the anode side). Adjust trimpot
RV3 so the low battery indicator just comes on
(negative sign on display). An increase in power
supply voltage to 4.52 VDC should have the low
battery indicator go out. Finally, disconnect the
power supply, and return the fuse to the fuse
holder in the rear panel.

CHAPTER E GENERAL OPERATION AND DESIGN
E-1. General
The AMPTEC RESEARCH 620A-4R Igniter
Tester is shown in block diagram form in Figure
E-1. All diagrams and information disclosed in
this chapter is proprietary and is included in
order to make troubleshooting to component
level possible.
The AMPTEC 620A series Igniter Tester uses
modern solid-state semiconductors exclusively
and digital CMOS circuits extensively to
minimize power requirements and make battery
operation useful and practical. AMPTEC also
maintains a spare parts inventory of all
components found in the 620A Tester and it’s
customer service department can also provide
additional assistance in the trouble shooting
process.
E-2. Troubleshooting
Since the 620A Tester is used to test potential
deadly explosive force detonators and warheads
of missiles etc., personnel that are not qualified
to make such electrical repairs on the 620A
Tester should not even attempt to remove the
calibration access screws or open the main
panel or effect any repair whatsoever.
Apparent 620A Tester malfunctions can
sometimes be the result of bad test
lead/connection wiring, wrong connections,
misinterpretation of specifications, low battery
levels, and in rare cases due to an incomplete
understanding of the instrument and how to use
it. A thorough review of the operating
instructions for this instrument is recommended
prior to any component replacement. Check to
be sure that cables and other test equipment are
in good working order before attempting to
troubleshoot the 620A series igniter tester .
If you turn on the AMPTEC 620A-4R, and the
display does not come on, it may indicate the
batteries need charging, or fuse needs replacing.
If the 620A-4R exhibits problems that cannot be
eliminated by reviewing Chapters B and D, the
following guidelines have been established to
help solve the problem.
E-2-1. Localizing the Problem
Chapter D-2 discusses how to use the
Functional Test Section of the 620A Tester to
help localize the problem. The key to successful
troubleshooting is to localize the problem to a
general electronic parameter as much as possible
before trying to pin the problem down to a
specific component. Certain questions should
be asked such as "Does the problem occur on all
ranges or on a specific range only?". If the
620A Tester does not come on when powered
up, did you check the front panel fuse. The
power supplies for both the current source and
the digital voltmeter electronics are also one of
the first things that should be tested.
As it is not possible to anticipate all failure
modes of the 620A series igniter tester, servicing
personnel should become familiar with this
section to gain a complete understanding of the
internal workings of the ohmmeter.
E-2-2. Component Replacement
If the malfunction is a faulty component, the
accuracy of the 620A series igniter tester can be
maintained only if the 620A is re-calibrated
following the component replacement and the
following precautions are taken:
Use only the specified component or its exact
equivalent. Spare parts can be ordered from
your nearest AMPTEC RESEARCH Service
Center or directly from the factory by referring
to the AMPTEC Stock Number listed in the
Parts Lists section at the back of this manual.
The highest quality 63/37 grade rosin core
electronic grade solder with a 50W or lower
maximum power soldering iron should be used.
Never use an acid core solder as corrosion of
components leads and PCB etch loss can occur.

When soldering, heat the PCB pad and the lead
of the component, not the solder. After several
seconds of the component lead in contact with
the hot soldering iron apply solder smoothly and
evenly onto the PCB pad and component lead
not the soldering iron. Do not touch or move
the replacement part until the solder has cooled.
Cold solder and bad solder joints can cause
more problems.
Use the chassis ground (connect to the common
terminal of the functional test section)
connection - i.e. connect to an earth ground to
avoid a static discharge to a static sensitive
component. Handle all 620A internal
components as if they are static sensitive if you
are not sure.
See Next Page for Start of 620 Circuit Descriptions and Functional Diagrams

E-3. Circuit Descriptions
The circuit descriptions which follow are
referenced to Figures E-1, E-2, E-3 and the
schematic diagrams at the back of this manual.
In the following descriptions, references to
integrated circuits are given in the form "IC201-
1", which refers to Integrated Circuit 201, pin 1.
E-4. Analog to Digital Conversion
The A to D conversion is done with a ICL8068
/ICL71C03 chip set. The ICL8068 takes care of
the analog part and the ICL71C03 takes care of
the digital part of the 4 ½ digit 20,000 count
dual slope conversion.
COUNTERS
DISPLAY
COMPARATOR
BUFFER
MULTIPLEXER
ZERO
CROSSING
DETECTOR
INTEG
UUT
CONTROL
LOGIC
INPUT
SWITCH
DC CONSTANT
CURRENT SOURCE
RANGE
SWITCH
MODEL 620A-4R OHMMETER BLOCK DIAGRAM
NUMBER OF COUNTS TO ZERO CROSSING
PROPORTIONAL TO VIN
AFTER ZERO CROSSING,
ANALOG SECTION WILL BE
IN AUTOZERO CONFIGURATION
BUSY
OUTPUT
INTEGRATOR
OUTPUT
CLOCK
AZ PHASE l INT PHASE ll DEINT PHASE ll AZ
INTERNAL
LATCH
POLARITY
DETECTED
ZERO CROSSING
OCCURS
ZERO CROSSING
DETECTED
Figure E1 - 620 Conversion Timing Diagram
Table of contents
Other Amptec Research Test Equipment manuals
Popular Test Equipment manuals by other brands

az-instrument
az-instrument 8930 Operation manual

Dixon Bayco
Dixon Bayco FloTech FT530 manual

Netscout
Netscout OneTouch AT 10G user manual

Viavi
Viavi OneAdvisor 1000 Quick Card User Guide

pico Technology
pico Technology PicoScope 2000 Series Programmer's guide

Keysight Technologies
Keysight Technologies InfiniiVision 1000 X-Series Service guide