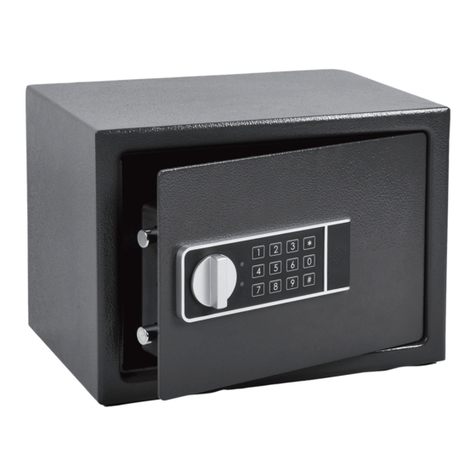
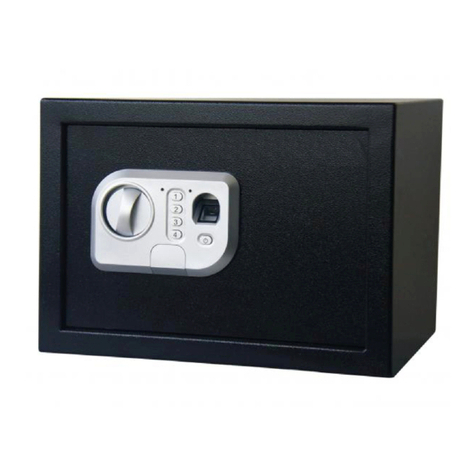
Amtex AM Series User manual


( FOR AM\AMD, KM\KMD, NM\NMD, HB SERIES )
HOTEL INTELLIGENT SAFE
INSTRUCTIONS

IMPORTANT DATA PURCHASING CARD..1
IMPORTANT TIPS………............………...…2
PRODUCT FEATURES…………....……...…3
CASE PARTS DESCRIPTION
I. Schematic Drawing of Case……….………4
II. Schematic Drawing of Control Panel….…5
POWER SUPPLY
I. Battery……………….....................………..6
II. Testing Battery Energy….....................….6
III. Replacing Batteries……...............……....7
USER CODE SYSTEM
I. Setting User Code…..........….............…....8
II. Opening Door with the User Code…....….8
III. Closing Door with the User Code….........9
MASTER CODE SYSTEM
I. Setting Master Code ……….................….10
II. For Emergency Use of Mater Code.…….11
USER CARD SYSTEM
I. Setting User Card…......…................…….12
II. Opening Door with the User Card…....….12
III. Closing Door with the User Card….…….13
EMERGENCY SYSTEM..............................14
SECURITY DISPLAY SYSTEM……...…….15
MOUNTING METHOD ……................…….16
DATA DISPLAY
I. Normal Data Display ……................…….17
II. Error Data Display ………...................….18
CUSTOMER SERVICE ……...............…….19
CONTENT
English
Please, keep a record of the following data once you get this instruction!
● Date of purchase Product model
● Serial number located on the lower right corner of the door
● The emergency key number
● Name and address of distributor
● Phone number of distributor
Thank you very much for recording the information down and keeping it!
TIPS:
● For safe use of the product, please read this Operation Manual carefully prior to use.
● Never leave your emergency keys in the safe!
IMPORTANT DATA PURCHASING CARD
English
01

All drawings in this manual have been supplied based on the AM, but the operation is the •
same as AMD, KM\KMD, NM\NMD and HB series.
Keep keys and this manual in a safe place,never in the safe.•
Do not use liquid or a sprayer to clean the product. Use a wet cloth instead.•
Do not place the product in an insecure and elevated place, or it may fall over and damage the •
product or hurt people.
Do not swipe anything in the card slot except bank card to avoid damage to the magnetic •
head or deformation of contact point. Otherwise it will cause failure of card swiping function.
Never spill liquid over the control panel, or it may cause electrical shock to the electronic parts •
inside and disable their proper functions.
Never try to dismantle the product by yourself. If maintenance is required, please contact the •
local service center or local distributor.
Never attempt to stuff the safe forcibly with articles of excessive quantity, or it may cause •
difculty in closing door and even damage the articles.
IMPORTANT TIPS
English
02
Fashionable exterior design and noble colors, suitable for use in deluxe hotels, apartments •
and ofces.
For AM/NM/KM/HB series, using highly reliable card reader system to enable operation with •
universal bank cards like VISA and MASTER. Easy of use plus adequate security provisions.
24K gold coated label and screw plus exquisite workmanship of the case, catering to the •
needs of successful business man.
Specially designed space for lap-top computer provides a safe “harbor” for your data.•
Unique opening system accessible by both digital code and bank card.•
One-step molding technology and unique spray coating technique which ensures the case is •
rust-free for 12 years.
Adoption of word advanced chip technology to enable the product has powerful network •
compatibility.
PRODUCT FEATURES
English
03

I. Schematic Drawing of Case
1. Bolts
2. Switch(ON/OFF)
3. Battery Compartment
a. External Battery Compartment b. Internal Battery Compartment
(a) (b)
CASE PARTS DESCRIPTION
English
04
12 3 12 3
II. Schematic Drawing of Control Panel
CASE PARTS DESCRIPTION
English
05
4
5
6
8
11
12
9
10
4. Display
5. Digital Keypad
6. Conrming Key ( # )
7. Clearing Key (﹡)
8. Card Slot
9. Card Swipe Indicator Icon
10. External Power Connector
11. Emergency Key Cover
(Gold Coated Label)
12. Serial Number
7

I. Battery
• The working voltage for the product is equal to 4 AA
batteries.
• System will turn into micro power consuming state
automatically in stand-by.
II. Testing Battery Energy
• Press “ # ”, the battery energy test procedure will start.
• If the display reads “BA - HI”, it means the batteries
are normal;
• If the display reads “BA - LO”, it means the voltage is
low. Please replace batteries immediately!
III. Replacing Batteries
Type A: For Internal Battery Compartment
• Make sure the power switch is in the “O”(off) state, if
there is a power switch on the side of back cover.
POWER SUPPLY
English
06
• Open the door, unscrew the back of door cover and remove the back cover.
• Replace 4 AA batteries by lining them up in a manner as indicated by the “+“and “-” signs.
Type B: For External Battery Compartment
• Make sure the power switch is in the “O”(off) state, if there is a power switch on the side of
back cover.
• Open the door, and remove the compartment cover on back of door.
• Replace 4 AA batteries by lining them up in a manner as indicated by the “+“and “-” signs.
WARNING!
No old and fresh batteries or different types of batteries are allowed to use together, or
the electronic system will fail.
POWER SUPPLY
English
07

Please, ensure the door is unlocked before you set the code!
If the door is locked when you get the safe, please unlock it
with the preset user code rst!
I. Setting User Code
• The preset user code is 1234.
• Enter four-digit code as the user code (code digit can
be three, ve, or six depending on programming), while
defaulted to four digits.
• Press “ # ”, the locking bolts retract, then the display will
read “CLOSED” and ash the new user code entered.
Then the new user code is set successfully!
II. Opening Door with the User Code
• Enter the new user code, the display will read “OPENED”
and then pull the panel to open the door.
TIPS: Here we just take the code “2345” for an example,
please choose your own user code for security.
USER CODE SYSTEM
English
08
III. Closing Door with the User Code
• Enter four-digit code and conrm by”#”, the display will read
“CLOSED” and close the door.
• Each time closing the safe, you can change the user code as well
as setting the code.
CAUTION!
Each code entered to lock the safe will be the user code, and
you must use this code to open the safe next time as well.
USER CODE SYSTEM
English
09

Please, ensure the door is unlocked before you set the
code!
If the door is locked when you get the safe, please unlock it
with the user code or preset master rst!
I. Setting Master Code
The preset master code: 011223.
• Push the power switch from position "I"(on) to "O"(off) and
wait for 3 seconds. Then connect the power by pushing
the power switch from position "O"(off) to "I"(on). If there
is no power switch on the back cover, please remove the
batteries. Then press any key once and place the batteries
again.
• The display will read “SECURE” rst, then “GOOD”.
• Press “**”, the display will read “PROG”. After “PROG”
disappears, enter the preset master code “011223” and
conrm by “#”, the display will read “NEW”.
MASTER CODE SYSTEM
English
10
• After “NEW” disappears, enter your new code (6 digits) within 5 seconds, and then the display
will read “AGAIN”.
• After “AGAIN” disappears, enter your new code (6 digits) again within 5 seconds and conrm
by “#” , then the display reads “DONE”, which indicates the master code is successfully set.
• If the display reads” ERROR”, do over these steps.
• If you want to change the code, do over these steps again.
TIPS: Here we just take the code “456789” for an example, please choose your own
master code for security.
CAUTION!
• Do not set code into 941229, 922146,922149,621223.
• Always remember the new master code, or you will not be able to change it again.
II. For Emergency Use of Mater Code
• Enter the congured master code and conrm by
pressing “#”, the display will read “OPENED” and then
pull the panel, the door will be open.
• The master code is usually used in case of emergency
only. It means you may use this system only when you
forget your user code or lost your user bank card.
MASTER CODE SYSTEM
English
11

This system is especially for AM,KM,NM and HB SERIERS.
Please, ensure the door is unlocked before you set the card!
If the door is locked when you get the safe, please unlock it with the
user code or master code rst!
I. Setting User Card
Universal bank cards with the magnetic stripe are available.
• Place the bank card in the slot and ensure the magnetic stripe
faces down.
• Swipe the card at a steady speed from right to left in the card slot.
The buzzer will beep and the display will read “CLOSED”.
• Door is locked, and the user bank card is set successfully.
II. Opening Door with the User Card
• Swipe the same card to open, the buzzer will beep and the display
will read ” OPENED”, and then pull the door.
CAUTION!
Each card swiped to lock the safe will be the user card, and you
must use this card to open the safe next time as well.
USER CARD SYSTEM
English
12
III. Closing Door with the User Card
• Swipe a card at a steady speed from right to left in the card slot.
The buzzer will beep and the display will read “ClOSED”.
TIPS: Each time closing the safe, you can change the user
card as well as setting the card.
USER CARD SYSTEM
English
13

Once the electronic circuit malfunctions or codes lose, please
open the safe in the emergency ways.
• Unscrew the golden label, you will nd a key hole.
• Input the key into key hole and turn the key, door will open.
CAUTION!
Please keep your emergency key in safe place, but never
in safe.
EMERGENCY SYSTEM
English
14
• Press“ ﹡ ” after the program starts up within 5 seconds,
the display will hide the code entered and read “ - ”
instead.
• The function will be not working if you do not press any
number or swipe the card within 5 seconds after pressing
” ﹡ ”.
TIPS:
● Press “#”, the function of hiding code is cancelled.
● To hide the code, you should press ” * ” each time
before entering the code.
SECURITY DISPLAY SYSTEM
English
15

The safe can be mounted by the either the back or the bottom. You should select the
appropriate mounting method considering the varying situations at rst.
• Drill holes for expansion bolts (or clamping screws) in the right place.
• Turn the expansion bolts counterclockwise to separate.
• Use the expansion bolts (or clamping screws) to secure the case to the wall (or oor).
• Make sure the case is mounted in place as required and all screws are tightened.
TIPS: Use the expansion bolt when there is a concrete wall (or oor) surface. Use the
clamping screw when there is a wooden wall (or oor) surface.
MOUNTING METHOD
English
16
A
B
Wa ll
Wa ll
Wall
Floor
Normal Data Display
• (PROG) indicates that the program of panel started up.
• (AGAIN) indicates that you need to key in the previously entered digits a second time.
• (BA-HI) indicates that the batteries are normal.
• (BA-LO) indicates that the batteries are low.
• (CLOSE) indicates that the locking bolts are extending automatically.
• (CLOSED) indicates that the locking bolts have extended.
• (DONE) indicates that you have successfully completed the operation.
• (NEW) indicates that you need to key in new digits right now.
• (OPEN) indicates that the locking bolts are retracting.
• (OPENED) indicates that the locking bolts have retracted (you can pull the door).
DATA DISPLAY
English
17

Error Indication
When the following indications appear on the display, here are errors. Please
operate the following instructions.
• HOLD15 —— indicates you have entered four consecutive times of error
code or error bank card. The system will be locked out and you will be not
able to operate the keys until the system unlocks itself after 15 minutes.
• ERROR —— indicates you have entered the code or swiped the card
incorrectly, and you have to enter the code or swipe the card correctly.
• ERROR1—— indicates the door fails to open as the bolts get stuck. In this
case, give a push to the door to set free the bolts before you perform the
opening operation.
• ERROR2 —— indicates the door fails to close as the bolts get stuck as
probably the door is left unlatched. In this case, give a push to the door until
it rmly t into place before you proceed with closing operation.
DATA DISPLAY
English
18
• Please ensure the purchase receipt, warranty card and bank card are kept in a safe place.
• The warranty card and credit card shipped with the product are proof of product warranty and
should be properly kept.
• The product carries a warranty to the purchaser to be free from defects for a period of one year
from the date of purchase (as evidenced by date of purchase receipt). In case of any product
failures, please contact the service center or local distributor. We shall come to your help at the
earliest possible times.
For any help, kindly consult the local distributor.
CUSTOMER SERVICE
English
19
This manual suits for next models
6
Table of contents