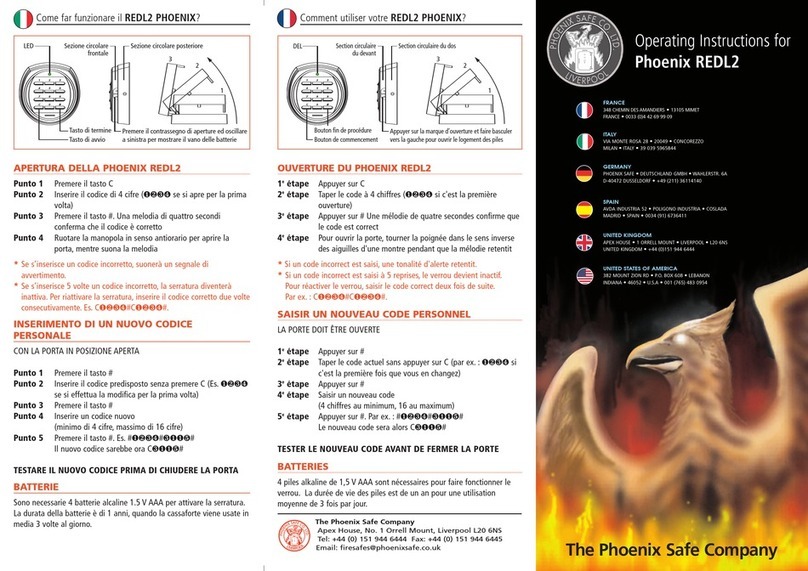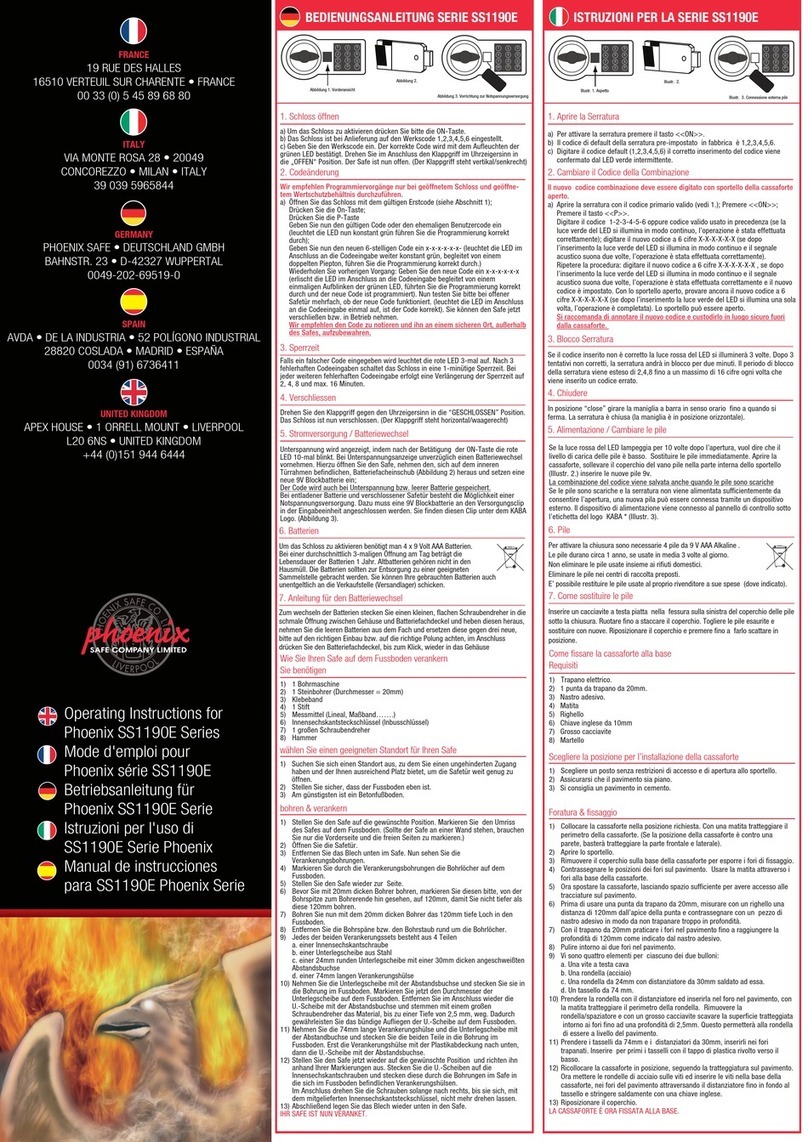
MANUAL DE INSTRUCCIONES
DE LA SS0100E y REGISTRO DE GARANTÍA
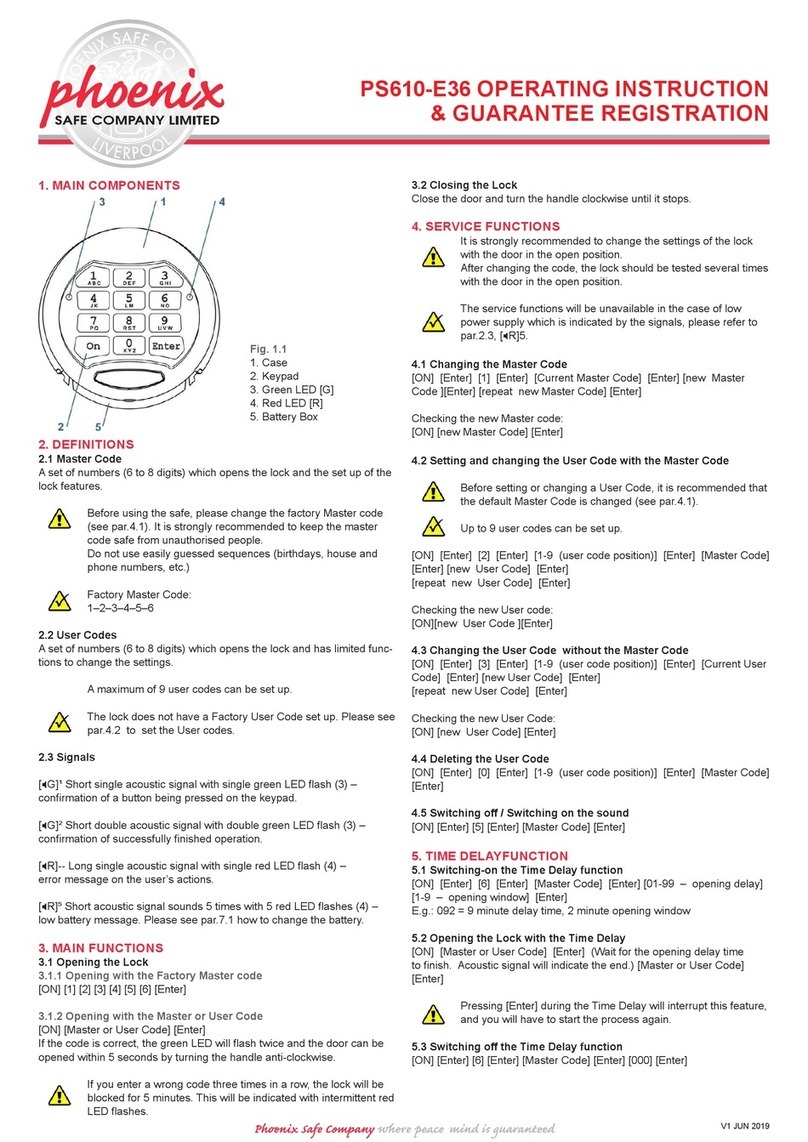
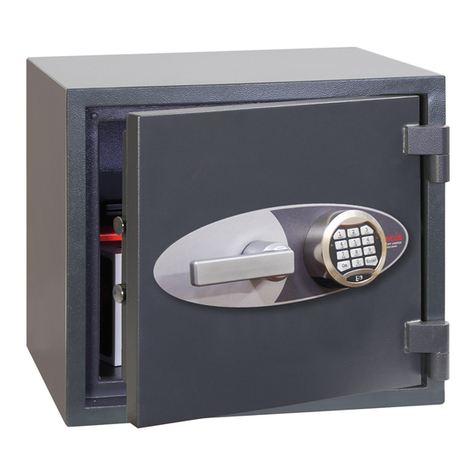
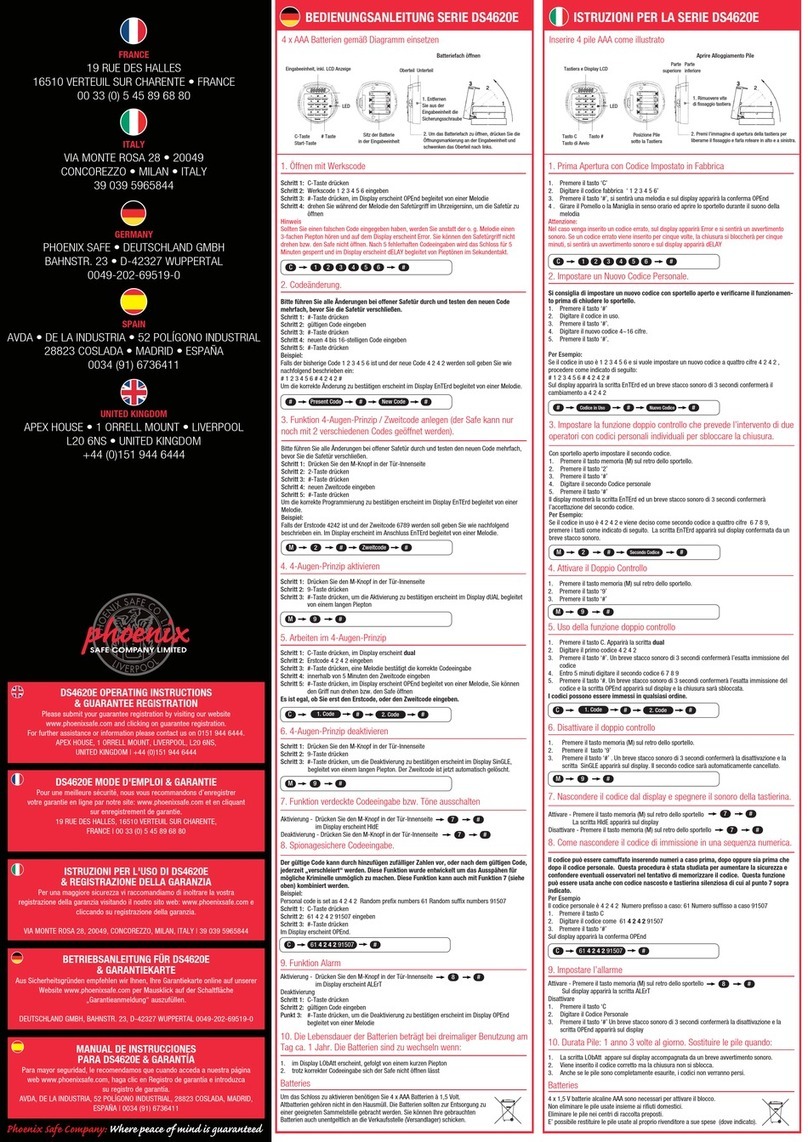
SS0100E INSTRUCTIONS
& GUARANTEE REGISTRATION
SS0100E INSTRUCTIONS & GARANTIE
Version 1/PB/JUL 16
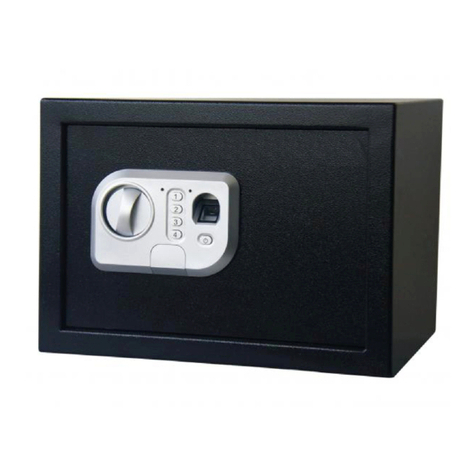
Schematic drawing of case
Schematic drawing of control panel
1. Bolts
2. Reset Button
3. Battery Compartment
4. Handle
5. Emergency Lock Cover
6. Display
7. Confirming button
8. External jack socket
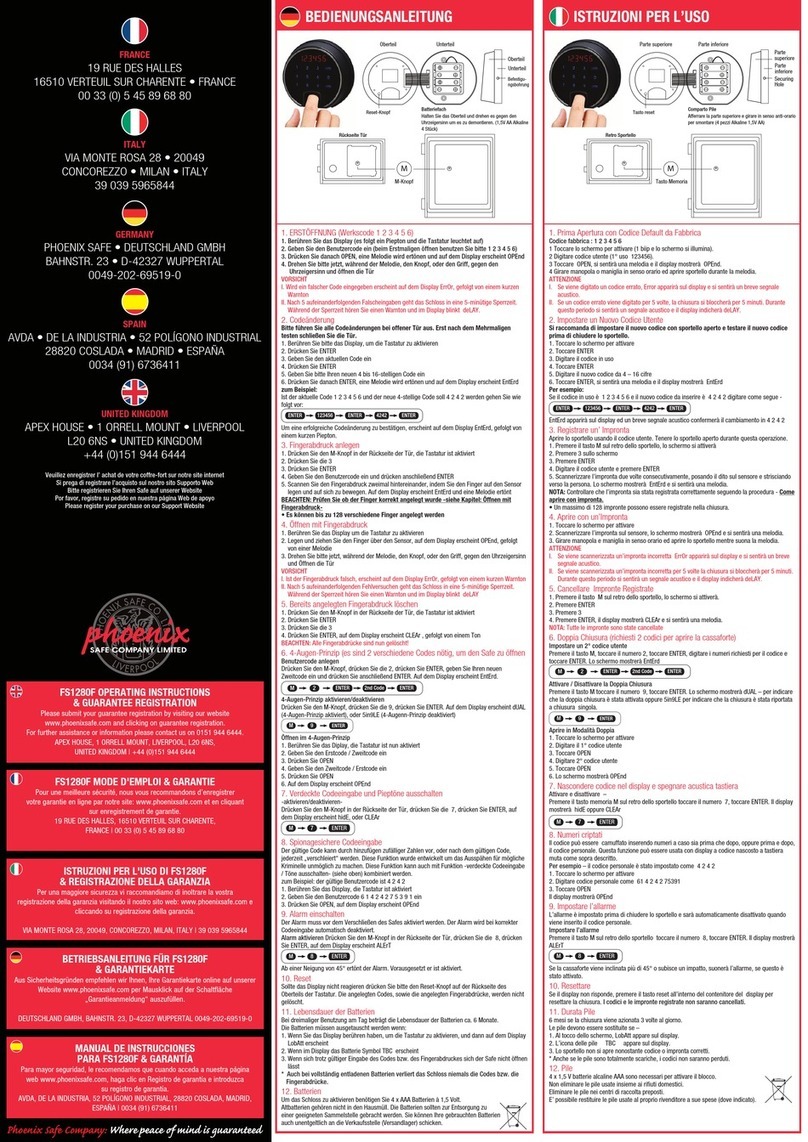
INSERTING THE BATTERIES
• With the door open, insert 4 x AA alkaline batteries (not supplied) into the battery compartment
(3). When the batteries are inserted, the display will show a series of "0" then flash “GOOD”.
The display will then be in standby mode, showing the year, month, date and day.
CAUTION: If the display shows "LO-BATIE", it means the voltage is low and you should insert new
batteries. Replace the batteries immediately, lining them up as indicated by the "+" and "-" signs.
OPENING THE DOOR
• Press the "#" button to activate the display.
• Input the user code and press"#" to confirm. (The pre-set code is 1234).
• Turn the handle clockwise to open the door.
NOTE: If an incorrect digit is inputted, you can clear this by pressing the "*" button. One digit will
be cleared each time the "*" button is pressed.
CAUTION: If the wrong code is entered 3 times consecutively, the key pad will automatically
lock and the alarm will sound for 60 seconds. While the alarm is sounding if the correct code is
entered the alarm will stop.
HIDDEN CODE FUNCTION
• Before entering the code to open the safe, press the "#" followed by the "*" button.
The numbers will not be shown on the display when inputting code.
CLOSING THE DOOR
• Close the door and turn the handle anti-clockwise. Your safe is now locked.
SETTING THE ALARM
• On closing the door press the "O" button, the display will show "BELL ON". The alarm is now
set and will activate if the safe is moved or attacked. The alarm will sound for 60 seconds.
While the alarm is sounding if the correct code is entered the alarm will stop.
SETTING THE USER CODE
OPTION A
• Press the "#" button, enter the current user code (pre-set user code is 1234) followed by "*",
the display will show "OPEN". Within 5 seconds, press the "*" button, the display will show
"········".
• Enter the new code (3-8 digits) and press "#" to confirm. The display will show "INTO",
indicating the new code has been successfully set.
OPTION B
• With the door open press the reset button (2), the display shows "········"
• Enter the new code (3-8 digits) and press"#" to confirm. The display will show "INTO",
indicating the new code has been successfully set.
SETTING THE MASTER CODE
OPTION A
• Press the ''#" button and enter the current master code (pre-set master code is 123456)
followed by "#", the display will show "OPEN". Within 5 seconds, press the "*" button, the
display will show "········".
• Enter the new code (3-8 digits) and press "#" to confirm. The display will show "INTO", which
indicates the new code has been successfully set.
OPTION B
• With the door open press the "#" button followed by the "0" button twice, then press reset
button (2).
• Enter the new master code (3-8 digits), and press the "#" button to confirm, the display will
show "INTO", indicating the new code has been successfully set.
SETTING DATE AND TIME
• On inserting the batteries the date and time will be shown as - 00-01-01 (year-month-day),
and 00:00 (hour-minute).
• With the safe in standby mode, press the "*" button and the backlight will illuminate. The 1st
number will start flashing prompting the year to be entered, followed by the, month, day,
hour and minute.
• Once the minute has been entered the backlight will turn off and the date and time has been
set.
CHECK THE OPENING RECORD
• On opening the door, wait for "OPEN" to disappear from the display and within 2 seconds
press "O".
• The display will show the record of when the door was last opened. (Year, month, date, hour,
minute and which code was used to open the safe)
NOTE: "PASS 1" means the door was opened by the user code. "PASS 2" means the door was
opened by the master code.
• Press "O" before the "PASS 1 or 2" disappears from the display to show the previous opening
record (the last 45 records can be viewed). Press "8" to scroll back to the most recent
records.
MOUNTING METHOD
• Place the safe into the required position and mark the floor / wall though the holes in the
back/base of the safe.
• Drill the holes for the expansion bolts using the marked positions.
• With the safe in position insert the fully assembled bolt through the back or base of the safe
and into the drilled holes.
• Tighten the nuts until secure.
CAUTION: The expansion bolts supplied are only suitable for concrete floor or wall surfaces.
2 3 1
WALL
WALL
WALL
A
B
#
8
0#
8
0#
8
0#
8
0
OPENING YOUR SAFE FOR THE FIRST TIME
You have 2 options to open the safe:
OPTION A:
• The safe has been supplied with an external battery holder, insert 4 x AA alkaline batteries
(not supplied) into the holder, and plug this into the jack socket on the bottom of the keypad
(8), (shown in the images below).
• Press "#" to activate the electronic lock.
• Enter the pre-set user code "1234", then press the"#" button, the display will show "OPEN"
• Turn the handle clockwise while the display is illuminated and pull the door open.
#
8
0#
8
0
#
8
0#
8
0
OPTION B:
• Remove the emergency lock cover (5) and use emergency key.
• Insert the emergency key, turn anti-clockwise and turn the handle clockwise to open the door.
CAUTION: Once the door has been opened remove the key and keep it in a safe place. (DO NOT
STORE THE EMERGENCY KEYS INSIDE THE SAFE).
#
8
0
45
6
7
8
Schematic drawing of case
Schematic drawing of control panel
1. Boulons
2. Bouton de réinitialisation
3. Compartiment à piles
4. Poignée
5. Couvercle de Verrouillage d'urgence
6. Affichage
7. Bouton de Confirmation
8. Prise jack externe
INSERTION DES PILES
• Avec la porte ouverte, insérez 4 piles alcalines AA (non fournies) dans le compartiment des
piles (3). Lorsque les piles sont insérées, l'écran affichera une série de "0" puis clignotera
"GOOD". L'affichage sera alors en mode veille, montrant l'année, le mois, la date et le jour.
ATTENTION: Si l'écran affiche "LO-BATIE", cela signifie que la tension est faible et vous devez
insérer de nouvelles piles. Remplacez les piles immédiatement, en les alignant comme indiqué par
le signe "+" et le Signe "-".
OUVERTURE LA PORTE
• Appuyez sur la touche "#" pour activer l’écran.
• Entrez le code utilisateur et appuyez sur "#" pour confirmer. (Le code prédéfini est 1234).
• Tourner la poignée dans le sens horaire pour ouvrir la porte.
REMARQUE: Si un chiffre incorrect est entré, vous pouvez l’effacer en appuyant sur la touche "*".
Un chiffre sera effacé à chaque fois que le bouton "*" est appuyé.
ATTENTION: Si un code incorrect est entré 3 fois de suite, le clavier sera automatiquement
verrouillé et l'alarme retentira pendant 60 secondes. Si un correct est entré lorsque que l'alarme
retentit, l'alarme s’ arrêtera.
FONCTION CODE CACHÉ
• Avant d'entrer le code pour ouvrir le coffre-fort, appuyez sur le «#» suivi par le bouton "*". les
chiffres ne seront pas affichées sur l'écran lors de la saisie du code.
FERMETURE DE LA PORTE
• Fermez la porte et tournez la poignée dans le sens antihoraire. Votre coffre-fort est maintenant
verrouillé.
REGLAGE DE L'ALARME
• Lors de la fermeture de la porte appuyez sur le bouton "O", l'écran affichera "BELL ON".
L'alarme est maintenant réglée et s’activera si le coffre est déplacé ou attaqué. L'alarme
retentira pendant 60 secondes. Si le correct code est entré alors que l'alarme retentit,
l'alarme s’arrêtera.
CONFIGURATION DU CODE 'UTILISATEUR
OPTION A
• Appuyez sur la touche "#", entrez le code d'utilisateur actuel (code utilisateur prédéfini est
1234) suivi de "*", l'écran affichera "OPEN". Dans les 5 secondes, appuyez sur la touche "*",
l'écran affichera "········".
• Entrez le nouveau code (3-8 chiffres) et appuyez sur "#" pour confirmer. L'écran affichera
"INTO", Indiquant que le nouveau code a été défini avec succès
OPTION B
• Avec la porte ouverte appuyez sur le bouton de remise à zéro (2), l'écran affichera "········"
• Entrez le nouveau code (3-8 chiffres) et appuyez sur "#" pour confirmer. L'écran affichera
"INTO", indiquant que le nouveau code a été défini avec succès.
CONFIGURATION DU CODE MAÎTRE
OPTION A
• Appuyez sur le bouton '' # "et entrez le code maître actuel (code maître préréglé est 123456)
suivi de "#", l'écran affichera "OPEN". Dans les 5 secondes, appuyez sur la touche "*", le
écran affichera "········".
• Entrez le nouveau code (3-8 chiffres) et appuyez sur "#" pour confirmer. L'écran affichera
"INTO", ce qui Indique que le nouveau code a été défini avec succès.
OPTION B
• Avec la porte ouverte appuyez sur bouton "#" suivi de la touche "0" deux fois, puis appuyez
sur Bouton de remise à zéro (2).
• Entrez le nouveau code maître (3-8 chiffres), puis appuyez sur la touche "#" pour confirmer,
l'écran affichera "INTO", indiquant que le nouveau code a été défini avec succès.
RÉGLAGE DE LA DATE ET DE L'HEURE
• En insérant des piles la date et l'heure seront présentées comme - 00-01-01
(année-mois-jour), et 00:00 (heure-minute).
• Avec le coffre-fort en mode veille, appuyez sur la touche "*" et le rétro-éclairage s'allumera.
Le 1er nombre se mettra à clignoter incitant à entrez l'année, puis le, mois, jour, heure et
minute.
• Une fois que la minute a été entrée , le rétro-éclairage sera éteint et la date et l'heure ont été
réglées.
VERIFIER LE COMPTE RENDU DES OUVERTURES
• En ouvrant la porte, attendez que "OPEN" disparaisse de l'écran et dans les 2 secondes
appuyez sur "O".
• L'écran affichera le compte rendu quand la porte a été ouverte en dernier. (Année, mois, date,
heure, minute et quel code a été utilisé pour ouvrir le coffre-fort)
NOTE: "PASS 1" signifie que la porte a été ouverte par le code utilisateur. "PASS 2" signifie que la
porte a été ouverte avec le code maître.
• Appuyez sur "O" avant que "PASS 1 ou 2" disparaissent de l'écran pour afficher le compte
rendu des dernières ouvertures (les 45 derniers enregistrements peuvent être consultés).
Appuyez sur "8" pour faire défiler les plus récents enregistrements.
METHODE DE MONTAGE
• Placer le coffre-fort dans la position requise et marquer le sol / mur à travers les trous dans le
dos / base du coffre-fort.
• Percez les trous pour les boulons d'expansion en utilisant les positions marquées.
• Avec le coffre-fort en position, insérez le boulon complètement assemblé à travers le dos ou à
la base du coffre-fort et dans les trous percés.
• Serrer les écrous jusqu'à ce qu’ils soient sécurisés.
ATTENTION: Les boulons d'expansion fournis sont uniquement adaptés pour sols ou murs en
béton.
2 3 1
WALL
WALL
WALL
A
B
#
8
0#
8
0#
8
0#
8
0
OUVERTURE DE VOTRE COFFRE POUR LA PREMIÈRE FOIS
Vous avez 2 options pour ouvrir le coffre-fort:
OPTION A:
• Le coffre-fort a été fourni avec un support de piles externe, insérez 4 piles alcalines AA dans
le support (Non fournies), et le brancher dans la prise jack sur le bas du clavier (8) (représenté
dans le shéma ci-dessous).
• Appuyez sur "#" pour activer le pavé électronique.
• Entrez le code utilisateur prédéfini "1234", puis appuyez sur la touche "#", l'écran affichera
"OPEN"
• Tournez la poignée dans le sens horaire lorsque que l'écran est allumé et tirez la porte pour
l’ouvrir.
#
8
0#
8
0
#
8
0#
8
0
OPTION B:
• Retirez le couvercle de verrouillage d'urgence (5) et utiliser la clef d'urgence.
• Insérez la clé d'urgence, tournez dans le sens antihoraire et tourner la poignée dans le sens
horaire pour ouvrir la porte.
ATTENTION: Une fois que la porte a été ouverte retirer la clé et la garder dans un endroit sûr. (NE
PAS GARDER LES CLEFS D’OUVERTURE D'URGENCE à l’intérieur du coffre).
#
8
0
45
6
7
8
Ilustración esquemática de la caja de seguridad.
Ilustración esquemática del panel de control
1. Pernos
2. Botón de reinicio
3. Compartimento de las pilas
4. Maneta
5. Cubierta de la cerradura de emergencia
6. Pantalla
7. Botón de confirmación
8. Entrada de la fuente de alimentación externa
INSTALACIÓN DE LAS PILAS
• Con la puerta abierta, inserte las cuatro pilas alcalinas AA (no suministradas) en el
compartimiento de las pilas (3). Una vez instaladas, la pantalla mostrará una serie de "0" y, a
continuación, parpadeará mostrando el mensaje "GOOD". La pantalla permanecerá entonces
en modo de espera (standby) mientras indica el año, el mes y el día.
ADVERTENCIA: si la pantalla muestra "LO-BATIE" (batería baja) es señal de que las pilas se están
agotando. Reemplace las pilas inmediatamente teniendo cuidado de colocar los polos positivo (+) y
negativo (-) donde corresponda.
APERTURA DE LA PUERTA
• Pulse la tecla "#" para activar la pantalla.
• Introduzca su código de usuario y pulse "#" para confirmar. (El código preconfigurado es
1234).
• Gire la maneta en el sentido de las agujas del reloj para abrir la puerta.
NOTA: si introduce un dígito incorrecto puede utilizar la tecla "*" para eliminarlo. Cada vez que
pulse esta tecla borrará un dígito.
ADVERTENCIA: si introduce un código erróneo tres veces consecutivas, el teclado se bloqueará
automáticamente y sonará la alarma durante 60 segundos. El sonido de la alarma se detendrá si
introduce el código correcto.
FUNCIÓN OCULTAR CÓDIGO
• Antes de introducir el código para abrir la puerta, pulse la tecla "#" seguida de "*". De esta
forma, evitará que se muestre el código en pantalla durante su introducción.
CIERRE DE LA PUERTA
• Cierre la puerta y gire la maneta en sentido contrario a las agujas del reloj. La caja de
seguridad está ahora cerrada.
CONFIGURACIÓN DE LA ALARMA
• Cuando cierre la puerta, pulse la tecla "0". La pantalla mostrará "BELL ON" (alarma activada).
La alarma está ahora activada y se disparará si se desplaza o manipula la caja de seguridad.
La alarma sonará durante 60 segundos. Introduciendo el código correcto la alarma se
detendrá.
CONFIGURACIÓN DEL CÓDIGO DE USUARIO
OPCIÓN A
• Pulse la tecla "#" e introduzca su código de usuario actual (el código de usuario preconfigura
do es 1234) seguido de "*". La pantalla mostrará el mensaje "OPEN" (abierta). Pulse la tecla
"*" antes de que transcurran 5 segundos. La pantalla mostrará ".......".
• Introduzca el nuevo código (de 3 a 8 dígitos) y pulse "#" para confirmar. La pantalla mostrará
"INTO" (aceptado), que indica que el nuevo código se ha configurado correctamente.
OPCIÓN B
• Con la puerta abierta pulse el botón reiniciar (2). La pantalla mostrará ".......".
• Introduzca el nuevo código (de 3 a 8 dígitos) y pulse "#" para confirmar. La pantalla mostrará
"INTO" (aceptado), que indica que el nuevo código se ha configurado correctamente.
CONFIGURACIÓN DEL CÓDIGO MAESTRO
OPCIÓN A
• Pulse la tecla "#" e introduzca el código maestro actual (el código maestro preconfigurado es
123456) seguido de "#". La pantalla mostrará el mensaje "OPEN" (abierta). Pulse la tecla "*"
antes de que transcurran 5 segundos. La pantalla mostrará "......".
• Introduzca el nuevo código (de 3 a 8 dígitos) y pulse "#" para confirmar. La pantalla mostrará
"INTO" (aceptado), que indica que el nuevo código se ha configurado correctamente.
OPCIÓN B
• Con la puerta abierta pulse la tecla "#" y, a continuación, pulse dos veces la tecla "0". Pulse
ahora el botón de reinicio (2).
• Introduzca el nuevo código maestro (de 3 a 8 dígitos) y pulse "#" para confirmar. La pantalla
mostrará "INTO" (aceptado), que indica que el nuevo código se ha configurado correctamente.
CONFIGURACIÓN DE LA FECHA Y LA HORA
• Al insertar las pilas, se mostrará la fecha y la hora con los formatos 00-01-01 (año - mes-día)
y 00:00 (hora-minutos).
• Con la caja de seguridad en modo de espera, pulse la tecla "*". Se iluminará el fondo de la
pantalla. Empezará a parpadear el primer número para que introduzca el año, seguido del
mes, el día, la hora y los minutos.
• Una vez haya introducido los minutos, se apagará la retroiluminación de la pantalla: la fecha y
la hora ya están configuradas.
COMPROBACIÓN DEL REGISTRO DE APERTURA
• Con la puerta abierta, espere a que desaparezca el mensaje "OPEN" (abierta) y pulse la tecla
"0" antes de que transcurran 2 segundos.
• La pantalla le mostrará el registro de la última vez que se abrió la puerta (indicando el año,
mes, día, hora, minutos y código utilizado para abrir la caja de seguridad).
NOTA: "PASS 1" significa que se ha abierto la puerta con el código de usuario. "PASS 2" significa
que se ha abierto la puerta con el código maestro.
• Pulse "0" antes de que desaparezca "PASS 1” o “PASS 2" de la pantalla para mostrar el
registro de la apertura anterior. El sistema le permite comprobar los últimos 45 registros.
Pulse "8" para desplazarse al registro más reciente.
MONTAJE
• Coloque la caja de seguridad en la posición deseada y marque sobre el suelo o pared los
puntos en los que realizará la perforación utilizando los orificios situados en la base o en la
parte posterior de la caja de seguridad.
• Perfore sobre los puntos marcados los orificios en los que introducirá los pernos de expansión.
• Con la caja de seguridad en la posición deseada, inserte los pernos de expansión a través de
los orificios de la base o de la parte posterior.
• Apriete firmemente las tuercas.
ADVERTENCIA: Los pernos de expansión suministrados solo son adecuados para paredes y suelos
de hormigón.
2 3 1
PARED
PARED
PARED
A
B
#
8
0#
8
0#
8
0#
8
0
APERTURA DE LA CAJA DE SEGURIDAD POR PRIMERA VEZ
Dispone de dos opciones para abrir la caja de seguridad:
OPCIÓN A:
• La caja de seguridad está equipada con porta-pilas externo. Introduzca cuatro pilas alcalinas
AA (no suministradas) en el porta-pilas e inserte el conector en la base del teclado (8) (tal
como se muestra en las ilustraciones siguientes).
• Pulse "#" para activar el cierre electrónico.
• Introduzca el código de usuario preconfigurado "1234" y pulse la techa "#". La pantalla
mostrará el mensaje "OPEN" (abierta).
• Gire la maneta en el sentido de las agujas del reloj mientras la pantalla está iluminada y tire
para abrir la puerta.
#
8
0#
8
0
#
8
0#
8
0
OPCIÓN B:
• Retire la cubierta de la cerradura de emergencia (5) y utilice la llave de emergencia.
• Inserte la llave de emergencia y gírela en sentido contrario a las agujas del reloj. Gire la maneta
para abrir la puerta.
ADVERTENCIA: una vez abierta la puerta, retire la llave y guárdela en lugar seguro. (NO GUARDE LA
LLAVE EN EL INTERIOR DE LA CAJA DE SEGURIDAD).
#
8
0
45
6
7
8

