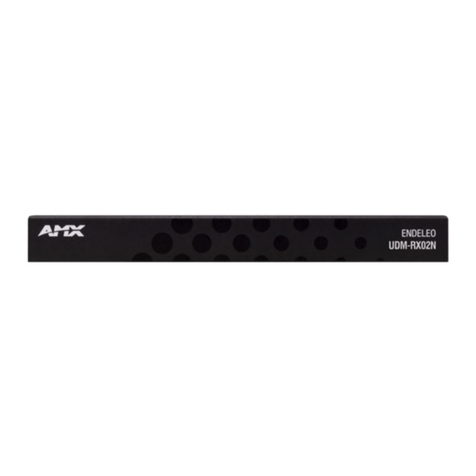
AMX Endeleo Multi-Format Receiver UDM-RX02 Parts list manual

Operation/Reference Guide
Endeleo Distributed Media
UDM-0102
Endeleo Multi-Format Distribution Mini-Hub
UDM-RX02
Endeleo Multi-Format Receiver
Last Updated: 12/29/2008

AMX Limited Warranty and Disclaimer
All products returned to AMX require a Return Material Authorization (RMA) number. The RMA number is
obtained from the AMX RMA Department. The RMA number must be clearly marked on the outside of each
box. The RMA is valid for a 30-day period. After the 30-day period the RMA will be cancelled. Any shipments
received not consistent with the RMA, or after the RMA is cancelled, will be refused. AMX is not responsible
for products returned without a valid RMA number.
Warranty Repair Policy
• AMX will repair any defect due to material or workmanship issues during the applicable warranty period at no cost to the AMX
Authorized Partner., provided that the AMX Authorized Partner is responsible for in-bound freight and AMX is responsible for
out-bound ground freight expenses.
• The AMX Authorized Partner must contact AMX Technical Support to validate the failure before pursuing this service.
• AMX will complete the repair and ship the product within five (5) business days after receipt of the product by AMX. The AMX
Authorized Partner will be notified if repair cannot be completed within five (5) business days.
• Products repaired will carry a ninety (90) day warranty or the balance of the remaining warranty, whichever is greater.
• Products that are returned and exhibit signs of damage or unauthorized use will be processed under the Non-Warranty Repair
Policy.
• AMX will continue to provide Warranty Repair Services for products discontinued or replaced by a Product Discontinuance
Notice.
Non-Warranty Repair Policy
• Products that do not qualify to be repaired under the Warranty Repair Policy due to age of the product or Condition of the prod-
uct may be repaired utilizing this service.
• The AMX Authorized Partner must contact AMX Technical Support to validate the failure before pursuing this service.
• Non-warranty repair is a billable service.
• Products repaired under this policy will carry a ninety (90) day warranty on material and labor.
• AMX will notify the AMX Authorized Partner with the cost of repair, if cost is greater than the Standard Repair Fee, within five (5)
days of receipt.
• The AMX Authorized Partner must provide a Purchase Order or credit card number within five (5) days of notification, or the
product will be returned to the AMX Authorized Partner.
• The AMX Authorized Partner will be responsible for in-bound and out-bound freight expenses.
• Products will be repaired within ten (10) business days after AMX Authorized Partner approval is obtained.
• Non-repairable products will be returned to the AMX Authorized Partner with an explanation.
• See AMX Non-Warranty Repair Price List for minimum and Standard Repair Fees and policies.

Software License and Warranty Agreement
• LICENSE GRANT. AMX grants to Licensee the non-exclusive right to use the AMX Software in the manner described in this
License. The AMX Software is licensed, not sold. This license does not grant Licensee the right to create derivative works of the
AMX Software. The AMX Software consists of generally available programming and development software, product documenta-
tion, sample applications, tools and utilities, and miscellaneous technical information. Please refer to the README.TXT file on
the compact disc or download for further information regarding the components of the AMX Software. The AMX Software is sub-
ject to restrictions on distribution described in this License Agreement. AMX Dealer, Distributor, VIP or other AMX authorized
entity shall not, and shall not permit any other person to, disclose, display, loan, publish, transfer (whether by sale, assignment,
exchange, gift, operation of law or otherwise), license, sublicense, copy, or otherwise disseminate the AMX Software. Licensee
may not reverse engineer, decompile, or disassemble the AMX Software.
• ACKNOWLEDGEMENT. You hereby acknowledge that you are an authorized AMX dealer, distributor, VIP or other AMX autho-
rized entity in good standing and have the right to enter into and be bound by the terms of this Agreement.
• INTELLECTUAL PROPERTY. The AMX Software is owned by AMX and is protected by United States copyright laws, patent
laws, international treaty provisions, and/or state of Texas trade secret laws. Licensee may make copies of the AMX Software
solely for backup or archival purposes. Licensee may not copy the written materials accompanying the AMX Software.
• TERMINATION. AMX RESERVES THE RIGHT, IN ITS SOLE DISCRETION, TO TERMINATE THIS LICENSE FOR ANY REA-
SON UPON WRITTEN NOTICE TO LICENSEE. In the event that AMX terminates this License, the Licensee shall return or
destroy all originals and copies of the AMX Software to AMX and certify in writing that all originals and copies have been
returned or destroyed.
• PRE-RELEASE CODE. Portions of the AMX Software may, from time to time, as identified in the AMX Software, include PRE-
RELEASE CODE and such code may not be at the level of performance, compatibility and functionality of the GA code. The
PRE-RELEASE CODE may not operate correctly and may be substantially modified prior to final release or certain features may
not be generally released. AMX is not obligated to make or support any PRE-RELEASE CODE. ALL PRE-RELEASE CODE IS
PROVIDED "AS IS" WITH NO WARRANTIES.
• LIMITED WARRANTY. AMX warrants that the AMX Software (other than pre-release code) will perform substantially in accor-
dance with the accompanying written materials for a period of ninety (90) days from the date of receipt. AMX DISCLAIMS ALL
OTHER WARRANTIES, EITHER EXPRESS OR IMPLIED, INCLUDING, BUT NOT LIMITED TO IMPLIED WARRANTIES OF
MERCHANTABILITY AND FITNESS FOR A PARTICULAR PURPOSE, WITH REGARD TO THE AMX SOFTWARE. THIS LIM-
ITED WARRANTY GIVES LICENSEE SPECIFIC LEGAL RIGHTS. Any supplements or updates to the AMX SOFTWARE,
including without limitation, any (if any) service packs or hot fixes provided to Licensee after the expiration of the ninety (90) day
Limited Warranty period are not covered by any warranty or condition, express, implied or statutory.
• LICENSEE REMEDIES. AMX's entire liability and Licensee's exclusive remedy shall be repair or replacement of the AMX Soft-
ware that does not meet AMX's Limited Warranty and which is returned to AMX in accordance with AMX's current return policy.
This Limited Warranty is void if failure of the AMX Software has resulted from accident, abuse, or misapplication. Any replace-
ment AMX Software will be warranted for the remainder of the original warranty period or thirty (30) days, whichever is longer.
Outside the United States, these remedies may not available. NO LIABILITY FOR CONSEQUENTIAL DAMAGES. IN NO
EVENT SHALL AMX BE LIABLE FOR ANY DAMAGES WHATSOEVER (INCLUDING, WITHOUT LIMITATION, DAMAGES
FOR LOSS OF BUSINESS PROFITS, BUSINESS INTERRUPTION, LOSS OF BUSINESS INFORMATION, OR ANY OTHER
PECUNIARY LOSS) ARISING OUT OF THE USE OF OR INABILITY TO USE THIS AMX SOFTWARE, EVEN IF AMX HAS
BEEN ADVISED OF THE POSSIBILITY OF SUCH DAMAGES. BECAUSE SOME STATES/COUNTRIES DO NOT ALLOW
THE EXCLUSION OR LIMITATION OF LIABILITY FOR CONSEQUENTIAL OR INCIDENTAL DAMAGES, THE ABOVE LIMITA-
TION MAY NOT APPLY TO LICENSEE.
• U.S. GOVERNMENT RESTRICTED RIGHTS. The AMX Software is provided with RESTRICTED RIGHTS. Use, duplication, or
disclosure by the Government is subject to restrictions as set forth in subparagraph ©(1)(ii) of The Rights in Technical Data and
Computer Software clause at DFARS 252.227-7013 or subparagraphs ©(1) and (2) of the Commercial Computer Software
Restricted Rights at 48 CFR 52.227-19, as applicable.
• SOFTWARE AND OTHER MATERIALS FROM AMX.COM MAY BE SUBJECT TO EXPORT CONTROL. The United States
Export Control laws prohibit the export of certain technical data and software to certain territories. No software from this Site may
be downloaded or exported (i) into (or to a national or resident of) Cuba, Iraq, Libya, North Korea, Iran, Syria, or any other coun-
try to which the United States has embargoed goods; or (ii) anyone on the United States Treasury Department's list of Specially
Designated Nationals or the U.S. Commerce Department's Table of Deny Orders. AMX does not authorize the downloading or
exporting of any software or technical data from this site to any jurisdiction prohibited by the United States Export Laws.
This Agreement replaces and supersedes all previous AMX Software License Agreements and is governed by
the laws of the State of Texas, and all disputes will be resolved in the courts in Collin County, Texas, USA. For
any questions concerning this Agreement, or to contact AMX for any reason, please write: AMX License and
Warranty Department, 3000 Research Drive, Richardson, TX 75082.
Important Safety Markings
UDM-0102 and UDM-RX02 Operation/Reference Guide
Important Safety Markings
Markings Used In This Manual
The following symbols are used on the UDM hardware and throughout this Installation Guide to advise
you of important instructions. All maintenance must be carried out by an AMX trained and qualified
installer.
Voltage
This symbol (FIG. 1) warns the presence of a voltage of sufficient magnitude to cause a severe or fatal
electric shock. Follow the appropriate instructions carefully to avoid the risk of injury.
There are NO user serviceable parts within the UDM-0102 or UDM-RX02.
Rating Label
The rating label, containing important safety information, is found on the underside of the UDM-0102
and UDM-RX02. Symbols used on this label are explained below;
FIG. 1 Voltage symbol
FIG. 2 Rating Label
The UDM is powered from a suitable 24 VDC supply.
FCC (Federal Communications Commission) Standards;
TESTED TO COMPLY
FOR HOME OR OFFICE USE
WITH FCC STANDARDS
This device complies with part 15 of the FCC rules.
Operation is subject to the following two conditions:
(1) This device may not cause harmful interference.
(2) This device must accept any interference received
including interference that may cause undesirable operation.
Conforms to particular European Directives.

Important Safety Markings
UDM-0102 and UDM-RX02 Operation/Reference Guide
Important Instructions
Compliance
FCC and IEC
Compliance with FCC and IEC standards are found within the rating label; see above.
Date of Manufacture
For US customers, the date of manufacture is also found underneath the UDM-0102 and UDM-RX02.
This symbol, used within this manual, indicates an important instruction for the
correct and safe installation, operation or maintenance of your UDM-0102 and
UDM-RX02.
Failure to comply with such instruction may result in injury to person or damage to the
UDM hardware.
FIG. 3 Date Of Manufacture Sticker (on bottom panel)
UDM-0102/RX02 Date of Manufacture Sticker
Model Number Model number and designation, comprised of up to seven characters.
Vendor ID One- or two-character ID code.
Date Code Three-digit date code, comprised of week of year (1-52) and last digit of year.
Consecutive number Starting at “0001” and continuing to “9999”.
Model Number Vendor ID Date Code
(WW/Y)
Consecutive Number
(4 digits)

Important Safety Markings
UDM-0102 and UDM-RX02 Operation/Reference Guide
Environmental Conditions
Temperature
DO NOT install or operate the UDM-0102 or UDM-RX02 in an area where the ambient temperature
exceeds 35ºC (95ºF) or falls below 5ºC (35ºF).
Humidity
DO NOT install or operate the UDM-0102 or UDM-RX02 in an area in which the ambient relative
humidity exceeds 85% or an area that is prone to condensation.
Water / Liquids
DO NOT install or operate the UDM-0102 or UDM-RX02 near water or in a location which may be
prone to water seepage, dripping or splashing.
DO NOT place objects containing liquids on the appliance.
The hub is not waterproof.
External use
DO NOT operate the UDM-0102 or UDM-RX02 outdoors.
The criteria on this page must be observed for the installation of the UDM-0102 and
UDM-RX02.

Important Safety Markings
UDM-0102 and UDM-RX02 Operation/Reference Guide

Table of Contents
i
UDM-0102 and UDM-RX02 Operation/Reference Guide
Table of Contents
Important Safety Markings ................................................................................. a
Markings Used In This Manual .................................................................................. a
Voltage............................................................................................................................ a
Rating Label.............................................................................................................. a
Important Instructions .............................................................................................. b
Compliance ............................................................................................................... b
FCC and IEC .................................................................................................................... b
Date of Manufacture ....................................................................................................... b
Environmental Conditions......................................................................................... c
Temperature .................................................................................................................... c
Humidity........................................................................................................................... c
Water / Liquids................................................................................................................. c
External use ..................................................................................................................... c
UDM-0102 1x2 Multi-Format Distribution Mini-Hub ..........................................1
Overview .................................................................................................................. 1
Common Application....................................................................................................... 1
Features .......................................................................................................................... 1
Compatibility................................................................................................................... 2
Product Specifications .................................................................................................... 2
Front Panel Controls ................................................................................................. 3
SELECT Pushbutton (Switching Sources) ......................................................................... 3
PRESETS 1/2 Pushbuttons (Executing Presets)................................................................ 3
Powering The UDM-0102 On/Off.................................................................................... 3
Front Panel LEDs ...................................................................................................... 3
Power Status LED............................................................................................................ 3
Active Source LEDs ......................................................................................................... 3
Status LED....................................................................................................................... 3
UDM-0102 Wiring and Connections ...................................................................5
Overview .................................................................................................................. 5
UDM-0102 Front Panel Components ........................................................................ 5
Power LED ...................................................................................................................... 6
ETHERNET Port (RJ45).............................................................................................. 6
Pinout Configuration ....................................................................................................... 6
Default IP Address .......................................................................................................... 6
Serial (RJ12) Port ...................................................................................................... 7
Serial Port - Default Communication Settings ................................................................. 7
DB9-to-RJ12 Adapter Cable Pinouts ............................................................................... 7

ii UDM-0102 and UDM-RX02 Operation/Reference Guide
Table of Contents
Active Input (A/B) and STATUS LEDs............................................................................... 7
SELECT and PRESETS 1/2 Pushbuttons ........................................................................... 7
UDM Port (RJ45)....................................................................................................... 8
UDM Port Pinouts ........................................................................................................... 8
UDM Port Transmission Details ....................................................................................... 8
UDM-0102 Rear Panel Components ......................................................................... 9
A/V Source Input Connectors ................................................................................... 9
VIDEO IN Connectors (HD15).......................................................................................... 9
Connecting a VGA Video Input ..................................................................................... 10
Connecting a Component Video Input .......................................................................... 10
Connecting an S-Video Input......................................................................................... 10
Connecting a Composite Video Input............................................................................ 10
Endeleo Video Adapter Cables ..................................................................................... 10
Audio & Video Formats/Resolutions/Distance............................................................... 11
IRTX (IR Transmit) Ports .......................................................................................... 11
Connecting an IR Device to an IRTX Port ...................................................................... 12
IR Receiver (IRRX) Port............................................................................................ 12
UDM-RX02 Multi-Format Receiver ....................................................................13
Overview ................................................................................................................ 13
Common Application..................................................................................................... 13
Features ........................................................................................................................ 13
UDM-RX02 Product Specifications ............................................................................... 13
Powering On the UDM-RX02 ........................................................................................ 14
UDM-RX02 Wiring and Connections .................................................................15
UDM-RX02 Front Panel Components...................................................................... 15
Rear Panel Components.......................................................................................... 15
Using an External Power Supply.................................................................................... 15
UDM Hub Port (RJ45) ............................................................................................. 15
Default IP Address ........................................................................................................ 15
SERIAL Port............................................................................................................. 16
IR Rx (IR Receiver) Port ........................................................................................... 16
Connecting an External IR Receiver Module.................................................................. 16
IR Transmit (IR Tx) Port ........................................................................................... 16
Connecting an IR Device to the IR Tx Port .................................................................... 16
AUDIO Connectors ................................................................................................. 17
VIDEO Connectors .................................................................................................. 17
VGA Connector (HD15) ................................................................................................. 17
Connecting a VGA Video Input ..................................................................................... 17
Connecting a Composite Video Input............................................................................ 17

Table of Contents
iii
UDM-0102 and UDM-RX02 Operation/Reference Guide
Connecting an S-Video Input ........................................................................................ 17
Connecting a Component Video Input.......................................................................... 18
Connecting the UDM-RX02 Receiver to the UDM-0102 Hub.................................. 18
UDM HUB Port LEDs ..................................................................................................... 18
Video Compensation (UDM-RX02).......................................................................... 19
Serial Connection to Display Device ....................................................................... 19
RJ-11 Connection to Display Device ............................................................................. 19
Configuration ...................................................................................................21
WebConsole Overview ........................................................................................... 21
Connecting to the UDM-0102................................................................................. 21
Status Page............................................................................................................. 22
Input Configuration ....................................................................................................... 22
Configuring Audio Types For Inputs ............................................................................. 24
Selecting Inputs for Display .......................................................................................... 24
Changing an Input......................................................................................................... 25
User Control.................................................................................................................. 25
Issuing Commands To a Selected Port .......................................................................... 26
Issuing IR Commands to Centrally Located Devices ...................................................... 27
Assigning an IR Command To an UDM-RC02 Remote Control ...................................... 28
Passthrough Mode (Inputs A – B) .................................................................................. 30
Configuring a Device for Passthrough Mode ................................................................ 30
Configuring a Port for Passthrough Mode .................................................................... 30
Using Passthrough Mode .............................................................................................. 31
Dual Output Mode ........................................................................................................ 31
Renaming the Output Ports .......................................................................................... 32
Video Compensation Guidelines ................................................................................... 32
Video Compensation - Basic Mode ............................................................................... 32
Video Compensation - Advanced Mode........................................................................ 33
Compensating Video Via the UDM-RC10 Remote Control............................................ 34
Testing Serial Control Commands ................................................................................. 35
Examples of Serial Controls .......................................................................................... 36
Adding Centrally Located Devices ................................................................................ 37
Device Configuration and Control................................................................................. 37
Custom Controls ........................................................................................................... 37
To Issue a Custom Control ............................................................................................ 38
Setup Page ............................................................................................................. 38
Network Configuration ................................................................................................. 39
Date and Time Configuration ........................................................................................ 39
Checking the Hub Time ................................................................................................. 39
Restoring Hub Configuration and Connections on Power Up ....................................... 40

iv UDM-0102 and UDM-RX02 Operation/Reference Guide
Table of Contents
Hub Reset...................................................................................................................... 40
Schedule Page ........................................................................................................ 41
Scheduling an Input....................................................................................................... 41
Scheduling a Control ..................................................................................................... 43
Scheduling Events for Devices ...................................................................................... 44
Preset Scheduling.......................................................................................................... 45
Protocols Page........................................................................................................ 47
Serial Protocols ............................................................................................................. 48
IR Protocols ................................................................................................................... 48
Protocols and IR Learning .................................................................................49
Overview ................................................................................................................ 49
Creating a Serial Protocol ....................................................................................... 49
Updating the UDM-RX02 With the Serial Protocol ................................................. 51
Creating and Learning an IR Protocol ..................................................................... 51
Creating an IR Protocol ................................................................................................. 51
IR Learning With a Device’s Remote Control................................................................. 53
Updating the UDM-RX02 With the IR Protocol ....................................................... 55
Deleting Protocols .................................................................................................. 55
Advanced Administration .................................................................................57
Overview ................................................................................................................ 57
Establishing a TFTP Session with the Hub and/or Receiver .................................... 57
Determining the Current Firmware Versions .......................................................... 58
Upgrading Firmware and Web Pages On a UDM-0102 .......................................... 58
Upgrading Port Controllers .................................................................................... 59
Copying the Hub Configuration file ........................................................................ 60
Copying Protocols Between UDM-0102s................................................................ 61
Upgrading Input Controllers ................................................................................... 61
Backend Commands ............................................................................................... 62
Changing the Login Password ....................................................................................... 62
Obtaining the Hub’s IP Address Via the Command Line ............................................... 62
Setting the Hub’s IP Address Via the Command Line.................................................... 62
UDM-RX02 Commands ........................................................................................... 63
Viewing the Video Compensation Settings ................................................................... 63
Resetting Video Compensation Settings ....................................................................... 63
Appendix A: Ascii / Hex Conversion .................................................................65
Overview ................................................................................................................ 65
Appendix B – Endeleo IR Codes .......................................................................67
Overview ................................................................................................................ 67

UDM-0102 1x2 Multi-Format Distribution Mini-Hub
1
UDM-0102 and UDM-RX02 Operation/Reference Guide
UDM-0102 1x2 Multi-Format Distribution
Mini-Hub
Overview
The UDM-0102 (FG-UDM-0102) is designed for smaller installations with long video/audio cable runs. It
supports two high-resolution input ports and one UDM output port, making it an ideal solution for distributing
audio/video content to a classroom, conference room or other presentation room.
Advanced, yet cost-effective, the UDM-0102 delivers media over easily-installed, dedicated Cat5/5e/6, which
de-couples distribution of the media from the corporate backbone. Users can quickly switch and transmit any
video source to any display device, power on/off display devices, and permission user control to select and
play video sources and media servers on demand.
The UDM-0102 supports any combination of the following: two RGBHV sources, two Component
video sources, two S-Video sources or six Composite video sources.
Supported source inputs to the UDM include standard VGA, Composite, Component or S-Video feed,
and output is presented as an RJ45 port for connection to Cat5, 5e or 6 twisted-pair Ethernet cable.
Video inputs are connected via the HD15 VIDEO IN Input connectors on the rear of the UDM. Adapters
are used to bring the different types of video source into the UDM.
To use Component or Composite input, you will need the Endeleo HD-15 to 3x RCA
Breakout Cable: UDM-HD15RCA3F (FG-HD15RCA3F, not included).
To use SVideo input, you will need the Endeleo HD-15 to S-Video Cable Breakout Cable:
UDM-SVID01 (FG-UDM-SVID01, not included).
Each UDM has an Ethernet network port to provide connectivity to a central management system, or can
be controlled by the onboard configuration pages. A Serial connection is also provided for CLI
administration and diagnostic purposes.
The UDM-0102 can deliver all content and control up to 2300 feet. See the Audio & Video Formats/
Resolutions/Distance section on page 11 for tested and confirmed distances.
Common Application
Ideal for distributing audio/video content to classrooms, conference rooms or other presentation rooms.
Features
2 multi-format inputs x 1 RJ-45 output
Digital audio support
Central device control
Switched manually, centrally (browser) and/or via remote control
FIG. 1 UDM-0102

UDM-0102 1x2 Multi-Format Distribution Mini-Hub
2UDM-0102 and UDM-RX02 Operation/Reference Guide
Compatibility
The UDM-0102 is compatible for use with UDM-RX02 (FG-UDM-RX02) Endeleo Multi-Format Receivers.
See the UDM-RX02 Multi-Format Receiver section on page 13 for details.
Product Specifications
UDM-0102 Specifications
Power Requirements: 24VDC @ .75A
Front Panel Components
Ethernet (RJ-45) port: Provides 10 BaseT network connectivity
Serial (RJ-12) port
(labelled “10101”):
Enables an administrator to control the various functions to the UDM-0102
from a command line prompt and terminal connection.
Requires a DB9-to-RJ12 adapter cable (FG-RS01) to connect to a PC.
LEDs: The front LEDs are grouped by control type and are labeled according to their
corresponding port (connector) numbers on the rear of the unit.
• Power - device is receiving power
• A - Source A is currently selected
• B - Source B is currently selected
• Status - changes from red to green when it receives a valid UDP command,
and returns to red after 30 seconds if it has not received anything.
SELECT (A/B) Pushbutton: Pushbutton switches between Source A / Source B.
PRESETS (1/2) Pushbuttons: Two pushbuttons execute user-defined presets.
UDM (RJ-45) port: Provides audio/video transport as well as control via Cat5, Cat5e or Cat6 to a
UDM-RX02 Receiver.
Rear Panel Connectors:
Source Inputs (A, B): Two sets of input connectors for A/V source devices (labelled A and B):
• VIDEO IN: HD-15 input connector (female) - supports VGA, Component, S-
Video and Composite formats.
• Analog Audio: Left (white) and Right (red) stereo RCA input connectors
(female).
• Digital Audio: SPDIF (female) input connector.
IRTX Ports: Two 3.5mm stereo IR Transmitter output ports allow up to two IR-controlled
devices (such as a DVD or VCR player) to be controlled via optional wired IR
emitters.
IRRX Port: 3.5mm stereo input port, allows connecting an IR receiver to allow learning IR
commands.
Power Socket: 2.1mm barrel-style DC power socket (female)
Operating Environment: • 35°F - 95°F (5°C - 35°C)
• Max. relative humidity - 85% (non-condensing)
Dimensions (HWD): • 1.61" x 8.63" x 3.66" (40.89 mm x 219.08 mm x 93.04 mm)
Weight: • 1.60 lb. (730 g)
Certifications: • CE
• FCC part 15 Class A
Included Accessories: Power Supply, 24VDC, 750 mA with cable (FG-UDM-PS)

UDM-0102 1x2 Multi-Format Distribution Mini-Hub
3
UDM-0102 and UDM-RX02 Operation/Reference Guide
Front Panel Controls
SELECT Pushbutton (Switching Sources)
The UDM-0102 supports 2 AV input sources that can be switched manually.
To switch the inputs at the device, press the SELECT pushbutton on the front of the device.
PRESETS 1/2 Pushbuttons (Executing Presets)
The UDM-0102 supports a total of 2 presets.
1. Select the AV input source (1 or 2), via the SELECT pushbutton.
2. Select either PRESET 1 or PRESET 2 to execute.
Powering The UDM-0102 On/Off
Powering on the Hub: Insert the barrel connector of the power supply into the power
connector on the UDM.
Powering off the Hub: Remove the barrel connector of the power supply from the power
connector on the UDM.
Front Panel LEDs
Power Status LED
Yellow LED on front panel indicates unit is powered.
Active Source LEDs
The front LEDs are grouped by control type and are labeled according to their corresponding port
(connector) numbers on the rear of the unit.
A- Source A is currently selected
B- Source B is currently selected
Status LED
This LED changes from red to green when it receives a valid UDP command, and returns to red after 30
seconds if it has not received anything.
UDM-0102 Specifications (Cont.)
Other AMX Equipment: • Endeleo HD-15 to S-Video Cable (FG-UDM-SVID01)
• Endeleo HD-15 to 3x RCA Breakout Cable (FG-HD15RCA3F)
• RS232 DB9/RJ12 Connection Cable (FG-RS01)
• UDM-RX02 Endeleo Multi-Format Receiver (FG-UDM-RX02)
• UDM-RC10 Endeleo Multi-Format IR Engineering Remote Control
(FG-UDM-RC10)
• UDM-RC02 Multi-Format IR Remote Control (FG-UDM-RC02)
• IR Emitter Module (FG-IR01)
• External IR Receiver Module (FG-IR03)

UDM-0102 1x2 Multi-Format Distribution Mini-Hub
4UDM-0102 and UDM-RX02 Operation/Reference Guide

UDM-0102 Wiring and Connections
5
UDM-0102 and UDM-RX02 Operation/Reference Guide
UDM-0102 Wiring and Connections
Overview
The system diagram in FIG. 2 illustrates a basic installation using the UDM-0102 Hub, UDM-RX02
receivers, and attached display and audio playback devices:
UDM-0102 Front Panel Components
FIG. 3 shows the components on the front panel of the UDM-0102:
FIG. 2 UDM-0102 System Diagram
FIG. 3 UDM-0102 - front panel components
Ethernet
Serial
Audio/Video
Cat5
IR Control
SWT
Laptop
Internet
HDTV Satellite Receiver
LCD
UDM-0102
UDM-RX02 UDM-0102
UDM-RC02
RJ45 port for connection
to an UDM-RX02 Receiver
ETHERNET port (RJ45)
Serial port (RJ12)
Power LED
Status LED
Active input (A/B) LED
Select
button
Preset buttons (1/2)
Source

UDM-0102 Wiring and Connections
6UDM-0102 and UDM-RX02 Operation/Reference Guide
Power LED
Refer to the Front Panel LEDs section on page 3 for descriptions of the front panel LEDs.
ETHERNET Port (RJ45)
The RJ45 port on the front panel of the UDM (labelled “ETHERNET”) provides 10 BaseT network
connectivity.
Pinout Configuration
The following table lists the pinouts, signals, and pairing for the Ethernet port.
FIG. 4 diagrams the pinouts and signals for the Ethernet RJ45 connector and cable.
Default IP Address
The default IP address of the UDM-0102 is 192.168.0.96.
Once the UDM-0102 is switched on, use the Setup option in the UDM WebConsole to configure the
Hub’s correct IP address (see the Setup Page section on page 38).
The IP address may also be configured via the serial port (refer to the Backend Commands section on
page 62).
RJ45 Ethernet Port Pinouts and Signals
Pin Signals Connections Pairing Color
1 TX + 1 --------- 1 1 --------- 2 Orange-White
2 TX - 2 --------- 2 Orange
3 RX + 3 --------- 3 3 --------- 6 Green-White
4 no connection 4 --------- 4 Blue
5 no connection 5 --------- 5 Blue-White
6 RX - 6 --------- 6 Green
7 no connection 7 --------- 7 Brown-White
8 no connection 8 --------- 8 Brown
FIG. 4 RJ45 wiring diagram
Consult the Network Administrator for correct cabling from the UDM-0102 onto the
network. For remote connectivity, the Firewall may have to be configured to open port
2008 for remote connectivity over UDP

UDM-0102 Wiring and Connections
7
UDM-0102 and UDM-RX02 Operation/Reference Guide
Serial (RJ12) Port
The SERIAL (RJ12) port on the front panel (labelled “10101”) is available for diagnostic and
troubleshooting purposes.
The Serial port on the UDM-0102 requires a DB9-to-RJ12 adapter cable (FG-RS01, not included) to
connect to a PC for Terminal control.
Serial Port - Default Communication Settings
Use hyper terminal with default serial settings to communicate with the UDM-0102 (and UDM-RX02):
DB9-to-RJ12 Adapter Cable Pinouts
The following table provides the pinout configuration for the DB9-to-RJ12 (FG-RS01, not included)
adapter cable (:
Active Input (A/B) and STATUS LEDs
Refer to the Front Panel LEDs section on page 3 for descriptions of the front panel LEDs.
SELECT and PRESETS 1/2 Pushbuttons
Refer to the Front Panel Controls section on page 3 for descriptions of the front panel control
pushbuttons.
Connecting the Serial port on the UDM-0102 is not an essential step in the
installation process.
Default Serial Settings
Baud Rate: 9600
Data Bits: 8
Parity: None
Stop Bits: 1
Flow Control: None
DB9-to-RJ12 Adapter Cable Pinouts
DB9 connector Function Abbreviation RJ12 connector
Pin 1 Not used NC
Pin 2 Transmit Data TD or TX or TXD Pin 1
Pin 3 Receive Data RD or RX or RXD Pin 2
Pin 4 Data Set Ready DSR Pin 3
Pin 5 Signal Ground GND Pin 4
Pin 6 Data Terminal Ready DTR Pin 5
Pin 7 Not Used NC Pin 6
Pin 8 Not Used NC
Pin 9 Not Used NC

UDM-0102 Wiring and Connections
8UDM-0102 and UDM-RX02 Operation/Reference Guide
UDM Port (RJ45)
The RJ45 port on the front panel of the UDM-0102 labelled “UDM” provides connectivity to a UDM-
RX02 Multi-Format Receiver. This is a standard RJ45 connector, and the UDM-RX02 can be connected
via either Cat5, Cat5e or Cat6 cabling.
UDM Port Pinouts
The following table describes the pinout configuration of the UDM port:
UDM Port Transmission Details
The following table provides transmission details for the UDM port:
An incorrectly terminated cable will result in the following scenarios:
UDM Port Pinouts
Pair Color RJ45 Pin Polarity Endeleo Function
1
White / Blue 5 -
Green
Blue 4 +
2
White / Orange 1 +
Red
Orange 2 -
3
White / Green 3 +
Blue
Green 6 -
4
White / Brown 7 +
Bi-Directional Control, Digital Audio, Phantom Power
Brown 8 -, Gnd
Transmission on UDM Port
Pair Pin UDM (CVBS) UDM (SVideo) UDM (YPbPr) UDM (RGB)
1 1 CVBS + Luma + Y+ Red +
1 2 CVBS - Luma - Y- Red -
2 3 Chroma + Pr+ Blue+
3 4 Pb+ Green +
3 5 Pb- Green -
2 6 Chroma - Pr- Blue -
4 7 Power, Data, Audio Power, Data, Audio Power, Data, Audio Power, Data, Audio
4 8 Power, Data, Audio Power, Data, Audio Power, Data, Audio Power, Data, Audio
Incorrectly terminated cable results
Pair Composite
Video
SVideo Component
Video
RGBHV
Video
User Port
LINK LED
1 No Video 1 No Luma No Y No RED LIT
2 No Video 3 No Chroma No Pr No BLUE LIT
3 No Video 2 NONE No Pb NONE No GREEN
NONE
LIT NONE
4
Other manuals for Endeleo Multi-Format Receiver UDM-RX02
2
This manual suits for next models
1
Table of contents
Other AMX Receiver manuals

AMX
AMX Mio Moderno MIO-IRRX User manual

AMX
AMX DX-TX Quick user guide

AMX
AMX AutoPatch Cat5 S-Video+Stereo TX User manual

AMX
AMX Mio Moderno MIO-IRRX User manual

AMX
AMX DXLink User manual

AMX
AMX FG1010-37 User manual

AMX
AMX DTV-RX02-HD User manual

AMX
AMX AXR-IRSM Plus User manual

AMX
AMX Viewpoint AXR-RF User manual

AMX
AMX AXR-RF User manual