AMX DUX-SRX User manual

USER MANUAL
DUX-SRX
100-METER 4K HDBASET SCALING RECEIVER

2USER MANUAL - DUX-SRX
100-METER 4K HDBASET SCALING RECEIVER
Table of Contents
IMPORTANT SAFETY INSTRUCTIONS...................................................................03
INTRODUCTION.....................................................................................................04
PACKING LIST .......................................................................................................05
SPECIFICATIONS ...................................................................................................06
CABLE SPECIFICATIONS........................................................................................07
PANEL OVERVIEW.................................................................................................08
INSTALL HARDWARE ............................................................................................10
OPERATE WITH IR .................................................................................................12
Control the Display...........................................................................................12
Control the Source ...........................................................................................13
OPERATE WITH RS232..........................................................................................14
RS232 Pinout...................................................................................................14
RS232 for API Command.................................................................................14
RS232 for Firmware Upgrading........................................................................15
RS232 for Serial Communication.....................................................................15
TROUBLESHOOTING .............................................................................................17
APPENDIX: API COMMAND...................................................................................18

3
USER MANUAL - DUX-SRX
100-METER 4K HDBASET SCALING RECEIVER
IMPORTANT SAFETY INSTRUCTIONS
NOTE:
We reserve the right to change the content from time to time without notice.
WARNINGS:
To reduce the risk of fire, electric shock or product damage, please observe
the following Safety Instructions while installing and operating the product:
Do not expose this apparatus
to rain, moisture, dripping or
splashing. No objects filled with
liquids, such as vases, shall be
placed on the apparatus.
To prevent risk of electric
shock or fire hazard due to
overheating, do not obstruct
the unit’s ventilation openings
with newspapers, tablecloths,
curtains, and similar items.
Do not install near any heat
sources such as radiators,
heat registers, stoves, or other
apparatus (including amplifiers)
that produce heat.
Do not place sources of naked
flames, such as lighted candles,
on the unit.
Clean this apparatus only with
dry cloth.
Protect the power cord from
being walked on or pinched
particularly at plugs.
Refer all servicing to qualified
service personnel.
Unplug this apparatus during
lightning storms or when un-
used for long periods of time.
Only use attachments/accesso-
ries specified by the manufac-
turer.
Do not install or place this
unit in a bookcase, built-in
cabinet or in another confined
space. Ensure the unit is well
ventilated.

4USER MANUAL - DUX-SRX
100-METER 4K HDBASET SCALING RECEIVER
INTRODUCTIONS
DUX-SRX is 100m HDBaseT Receiver with 4K@60Hz Scaler, transmits uncompressed
4K@60Hz UHD video, Ethernet, RS232 and IR up to 100m/328ft over a signal CatX cable
and supports analog and digital audio de-embedding for HDMI audio output.
DUX-SRX comes with an auto-scaler for HDMI scaling out which can be adjusted by API
command. In addition, the HDBaseT Receiver is capable of automatic display control
through CEC or RS232, volume adjustment, Ethernet routing and accepts third-party
control.
DUX-SRX HDBaseT Scaling Receiver is ideal for applications where high quality video
transmission and scaling is required. While working with a Matrix like DUX-8D, a
standalone AV switching and control system with video scaling will be created and will
meet requirements for classroom and huddle room applications.
Features
Capable of transmission:
Via Cat5e/6 cable:
- Up to 70m/230ft: 4K@30Hz YUV 4:4:4 24bit or 4K@60Hz YUV 4:2:0 24bit
- Up to 100m/328ft: 1080p@60Hz 36bit
Via Cat6a/7 cables:
- Up to 100m/328ft: 4K@30Hz YUV 4:4:4 24bit or 4K@60Hz YUV4:2:0 24bit
- Up to 100m/328ft: 1080p@60Hz 48bit
Supports analog and digital audio de-embedding for HDMI Audio Out.
Fully compliant with HDMI 1.4, and compatible with HDMI 2.0 (4K@60Hz, 4:2:0).
HDCP 2.2 compliant.
Bi-directional IR, RS232 and Ethernet pass-through over a CatX cable.
Default auto-scaler for HDMI Scaling Out or output resolution adjustment by API.
Built-in CEC controller for HDMI OUT.
Built-in RS232 controller for pre-loading or storage of RS232 commands of the
display device.
Automatic CEC and RS232 command to power on or standby the display by
detecting input signal status.
Seamless switching when using with a Matrix like DUX-8D.
NOTE: The actual signal transmission distance depends on signal resolution and cable
quality.

5
USER MANUAL - DUX-SRX
100-METER 4K HDBASET SCALING RECEIVER
PACKING LIST
1 x DUX-SRX
1 x Power Adapter (12 VDC, 3.0A)
1 x AC Cable
2 x Phoenix Male Connector (3.5 mm, 3-pin)
1 x IR Emitter
1 x IR Receiver
2 x Mounting Brackets
1 x User Manual

6USER MANUAL - DUX-SRX
100-METER 4K HDBASET SCALING RECEIVER
SPECIFICATIONS
Technical
Input 1 x HDBT IN
Input Signal Type HDBT
Input Resolution
• VESA:
800x6008, 1024x7688, 1280x7688, 1280x8008,
1280x9608, 1280x10248, 1360x7688, 1366x7688,
1440x9008, 1600x9008, 1600x12008, 1680x10508,
1920x12008
• SMPTE:
720x480P7,8, 720x576P6, 1280x720P6,7,8,
1920x1080P6,7,8, 3840x2160P2,3,5,6,8, 4096x2160P2,3,5,6,8
1 = @ 23.98 Hz, 2 = @ 24 Hz, 3 = @ 25 Hz,
4 = @ 29.97 Hz, 5 = @ 30 Hz, 6 = @ 50 Hz,
7 = @ 59.94 Hz, 8 = @ 60 Hz;
Input Video Level 0.5-1.2 V p-p
Output
1 x HDMI OUT
1 x S/PDIF OUT
1 x AUDIO OUT
Output Signal Type HDMI: TMDS
Audio Output S/PDIF OUT
L/R OUT
Audio Format S/PDIF OUT: PCM 2.0, Dolby 2.0, Dolby 5.1;
L/R OUT: PCM 2.0.
Output Resolution
• VESA:
800x6008, 1024x7688, 1280x7688, 1280x8008,
1280x9608, 1280x10248, 1360x7688, 1366x7688,
1440x9008, 1600x9008, 1600x12008, 1680x10508,
1920x12008
• SMPTE:
1280x720P8, 1920x1080P8, 3840x2160P5,8
1 = @ 23.98 Hz, 2 = @ 24 Hz, 3 = @ 25 Hz,
4 = @ 29.97 Hz, 5 = @ 30 Hz, 6 = @ 50 Hz,
7 = @ 59.94 Hz, 8 = @ 60 Hz;
Video Impedance 100 Ω
Maximum Pixel Clock 594 MHz

7
USER MANUAL - DUX-SRX
100-METER 4K HDBASET SCALING RECEIVER
Control
Control Methods Telnet, RS232, IR
General
Operating Temperature / RH 32°F ~ 113°F (0°C ~ 45°C)
10% ~ 90%, non-condensing
Storage Temperature / RH -4°F ~ 140°F (-20°C ~ 70°C)
10% ~ 90%, non-condensing
Power Supply 12 VDC 3.0A
Power Consumption 16.4 W (Max.)
ESD Protection
Human-body model:
• ±8 kV (Air-gap discharge)
• ±4 kV (Contact discharge)
Dimension (W × H × D) 234.4 mm × 25 mm × 143 mm
Weight 0.9 kg
Certification CE, FCC
CABLE SPECIFICATIONS
To ensure best performance of DUX-SRX, please use stright-through Category cables
wired to T568B standard and a Transmitter device which also supports 100-meter
transmission.
Cable Type Range Supported Video
Cat5e/6
100m/328ft 1080p@60Hz 36bit
70m/230ft
1080p@60Hz 3D
4K@30Hz YUV4:4:4
4K@60Hz YUV4:2:0
Cat6a/7 100m/328ft
1080p@60Hz 36bit
1080p@60Hz 48bit
1080p@60Hz 3D
4K@30Hz YUV4:4:4
4K@60Hz YUV4:2:0

8USER MANUAL - DUX-SRX
100-METER 4K HDBASET SCALING RECEIVER
PANEL OVERVIEW
1 2 3 4 5
Item Name Description
1 POWER LED On: DUX-SRX is powered on.
Off: DUX-SRX is powered off.
2 SCALER LED Blinking: DUX-SRX is working properly.
Off: DUX-SRX is not working properly.
3 STATUS LED Blinking: DUX-SRX is working properly.
Off: DUX-SRX is not working properly.
4 HDCP LED
On: HDCP video is being transmitted.
Blinking: Non-HDCP video is being transmitted.
Off: No HDMI signal.
5 LINK LED
On: HDBT IN is linked.
Off / Blinking: HDBT IN is not linked and there is a link
error.
Front Panel

9
USER MANUAL - DUX-SRX
100-METER 4K HDBASET SCALING RECEIVER
1 2 3 4 5 6 7 8 9 10
Item Name Description
1 DC 12V Connects the Power Adapter provided.
2 ETHERNET 1 Connects to an Ethernet device.
3 ETHERNET 2 Connects to an Ethernet device.
4 HDBT IN Connects to an HDBT Transmitter device via a CatX cable.
5 IR IN Connects the IR Receiver provided.
6 IR OUT Connects the IR Emitter provided.
7 HDMI OUT Connects to an HDMI display device.
8 S/PDIF OUT Uses a coaxial port for S/PDIF digital audio output.
9 AUDIO OUT Uses a 3-pin Phoenix female port for L/R analog audio output.
10 RS232 For RS232 serial communication or firmware upgrading.
Rear Panel

10 USER MANUAL - DUX-SRX
100-METER 4K HDBASET SCALING RECEIVER
INSTALL HARDWARE
WARNING:
Before installation, disconnect the power supplies of all the devices.
Please use quality cables and accessories specified or provided by the
manufacturer.
During installation, connect and disconnect cables with caution.
To install DUX-SRX with an HDBT Transmitter (e.g. DUX-8D) (See Application
Example: System Wiring on Page 11):
1. Connect the HDBT Transmitter (e.g. DUX-8D) selected to input sources (e.g. HDMI
input sources from a Blu-ray Player, cable/satellite TV, media server, etc.).
2. Connect DUX-SRX’s HDBT IN to HDBT OUT of the HDBT Transmitter.
3. Connect DUX-SRX’s HDMI OUT to an HDMI output device (e.g. a projector).
4. If Audio Output is needed, connect DUX-SRX’s S/PDIF (for digital audio signal) or
L/R (for analog audio signal) connector.
5. Connect the included Power Adapter to DUX-SRX.
6. Power on all the devices and start operation.
NOTE:
1) 70m/230ft @4K or 100m/328ft @1080p are maximum transmission distances realizable
when DUX-SRX and other devices are in perfect conditions and the straight cable runs with no
electrical interference, bends, kinks, patch panels or wall outlets, etc. If any of these turns to be
an issue in your installation, transmission distance will be affected.
2) When all set, check the LED indicators of DUX-SRX. For LED indication, please refer to page
08.

11
USER MANUAL - DUX-SRX
100-METER 4K HDBASET SCALING RECEIVER
IR Receiver
Projector Remote
Blu-Ray Player
Touch Panel Ethernet Switch Projector
Audio System
IR Emitter
DUX-SRX
HDBT Transmitter (e.g. DUX-8D)
RS232 SignalHDMI Signal
HDMI Signal
HDBT Signal
Ethernet Ethernet
Audio
Signal
Audio
Signal
Application Example: Sytem Wiring

12 USER MANUAL - DUX-SRX
100-METER 4K HDBASET SCALING RECEIVER
OPERATE WITH IR
DUX-SRX allows IR pass-through over HDBaseT. Hence, you can either control the
source from the display location or control the display from the source location.
To realize such function, an HDBT Transmitter, e.g. DUX-8D or DUX-TX is needed.
Control the Display
To control the display from the source location:
1. Connect HDMI Display device to HDMI OUT of DUX-SRX.
2. Connect the IR Emitter provided to IR OUT of DUX-SRX.
3. Connect the IR Receiver provided and a source device to the HDBT Transmitter (e.g.
DUX-8D).
4. Connect DUX-SRX and the HDBT Transmitter through HDBT.
When all set, the display can be controlled at the source end through a display remote.
IR Receiver
Display RemoteBlu-Ray Player
Display
IR Emitter
DUX-SRX
HDBT Transmitter (e.g. DUX-8D)
HDMI Signal
HDMI Signal
HDBT Signal

13
USER MANUAL - DUX-SRX
100-METER 4K HDBASET SCALING RECEIVER
Control the Source
To control the source from the display location:
1. Connect the IR Receiver provided to IR IN of DUX-SRX;
2. Connect a display device to HDMI OUT port of DUX-SRX.
3. Connect the IR Emitter provided and a source device to the HDBT Transmitter (e.g.
DUX-TX).
4. Connect DUX-SRX and the HDBT Transmitter via HDBT.
When all set, the source can be controlled at the display location through a source device
remote.
IR Receiver
Player Remote
Blu-Ray Player
Display
IR Emitter
DUX-SRX
HDBT Transmitter
(e.g. DUX-TX)
HDMI Signal
HDMI Signal
(HDBT IN)
HDBT Signal

14 USER MANUAL - DUX-SRX
100-METER 4K HDBASET SCALING RECEIVER
OPERATE WITH RS232
RS232 Pinout
DUX-SRX installs a RS232 port at its rear panel and accepts Phoenix connector for
firmware upgrading or serial communication.
Control System
TX
TX
RX
RX
GND
GND
RS232 for API Command
Connecting DUX-SRX to a control PC, users can control the device using API command
over a professional serial interface software.
Before executing the API command through RS232 serial connection, please ensure the
RS232 interface of DUX-SRX and the control PC are configured correctly. Please refer to
the parameters in the table below.
A whole list of API Commands for controlling DUX-SRX is available in Appendix.
Parameters Value
Baud Rate 9600 bps
Data bits 8 bits
Parity None
Stop bits 1 bit
Flow control None
DUX-SRX
PC Server
RS232
(API Command)
Telnet

15
USER MANUAL - DUX-SRX
100-METER 4K HDBASET SCALING RECEIVER
RS232 for Firmware Upgrading
RS232 port of DUX-SRX can be used for firmware upgrading.
To upgrade firmware of DUX-SRX:
1. Download firmware upgrading execution software (please contact the product
manufacturer or your local dealer) to a flash drive;
2. Connect the flash drive to the USB port (inside the case) of DUX-SRX;
3. Connect your PC to RS232 port using a RS232 cable;
4. Send the command (Command 17 in Appendix: API COMMAND) through CommUart
Assistant to start upgrading;
5. When the upgrading is successful, power cycle the device.
DUX-SRX
PC Server
RS232 Cable
(API Command)
USB port inside the case
Firmware Upgrading
Execution Software
RS232 Pass-through
RS232 port of DUX-SRX can also be used for pass-through while working with a
Transmitter device like DUX-8D.
To start RS232 pass-through between DUX-SRX and a Transmitter (e.g. DUX-8D):
1. Connect a RS232 Device (RS232 Device 1) to RS232 port of DUX-SRX using a
RS232 cable;
2. Connect another RS232 Device (RS232 Device 2) to RS232 port of the Transmitter
using a RS232 cable;
3. Connect HDBT IN of DUX-SRX and HDBT OUT of the Transmitter using a CatX cable.

16 USER MANUAL - DUX-SRX
100-METER 4K HDBASET SCALING RECEIVER
4. When all set, the RS232 Device 1 can be controlled at RS232 Device 2 or vice versa.
RS232 Cable
HDBT Cable
RS232 Cable
DUX-SRX
HDBT Transmitter (e.g. DUX-8D)
RS232 Device 2
RS232 Device 1
CatX Cable

17
USER MANUAL - DUX-SRX
100-METER 4K HDBASET SCALING RECEIVER
TROUBLESHOOTING
1. Why the Power LED is off?
• Check that all the devices are on.
• Check that all the cables are qualified and connected properly.
2. Why the Link LED is off or blinking?
• Check that all the devices are on.
• Check that all the cables are qualified and connected properly.
• Check that the CatX cable used complies with the recommended specifications.
For more information, see CABLE SPECIFICATIONS.
3. Why the display connected to DUX-SRX shows no picture?
• Check that all the devices are on.
• Check that all the cables are qualified and connected properly.
• Check that the Link LED is steady on. For more information, see Q2 above.
• Check that the display works properly, and that the source device has normal
signals output.
• Ensure that the display device supports HDCP.
• Ensure the CatX cable and the HDMI cables used complies with the recommend-
ed specifications. For more information, see CABLE SPECIFICATIONS.
• Check that your display device is switched to the correct source input mode.
• Check that no compatibility issue exists between DUX-SRX and the display. If so,
replace the display with other models.
4. Why the display connected to DUX-SRX shows snow or mosaic?
• Check that all the cables are qualified and connected properly.
• Check that Ethernet cables are Cat5e/6 or higher gauge.
• Check that the source input device has no such problem as snow, mosaic or with
a damaged disc. If so, replace with another qualified input source.
• Check that no compatibility issue exists between DUX-SRX and the display. If so,
replace the display with qualified models.

18 USER MANUAL - DUX-SRX
100-METER 4K HDBASET SCALING RECEIVER
APPENDIX: API COMMAND SET
IDX Function Description More Details
Syntax Example
1 To execute a global preset
Command:
CSP#T
Return:
CSP#T
Description:
CECPWR_ONOFF will control sink
power on or off
SP#: #={0, 1}
0 : OFF
1 : ON
Command:
CSP1T
Return:
CSP1T
Description:
Executes the sink power on.
2To define a sink power by CEC
automatically
Command:
CSPA#T
Return:
CSPA#T
Description:
SPA#: #={0, 1}
0 : Disable
1 : Enable
Command:
CSPA1T
Return:
CSPA1T
Description:
Enable control the sink power by
CEC automatically.
3To define a Delay Time to execute a
sink power off when no active signal
Command:
CD#SPT
Return:
CD#SPT
Description:
CECAUTO_DELAY is short for CEC
auto Power Delay Timing
D#: #={0~30MIN}
Command:
CD5SPT
Return:
CD5SPT
Description:
Define Delay Time to 5 minutes.
4To adjust the output’s volume to a
specific decibel level
Command:
CVA#T
Return:
CVA#T
Description:
VA#: # = {0~100}
Command:
CVA100T
Return:
CVA100T
Description:
Adjusts volume to 100
5 To verify the output’s volume status
Command:
SVT
Return:
SVT( # )
Description:
#: # = {0~100, M}
Command:
SVT
Return:
SVT( 100 ) or SVT( M )
Description:
Volume is 100 or mute.

19
USER MANUAL - DUX-SRX
100-METER 4K HDBASET SCALING RECEIVER
IDX Function Description More Details
Syntax Example
6To increase the output’s volume
by a step
Command:
CVS+T
Return:
CVS+T( # )
Description:
#: # = {0~100}
Command:
CVS+T
Return:
CVS+T( 50 )
Description:
Increases volume a step, return the
volume is at 50.
7To decrease the output’s volume
by a step
Command:
CVS-T
Return:
CVS-T( # )
Description:
#: # = {0~100}
Command:
CVS-T
Return:
CVS-T( 50 )
Description:
Decreases volume a step, return
the volume is at 50.
8To define the step of the output’s
volume
Command:
CVS#T
Return:
CVS#T
Description:
VS#: # = {1~20}
Command:
CVS10T
Return:
CVS10T
Description:
Define the step of the output’s
volume is 10.
9To verify the step of the output’s
volume
Command:
SVST
Return:
SVST( # )
Description:
#: # = {1~20}
Command:
SVST
Return:
SVST( 10 )
Description:
The step of the output’s volume
is 10
10 To mute the output
Command:
CVMT
Return:
CVMT
Description:
Mute the output
Command:
CVMT
Return:
CVMT
Description:
Mute the output
11 To un-mute an output
Command:
CVUT
Return:
CVUT
Description:
Un-mute an output.
Command:
CVUT
Return:
CVUT
Description:
Un-mute the output.

20 USER MANUAL - DUX-SRX
100-METER 4K HDBASET SCALING RECEIVER
IDX Function Description More Details
Syntax Example
12 To set output resolution
Command:
CR#T
Return:
CR#T
Description:
R#: # = {1~18}
1 : 3840x2160@60
2 : 3840x2160@30
3 : 1920x1200@60
4 : 1920x1080@60
5 : 1280x720@60
6 : 1600x1200@60
7 : 1680x1050@60
8 : 1600x900@60
9 : 1440x900@60
10 : 1366x768@60
11 : 1360x768@60
12 : 1280x1024@60
13 : 1280x960@60
14 : 1280x768@60
15 : 1280x800@60
16 : 1024x768@60
17 : 800x600@60
18 : AUTO
Auto ( preferred native timing of
the display )
Command:
CR1T
Return:
CR1T
Description:
Set output resolution is
3840x2160@60.
13 To verify output resolution
Command:
SRT
Return:
SRT( # )
Description:
R#: # = {1~17, 101~117}
1 : Fix 3840x2160@60
2 : Fix 3840x2160@30
…
16 : Fix 1024x768@60
17 : Fix 800x600@60
101 : Auto 3840x2160@60
…
117 : Auto 800x600@60
Command:
SRT
Return:
SRT( 1 ) or SRT( 101 )
Description:
Output resolution is Fix
3840x2160@60 or Auto
3840x2160@60.
14 To reset system setting
Command:
~SYSR!
Return:
~SYSR!
Description:
Reset system setting
Command:
~SYSR!
Return:
~SYSR!
Description:
Reset system settings
Table of contents
Other AMX Receiver manuals

AMX
AMX AutoPatch Cat5 S-Video+Stereo TX User manual

AMX
AMX AXC-RCVI User manual

AMX
AMX FG1010-37 User manual

AMX
AMX Sensors and Receivers IR User manual

AMX
AMX Endeleo Multi-Format Receiver UDM-RX02 User manual

AMX
AMX Endeleo UDM-RX01 User manual

AMX
AMX AXD-IR Plus User manual

AMX
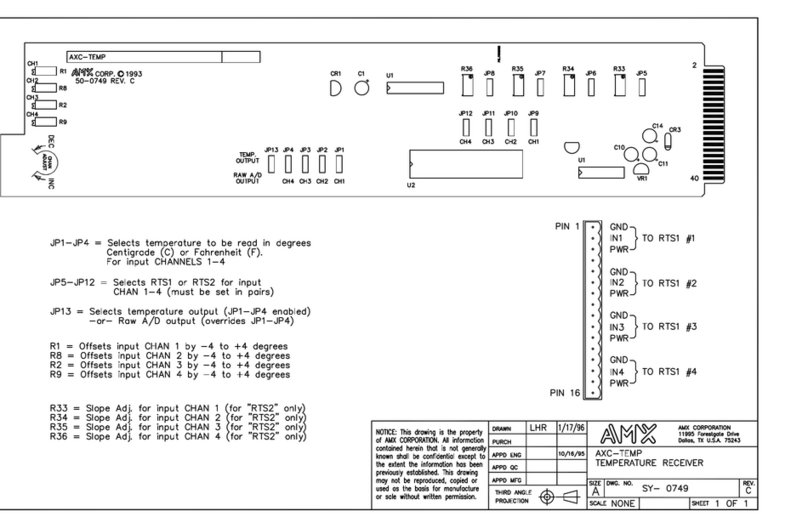
AMX AXC-TEMP Guide

AMX
AMX UDM-RX02N User manual

AMX
AMX AXD-IR Plus User manual

AMX
AMX AXR-RF User manual

AMX
AMX Viewpoint AXR-RF User manual

AMX
AMX DTV-RX02-HD User manual

AMX
AMX DCP-SRX User manual

AMX
AMX Endeleo Multi-Format Receiver UDM-RX02 Parts list manual
AMX
AMX DXLink User manual

AMX
AMX PMB-RF User manual

AMX
AMX DXLink User manual

AMX
AMX Mio Moderno MIO-IRRX User manual
AMX
AMX AutoPatch CAT-5 RGBHV RX User manual