ANALOX ATA Pro User manual


ATA Pro
Technical Manual Int. Approved
Document ref: HEL-810-12 December 2017 Page 1 of 27
Copyright © 2017 Analox Ltd. All Rights Reserved.
Commercial in Confidence
Revision history
Date
Rev
By
DCN
Comments
CHKD
CHKD
Date
APPD
APPD
Ref
APPD
Date
07/12/2017
12
PJO
2017-
0103
Declaration of Conformity Updated
LG
07/12/2017
-
-
-
03/05/2017
11
PJO
2017-
0051
Update dimensions in specification,
general tidy up of page breaks, margins
etc.
DG
16/05/2017
-
-
-
27/10/2016
10
DG
2016-
0081
Update Ata Pro user manual for He sensor
life
PJO
02/11/2016
-
-
-
13/01/2014
09
PJO
2013-
0047
Updated to suit ATA pro, DIN restrictor
added as kit
-
-
-
-
-
29/09/2011
08
PJO
2011-
0122
Flow rate of 0.2 –1.0 L/m now specified
-
-
-
-
-


ATA Pro
Technical Manual Int. Approved
Document ref: HEL-810-12 December 2017 Page 1 of 27
Copyright © 2017 Analox Ltd. All Rights Reserved.
Commercial in Confidence
We are delighted to welcome you as a user of the
ATA pro
The following guide should assist you in using your
ATA pro


ATA Pro
Technical Manual Int. Approved
Document ref: HEL-810-12 December 2017 Page 1 of 27
Copyright © 2017 Analox Ltd. All Rights Reserved.
Commercial in Confidence
1. Packaging and Contents Check.................................................................................. 2
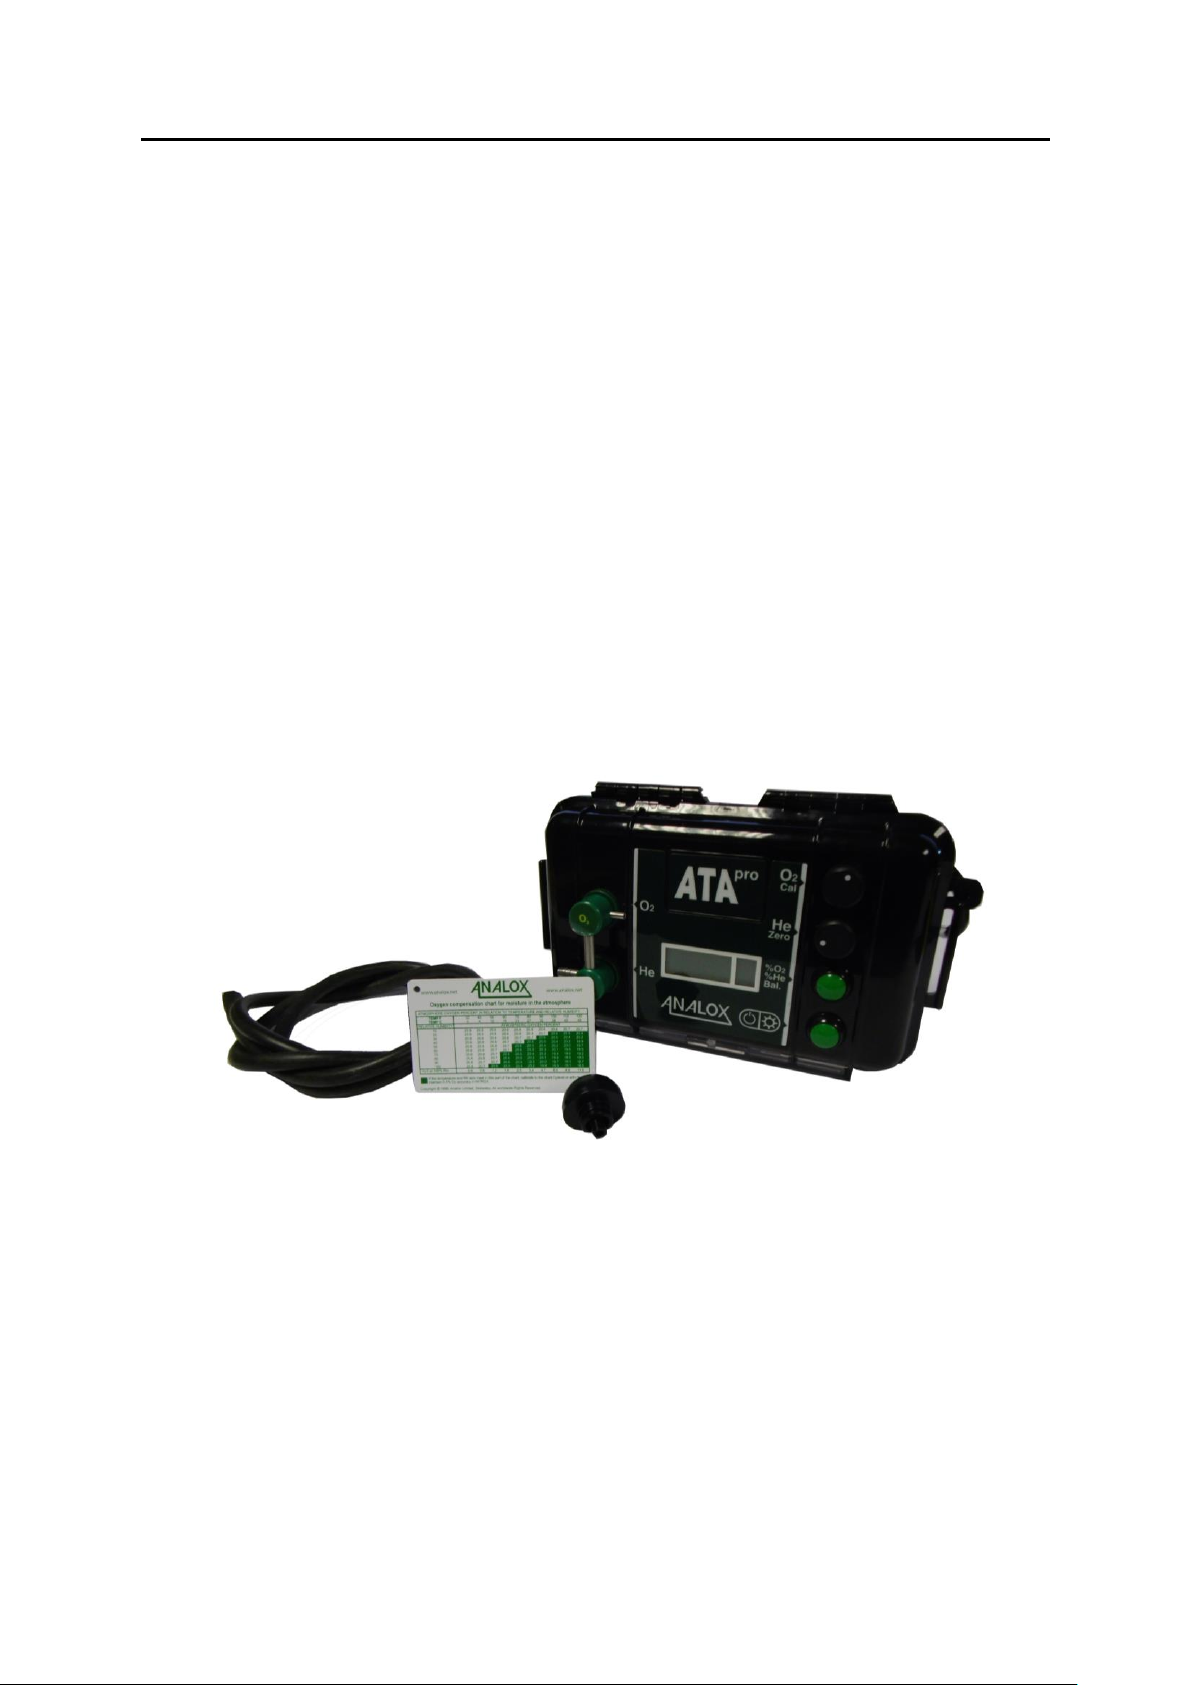
2. About the ATA pro ..................................................................................................... 3
3. Operation .................................................................................................................. 4
3.1 Controls ..............................................................................................................4
3.2 Oxygen Sensor Calibration.....................................................................................5
3.3 Helium Sensor Zero Adjust ....................................................................................7
3.4 Analysing Your Mix ...............................................................................................7
3.5 Accessories..........................................................................................................9
4. Quick Check............................................................................................................... 10
5. After Sales Service .................................................................................................. 11
5.1 Battery Replacement........................................................................................... 11
5.2 Sensor Replacement ........................................................................................... 12
5.3 Warranties......................................................................................................... 13
5.4 General Care...................................................................................................... 13
5.5 Safety Information ............................................................................................. 14
5.6 First Aid Procedures ............................................................................................ 14
5.7 Sensor Handling Information................................................................................ 14
6. Warranty Information ............................................................................................. 15
7. Specification............................................................................................................ 16
8. Altitude Correction Chart......................................................................................... 17
9. Oxygen Compensation Chart ................................................................................... 18
10. Disposal ................................................................................................................ 19
11. Declaration of Conformity..................................................................................... 20

ATA Pro
Technical Manual Int. Approved
Document ref: HEL-810-12 December 2017 Page 2 of 27
Copyright © 2017 Analox Ltd. All Rights Reserved.
Commercial in Confidence
1. Packaging and Contents Check
On opening your Ax ATA pro, please check you have the following items:
a) ATA pro & Battery
b) Flow Adaptor, Tubing & Sample Dome
c) O2 Compensation Card
d) User Manual
e) Any additional options or accessories ordered for your Ax ATA pro,
from:
•Storage Case: compact water proof, drop proof case ideal
For storing your ATA pro and accessories
•DIN flow restrictor
Ax ATA pro Kit

ATA Pro
Technical Manual Int. Approved
Document ref: HEL-810-12 December 2017 Page 3 of 27
Copyright © 2017 Analox Ltd. All Rights Reserved.
Commercial in Confidence
2. About the ATA pro
The ATA pro is designed to be a true trimix analyser, measuring the
concentration of Oxygen, Helium and balance gas in your trimix. The Oxygen
and Helium sensors measure in the range 0.1-100%.
The ATA pro has been designed to offer the highest levels of accuracy without
compromising ease of use. Oxygen calibration and Helium zero adjust features
are provided as standard, and Oxygen compensation is provided to ensure you
get more accurate Helium readings.
Readings are displayed individually on a scroll through backlit display.
Power is provided by one AA size battery. The ATA pro will automatically switch
off after 15 minutes to ensure battery life is not compromised if the instrument
is accidentally turned on. On receipt of the ATA pro all you have to do is fit the
battery, refer to section 5.1 Battery Replacement.
The ATA pro has been designed specifically for the diving industry where hostile
environmental conditions are the norm not the exception.

ATA Pro
Technical Manual Int. Approved
Document ref: HEL-810-12 December 2017 Page 4 of 27
Copyright © 2017 Analox Ltd. All Rights Reserved.
Commercial in Confidence
3. Operation
3.1 Controls
The analyser is fitted with an on/off button located on the front of the unit. To
turn the unit on press the button once, the unit will automatically turn off after
15 minutes, to prevent accidental battery drainage. Alternatively the unit can be
turned off by pressing and holding the on/off button for 3 seconds.
When the analyser is switched on it will display a reading and a marker
indicating which gas is being displayed, O2, He or BAL.
Do not use the ATA pro before calibration
(see section 3.2 Oxygen Sensor Calibration).
The on/off button also turns the backlight on and off, the backlight will
automatically turn off after 30 seconds.
O2Cal
He Zero
adjust
Mode
On/off &
backlight

ATA Pro
Technical Manual Int. Approved
Document ref: HEL-810-12 December 2017 Page 5 of 27
Copyright © 2017 Analox Ltd. All Rights Reserved.
Commercial in Confidence
The low battery warning is a shown by ‘bAt L’ on the display. When present,
change the battery before using the instrument (see section 5.0 After Sales
Service).
Waterproof calibration and zero adjustment knobs are located on the front of the
instrument for Oxygen and Helium sensor adjustments. Turn them fully from left
to right and then fully left, the reading should increase and then decrease. (If
the reading does not change see section 4.0 Quick Check). When the Helium
sensor adjustment is fully left the instrument display may show ‘Err’, this is not
a fault if the display returns to numbers when the adjustment is set to the mid-
point
WARNING
Do NOT use when the LOW BATTERY symbol is on!
3.2 Oxygen Sensor Calibration
Oxygen sensor calibration in clean air is essential before every use and is
performed as follows;
1. Remove the flow adaptor from the sensors.
2. Expose the analyser to clean air for two minutes and adjust the calibration
knob until the display reads the correct value using the oxygen
compensation chart (you can find this chart on the inside of the back
cover). If this is not possible refer to paragraph 3 below or to sections 4.0
Quick Check and 5.0 After Sales Service.
O2 calibration in clean air

ATA Pro
Technical Manual Int. Approved
Document ref: HEL-810-12 December 2017 Page 6 of 27
Copyright © 2017 Analox Ltd. All Rights Reserved.
Commercial in Confidence
3. It is possible that at very high altitude normal calibration is not
achievable. In this event you must ascertain the actual pressure in BAR
and multiply the atmospheric oxygen percent (20.9%) by this pressure
and set the reading during calibration to the calculated level (this is the
surface equivalent oxygen percentage). An altitude correction chart is
shown for reference on page 22. When you measure the level of oxygen
in the sample you must divide the reading by the same atmospheric
pressure value to obtain the true percentage of Oxygen in your sample.
For Example: At an atmospheric pressure of 0.8bar, the surface
equivalent oxygen percentage is
20.9% x 0.8 = 16.7% O2 Surface Equivalent. If the reading you then
obtain from your sample is 32.0% you must divide this by 0.8 to obtain
the true Oxygen percentage, 32.0/0.8 = 40.0% O2 True Percentage.
WARNING
The analyser is sensitive to Oxygen partial pressure.
Calibration must always be carried out at the same
atmospheric pressure as Oxygen measurement.

ATA Pro
Technical Manual Int. Approved
Document ref: HEL-810-12 December 2017 Page 7 of 27
Copyright © 2017 Analox Ltd. All Rights Reserved.
Commercial in Confidence
3.3 Helium Sensor Zero Adjust
The Helium sensor zero adjust enables you to retain the accuracy of the analyser
over its operational life, as the sensor ages.
1. Remove the flow adaptor from the sensors.
2. Use the mode button to change the display to read Helium.
3. Expose the analyser to clean air for two minutes and adjust the calibration
knob until the display reads 0.0. If the Helium sensor adjustment is
turned too far to the left the instrument display may show ‘Err’, this is not
a fault, just return the adjustment to the mid-point then re-adjust for a
reading of 0.0
3.4 Analysing Your Mix
The ATA pro is provided with a flow adapter and tubing which can be connected
to the gas Sampling Dome.
1. Ensure the ATA pro has been calibrated as per the instructions in sections
3.2, and 3.3.
2. Push the flow adaptor into the sensors, as per the picture over the page.
3. Attach the tubing from the flow adaptor to the Sampling Dome
4. Very slowly open the Tank valve until gas can just be heard quietly hissing
out.
5. Press the sampling dome firmly against the tank outlet.
6. Allow approx. 10-15 seconds for the reading to stabilise on the display, and
take the O2 reading.

ATA Pro
Technical Manual Int. Approved
Document ref: HEL-810-12 December 2017 Page 8 of 27
Copyright © 2017 Analox Ltd. All Rights Reserved.
Commercial in Confidence
7. Use the mode button to change the display to read the Helium concentration.
Ensure the readings are stable and take the He reading
8. Use the mode button to change the display to show the balance gas (BAL.),
i.e. the inferred Nitrogen concentration. Take your reading and close the
tank
Analysing your mix
9. If in doubt repeat the procedure taking care to ensure a gas flow of between
0.2 and 1.0 l/m.
10. If you wish to carry out multiple cylinder checks, to re-zero the sensors,
you will need to remove the flow adaptor. This will allow the previous gas
mix to quickly vent into the atmosphere.
WARNING
Very high flows may pressurise the sensors and
inaccurate readings or sensor damage will result.

ATA Pro
Technical Manual Int. Approved
Document ref: HEL-810-12 December 2017 Page 9 of 27
Copyright © 2017 Analox Ltd. All Rights Reserved.
Commercial in Confidence
3.5 Accessories
The ATA pro can be supplied with any of the following accessories;
a) Storage case; compact water proof, drop proof case ideal for storing your
ATA pro, and accessories.
Part number: SA2ATACASE
b) DIN flow restrictor kit –Comprising DIN flow restrictor, 0.2 to 1.2 l/m
flow meter
& 1m neoprene tubing
Part number: 6000-0197K

ATA Pro
Technical Manual Int. Approved
Document ref: HEL-810-12 December 2017 Page 10 of 27
Copyright © 2017 Analox Ltd. All Rights Reserved.
Commercial in Confidence
4. Quick Check
SYMPTOM
CONDITION
ACTION
‘bAt L’ symbol
flashing
intermittently on
display
Low battery
Change battery
No display
Switched off
Bad connection
Switch on
Check battery connection
Return to supplier
Zero reading on O2
O2 Sensor disconnected
O2 sensor polarity
incorrect
O2 Sensor expired
No Oxygen
Check connection
Check sensor is connected
correctly
Change sensor
Check in air and ensure
sensor face is free from
obstruction
‘Err’ shown on
helium display
He Zero knob turned too
far left
Helium sensor
disconnected Helium
sensor fault
Turn knob to mid point
before calibrating
Check connection
Carry out He coarse
calibration
Return to supplier
He Reading is
negative
Zero Adjust required
Adjust the reading using
the He zero pot on the
front
If still negative
Recalibrate using internal
pots
Reading erratic
Pressure on sensor
Radio transmission
Sensor old or faulty
Condensation on sensor
Check flow
Move unit away
Change sensor
Dry sensor face
Reading does not
change when
calibration knob is
turned
Faulty connections
Sensor failure
Return to supplier
Change O2 sensor
Recalibrate the Helium
sensor using internal pots
Display segments
missing
Display faulty
Return to supplier
Will not calibrate
Sensor faulty
Sensor not in air
High altitude
Change sensor
Check flow adapter is
correct Calculate percent
equivalent = 20.9% x bar
Reading drifts
Rapid temperature
change
Do not move analyser
from one temperature to
another immediately
before use

ATA Pro
Technical Manual Int. Approved
Document ref: HEL-810-12 December 2017 Page 11 of 27
Copyright © 2017 Analox Ltd. All Rights Reserved.
Commercial in Confidence
5. After Sales Service
5.1 Battery Replacement
a) In a clean, dry environment, open the analyser case.
b) Remove the cover from the battery holder
b) Slide the battery out of its holder.
c) Push in the new battery, ensuring the polarity is correct (Shown on
battery holder).
d) Refit the battery cover
d) Close the lid.
e) Ensure the unit is turned off after fitting the battery.

ATA Pro
Technical Manual Int. Approved
Document ref: HEL-810-12 December 2017 Page 12 of 27
Copyright © 2017 Analox Ltd. All Rights Reserved.
Commercial in Confidence
5.2 Sensor Replacement
O2sensor
a) Replacement sensor part number: 9100-9212-94.
b) In a clean, dry environment, open the analyser case.
c) Disconnect the O2sensor from the circuit board.
d) Unscrew the O2sensor locking ring on the front face of the analyser.
e) Pull out the O2sensor.
f) Dispose of the old sensor according to local regulations for Lead and
Potassium Hydroxide solution.
g) Remove the new sensor from its pack and check it for leaks, check the
sensor has a rubber o-ring fitted at the base of the thread on the front of
the sensor. Push the sensor through the hole in the lid and screw on the
locking ring.
h) Connect to the circuit board.
i) Close the lid.
He Sensor
a) Replacement sensor part number: 9100-4535
b) In a clean, dry environment, open the analyser case.
c) Disconnect the He sensor from the circuit board.
d) Unscrew the He sensor locking ring on the front face of the analyser.
e) Pull out the He sensor, and dispose of it.
f) Remove the new sensor from its pack, check the sensor has a rubber o-
ring fitted at the base of the thread on the front of the sensor. Push the
sensor through the hole in the lid and screw on the locking ring.
g) Connect sensor to the circuit board and carry out He coarse calibration.
He coarse calibration
a) Turn the Ax ATA pro on and calibrate the O2 sensor in clean air, as per
the instructions in section 3.2
b) Change the display to show the Helium concentration, and expose the He
sensor to clean air.
c) Adjust the external zero adjust pot to the mid-point.
d) Adjust the internal zero potentiometer until the
display reads 0.0.
e) Expose the sensor to span gas i.e. 100% Helium and allow the reading to
stabilise.
f) Adjust the internal Span potentiometer until the display reads 100, or the
concentration of Helium in the span gas.
g) Close the lid.

ATA Pro
Technical Manual Int. Approved
Document ref: HEL-810-12 December 2017 Page 13 of 27
Copyright © 2017 Analox Ltd. All Rights Reserved.
Commercial in Confidence
5.3 Warranties
The ATA pro is supplied with a 2 year electronics warranty. The He
sensor is supplied with a 1 year warranty, and the O2 sensor is supplied
with a 3 year graded warranty detailed below.
1 year Free replacement
12-18 months 75% credit towards a replacement sensor
18-24 months 50% credit towards a replacement sensor
24-36 months 25% credit towards a replacement sensor
5.4 General Care
Although designed to be water resistant the ATA pro should not be intentionally
immersed in liquid or left outside unprotected.
To clean the ATA pro use a damp soft cloth.
Protect the ATA pro from long periods of direct sunlight and do not subject it to
high or low temperature extremes.
The O2 sensor in the Ax ATA pro is an electrochemical device and contains a
caustic electrolyte. Always check to make sure that it is not leaking and do not
allow it onto any part of your body or clothing. In the event that you do come
into contact with the electrolyte wash the contaminated part with copious
amounts of water (see 5.5 Safety Information).
sor Technology Ltd.
glo Enviromental Protection Ltd.
ANALOX 9100-9212-94
OXYGEN SENSOR
beck Court
Business Park, Stokesley
S9 5PT England
44 ( 0 )1642 711400
WARNING
If after handling the
sensor your fingers or
other parts of your body
feel slippery or stings
wash with a lot of water.
If stinging persists get
medical attention!

ATA Pro
Technical Manual Int. Approved
Document ref: HEL-810-12 December 2017 Page 14 of 27
Copyright © 2017 Analox Ltd. All Rights Reserved.
Commercial in Confidence
5.5 Safety Information
When the life of the battery has expired it should be disposed of safely in
accordance with local regulations.
When the life of the O2sensor has expired or it is leaking or otherwise damaged
it must be disposed of safely in accordance with local regulations.
The O2sensor contains KOH (Potassium Hydroxide) solution which is hazardous
and can have the following effects:
Skin Potassium Hydroxide is corrosive - skin
contact could result in a chemical burn.
Ingestion Can be harmful or FATAL if swallowed.
Eye Contact can result in the permanent loss of sight.
5.6 First Aid Procedures
Skin Wash the affected part with a lot of water
and remove contaminated clothing. If
stinging persists get medical attention.
Ingestion Drink a lot of fresh water. Do not induce
vomiting. Get medical attention.
Eye Wash with a lot of water for at least 15
minutes and get medical help immediately.
5.7 Sensor Handling Information
ATA pro oxygen sensors are normally supplied in sealed packs. Before the pack
is opened check that the sensor has not leaked. The sensors are themselves
sealed and do not under normal circumstances present a health hazard however
if leakage of the Potassium Hydroxide electrolyte has occurred use rubber gloves
and wear chemical splash goggles to handle and clean up. Rinse contaminated
surfaces with water.
This manual suits for next models
1
Table of contents
Other ANALOX Measuring Instrument manuals

ANALOX
ANALOX Ax60+ Multi-Gas User manual

ANALOX
ANALOX O2EII Pro User manual

ANALOX
ANALOX ADM Aspida User manual

ANALOX
ANALOX ACG+ Programming manual

ANALOX
ANALOX Sub Mk III F User manual

ANALOX
ANALOX 1371 MK2 User manual

ANALOX
ANALOX EII CO User manual

ANALOX
ANALOX ACG+ User manual

ANALOX
ANALOX ACG+ User manual

ANALOX
ANALOX Sub Aspida User manual
Popular Measuring Instrument manuals by other brands

Brandson
Brandson 20200612SZ231 user manual

Hanna Instruments
Hanna Instruments HI 93715 instruction manual

Microwave Telemetry
Microwave Telemetry Solar PTT-100 Field manual

Falke
Falke clorofiLOG CFL2060 manual

Sealey
Sealey AK9635D.V3 manual

PCB Piezotronics
PCB Piezotronics 3503A102KG Installation and operating manual