manuals.online logo
Brands
  1. Home
  2. •
  3. Brands
  4. •
  5. Anchor
  6. •
  7. Speakers
  8. •
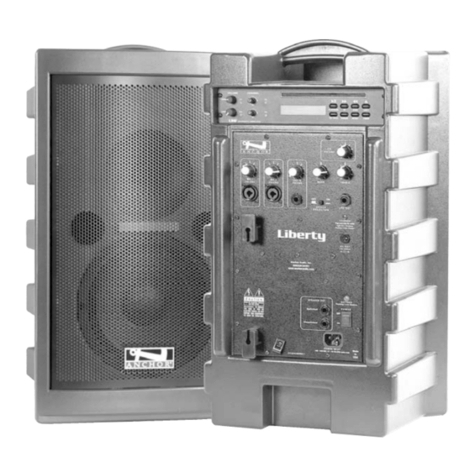
  9. Anchor LIBERTY PLATINUM User manual

Anchor LIBERTY PLATINUM User manual

Other manuals for LIBERTY PLATINUM

4

Other Anchor Speakers manuals

Anchor MEGA-DP1-AIR-B User manual

Anchor

Anchor MEGA-DP1-AIR-B User manual

Anchor Beacon BEA-6000 User manual

Anchor

Anchor Beacon BEA-6000 User manual

Anchor AN-1000X+ User manual

Anchor

Anchor AN-1000X+ User manual

Anchor MiniVox User manual

Anchor

Anchor MiniVox User manual

Anchor AN-135+ User manual

Anchor

Anchor AN-135+ User manual

Anchor AL-WB User manual

Anchor

Anchor AL-WB User manual

Anchor Explorer PB-2500 User manual

Anchor

Anchor Explorer PB-2500 User manual

Anchor MegaVox PRO MEGA-6000 Manual

Anchor

Anchor MegaVox PRO MEGA-6000 Manual

Anchor AN-Mini User manual

Anchor

Anchor AN-Mini User manual

Anchor AN-1000X+ Instruction manual

Anchor

Anchor AN-1000X+ Instruction manual

Anchor MiniVox PB-25 User manual

Anchor

Anchor MiniVox PB-25 User manual

Anchor MegaVox Pro User manual

Anchor

Anchor MegaVox Pro User manual

Anchor MiniVox Lite PB-30U1 User manual

Anchor

Anchor MiniVox Lite PB-30U1 User manual

Anchor ClassACT CA-130U1 User manual

Anchor

Anchor ClassACT CA-130U1 User manual

Anchor AN-1000X User manual

Anchor

Anchor AN-1000X User manual

Anchor AN-Mini User manual

Anchor

Anchor AN-Mini User manual

Anchor AN-130 User manual

Anchor

Anchor AN-130 User manual

Anchor Beacon BEA-6000 User manual

Anchor

Anchor Beacon BEA-6000 User manual

Anchor AN-130 User manual

Anchor

Anchor AN-130 User manual

Anchor BEACON BEA-6000 User manual

Anchor

Anchor BEACON BEA-6000 User manual

Anchor MegaVox PRO MEGA-6000 User manual

Anchor

Anchor MegaVox PRO MEGA-6000 User manual

Anchor PB-30 User manual

Anchor

Anchor PB-30 User manual

Anchor Beacon BEA-6000 User manual

Anchor

Anchor Beacon BEA-6000 User manual

Anchor MegaVox PRO MEGA-6000 User manual

Anchor

Anchor MegaVox PRO MEGA-6000 User manual

Popular Speakers manuals by other brands

Electro-Voice LR4S engineering data

Electro-Voice

Electro-Voice LR4S engineering data

Definitive Technology Sound Cylinder user guide

Definitive Technology

Definitive Technology Sound Cylinder user guide

AudioSource LS545 user manual

AudioSource

AudioSource LS545 user manual

Paso C402-T Instructions for use

Paso

Paso C402-T Instructions for use

Altec Lansing 416-8C LF SPEAKER manual

Altec Lansing

Altec Lansing 416-8C LF SPEAKER manual

Kenwood KFC-1072 Servise manual

Kenwood

Kenwood KFC-1072 Servise manual

Peavey ProSys 112 user guide

Peavey

Peavey ProSys 112 user guide

JBL Control Contractor 60 Series installation instructions

JBL

JBL Control Contractor 60 Series installation instructions

Aura STORM-8 owner's manual

Aura

Aura STORM-8 owner's manual

Oontz ANGLE 3 PLUS quick start guide

Oontz

Oontz ANGLE 3 PLUS quick start guide

Electro-Voice LR4A engineering data

Electro-Voice

Electro-Voice LR4A engineering data

Rave RK-650-ICA-B owner's manual

Rave

Rave RK-650-ICA-B owner's manual

Flux Reference Series installation manual

Flux

Flux Reference Series installation manual

Lanzar AQAWBS64BK installation manual

Lanzar

Lanzar AQAWBS64BK installation manual

DAPAudio DCS-6230 manual

DAPAudio

DAPAudio DCS-6230 manual

Aluratek ABS03F quick start guide

Aluratek

Aluratek ABS03F quick start guide

Kenwood KES-5A instruction manual

Kenwood

Kenwood KES-5A instruction manual

Sonance ORIGINAL SERIES instruction manual

Sonance

Sonance ORIGINAL SERIES instruction manual

manuals.online logo
manuals.online logoBrands
  • About & Mission
  • Contact us
  • Privacy Policy
  • Terms and Conditions

Copyright 2025 Manuals.Online. All Rights Reserved.

1. Choose any available wireless channel from 1 thru 16
2. Set the Wireless Channel Selection Knob to the channel you choose in step 1
If you have two wireless receivers repeat above for the second receiver. Remember, each
receiver/transmitter pair must be set to different channels to avoid interference.
OPERATING THE WIRELESS MICROPHONE/TRANSMITTER
1. Unscrew battery cover on bottom of
microphone
2. Set the CHANNEL SELECTOR dial to match
the channel setting of your receiver
3. Replace battery cover and tighten firmly
1. The channel selection dial is located on
the side of the transmitter
2. Set the CHANNEL selection dial to match
the channel setting of the receiver
The wireless RX indicators will light
(only one indicator will light at a time)
when the wireless
signal is being transmitted and received
ANCHOR AUDIO WIRELESS
CHANNEL SELECTION -
HANDHELD TRANSMITTER
CHANNEL SELECTION -
BODY-PACK TRANSMITTER
CHANNEL SELECTION - BUILT-IN RECEIVER
WIRELESS 2
VOLUME CONTROL
WIRELESS 1 CHANNEL
SELECTION
WIRELESS 1 RX
INDICATOR LIGHTS
WIRELESS 2 RX
INDICATOR LIGHTS
WIRELESS 1
VOLUME CONTROL
WIRELESS 2 CHANNEL
SELECTION
CORRECT SYSTEM PLACEMENT WRONG SYSTEM PLACEMENT
SOUND SYSTEM PLACEMENT
(having the micrphone too close to front of unit may cause feedback)
AC OPERATION & BATTERY CHARGING/INDICATORS
Liberty Sound Systems includes an automatic charging system designed to properly
charge and maintain the systems built-in batteries. To charge batteries plug the system
into an AC outlet and operate as normal while built-in batteries are charging. The
CHARGE STATUS LED will light when charging. Bright red indicates charge process has
begun. Amber indicates the charge process is almost complete, and green indicates
full battery. It takes approximately 7 hours to charge the completely drained Liberty
batteries.
SYSTEM STORAGE & BATTERIES
Fully charge batteries before first use and storage. For extended periods of storage
either leave system plugged into an AC outlet or charge the system at least once each
month for a minimum of 24 hours.
BUILT-IN BATTERY MAINTENANCE
To preserve battery life the built-in batteries MUST be FULLY charged before the first use.
Regardless of length of operation, it is recommended that batteries be fully charged as
soon as possible after each use.
MADE IN THE USA
SIX YEAR WARRANTY
NEED MORE HELP? Liberty Sound System Setup & Operation Videos!
Visit Our Website: www.anchoraudio.com Anchor Audio, Inc. • (800) 262-4671 • www.anchoraudio.com
You can view a demonstration video complete with a trouble shooting section at
www.anchoraudio.com.
Please check your new unit carefully for any damage which may have occurred during
shipment.
LIBERTY PLATINUM SOUND SYSTEM
The Liberty sound system comes with a six year warranty, the CD and MP3 players
come with a two year warranty, and and all Anchor Audio batteries and
wireless come with a two year warranty.
UNPOWERED COMPANION SPEAKER
One powered Liberty sound system and one unpowered Liberty companion speaker.
Using a speaker cable
(SC-50NL)
connect the SPEAKER OUTPUT jack on the powered
system to the IN jack on the unpowered speaker.
POWERED SOUND SYSTEMS
Two or more powered Liberty Sound Systems. Using a speaker cable
(EX-50PPS)
connect
the LINE OUT jack on the first powered Liberty to the LINE IN jack on the second
powered Liberty. Set second Liberty volume to maximum so full volume control will be
at the first or primary sound system.
CONNECTING MULTIPLE SOUND SYSTEMS
NOTE: AC power is not required for an unpowered companion speaker.
HAVING TROUBLE WITH YOUR SOUND SYSTEM?
CONDITION POSSIBLE SOLUTION
No Sound
(power LED off)
• turn POWER switch ON
• charge battery or plug in AC cord
• safely shut down if unit overheats, turn volume lower &
turn speaker ON
No Sound
(power LED on)
• check for output from source
• make sure all cables are completely plugged in
• turn up volume control of input used
• remove plug from speaker output if not using external
speaker output
Shortened Battery Life • charge battery fully; if battery life continues to deteriorate,
contact Anchor Audio customer service: 800.262.4671
HAVING TROUBLE WITH YOUR WIRELESS SYSTEM? (Wireless Models Only)
CONDITION POSSIBLE SOLUTION
No Sound
(RX Indicator: ON)
• turn up WIRELESS volume control
• make sure mic is plugged into body pack transmitter
No Sound
(RX Indicator: OFF)
• push mic power button
• turn Liberty POWER switch on
• make sure transmitter power switch is on
• set receiver and transmitter to same channel
• replace battery in transmitter
Excessive Hum or Noise • use shielded cables
• use balanced microphone
Distorted Sound • lower system volume control
• lower input volume control
100-0227-000