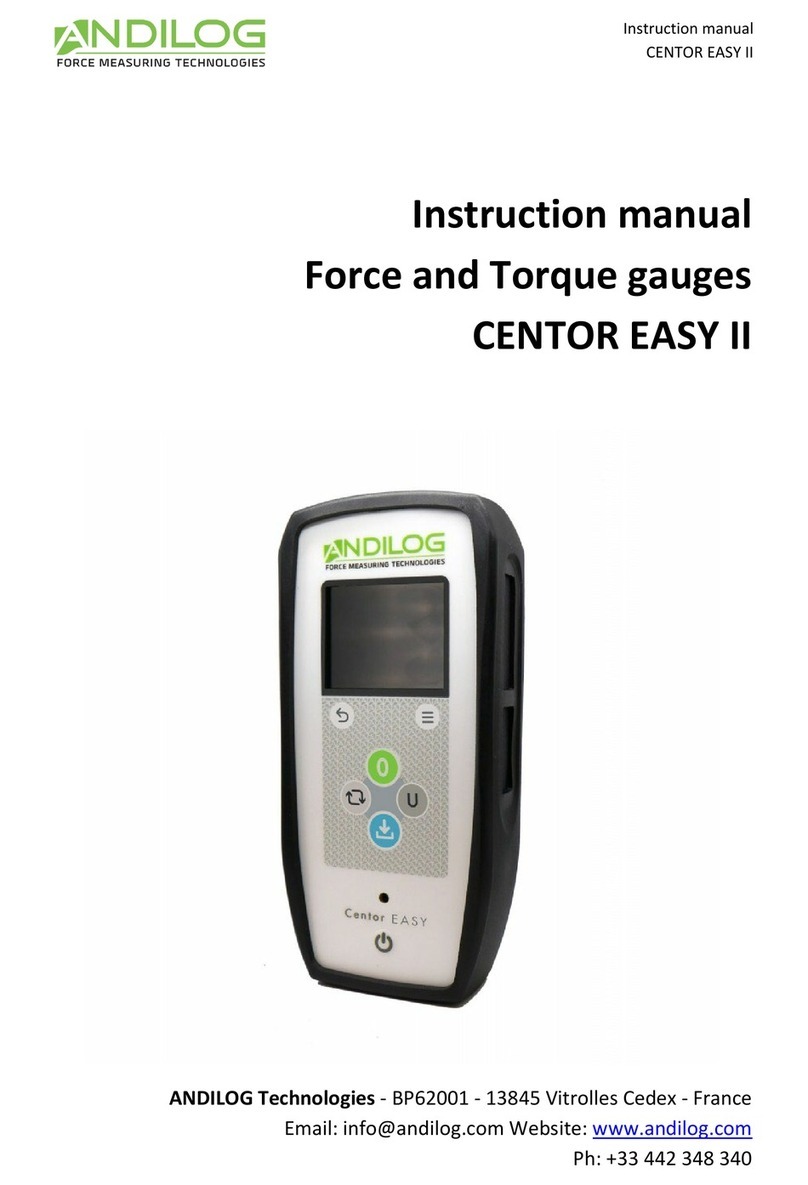
ANDILOG CENTORMETER EASY User manual

Operating Manual - 1.0
CENTORMETER EASY
Operating Manual
CENTORMETER EASY
V1.0
ANDILOG Technologies - BP62001 - 13845 Vitrolles Cedex 9 - France
Ph: +33(0)820.888.202 –Fax: +33(0)820.888.902

Operating manual –V1.0
CENTORMETER EASY
- 1 -
I. Introduction ...............................................................................................................................2
1. Presentation ..........................................................................................................................2
2. Definition...............................................................................................................................2
II. Handling.................................................................................................................................2
1. Unpacking..............................................................................................................................2
2. Recommendation before first use ........................................................................................3
3. Product presentation ............................................................................................................4
4. Starting your torque analyzer CENTORMETER EASY.............................................................6
5. Display mode .........................................................................................................................7
6. Reset function .......................................................................................................................8
7. Measure unit .........................................................................................................................8
8. Peak values ............................................................................................................................8
9. Backlight ................................................................................................................................8
10. Perform a measurement .......................................................................................................8
III. Advanced Features..............................................................................................................10
1. Setting screen:.....................................................................................................................10
2. Display .................................................................................................................................11
3. System setting .....................................................................................................................12
4. Using the RS232 Output ......................................................................................................12
IV. Associated products ............................................................................................................13
1. Acquisition software............................................................................................................13
2. Interface Cables...................................................................................................................13
V. APPENDICES.........................................................................................................................14
1. Keyboard chart ....................................................................................................................14
2. Actions:................................................................................................................................14
3. Error messages ....................................................................................................................15
4. SubD15 connector ...............................................................................................................15
Revision
Date
Description
Rev. 1.0
04.2015
Creation

Operating manual –V1.0
CENTORMETER EASY
- 2 -
I. Introduction
1. Presentation
Thank you for choosing the CENTORMETER EASY Torque analyzer manufactured by Andilog
Technologies.
This torque analyzer is the result of 25 years experience in force and torque measurements with
new electronic technologies offering a higher-performance and more reliable instrument.
2. Definition
To help you during the reading of this Operating Manual, please find below some definitions:
INTERNAL CHANEL: Also known and called as Channel V1 or Internal sensor. Referred to the
sensor which is connected to the board. This sensor cannot be disconnected from the unit. The
sensor may however be located inside the housing or outside therefore and connected by a wire
at the bottom of the gauge. The sensor can be measuring; force, torque linear or angular
displacement.
CALIBRATION: The CENTORMETER units are calibrated by Andilog and always delivered with a
certificate of calibration according to COFRAC standard. It is generally recommended to re-
calibrate your equipment once a year unless different internal procedure of you company
applied. Com-Ten Industries guarantee a full check up of your equipment, with software update
and also the adjustment of the calibration to ensure perfect accuracy of your force gauge.
II. Handling
CAUTION - Unpacking: Check that it has not been damaged during transportation. If you have
any doubt, please contact us, and our service support will you guide you through simple checks
to ensure that the gauge has not been damaged.
1. Unpacking
The CENTORMETER Easy is supplied with:
Power cord
Certificate of calibration
Operating manual

Operating manual –V1.0
CENTORMETER EASY
- 3 -
2. Recommendation before first use
a.Battery
The battery reaches its maximum capacity after several charges. This is very important! A new
gauge has a battery that does not have its full capacity at the first power on. The gauge will shut
down automatically if the battery is too low.
The battery life is 8 hours under a normal use. The gauge should be charged after normal use.
You should charge it every 3 weeks, to ensure a maximum life time of the batteries.
It is recommended to use the original power adaptor supplied by ANDILOG Technologies. The
power adaptor has the following specifications: 12V, 1.5A
b. Sensor
In spite of its mechanical protection, sensor overload can damage the
instrument. The instrument stops if the capacity has been exceeded 10 times.
You have to return it to ANDILOG TECHNOLOGIES for checking.
It is important that measured values are under 90% of the sensor capacity.
c.Test bench
The unit can be affixed to a test bench via the four holes on the unit’s base.
d. Conditions
Working Temperature: 0°C to +35°C
Stock Temperature: -20°C to +45°C
Humidity: 5% to 95%
Altitude: 3000m

Operating manual –V1.0
CENTORMETER EASY
- 4 -
3. Product presentation
General view:
Back of the Centormeter
Run down adapteur
(optional accessories
for motorized torque
tools))
Internal senor supply
with matching
square
4 fixing
holes
Display
Power switch
USB/RS232 Output
Power supply
(110V/220V)
Not used
Not used

Operating manual –V1.0
CENTORMETER EASY
- 5 -
Display presentation:
VALUE DISPLAY
BACK LIGHT
SETTING MODE
CANCELS ACTIONS
DISPLAY OF
PEAK VALUES OR
CALCULATIONS
UNIT CHANGE
ON/OFF BUTTON

Operating manual –V1.0
CENTORMETER EASY
- 6 -
4. Starting your torque analyzer CENTORMETER EASY
Press the I/O button, the information screen showing the status of the CENTORMETER force
gauge is displayed for 5 seconds and then the main screen is displayed.
Software version: the line indicates the software version installed on the force gauge.
Current date: displayed according to the format: DD / MM / YYYY.
Battery information:
When the battery is low, a low battery message is displayed on the screen as the gauge is
turned on, before carrying out tests.
If the charger is connected, the message « CHARG » will be displayed.
While displaying low battery indication, CENTORMETER gauge runs internal tests. If during these
tests, problems are detected, the internal information screen is displayed.
An error message indicates that the gauge is not in optimum operating condition for measuring.
Please see the Appendices chapter for the meaning of indications and error messages.
If the error detected makes measurement impossible (defective sensor for example), the display
will hold and it will be impossible to take any further action. Then return the instrument to
ANDILOG TECHNOLOGIES for examination.
If the error detected does not make measurement impossible (low battery for example) you can
switch to the main screen by pressing MAX button.
ANDILOG
CENTORM EASY
V 3.36
DATE:
01/01/2015
BAT :100%
Gauge version
Software version
Battery information

Operating manual –V1.0
CENTORMETER EASY
- 7 -
5. Display mode
NOTE: Described here are manufacturer settings, prepared by ANDILOG TECHNOLOGIES for
delivery.
When turned on, CENTORMETER force gauge displays a small square in the middle of main
screen (line 1). This small square slides from left to right and then the value of the force applied
to the force gauge sensor appears on line 1 in big letters. If no force is applied, CENTORMETER
force gauge displays « 0 ».
Sensor Capacity: the range of the sensor detected can be displayed at any time, even for
additional external sensor.
Measure unit: indicates the unit used for the display. Several units are available. Press the
“UNIT” button to change the measure unit.
Line 1: displays the current reading.
Time Bar graph: a black line is the representation of the time.
Line 2: displays the maximum, minimum, current values and calculations. Could be selected by
pressing “MAX” button.
Status line: Low battery indication: pictogram indicating the battery power status via 4
horizontal lines which respectively symbolize 25%, 50%, 75% and 100% of power. When adaptor
is connected, this pictogram flashes.
3 Nm
+0000
MXI+00.00
VLI
Measure Unit
Sensor Capacity
Line 1
Time Bar graph
Line 2
Status line

Operating manual –V1.0
CENTORMETER EASY
- 8 -
An easy-to-remember small symbol indicates the direction of the force exerted on the sensor (
).
VAL 1: indicates the value displayed on line 1. You can effectively modify the information
displayed on this line. We will see on Chapter 4 part C how to change the displayed value.
NOTE: on lines 1 and 2 you can display the following values:
VLI: current value MXI: maximum value
MNI: minimum value CP: calculation (If calculation is used)
6. Reset function
Press on “ZERO” button to reset the force gauge.
This button allows for tare. The gauge will take into consideration the weight of accessories
(hook or plate) fixed on the sensor’s rod.
Pressing this button resets all memories and peak values.
NOTE: When turned ON the CENTORMETER completes several self-tests to check the sensor’s
health. It is possible to leave tools fixed on the force gauge, but the total weight must not
exceed 20% of the sensor’s maximum capacity.
7. Measure unit
To change the unit of measure, just press “UNIT” button.
When the force gauge has an external sensor attached, it detects the type of sensor connected
and displays the corresponding units.
8. Peak values
The CENTORMETER automatically calculates peak values (maximum and minimum) and
systematically displays them on line 2. Pressing “MAX” button makes max. Value, min. value and
current value successively display (as well as a calculation if it has been set).
To reset those values press the “ZERO” button.
9. Backlight
You can turn on the backlight by pressing “O” button.
When using the force gauge on battery, the backlight automatically turns off after 3 minutes of
operation. The total battery life the CENTORMETER will be reduced when the backlight is turned
on.
When the gauge is used with the charger, the backlight does not switch off.
10. Perform a measurement

Operating manual –V1.0
CENTORMETER EASY
- 9 -
Place your torque tools to control in the square fixture of the Centormter Easy. Press the ZERO
button to reset to 0 the maximum and minimum values. Apply torque on your torque tools.
The Centometer Easy automatically display the maximum values measured on the first line and
will remember it until the ZERO buttons is pressed or the power is turned off.
To make the next test, press ZERO
You can also send the maximum value to a PC pressing the TDX button or from the optional RSIC
Lab software.

Operating manual –V1.0
CENTORMETER EASY
- 10 -
III. Advanced Features
Access to the advanced features configuration mode by pressing the M button. The following
screen appears:
1. Setting screen:
In the menu, the button has the following functions:
A On/Off Turn the gauge on or off
B ZERO Arrow to the left: displaces the cursor to the left
C Units Arrow downward: displaces the cursor to the bottom
D TDX Arrow to the right: displaces the cursor to the right and validates
E MAX Arrow upward: displaces the cursor to top
F M switches to the previous screen saving modifications.
G O Turn on the backlit.
E X Switches to the previous screen cancelling modifications.
To move within the menu, use “- MAX ” and “- UNIT ” buttons
To select the desired function, highlight it and press the “TDX” button.
To switch to display mode, use “M” button.
In the following screens, the operating mode is the same. In any other screen whatever the
position of the cursor:
“X”: switches to the previous screen cancelling the modifications.
“M”: switches to the previous screen saving the modifications.
MENU
CENTORM
SCREEN
SYSTEM
END TDX

Operating manual –V1.0
CENTORMETER EASY
- 11 -
Following are the force gauge functions described one by one:
2. Display
Exit by pressing the “M” button to save your parameters.
From this menu you can entirely set the main screen.
CAUTION: if Auto-off displays NO, we advise you to use the force gauge with the charger to
avoid the measuring process being interrupted because of low battery condition.
Menu
Choice
Description
LINE 1
VLI, MXI, MNI
Set the display of the first line 1 : current value (VLI),
Maximum (MXI), Minimum (MNI)
LINE 2
NO, VLI, MXI, MNI
Set the display of the second line 2 : None (NO), current
value (VLI), Maximum (MXI), Minimum (MNI)
SIGN
NO, TRA, COM
Set if the sign is displayed and if yes the direction of the
positive sign : tensile (TRA) or compression (COM)
DECIMA
0,1, 2, 3, 4
Number of decimals
BARGRA
YES, NO
Display the bar graph or not
GONOGO
NO, PAS, FAI
Display or not the word PASS or FAIL when the limit is
reached
DIRECT
H, B
determines the direction of display, caution: the front
panel buttons are not affected by this parameter
AUTOFF
NO, 5, 10, 15
Determines if force gauge stops if no button is
activated after 5, 10, 15 min.
DISPLAY
LINE1
LINE2
SIGN
DECIMA
BARGR
GONOGO
DIRECT
AUTOFF
MENU TDX
MENU TDX

Operating manual –V1.0
CENTORMETER EASY
- 12 -
3. System setting
This screen displays the general information of your CENTORMETER.
Exit the screen by pressing “M” button to save the settings.
4. Using the RS232 Output
By default, on the Centometer Easy the RS232 output is switched ON. The RS232 cable connects
to the 15pins connector on the back of the unit. Once connected to a computer, the
Centormeter EASY can send data according to two protocols:
Pressing the TDX button, the Centormeter EASY send under ASCII format the maximum
torque value
The computer queries the Centormeter EASY to retrieve the value
List of the available commands
Menu
Choice
Description
Demand
F
Send the raw data
P
Send the maximum
V
Send the minimum
RS232 configuration
Menu
Choice
Bauds
9600
Parity
SANS
Bits stop
NON
Bits
8
Stop
1
SYSTEM
CENTORM
F:3.17/H30
01/01/1999
03:24
>ENGLISH<
SPIP AV10
N99 0001
16/11/1999
MENU TDX

Operating manual –V1.0
CENTORMETER EASY
- 13 -
IV. Associated products
1. Acquisition software
ANDILOG TECHNOLOGIES has developed several programs to save and analyse values.
You want to analyse values on a chart: RSIC software has been developed to this.
You want to capture the values graph and use graphics tools: CALIGRAF software goes further in
tests analysis.
If you wish to connect your gauge to a PC via one of our programs, contact your ANDILOG
TECHNOLOGIES.
2. Interface Cables
Several interface cables can be used with CENTOR force gauge:
External pedal: allows simulation of a keyboard button
Cable for RS232 link: connect your gauge to a computer using the RS232 output through a USB
or RS232 port

Operating manual –V1.0
CENTORMETER EASY
- 14 -
V. APPENDICES
1. Keyboard chart
BUTTON N°
MEASURE Screen
MENU Screen
1 on/ off
Turn the gauge on /
off
Turn the gauge on /
off
2O
Backlight on/ off
Backlight on/ off
3ZERO
Resets values
Left Arrow
4UNIT
Changes units
Down Arrow
5MAX
Displays max and min
values
Up Arrow
6TDX
Sends a value through
RS232
Right Arrow
7X
Inactif
Returns to preceding
screen without saving
8M
Setting mode
Returns to preceding
screen with saving
2. Actions:
While setting screen is displayed:
M + X activates factory setting
While the system screen is displayed:
M + MAX Displays diagnostic screen
While the diagnostic screen is displayed:
M + MAX to return to preceding screen

Operating manual –V1.0
CENTORMETER EASY
- 15 -
3. Error messages
Diagnostic screen:
This screen is displayed in two cases:
After the completion of internal tests, if a minor or major defect has been found.
In System Menu, when M + MAX are pressed.
Minor defects:
Low battery
Expired calibration date
Press MAX button to continue
Major defects:
Damaged sensor
High number of overloads (>5)
Internal error
4. SubD15 connector
Connector detail SubD 15 pins connected to CENTORMETER electronic card
PIN 3 RS232 TXD
4RS232 RXD
12 Input Force pedal
13 GND
Table of contents
Other ANDILOG Measuring Instrument manuals