Andrew Alliance Waters Andrew+ User manual

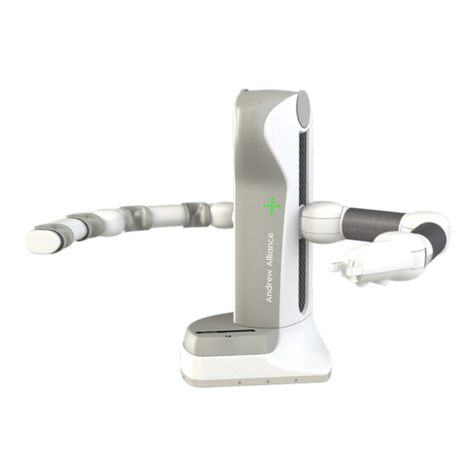
Andrew+
User Manual

Andrew+ User Guide
2 of 28
©2011-2021 All Rights Reserved. Andrew Alliance - A Waters Company.

Andrew+ User Guide
3 of 28
Instruction icons........................................................................................................................................................................... 4
Trademarks .................................................................................................................................................................................. 4
Abbreviations used ...................................................................................................................................................................... 5
Glossary........................................................................................................................................................................................ 5
Delivery package .......................................................................................................................................................................... 6
Introduction........................................................................................................................................................................ 6
1.1. Unit description ....................................................................................................................................................... 6
1.2. Safety precautions and warnings............................................................................................................................ 7
1.3. Symbols.................................................................................................................................................................... 9
Overview of the hardware ................................................................................................................................................. 9
Technical specifications.................................................................................................................................................... 10
Working area of Andrew+ ................................................................................................................................................ 11
Unpacking Andrew+ ......................................................................................................................................................... 12
5.1. Andrew+ is delivered fully assembled and requires no tools for the following steps. ....................................... 12
Connect Andrew+ to OneLab........................................................................................................................................... 13
Andrew+ tools .................................................................................................................................................................. 14
7.1. Single-channel and multi-channel electronic pipettes......................................................................................... 14
7.1.A. How to equip an Andrew Alliance pipette with a pipette adaptor ....................................................................... 15
7.1.B. How to install Andrew Alliance pipettes on the Andrew+ stand .......................................................................... 18
7.2. Labware gripper .................................................................................................................................................... 19
7.3. Liquid level detector .............................................................................................................................................. 19
Dominos ........................................................................................................................................................................... 20
8.1. Waste ..................................................................................................................................................................... 20
How to install the Waste Domino .................................................................................................................................... 21
8.2. Tip box Domino ..................................................................................................................................................... 21
8.2.A. Tip box Domino based on TIS technology............................................................................................................. 21
8.2.B. Tip rack holder Domino for 5mL and 10mL tips ................................................................................................... 21
8.2.C. Installation of the tip rack ...................................................................................................................................... 22
External tool docking station ........................................................................................................................................... 22
Liquid handling operations........................................................................................................................................ 23
10.1. Volumes in consumables ...................................................................................................................................... 23
How to use Andrew+.................................................................................................................................................. 23
Maintenance............................................................................................................................................................... 26
12.1. General information.............................................................................................................................................. 26
12.1.A. Recommended maintenance if Andrew+ is moved............................................................................................ 26
12.2. Compatible solvents with Andrew+ ...................................................................................................................... 27
Unit end of life............................................................................................................................................................ 27
Certification ................................................................................................................................................................ 27
Contacts...................................................................................................................................................................... 28
15.1. How to contact Andrew Alliance support team.................................................................................................... 28
15.2. Andrew Alliance contacts/locations ...................................................................................................................... 28

Andrew+ User Guide
4 of 28
About this manual
This user manual is specially designed to detail the device’s functions and features.
•Please read this manual before using the device to ensure proper use and safety
•Please view this manual as part of the product and keep it somewhere easily
accessible
•Ensure adequate material resistance when using chemical substances
•Descriptions are based on the default setting of the device
•Images and screenshots may differ in appearance from the actual product
•Content may differ from the final product, or from software provided by service
providers or carriers, and is subject to change without prior notice
•Andrew Alliance is not liable for performance issues or incompatibilities caused
by misuse of this device
Instruction icons
DANGER
Situation that
could cause
injury to yourself
and others
DANGER
Radiation with
potential for risk
to health or
death as a
consequence
DANGER
Biohazard with
potential for risk
to health or
death as a
consequence
CAUTION
Situation that
could cause
damage to your
device or other
equipment
NOTE
Notes, usage
tips, or
additional
information
Trademarks
•Andrew Alliance and Andrew Alliance logo are registered trademarks of Andrew
Alliance S.A.
•2011, Andrew Alliance S.A., All rights reserved. Duplication or distribution without
written permission is prohibited. Andrew Alliance S.A. reserves the right to revise
this manual. Issue August 2018.
•Registered trademarks are not marked in all cases with ™ or ® in this manual
Andrew Alliance S.A.
Chemin Grenet 21
1214 Vernier (Genève)
Switzerland

Andrew+ User Guide
5 of 28
Abbreviations used
MCP
Microplate
LH
Liquid handling
DWP
Deepwell plate
BSL
Biosafety level
PIPETTE ADAPTOR
Magnetic interface device adaptor
AA PIPETTE
Andrew Alliance electronic pipette
OLM
Optical localization module
LLD
Liquid level detector
TIS
Tip insertion system
ROW
Rest of the world
Glossary
Tool
Device which can be automatically handled by Andrew+ robot. Some
tools may require an adaptor (e.g. PIPETTE ADAPTOR) as interface to
allow the manipulation
Tool stand
Part of Andrew+ Robot designed to host up to 4 tools. The tool stand is
the right arm of Andrew+ and allows both charging and wireless
communication with the tools
Docking
stations
Optional component used by Andrew+ to host additional tools for
experiments which require more than 4 tools or tools which cannot be
installed on the Andrew+’s tool stand
Pipette+
Smart pipette stand+ with cloud connectivity capable of wirelessly
control ling Andrew Alliance electronic pipettes

Andrew+ User Guide
6 of 28
Delivery package
QUANTITY
PART NUMBER
DESCRIPTION
1
718.8000
Andrew+ robot
1
718.5131
Power supply
1
718.5871
Ethernet cable
1
218.1301
Waste Domino
Introduction
This paragraph describes the small number of steps that should be followed in order to
have your Andrew+ unit operational in less than 5 minutes.
1.1. Unit description
Andrew+ is a laboratory benchtop robot able to execute experiments according to
protocols described by a user through its software: OneLab™.
Andrew+ is capable of handling a variety of laboratory tools which are automatically
used by the system. Examples of such tools are:
•Andrew Alliance electronic pipettes
•Labware gripper
•Liquid level detector
Laboratory conventional consumables required to execute experiments are arranged
into in a magnetic-based modular system called Dominos. Using its camera, Andrew+
can localize and identify the consumables present in its working area. It stands on a
base which has a dual functionality, namely, avoiding involuntary movement of the
robot arm, and hosting the Optical Location Module (OLM) with which it can measure
the length of the pipettes and tips. The right arm of Andrew+, referred to as the ‘tool
stand’ can hold up to a maximum of 4 tools. Their manipulation does not require any
user intervention. Your consumables should be placed in appropriate Dominos, located
within the Andrew+ workspace, so that Andrew+ can identify them. Depending on your
protocol, you can have 2 Dominos for a small experiment and up to 11 Dominos,
compatible with multi-channel pipettes, for a more complex one. Andrew+ is made for
research and development, industrial laboratories and routine work, with applications
limited but not restricted to life sciences, biotechnology, chemistry, clinical research and
diagnostic.

Andrew+ User Guide
7 of 28
1.2. Safety precautions and warnings
For safe and correct use of Andrew+, it is recommended that both operating and service
personnel follow the instructions contained in this guide when installing, using, cleaning,
and maintaining this instrument. If the instructions described in this manual are not
carefully followed, Andrew+ cannot function correctly and the warranty will be null and
void.
DANGER:
Potential injuries
The potential exists for bodily harm if you interfere with the work area of the
instrument while it is running.
•DO NOT put any part of your body into the working area of Andrew+ when it is
moving.
•DO NOT put hands or fingers into this area when Andrew+ is gripping or releasing
a tool.
•DO NOT put hands or fingers inside the vertical movement compartment of
Andrew+.
Consumables can be moved only when Andrew+ is switched off or when its arm is
folded back into the idle position. The hand should be close to the shoulder.
•The laboratory tools compatible with Andrew+ can be removed or placed on the
tool stand only when Andrew+ is in the idle position.
•DO NOT stay close to the arm when it is opening.
•DO NOT place anything inside the Optical Location Module aperture.
•DO NOT try to manually open the aperture of the Optical Location Module.
•DO NOT place your fingers in front of the light or in front of the camera located on
the underside of the hand of Andrew+.

Andrew+ User Guide
8 of 28
Use of biohazardous
and radioactive substances
If Andrew+ is potentially biohazardous due to the use of biohazardous substances, it
should be prominently marked with the following symbol:
At a minimum, a biohazard symbol should be placed near the sampling area and visible
during NORMAL USE.
Any part of the equipment that contains biohazardous waste material which can be
removed from the equipment during NORMAL USE, or a biohazardous drain connection,
should be marked with an appropriate biohazard symbol.
Be aware that Andrew Alliance S.A.:
Will only accept an Andrew+ for repair or return (from loan) r if the instrument has
both been removed from and fully decontaminated from Biological substances,
and that the appropriate Decontamination Form has been correctly completed
and sent to Andrew Alliance Service & Support at support@andrewalliance.com
Entry into your Biosafety level (BSL) 4 by Andrew Alliance personnel, or its
representatives, is not permitted under any circumstances.
Entry into your BSL 3 is permitted and Services provided, with appropriate
confidentiality, when you can justify that removal of the Product from your
location is not feasible. In this instance, you must provide evidence of
decontamination, when asked, for Products that require Service. You must
provide a list of recommended inoculations available against the bio-hazardous
materials used, providing information about hazards in the location, instructions
for safe entry into the location, instructions in the event of a fire, exposure or spill
and other potential emergencies, ensuring the provision of appropriate safety
equipment that is in appropriate working order, and with full guidance for use.
Waivers are not signed before entry or visit to any bio-hazardous area at your location.
Andrew Alliance retains the right to refuse Services until the above requirements are met
to the complete satisfaction of company employees who have been trained to expect
appropriate safety standards.

Andrew+ User Guide
9 of 28
1.3. Symbols
Advice to be aware and to be careful about!
These symbols point out a potential danger for users and/or damage to Andrew+ if
they are not followed. When this symbol is visible, it is mandatory to carefully read
the User Manual before taking any action or using the system.
Overview of the hardware

Andrew+ User Guide
10 of 28
Technical specifications
TECHNICAL SPECIFICATION
DEFINITION
Warranty
1 year
Power requirement
Voltage range 90~264 VAC, AC current 1.85A/115VAC,
1.0A/230VAC, Frequency 47~63Hz, inrush current (max)
120A/230VAC
Electrical configuration
Andrew+ should be connected exclusively with the power
supply GSM160B24-R7B and electrical cable supplied with the
instrument
Interfaces
•Wi-fi (2.4 GHz / 5 GHz)
•Ethernet connection (1Gigabit)
Operating temperature
4°C-37°C
Imaging system
Hand:
•High resolution camera equipped with white LED light
OLM:
•High resolution camera equipped with low power white
LED and class II red laser (wavelength = 650 nm)
Operating humidity
Maximum relative humidity 80% for temperatures up to 37°
C.
Altitude
Up to 2000 m above mean sea level
Safe operating conditions for
the system
•Fluctuation of the supply voltage up to 10% of the rated
voltage
•Transient overvoltage
Degree of protection
IP 20
Required personal
computer characteristics
Tablet or computer equipped with Internet browser and
network capability.
Dimensions
Dimension with both arms folded:
53.5 cm (H) x 43 cm (W) x 45.5 cm (L)
Weight
16 kg (only the robot)
Audio
Integrated audio system (nominal power = 1.5 W)
Additional external power
interfaces
•Connection with docking station (1A @ 24 V)
•4 tool slots embedded in the tool stand (500mA @ 7.5 V)
Working space
Domino self-assembling configuration dynamically set-up on
a conventional bench space, allowing operations on an
arbitrary set of Dominos from 1 up to 11 elements
compatible with multi-channel pipettes - according to
available space and experiment requirements.

Andrew+ User Guide
11 of 28
Working area of Andrew+
The required working area of Andrew+ depends on the complexity of the protocol. In
fact, based on the number of consumables, one or more Dominos may be needed. The
image below shows the maximum working area of Andrew+ when the system is used
with 11 Dominos.
Andrew+ should have enough space to work!
Its work area should be free of any obstacles; dimensions:
•Width: 1078 mm / 42.52 in
•Depth:
oOnly with Dominos: 668 mm / 26.3 in
oWith at least one Device+ on the edge: 711 mm / 29 in
•Height: 606.5 mm / 23.88 in
(Deck with only Dominos) 668
(Deck with Device+)

Andrew+ User Guide
12 of 28
Unpacking Andrew+
5.1. Andrew+ is delivered fully assembled and requires no tools for the
following steps.
Open the cardboard and remove the top foam-based protection.
To extract Andrew+ from its cardboard box, put one of your hands on the base and the
other hand on the top of the body, then lift up Andrew+.
DO NOT grab Andrew+ from its arms, doing so will cause irreversible
damage to the unit.
Install Andrew+ on a level and stable bench. The bench surface must be cleaned with
acetone or ethanol before placing Andrew+.
Please check that the bench is level. This is required in order to
guarantee the correct operation of Andrew+.
Open the left arm of Andrew+, followed by the right arm. Verify that the right arm is
completely open. A magnetic connection should be automatically established between
the two portions of the joints in the shoulder. The same should happen for the elbow.
Connect the power supply to Andrew+ using the power plug present in its base plate.
Andrew+ can be connected wirelessly (via Wi-Fi) but if an Ethernet connection is needed,
connect the Ethernet cable provided by Andrew Alliance to Andrew+.
DO NOT use any other power supply except the one provided by
Andrew Alliance.
Power
plug
Ethernet plug

Andrew+ User Guide
13 of 28
Connect the power supply to one of the wall plugs present in your lab. At this point,
Andrew+ turns on automatically and the booting procedure of the embedded PC is
initiated.
Connect Andrew+ to OneLab
1. Verify that Andrew+ is connected to the power plug
2. Wait for the LED present on Andrew+’s body to turn blue and start blinking
3. Connect your computer, tablet or smartphone to the Wi-Fi name of Andrew+
4. Go to you Wi-Fi settings and select the network with the name corresponding to the
serial number of your Andrew+
5. The LED present on Andrew+ will stop blinking after a successful Wi-Fi connection.
6. Launch a web browser, type http://192.168.2.1 and follow the on-screen steps to
continue
If you don’t have a Wi-Fi compatible device, please refer to our online help:
http://help.andrewalliance.com
For any additional help, feel free to contact our support team (see 15.1. How to contact
Andrew Alliance support team)

Andrew+ User Guide
14 of 28
Andrew+ tools
The capability to manipulate several tools enables different functionalities in Andrew+.
The description of some of those tools is provided in this section
7.1. Single-channel and multi-channel electronic pipettes
Andrew+ is capable of manipulating Andrew Alliance electronic
pipettes; both single-channel and 8-channel models.
The same pipettes can be used in manual mode or using
Pipette+.
To allow Andrew+ to handle those pipettes, it is necessary to
equip each Andrew Alliance electronic pipette with a pipette
adaptor.
In particular, there are two types of pipette adaptor: one model
for single-channel pipettes and one model for 8-channel
pipettes
Pipette adaptor
for single-channel pipette
Pipette adaptor
for 8-channel pipette

Andrew+ User Guide
15 of 28
DO NOT forget to equip each Andrew Alliance electronic pipette with a
PIPETTE ADAPTOR before placing it into the Andrew+ tool stand.
DO NOT put pipettes other than Andrew Alliance branded electronic
pipettes in the tool stand of Andrew+
7.1.A. How to equip an Andrew Alliance pipette with a pipette adaptor
The installation of the pipette adaptor is very simple and is described in this section
Select which pipette adaptor is required according to the type of
pipette:
o718.4001 for single-channel pipette
o718.4101 for 8-channel pipette
Open the pipette adaptor using the two small clamps present on its side (highlighted by
the two arrows in the image below)

Andrew+ User Guide
16 of 28
Separate the two parts of the pipette adaptor.
Position the pipette inside the pipette adaptor.

Andrew+ User Guide
17 of 28
Once the pipette is correctly positioned, close the pipette adaptor.
Use the two clamps to secure the tightness of the pipette inside the pipette adaptor.
Keep pressing the two parts of pipette adaptor with your hands, while closing the
clamps.

Andrew+ User Guide
18 of 28
Verify that the pipette adaptor is correctly installed.
Check the back of the pipette and verify that any marking is visible when the pipette
adaptor is installed
7.1.B. How to install Andrew Alliance pipettes on the Andrew+ stand
To equip Andrew+ with Andrew Alliance pipettes it
is sufficient to place them in any available slot of
the tool stand. It is not necessary to turn on the
pipettes before placing them. The display of the
pipette should be oriented toward the user as
indicated in the picture on the right.
Please be sure that the metallic pins present on the
side of the pipette are in contact with the metallic
pins present in the slot of the tool stand.

Andrew+ User Guide
19 of 28
7.2. Labware gripper
The Labware gripper is a compact Bluetooth
controlled device which allows Andrew+ to
manipulate labware.
It is composed of two main parts: the clamp,
whose geometry and shape can differ according to
the consumable shape, and the body, responsible
for communication with Andrew+ and the control
of the actuator.
The Labware gripper does not require an adaptor
and can be placed in any slot of the tool stand. It
has two metallic pins on the side which allow the
charging of the embedded battery and serial
communication with Andrew+.
7.3. Liquid level detector
The Liquid Level Detector (LLD) is a compact Bluetooth controlled device which allows
Andrew+ to identify the location of liquid levels in consumables placed on its working
deck by using ultrasonic waves. This process requires no contact with actual liquids, thus
there is no risk of contamination and there is no need for conductive tips. It has the
benefit of:
•Removing the need to manually enter the stock solution volumes during
experiment preparation.
•Removing the possible user errors related to the previous point.
•Measures the position of the liquid level during the execution of an experiment
(e.g. evaporation liquids).
The LLD does not require any pipette adaptor to be compatible with Andrew+ and it can
be placed in any slot of the tool stand. It has two metallic pins on the side which allow
the charging of the embedded battery and the serial communication with Andrew+.

Andrew+ User Guide
20 of 28
Dominos
The conventional consumables required to execute experiments are arranged into a
magnetic-based modular system called Dominos. By means of this system, Andrew+ can
identify the type of consumable and their position in the working area. Each Domino can
host one or more consumables according to its design.
Each Domino is equipped with two or more
markers optimized for its optical tri-
dimensional location.
An additional label containing the name of the
Domino and its unique serial number is
present as well. Such information is also stored
in two Datamatrix markers which are scanned
by Andrew+ for traceability purposes.
For additional information about cooled Dominos, please download the Domino catalog
on www.andrewalliance.com or contact Andrew Alliance.
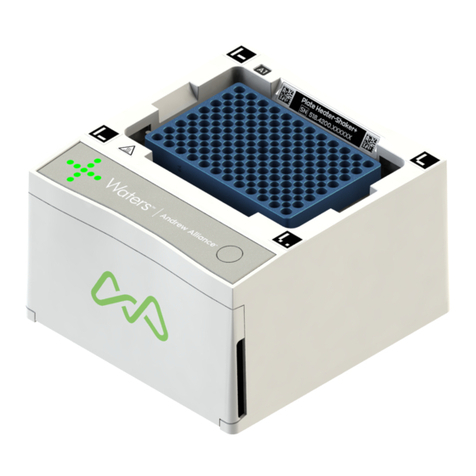
8.1. Waste
The waste Domino is equipped with
two electronic connectors: one side
is connected to the base of Andrew+
and one connects to additional
docking stations in case more than 4
tools are required during execution
of the experiment.
The waste Domino hosts a foldable
silicone waste designed by Andrew
Alliance, and capable of containing
up to 900 pipette tips 1mL.
This manual suits for next models
1
Table of contents
Other Andrew Alliance Laboratory Equipment manuals
Popular Laboratory Equipment manuals by other brands

BIO RAD
BIO RAD QX200 instruction manual

Molecular Devices
Molecular Devices QPix 420 user guide

Ultravation
Ultravation UVS Series owner's guide

VERDER
VERDER Carbolite Gero AX 120 Installation, operation and maintenance instructions

Blue-White industries
Blue-White industries CHEM-FEED C-1500N manual

Milestone
Milestone ultraWAVE 3 Operator's manual