1-5/8" Screw
325-5086-00
Self-threading Screw
325-5010-00
Step 5
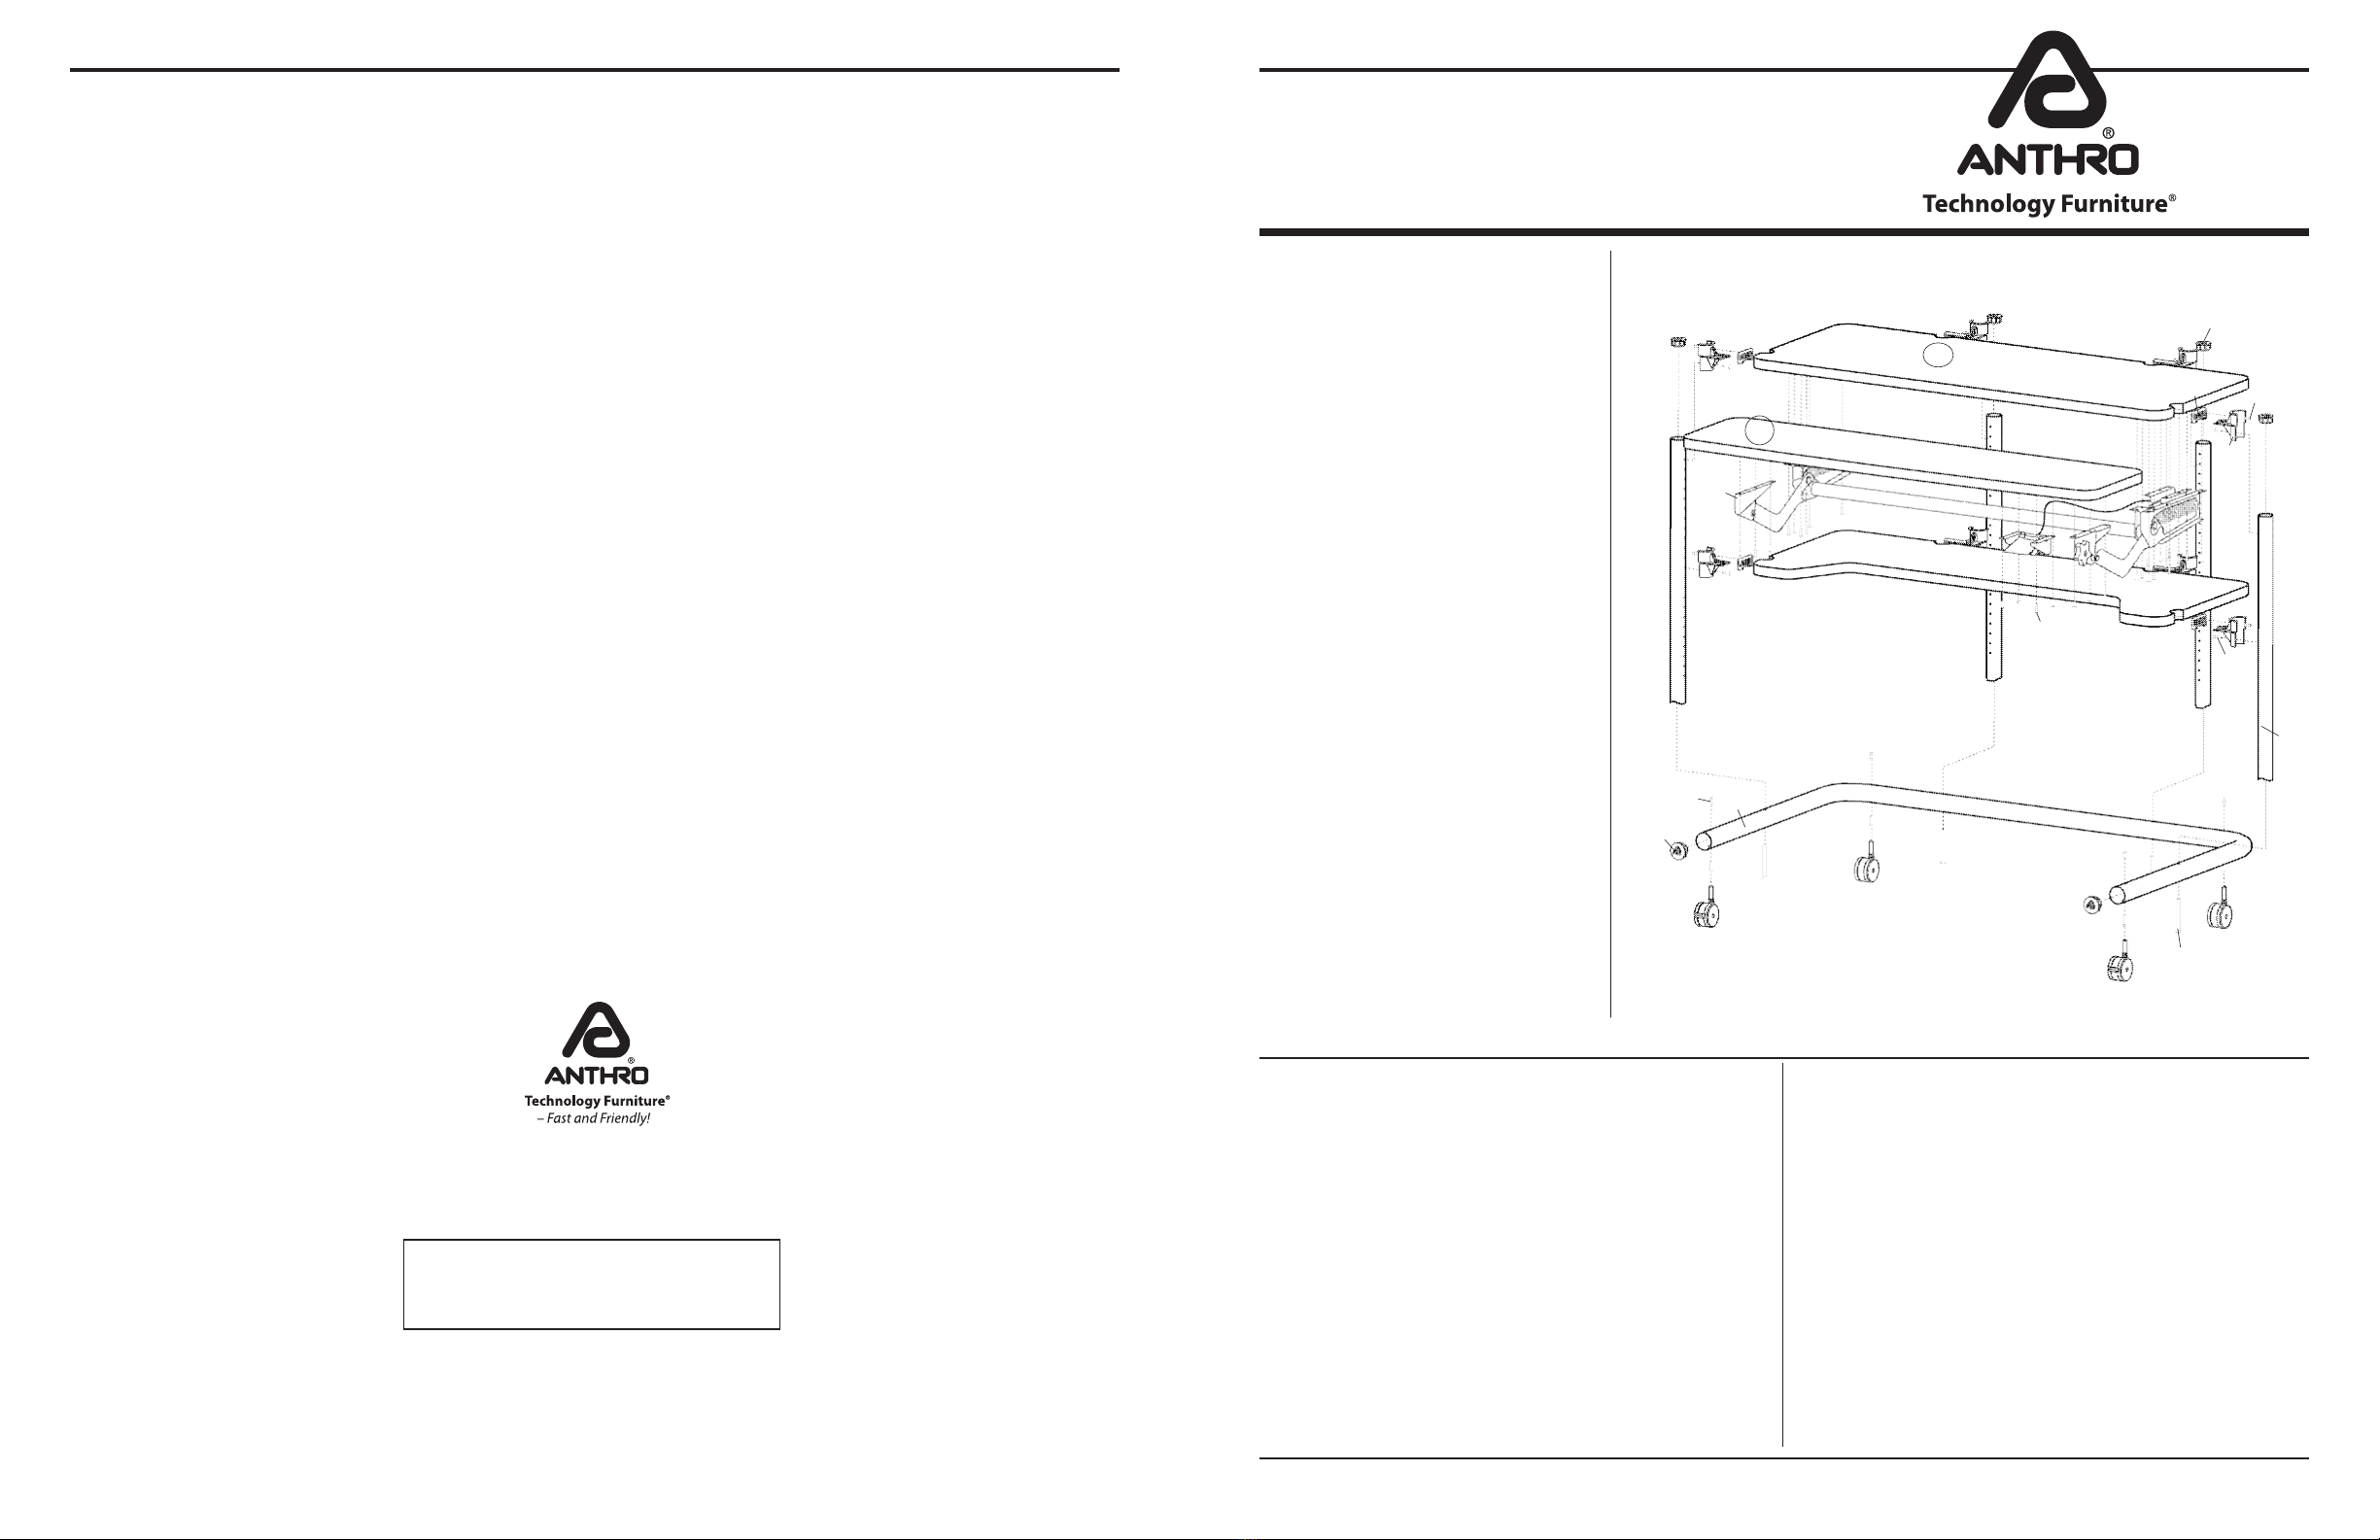
Attach four shelf supports to the Adjusta and recessed
shelves. Begin by rst installing a shelf clamp into the
shelf notch. Be sure the pointed barbs face towards the
outer shelf edge.
Next, slide a shelf support into the recesses of the shelf
clamp and shelf. Push in as far as possible.
Finally, secure with a Clamp Screw.
Step 6
Loosely attach the Adjusta shelf to hole 2 from the top
(non-coped end) of each vertical leg using one
Self-threading Screw per leg.
TIP: Use the holes in the vertical legs as a ruler to ensure
that your Self-threading Screws are installed into the
correct locations.
Step 7 (requires shelf to be placed 12” from oor)
NOTE: This step requires the shelf assembly be positioned
a minimum of 12” or higher o the oor to allow the
Adjusta mechanism to be secured to the Adjusta shelf.
Place the mechanism onto the Adjusta shelf assembly.
Align the mechanism anges with the predrilled holes on
the shelf underside. Secure the mechanism to the shelf
using a total of twelve Wood Screws.
Next, align the six holes of the brake assembly with those
on the shelf.
NOTE: it may be necessary to depress the paddle while
manipulating the brake over the predrilled shelf holes.
Finally secure the brake assembly using a total of six
Wood Screws.
First
Next
Finally
Insert one Self-threading Screw
through each Shelf Support,
but DO NOT FULLY TIGHTEN.
Barbs
Anthro® Corporation Technology Furniture®10450 SW Manhasset Drive Tualatin, Oregon 97062 anthro.com
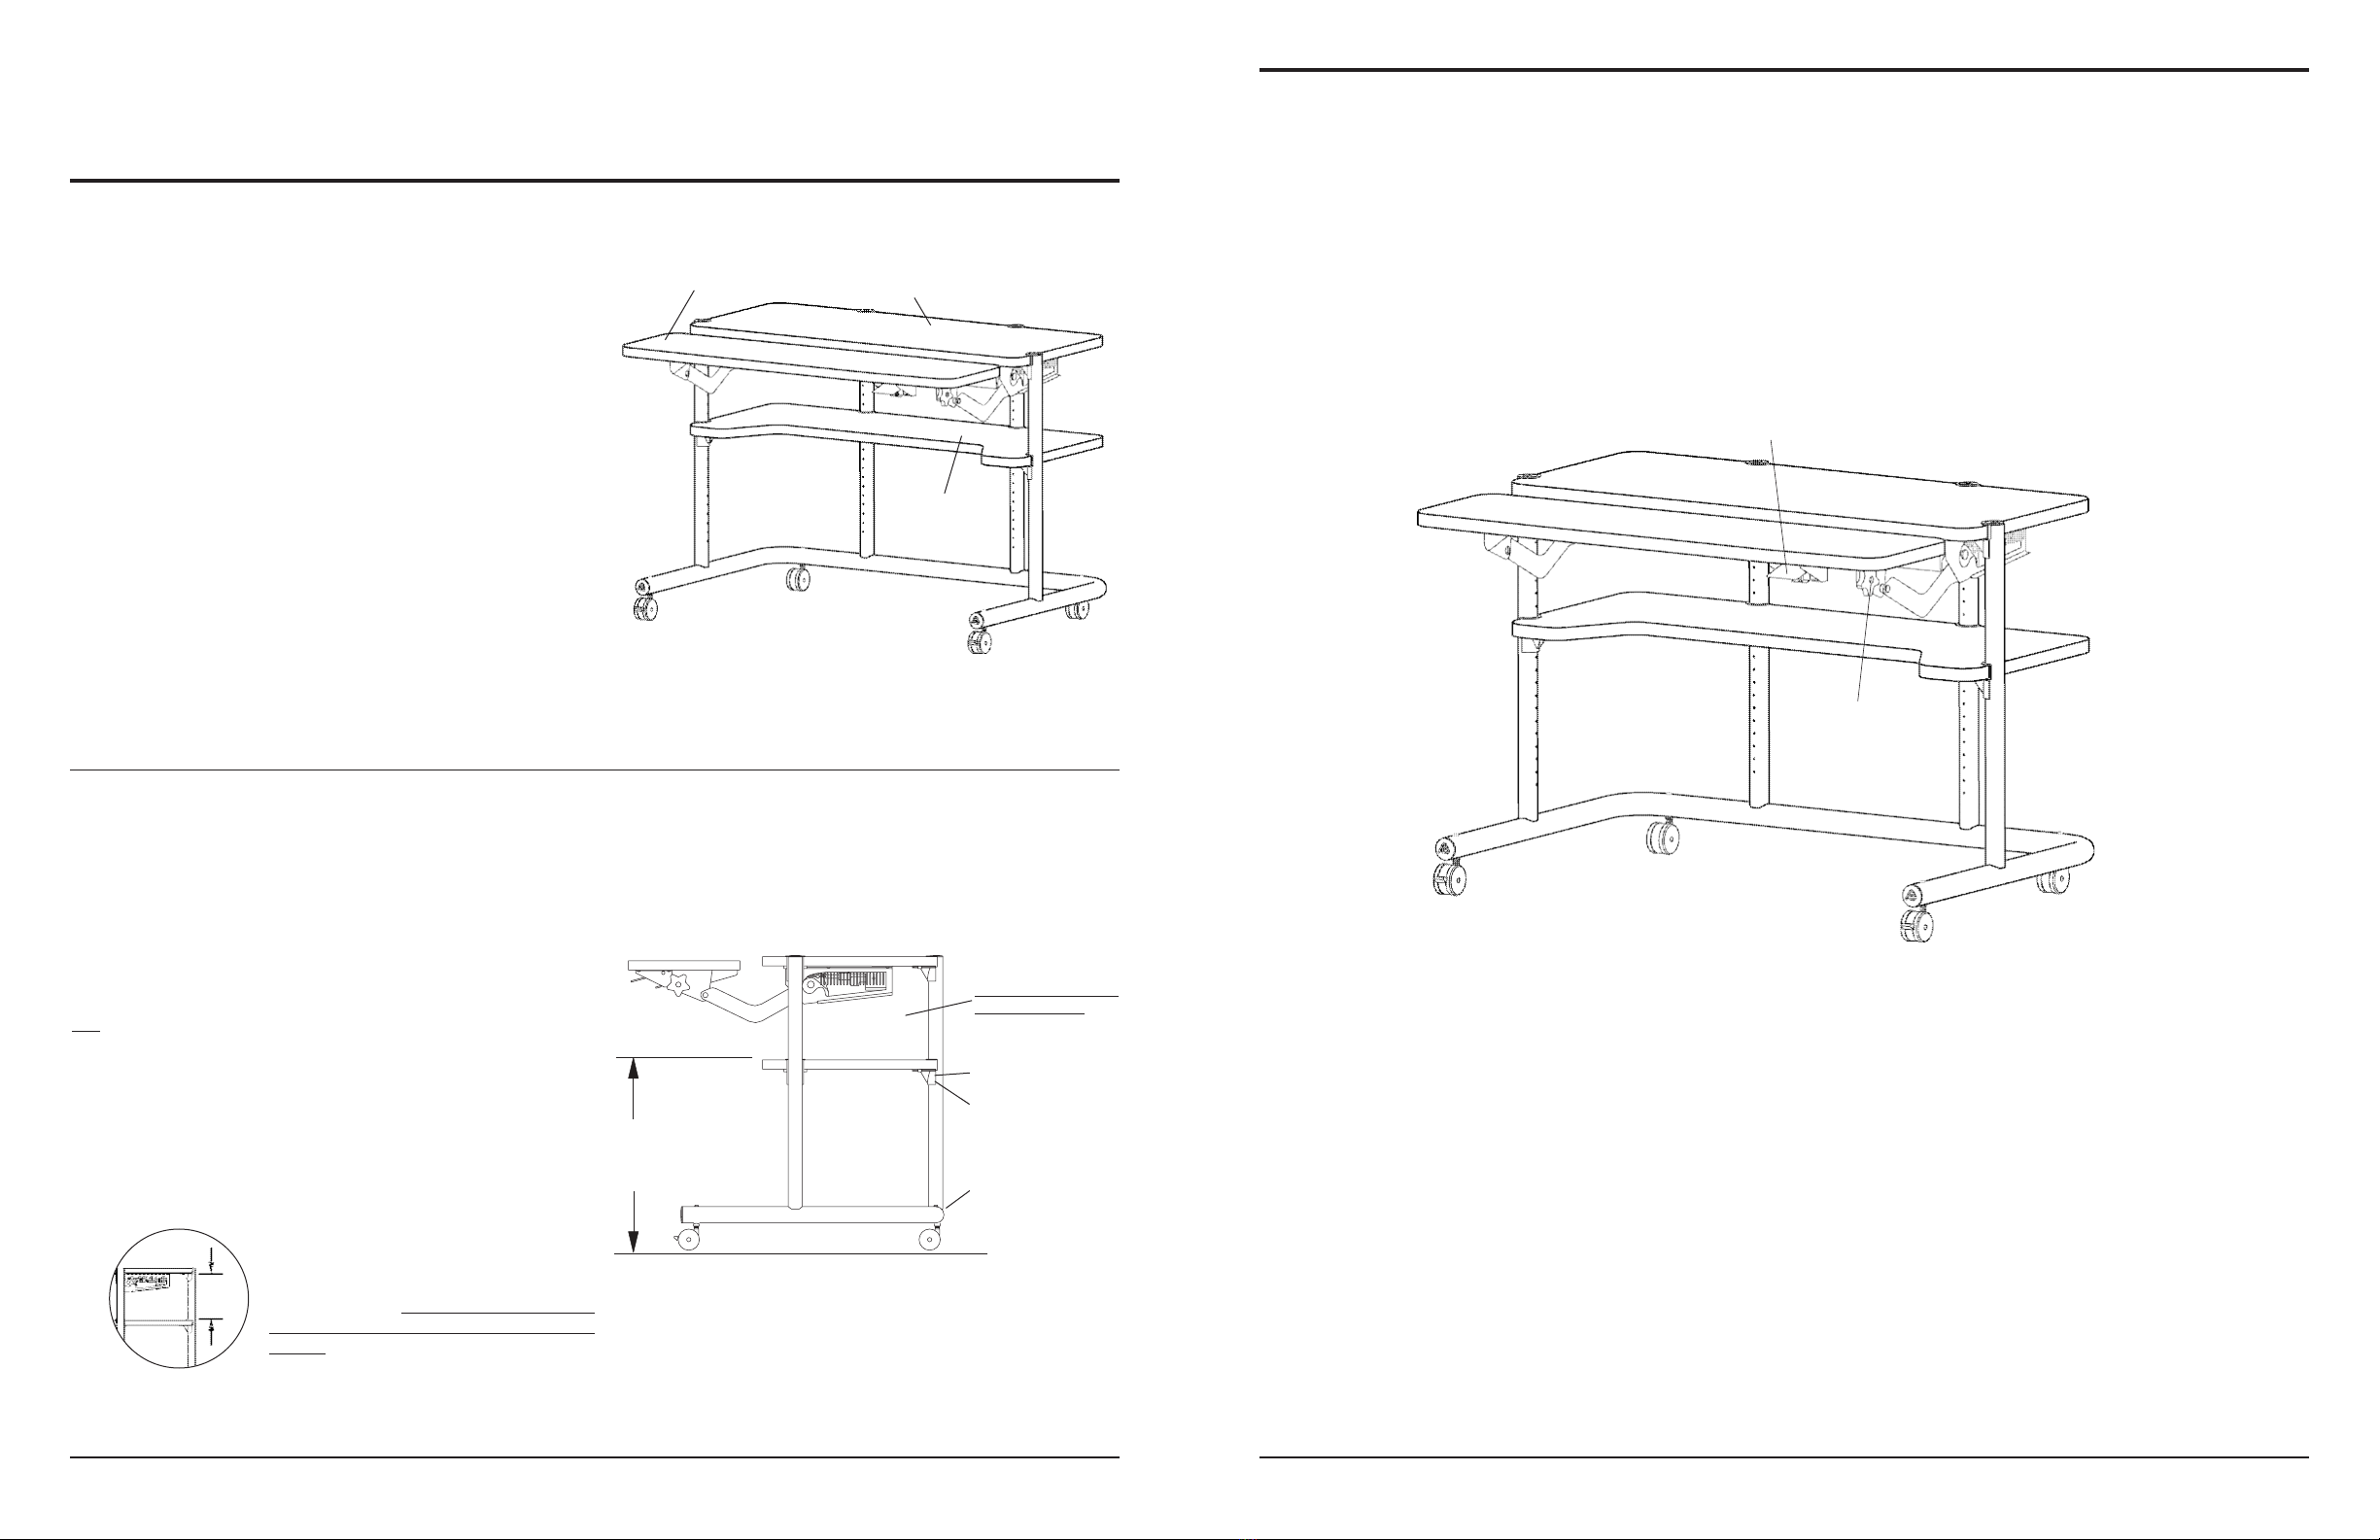
Step 8
Carefully transfer the shelf assembly (from Step 7) onto
the oor, lying on the back vertical leg as shown.
From the coped end, carefully slide the recessed shelf up
into the desired location.
TIP: Use the holes in the vertical legs as a ruler to ensure
that your Self-threading Screws are installed into the
correct locations.
Loosely secure the recessed shelf to the vertical legs
using a total of three Self-threading Screws.
Step 9
Install all four caster inserts into the base tube and secure
with one Caster Insert Screw per insert.
Next, push the casters, (locking ones in front) into the
caster inserts.
Step 10 (uses the 5/32” Hex Key)
Rotate the shelf assembly (from Step 8) upside down as
shown. Place the base tube assembly (from Step 9) onto
the vertical legs.
Attach the base tube to each leg using a total of three
Base Tube Screws.
Tighten all Self-threading and Base Tube Screws.
Questions on your AdjustaCart Assembly? Call 1-800-325-3841
Locking Castors
REMINDER: the Adjusta Mechanism needs a minimum clearance of 10”
between the shelves to function properly. Do not install your recessed
shelf any higher than the hole locations given in Step 2.
Hole 11, 12 or 13
(refer to Step 2)
Bottom
(coped)
end
TIP: Use the 5/32” Hex Key to tighten
the Self-threading Screws located on
the Adjusta Shelf which are obscured
by the mechanism.
Top
(non-coped)
end
Hole 2
Bottom
(coped)
end
(12” high work
surface shown in
gray)
Paddle
Brake
Mechanism Flanges
3/4" Wood Screw
325-5106-00
Self-threading Screw
325-5010-00
1/2” Caster Insert Screw
325-5052-00
3-1/2” Bolt
325-5000-00