CT Cart Assembly Instructions 3
STEP 1
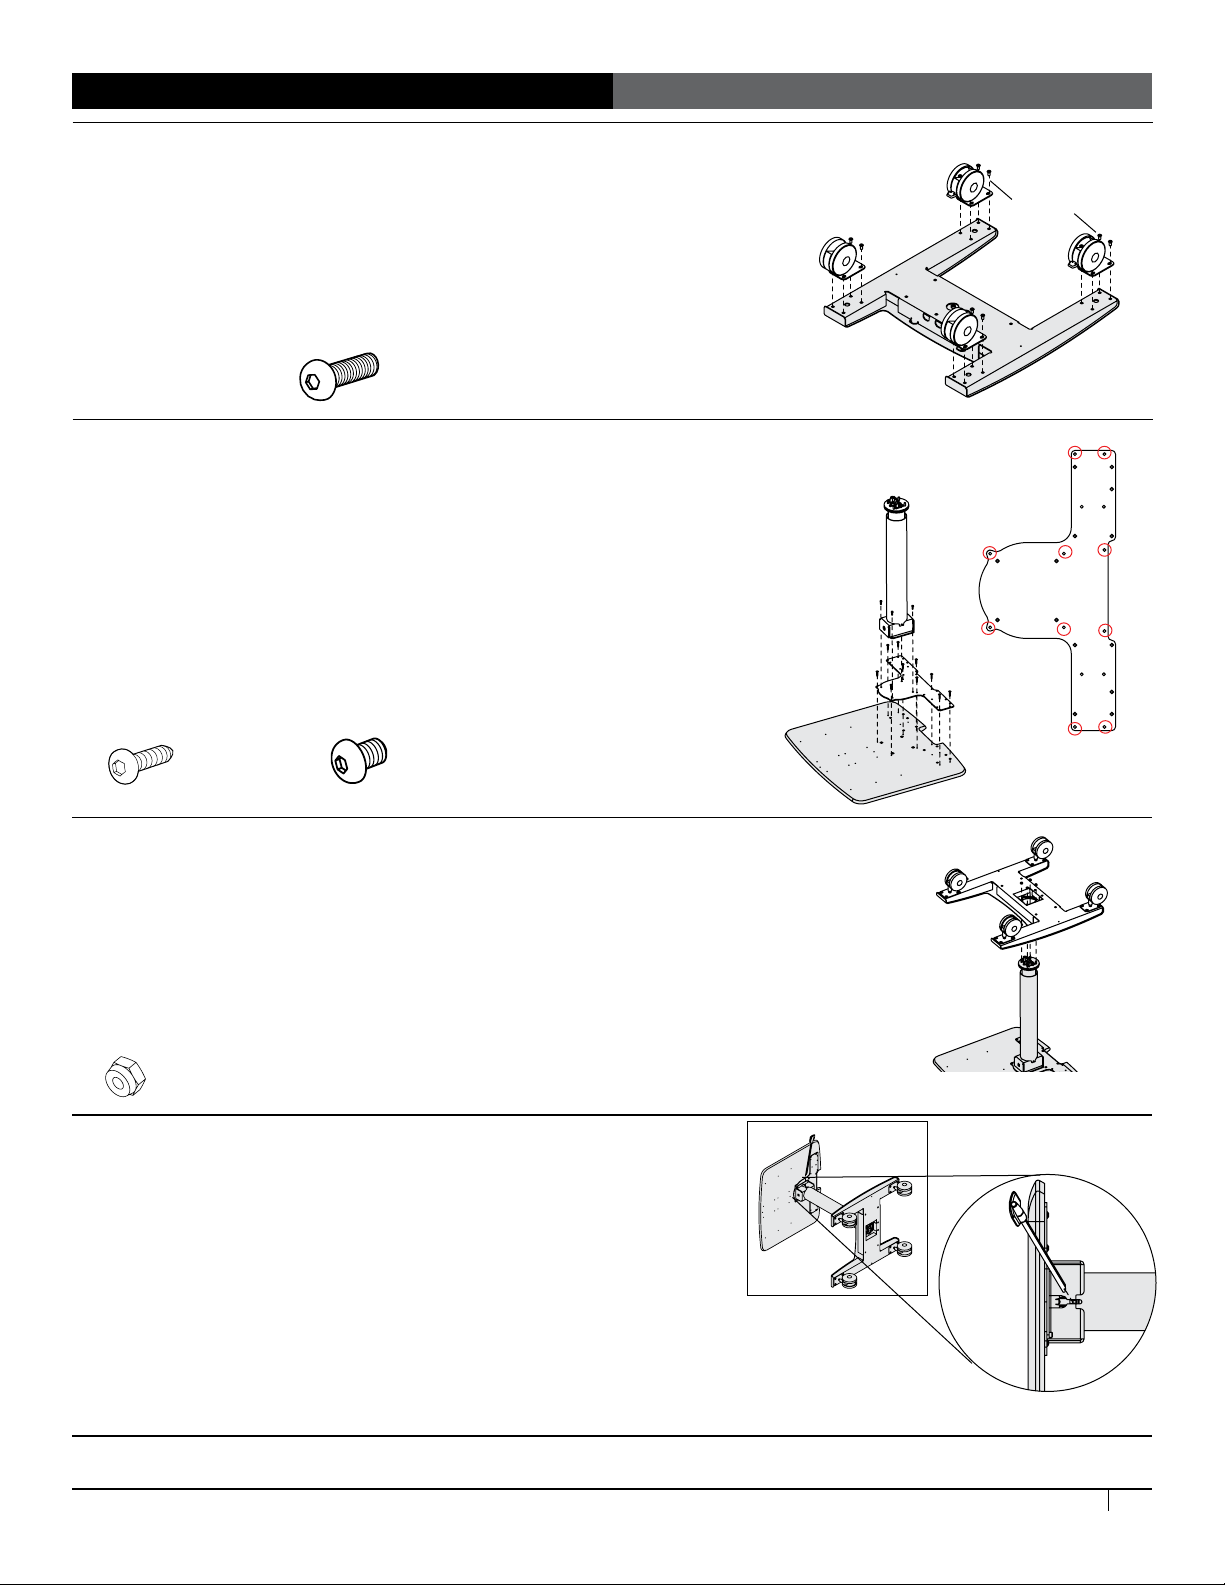
Assemble the base
¡Turn the base upside down on a non-marring surface. Align the casters with the
base so that the casters with the locks are at the front of the cart. Using the
Anthro driver, attach each caster with four 1/2" button-head screws.
¡If your assembly includes a base shelf, install its bracket now.
¡Set aside the base.
STEP 2
Attach the column to the top
¡Set the shelf upside down on a non-marring surface. Align the plate with the
shelf so that the bumps on the plate rest into the holes on the shelf. Using the
Anthro driver, attach the plate to the shelf with ten 1" Button-head Screws
through the holes indicated.
¡Align the column with the plate so that the four holes on the top of the column
line up with four holes on the plate and the lever opening (the label is next to
the opening) on the column faces the side of the cart, not the front or back.
Attach the column to the plate with four 3/8" Button-head Screws.
STEP 3
Attach the base to the cart
¡Align the base with the column so that the threaded stems on the bottom of the
column align with the holes on the base and the long feet of the base are above the
front of the shelf.
¡Attach the base to the column with four nuts (metal side first) using the 3-way
wrench or your 7/16” socket, nut driver, or wrench.
1/2” Button-hd Screw
325-5003-00
CONGRATULATIONS! YOUR CT CART ASSEMBLY IS COMPLETE!
1” Btn-Hd Screw
325-5580-00
3/8" Btn-hd Screw
325-5232-00
Nylock Nuts
325-5259-00
STEP 4
Insert the lever
¡Rotate the cart to its side so that the lever opening at the top
of the column is facing up.
¡Align the lever with the column so that the notch in the lever
faces the base of the cart. When installed the notch goes
over the button at the center of the column that activates
the height-adjustment cylinder. Angle the lever up into the
opening and shove it into place.
¡Lock the casters and rotate the cart right side up.
Front of cart
Locking Casters
Top-down view