Anvil Gruvlok 1007 User manual

www.anvilintl.com
NOVEMBER 2013
For the most current product/pricing information on Anvil products, please visit our website at www.anvilintl.com
1007 & 3007 Roll Groover Manual

Building ConneCtions that last
For over 160 years, Anvil has worked diligently to
build a strong, vibrant tradition of making connections —
pipe to pipe and people to people.
We pride ourselves in providing the finest quality pipe products and
services with integrity and dedication to superior customer service at all levels.
We provide expertise and product solutions for a wide range of applications,
from plumbing and mechanical, HVAC, industrial and fire protection to mining,
and oil and gas. Our comprehensive line of products includes: grooved pipe
couplings, grooved and plain-end fittings, valves, cast and malleable iron fittings,
forged steel fittings, steel pipe nipples and couplings, pipe hangers and supports,
channel and strut fittings, mining and oil field fittings, along with much more.
As an additional benefit to our customers, Anvil offers a complete and
comprehensive Design Services Analysis for mechanical equipment rooms, to
help you determine the most effective and cost-efficient piping solutions for
your pipe system.
At Anvil, we believe that responsive and accessible customer support
is what makes the difference between simply delivering products —
and delivering solutions.

TABLE OF CONTENTS
IMPORTANT SAFETY NOTICE
Carefully read and understand instructions before assembling and operating the Groover(s). Become
thoroughly familiar with the Groover operation, usage and possible hazards specific to the Groover(s).
SECTION I
Safety Instructions ..................................................4
A) General ...............................................................4
B) Operator Safety ..................................................4
C) Groover Set-Up ..................................................4
D) Groover Operation..............................................4
E) Electrical Safety ..................................................4
SECTION II
Groover Description (Models 1007 & 3007) .................. 5
A) Standard Equipment ..........................................5
B) Optional Equipment ...........................................5
C) Grooving Capability ............................................5
D) Grooving Times .................................................5
SECTION III
Groover Set-Up ..................................... 6 - 7
A) Model 1007 ........................................................6
B) Model 3007 .......................................................7
SECTION IV
Pipe Set-Up and Positioning (Models 1007 & 3007) ....... 8 - 9
A) Steel Pipe ...........................................................8
B) CTS Copper System ...........................................9
SECTION V
Setting Groove Diameter (Models 1007 and 3007) ........10
A) Steel Pipe and CTS Copper System ..................10
SECTION VI
Grooving the Pipe or Tube (Models 1007 and 3007) .11 - 12
A) Steel Pipe .........................................................11
B) CTS Copper System .........................................12
SECTION VII
Grooving Roll Change .......................... 13 - 14
1. Roll Removal ....................................................13
A) Guide Roll Mount Plate ...............................13
B) Top (Groove) Roll .......................................13
C) Bottom (Drive) Roll ....................................13
2. Roll Installation ................................................14
A) Bottom (Drive) Roll ....................................14
B) Top (Groove) Roll .......................................14
C) Guide Roll Mount Plate ..............................14
SECTION VIII - Groover Maintenance ..............15
SECTION IX - Replacement Parts ............. 16 - 19
A) 1007 & 3007 Groover Head .............................16
B) 1007 Base Assembly .......................................17
C) 3007 Base Assembly .......................................18
D) 1007 & 3007 Steel & Copper Guide
Roll Assemblies ..............................................19
SECTION X - Groove Specifications .......... 20 - 21
A) IPS Steel Size Pipe ..........................................20
B) CTS Copper System ........................................21
SECTION XI - Troubleshooting ....................... 22
1007/3007 RGM-10.13

4
CAUTION
CAUTION - The Gruvlok®Model 1007 and 3007 Roll Groovers are to be used only for roll grooving of pipe. These operating
instructions provide important information for the safe operation of the Groovers to protect the operator from possible, serious
injury. The Groovers are designed for safe, reliable operation. However, unforeseen circumstances, impossible to predict,
could result in an accident. Following the information in these operating instructions will permit safe operation of the Groover.
A. GENERAL
1. Carefully read and understand these operating instructions
before assembling and operating the Groover.
2. Read and follow the safety labels on the Groover.
3. Understand the function and the location of all power and
grooving controls before using the Groover.
B. OPERATOR SAFETY
1. Do not wear loose clothing, loose sleeve cuffs, loose
fitting gloves, or jewelry that could get caught in moving parts.
2. Wear safety glasses and safety shoes.
3. Tie-up or cover long hair.
4. Wear ear protection if using the Groover in a high noise area
or for prolonged periods of grooving.
5. Do not operate the Groover if you are tired from fatigue or
medication.
6. Do not allow horseplay around the Groover.
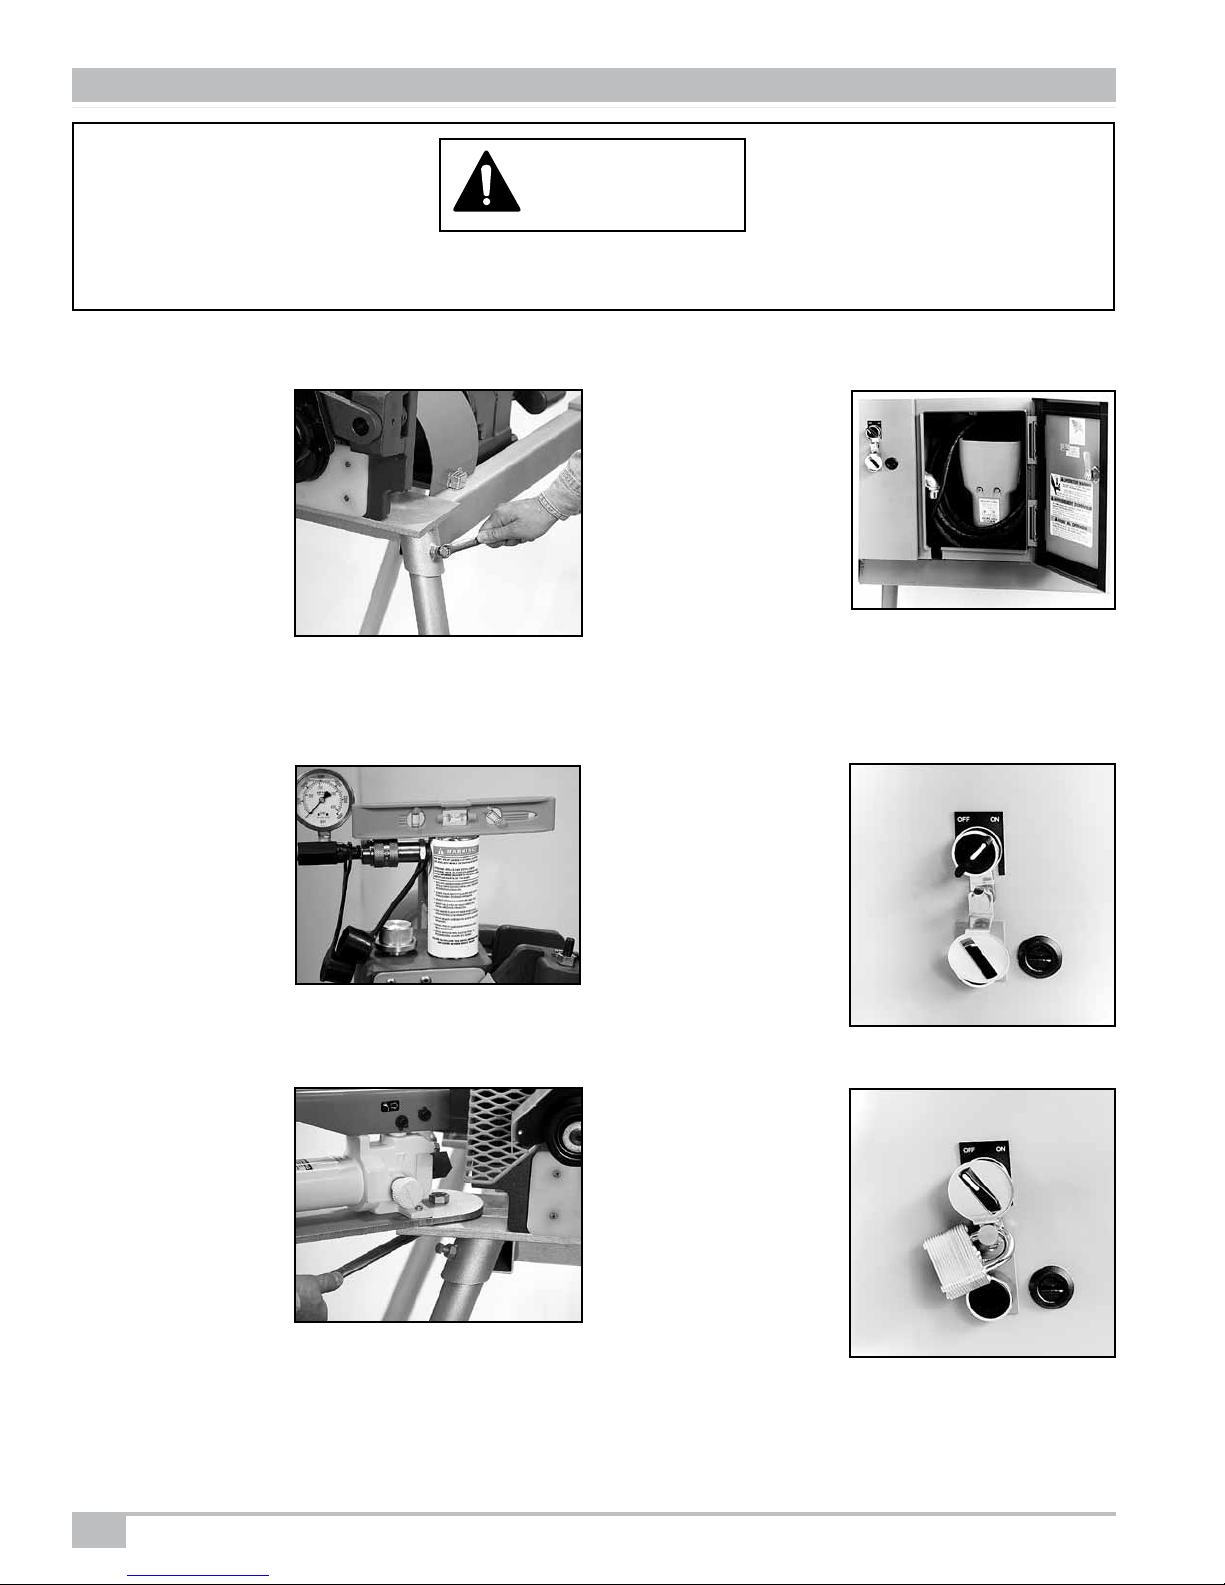
C. GROOVER SET-UP
1. Provide a safe work area. Keep the work area well lighted and
maintain a clear, uncluttered space for operation of the Groover.
2. Do not use the Groover in wet or damp locations. The floor area
around the Groover must be dry and free of slippery materials.
3. Set-up the Groover on firm, level ground. Do not locate the
Groover on sloped or irregular ground conditions.
4. Remove all tools, wrenches, etc., from the Groover and power
drive base before applying power to the Groover.
5. Do not attempt to lift the Groover by yourself.
A hoist is recommended for lifting and moving the Groover.
6. Use the Model 3007 Groover only with a Ridgid*300 Power
Drive with 38 RPM operation.
7. The Model 3007 Groover must be properly mounted on the
Ridgid 300 support arms and the Groover driveshaft firmly
tightened Into the Ridgid 300 chuck jaws.
8. Unplug the Ridgid 300 drive power cord on the Model 3007
Groover or switch the drive power switch to the "Off" position
and lockout the switch with a padlock on the Model 1007
Groover prior to servicing or changing groover parts.
9. Tool and Ridgid 300 Power Drive must be mounted to the
floor for proper operation.
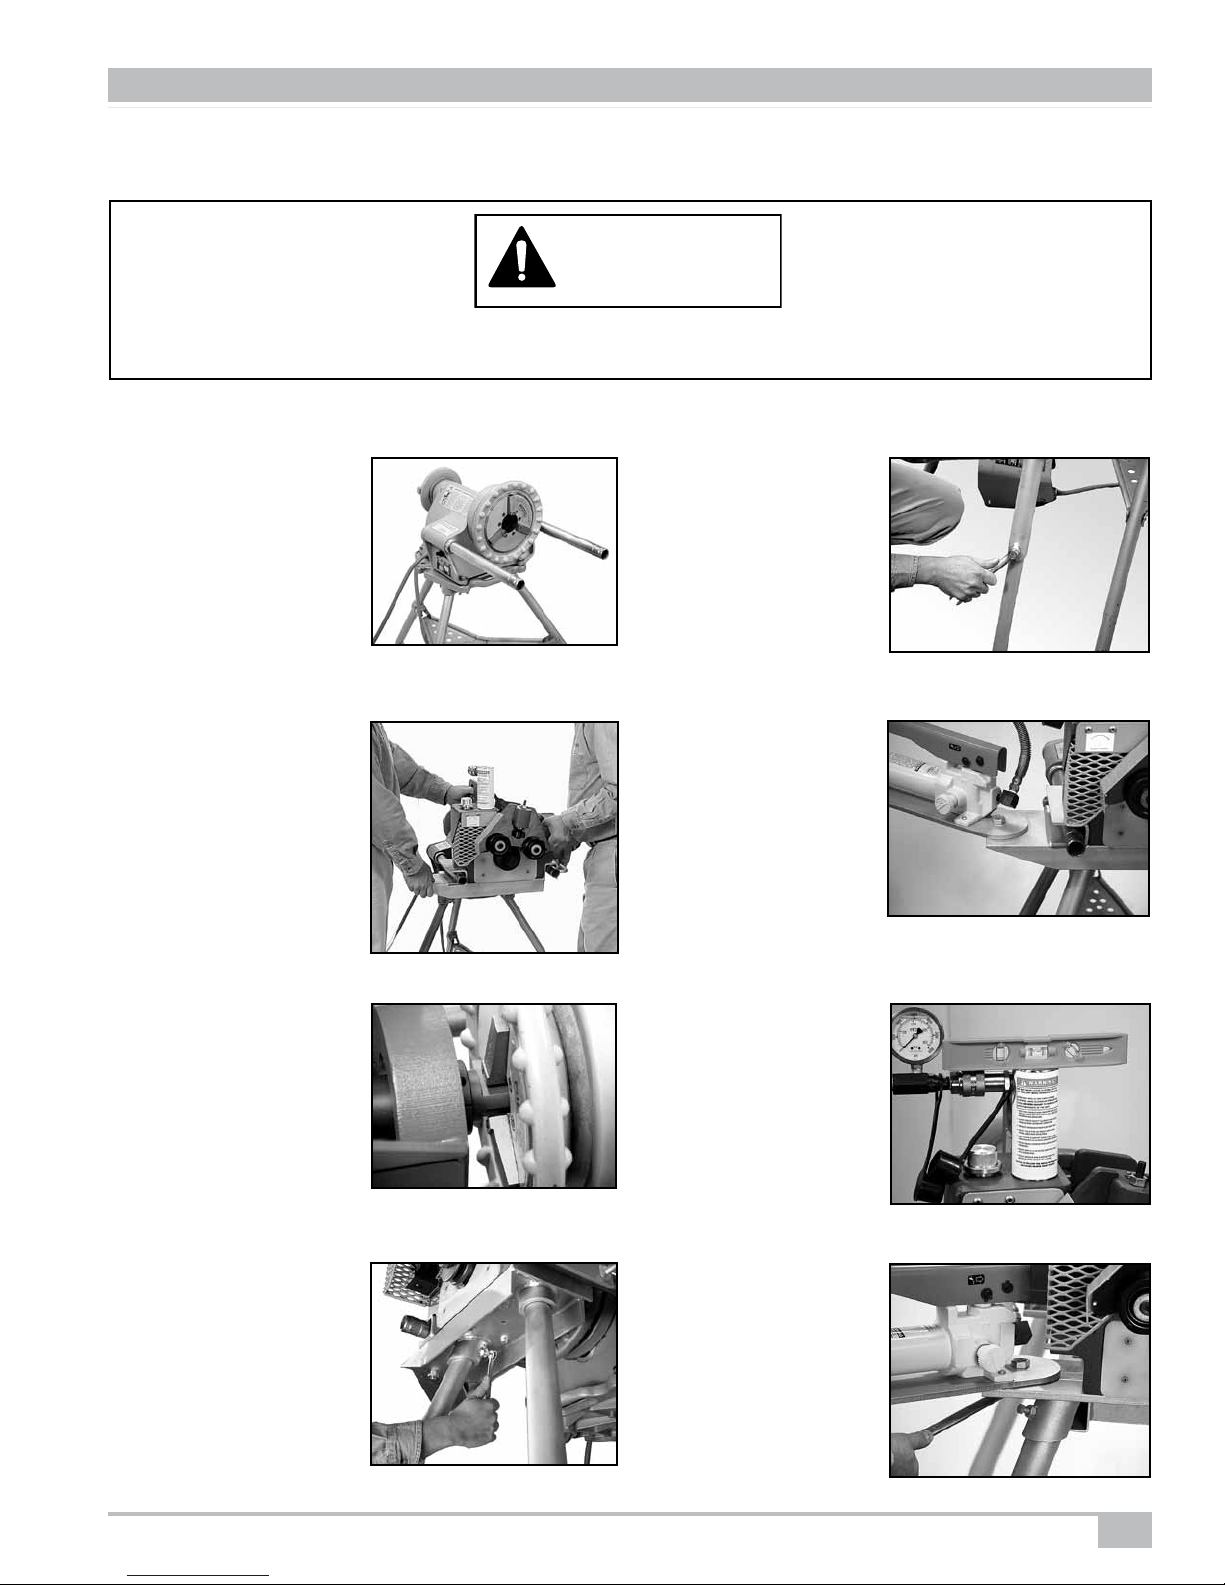
D. GROOVER OPERATION
1. All safety guards must be in place. Never operate the Groover
with the guards removed.
2. Do not operate the Groover without a foot switch. A foot switch
is required for safe operation of the Groover.
3. Operate the Groover only from the pump side of the Groover.
4. Keep hands away from guide and grooving rolls. The Groover is
designed for "hands clear" grooving.
5. Maintain balanced footing keeping the foot switch within
comfortable reach. Do not reach across the Groover or pipe.
Keep hands and clothing away from all moving parts.
6. Do not place excessive force on the hydraulic pump handle.
Follow grooving instructions for safe Groover operation.
7. Provide proper pipe support with a pipe stand fastened to the
floor or ground.
8. Use the Groover only for the size and wall thickness pipe for
which it was designed.
9. Do not operate the Groover if any part of the Groover is
damaged or broken.
10. Do not attempt to groove pipe shorter than 5” in length.
11. Keep all visitors and bystanders at a safe distance from the
Groover, pipe and power cords.
E. ELECTRICAL SAFETY
1. Ground the Ridgid 300 Power Drive (Model 3007) or drive motor
(Model 1007). The power drive must be connected to an
internally grounded electrical system.
2. The Model 1007 Groover must be connected to the proper
power supply that matches the Groover either a 115 volt, 60Hz,
single phase power supply with 30 amp capacity.
3. Use 3-wire extension cords only which have 3-prong grounding
plugs and 3-pole receptacles which mate with the Groover's plug.
4. Extension cord conductor size (i.e. American Wire Gage) must
be large enough to prevent significant voltage drop which could
damage the Groover drive motor or cause loss of power. The
chart below shows the recommended extension cord size.
SECTION I - SAFETY INSTRUCTIONS
Extension Cord Length** required Wire size
25' 12
50' 12
100' 10
**Extension cord length greater than 100 Feet is not recommended.
*“RIDGID” is a registered trade mark of Ridgid Tool of Elyria, Ohio.
1007/3007 RGM-7.09

5
A. 1007 STANDARD EQUIPMENT - Roll Groover complete with groove
and drive rolls for 2" - 12" steel pipe, Steel/CTS Dual Guide Roll
Assembly, one and one-half horsepower electric motor drive with
foot switch. Two stage hydraulic hand pump, mounting base with
footed support legs. Complete set-up and operating instructions; 2" - 6"
rolls on tool, 8" - 12" rolls stored in box, and three depth gauges
covering the range of 2" through 12" pipe are mounted on the tool.
Shipped in closed wood crate that can be used for storage or rental
tool return.
Shipping Weight: 620 lbs.
B. OPTIONAL EQUIPMENT – (See Section IX for part numbers)
Steel Pipe:
• 2"-12"Schedule10,10S;40,40SRolls:Consistingof2"-6"and
8"-12" roll sets.
• 14"-16"SteelGroovingRolls(Model1007only)
CTS Copper System:
• 2"-8"CTSCopperSystemGroovingRolls,2"-4"CTSDepth
Gauge, and 5"-8" CTS Depth Gauge.
Other:
• Optional230volt,60Hz,15amp,singlephaseelectricalpanel
with motor is available for the 1007 Roll Groover.
A. 3007 STANDARD EQUIPMENT – Roll Groover complete with groove
and drive rolls for 2" - 12" steel pipe, Steel/CTS Dual Guide Roll
Assembly, two stage hydraulic hand pump, mounting base with
footed support legs for direct attachment to your Ridgid* 300 Power
Drive. Complete set-up and operating instructions; 2" - 6" rolls on
tool; 8" - 12" rolls stored in box, and three depth gauges covering
the range of 2"-12" pipe are mounted on the tool. Required Ridgid
300 Power Drive not included.
Shipped in closed wood crate that can be used for storage or rental
tool return.
Shipping Weight: 330 lbs.
SECTION II - GROOVER DESCRIPTION
1. All wall thicknesses shown are the maximum wall thicknesses for the indicated pipe material.
2. Minimum wall thickness for each pipe material and size is:
Steel: 2" - 12" Schedule 10
Stainless Steel: 2" - 12" Schedule 10S, 40S
Copper: 2" - 21/2" - Type M 3" - 8" - Type DWV
D. Grooving Times – This chart shows approximate grooving times with the groover set-up for the proper size and groove diameter and the pipe properly
positioned on the groover. The times shown are average times from the start of rotation of the pipe in the grooving rolls to completed groove.
C. GROOVER CAPABILITY
Groover Capability
Pipe Material Pipe Size/Wall Thickness (Schedule)1,2
In. 2 21⁄23 4 5 6 8 10 12 14 16
DN(mm) 50 65 80 100 125 150 200 250 300 350 400
Steel Schedule 10, 40 STD.
Stainless Steel Schedule 10S, 40S
Copper K, L, M & DWV
Model 1007/3007 Steel Pipe Grooving Times (Minutes: Seconds)
Pipe Size (In./DN(mm))/Max Steel Pipe Wall Thickness
2 21⁄23 4 5 6 8 10 12 14 16
50 65 80 100 125 150 200 250 300 350 400
0:20 0:20 0:25 0:30 1:00 1:20 1:35 1:50 2:20 2:40 3:00
*“RIDGID” is a registered trade mark of Ridgid Tool of Elyria, Ohio. 1007/3007 RGM-11.13

6
4. With a flat screwdriver,
open the door to the
electrical storage cabinet.
Remove the power cord
and foot switch from the
cabinet mounted on the
Groover frame. Plug the
power cord into a grounded
electrical outlet that matches
the Groover. Power
requirements: 110 volt, 30
amp or optional 230 volt.
3. Position the pump to the
desired orientation for
ease of operation. Tighten
nut to lock pump in
position or if desired,
back off just slightly to
permit pump to be
oriented by operator to
most comfortable
position during groover
operation (15/16" wrench).
1. Install a support leg
tube into the receiving
socket on the under side
of the groover base.
Push the tube fully into
the recieving socket as-
suring that the angled
cut on the tube bottoms
in the receiving socket.
Tighten the retaining
bolt on the receiving
socket. Repeat for the
other three legs (9/16" wrench).
A. MODEL 1007
SECTION III - GROOVER SET-UP
CAUTION
CAUTION - Removal of the Groover from the shipping box and mounting of the support legs should be accomplished only with the aid
of a hoist or other lifting device. To avoid possible injury DO NOT ATTEMPT TO LIFT THE MODEL 1007 ROLL GROOVER MANUALLY.
2. The Groover should be
leveled for best grooving
results. Assure level
position of the Groover
and provide a firm fixed
base location for the
Groover.
5. Remove the padlocked
lockout clip from the power
switch. Turn the power
switch to the "on" position.
6. Turn the power switch to
the "off" position when
finished grooving or when
moving the groover. Install
the lockout clip to the power
switch and padlock the
lockout clip into position.
(1/4" shank padlock).
1007/3007 RGM-7.09

7
7. The Groover should be
leveled for best grooving
results. Place level on top of
hydraulic ram as shown and
adjust the support legs as
required to level the
Groover and provide a firm
fixed base location for both
the Groover and power drive.
8. Position the pump to the
desired orientation for ease
of operation. Tighten nut to
lock pump in position or if
desired, back off just
slightly to permit pump to
be oriented by operator to
most comfortable position
during groover operation.
(15/16" wrench)
3. Align the flats on the
triangular shaft tailpiece with
the Ridgid 300 chuck jaws
and slide the Groover back
into the chuck jaws. Securely
tighten the chuck jaws. Push
extension arms in flush with
the Groover mounting base
front.
5. Extend the smaller diameter
of the support leg by
loosening the lock bolt on
the support leg and sliding
the smaller diameter tube to
its required length.
Retighten the lock bolt. (9/16"
wrench). The support legs
must be mounted to the
floor for continuous
operation.
4. Install the larger diameter of
the support leg tube into the
receiving socket on the under
side of the groover base. Push
the tube fully into the receiving
socket assuring that the
angled cut on the tube
bottoms in the receiving
socket. Tighten the retaining
bolt on the groover base.
Repeat for the other leg (9/16" wrench).
SECTION III - GROOVER SET-UP
THE GRUVLOK®MODEL 3007 ROLL GROOVER IS DESIGNED FOR
USE WITH A RIDGID* 300 POWER DRIVE.
CAUTION
CAUTION - Removal of the Groover from the shipping box and mounting of the Groover to the Ridgid 300 drive should be
accomplished by 2 persons. To avoid possible injury DO NOT ATTEMPT TO LIFT THE MODEL 3007 ROLL GROOVER BY ONE PERSON.
1. Extend the mounting arms of
the Ridgid 300 power drive,
approximately 12" out from the
body of the drive.
The Ridgid 300 must be
mounted to the floor for
continuous operation.
B. MODEL 3007
2. Grasp the Groover base on
opposite sides, lift the Groover
out of the shipping crate and
place the mounting slots in
the groover base over the
extended mounting arms.
6. Loosely attach pump
assembly to groover base
using the 5/8" nut and bolt
provided, then securely
connect the coupler located
on the end of the hose
assembly to it's mating part
on the hydraulic ram.
*“RIDGID” is a registered trade mark of Ridgid Tool of Elyria, Ohio. 1007/3007 RGM-7.09

8
6. Using the slot on top of the
Roller plate adjustment rod,
lower the guide rolls into
firm contact with the pipe.
Note: Improper tool adjust-
ment will cause pipe flare
and/or the pipe to roll out of
the machine.
5. Make sure the knurled stop
(groove diameter stop) is
not in contact with the top
surface of the groover
housing. If contact is noted,
release hydraulic pressure
by turning the release
valve knob counterclock-
wise allowing the groover
head to raise. Turn the
knurled stop counterclock-
wise sufficiently to allow clearance between the bottom of the
knurled stop and the top of the groover housing when the top
grooving roll is in contact with the pipe.
1. Set both plastic guide rolls
located on the front of the
Groover, into the correct
holes for the size pipe being
grooved (1/4" allen wrench).
A. STEEL PIPE
SECTION IV - PIPE SET-UP AND POSITIONING (MODELS 1007 & 3007)
The Model 1007 and Model 3007 Groovers come with 2" through 6" IPS pipe size grooving rolls installed unless otherwise
requested on your order. To change grooving rolls for other size(s) or for copper tube refer to Section VII for grooving rolls
and guide roll plate changeout.
65% – 75% OF
PIPE LENGTH
Adjustable Height
Pipe Stand
Groover Centerline
Pipe Centerline
0 to 1/4down
SIDE VIEW DIAGRAM
Groover Centerline
TOP VIEW DIAGRAM
Pipe Centerline
0 to
1
/
4
toward user
2. Insert pipe over the bottom
roll (groove roll) positioning
the pipe flush against the
front flange of the bottom
roll. Be certain pipe does
not override this flange.
3. Using the slot on top of the
roller plate adjustment rod,
raise (counterclockwise
rotation) the guide roll
mounting plate sufficiently
to ensure that the top
grooving roll makes contact
with the pipe prior to guide
roll contact.
4. Close the release valve on
the hydraulic pump by turn-
ing the knob clockwise.
Pump the hydraulic hand
pump to lower the top
grooving roll into light firm
contact ( approx. 100 psi)
with the pipe.
7. Use one (1) roller pipe stand to support the pipe. Adjust the out-
board pipe stand to assure proper contact between the pipe and
guide rolls. Pipe stand should be 65% - 75% of the pipe length
away from Groover. Looking at the front of the Groover, the pipe
stand should be positioned to angle the pipe approximately 0° to 1/4°
downward, away from the front of the groover and 1/4° to the left
side at the Groover. See figures below.
1007/3007 RGM-7.09

9
SECTION IV - PIPE SET-UP AND POSITIONING (MODELS 1007 & 3007)
To groove copper tube using the CTS Copper System, the Steel/CTS Dual Guide Roll Assembly must be used for all sizes of
tube. (K, L, M, DWV). DO NOT use the Advanced Copper Method guide roll assembly when using the Copper CTS System.
Failure to use the correct guide roll assembly will result in the tubing rolling out of the machine before a correct groove can be
made. If the Groover is set-up for steel pipe or Advanced Copper Method, is will also be necessary to change the grooving
rolls to the ones required for CTS Copper System. Refer to Section VII for grooving roll and guide roll plate changeout.
1. Set one plastic guide roll
located on the front of the
Groover, into the correct
hole for the size tube being
grooved (1/4" allen wrench).
See hole location below.
B. CTS COPPER SYSTEM
2. Insert tube over the bottom
roll (groove roll) positioning
the tube flush against the
front flange of the bottom
roll. Be certain tube does
not override this flange.
3. Using the slot on top of the
roller plate adjustment rod,
raise (counterclockwise
rotation) the guide roll
mounting plate sufficiently
to ensure that the top
grooving roll makes contact
with the tube prior to guide
roll contact.
4. Close the release valve on
the hydraulic pump by turn-
ing the knob clockwise.
Pump the hydraulic hand
pump to lower the top
grooving roll into light firm
contact ( approx. 100 psi)
with the tube.
6. Using the slot on top of the
Roller plate adjustment rod,
lower the guide rolls into
firm contact with the tube.
Note: Improper tool adjust-
ment will cause tube flare
and/or the tube to roll out of
the machine.
5. Make sure the knurled stop
(groove diameter stop) is
not in contact with the top
surface of the groover
housing. If contact is noted,
release hydraulic pressure
by turning the release valve
knob counterclockwise
allowing the groover head
to raise. Turn the knurled
stop counterclockwise
sufficiently to allow clearance between the bottom of the knurled
stop and the top of the groover housing when the top grooving
roll is in contact with the tube.
65% – 75% OF
PIPE LENGTH
Adjustable Height
Pipe Stand
Groover Centerline
Pipe Centerline
0 to 1/4down
SIDE VIEW DIAGRAM
Groover Centerline
TOP VIEW DIAGRAM
Pipe Centerline
0 to
1
/
4
toward user
7. Use one (1) roller pipe stand to support the pipe. Adjust the out-
board pipe stand to assure proper contact between the tube and
guide rolls. Pipe stand should be 65% - 75% of the pipe length
away from Groover. Looking at the front of the Groover, the pipe
stand should be positioned to angle the tube approximately 0° to 1/4°
downward, away from the front of the groover and 1/4° to the left
side at the Groover. See figures below.
GUIDE ROLL – HOLE LOCATION
2"-3" CTS Copper
(Same as 2"-31/2" Steel)
4"-8" CTS Copper
(Same as 4"-6" Steel)
1007/3007 RGM-7.09

10
3. Turn the Knurled
Stop to snug against
the surface of the
groove diameter
gauge. Release the
pump pressure by
turning the pump
release valve
counterclockwise
and remove the
groove diameter
gauge.
For proper set-up and positioning of pipe, refer to instructions as
shown in Section IV.
1. Increase the pump pressure to the recommended set-up pressure
shown in the chart for the size and wall thickness pipe to be
grooved.
2. Slide the "C" shaped
groove diameter
gauge, for the pipe
size to be grooved
under the adjustable
Knurled Stop at top
left side of the
groover base.
Each gauge is
marked with two (2)
size ranges. Place
the correct pipe size area, for the size being grooved, under the
adjustable knurled nut. When grooving pipe with a diameter of
14"-16", use the area marked 12".
The groove body diameter gauges are mounted on the back of the
groover body.
Note: For CTS Copper System, use the CTS Depth Gauges.
SECTION V – SETTING GROOVE DIAMETER (MODELS 1007 & 3007)
STEEL PIPE
Recommended Set-up Pressure (both models)
Pipe Size Wall Set-up Pressure
Inches Schedule PSIG
2" - 6" 10 100
8" - 12" 10 2,000
14" - 16" 10 2,000
2" 40 100
21/2" - 4" 40 2,500
5" - 6" 40 3,600
8" - 10" 40 4,000
12" STD. 4,600
14" - 16" STD. 4,600
STEEL PIPE and CTS COPPER SYSTEM
CTS COPPER SYSTEM
Recommended Set-up Pressure (both models)
Tube Size Wall Set-up Pressure
Inches Type PSIG
2" - 4" K, L, M, DWV 100
5" - 6" K, L, M, DWV 200
8" K, L, M, DWV 400
*“RIDGID” is a registered trade mark of Ridgid Tool of Elyria, Ohio.
1007/3007 RGM-7.09

11
4. Maintain grooving
force until the Knurled
Stop (groove diameter
stop) comes into full,
firm contact with the
top of the groover
base head. Allow the
pipe to rotate 1 to 2
revolutions assuring
completion of the
groove.
Release the foot switch to allow the pipe to stop rotation.
5. Open the hydraulic
hand pump release
valve by turning
counterclockwise.
Remove the pipe from
the Groover.
Check the groove
diameter. If required,
adjust the groove
diameter stop to
assure grooves to be
within Gruvlok groove
specification limits.
(Grooving Specifications are shown in Section X of these
instructions.)
SECTION VI – GROOVING THE PIPE OR TUBE (MODELS 1007 & 3007)
1. Recheck for correct pipe set-up and position on the bottom roll
and adjust as required. Close the relief valve on the hydraulic hand
pump and increase pump pressure to 400 psi. (200 psi for Sch. 10)
MODEL 3007 ONLY – Extremely Important
Check to see that the Ridgid*
300 drive directional
switch is set to "reverse"
position (clockwise rotation
of the pipe looking at the
front of Groover.)
Pipe must be square on
ends.
Burrs or torch slag must
be removed. Any pipe manufacturing seam, on inside or outside
of pipe, must be removed.
A. STEEL PIPE
Knurled stop** adjustment groove diameter change
Turns Inches
1/8.008"
1/4.016"
3/8.024"
1/2.032"
3/4.047"
1.062"
11/2.094"
2.125"
2. Start the drive motor by
depressing the foot switch
to rotate the pipe. Assure
that the pipe is tracking
firmly against the back of
the bottom roll.
3. With the pipe rotating,
increase grooving force
by slowly pumping the
hydraulic pump handle to
raise pump pressure.
Do not pump too fast.
Using the pressure gauge
mounted on the hydraulic
ram maintain approximately the listed grooving pressures for size
and wall thickness of pipe to efficiently form the groove.
STEEL PIPE
Recommended Grooving Pressure
Pipe Size Wall Grooving Pressure
Inches Schedule PSIG
2" - 6" 10 800 - 1,000
8" - 12" 10 3,000 - 3,400
14" - 16" 10 3,400 - 3,800
2" 40 1,600 - 2,000
21/2" - 4" 40 2,600 - 3,000
5" - 6" 40 3,400 - 3,800
8" - 10" 40 4,400 - 4,800
12" STD. 4,600 - 5,000
14" - 16" STD. 4,600 - 5,000
Note: Adjustment of the Knurled Stop (groove diameter stop) will
produce the below listed groove diameter changes.
**Knurled Stop Rotation:
Clockwise rotation – Increase groove diameter
Counterclockwise rotation – Decrease groove diameter
6. After adjustment of the Knurled Stop, if the groove diameter is
large (i.e. shallow groove depth), place the pipe end back into the
Groover and complete the same groove to the new diameter stop
setting. If the groove diameter is small (i.e. deep groove depth),
put an unfinished end into the Groover and complete the groove.
Recheck the groove diameter for conformance to grooving
specifications.
*“RIDGID” is a registered trade mark of Ridgid Tool of Elyria, Ohio. 1007/3007 RGM-7.09

12
4. Maintain grooving
force until the Knurled
Stop (groove diameter
stop) comes into full,
firm contact with the
top of the groover
base head. Allow the
tube to rotate 1 to 2
revolutions assuring
completion of the
groove.
Release the foot switch to allow the tube to stop rotation.
SECTION VI – GROOVING THE PIPE OR TUBE (MODELS 1007 & 3007)
CTS COPPER SYSTEM
Recommended Grooving Pressure
Tube
Size
COPPER TUBING TYPE
K
Pressure
L
Pressure
M
Pressure
DWV
Pressure
In. PSI PSI PSI PSI
2" 600 500 400 –
21/2" 700 600 500 –
3" 700 600 500 250
4" 900 800 600 300
5" 1,200 900 700 450
6" 1,500 1,100 800 600
8" 2,000 1,600 1,000 700
1. Recheck for correct tube set-up and position on the bottom roll
and adjust as required. Close the relief valve on the hydraulic
hand pump and increase pump pressure to 100 psi.
MODEL 3007 ONLY – Extremely Important
Check to see that the Ridgid*
300 drive directional
switch is set to "reverse"
position (clockwise rotation
of the tube looking at the
front of Groover.)
Tube must be square on
ends.
Burrs must be removed.
Any tube manufacturing seam, on inside or outside of tube, must
be removed.
B. COPPER TUBE: CTS COPPER SYSTEM
2. Start the drive motor by
depressing the foot
switch to rotate the tube.
Assure that the tube is
tracking firmly against the
back of the bottom roll.
3. With the tube rotating,
increase grooving force
by slowly pumping the
hydraulic pump handle to
raise pump pressure.
Do not pump too fast.
Using the pressure gauge
mounted on the hydraulic ram maintain approximately the listed
grooving pressures for size and type of tube listed below to
efficiently form the groove.
*“RIDGID” is a registered trade mark of Ridgid Tool of Elyria, Ohio.
5. Open the hydraulic
hand pump release
valve by turning
counterclockwise.
Remove the tube from
the Groover.
Check the groove
diameter. If required,
adjust the groove
diameter stop to
assure grooves to be within Gruvlok groove specification limits.
(Grooving Specifications are shown in Section X of these
instructions.)
Knurled stop** adjustment groove diameter change
Turns Inches
1/8.008"
1/4.016"
3/8.024"
1/2.032"
3/4.047"
1.062"
11/2.094"
2.125"
Note: Adjustment of the Knurled Stop (groove diameter stop) will
produce the below listed groove diameter changes.
**Knurled Stop Rotation:
Clockwise rotation – Increase groove diameter
Counterclockwise rotation – Decrease groove diameter
6. After adjustment of the Knurled Stop, if the groove diameter is
large (i.e. shallow groove depth), place the tube end back into the
Groover and complete the same groove to the new diameter stop
setting. If the groove diameter is small (i.e. deep groove depth),
put an unfinished end into the Groover and complete the groove.
Recheck the groove diameter for conformance to grooving
specifications.
1007/3007 RGM-7.09

13
3. Cradle one hand under
the top roll and pull the
top roll shaft out from
the front.
Caution: The top roll is
heavy. Brace your hand
to receive the weight
of this component. As
the shaft disengages,
the top roll will fall
into your hand. If you
have not removed the bottom roll (8" – 12" and 14" – 16" roll
removal) the weight of the top roll could pinch, or trap your
hand against the bottom roll.
SECTION VII – GROOVING ROLL CHANGE (MODELS 1007 & 3007)
1. ROLL REMOVAL
Note: With 2" – 6" grooving rolls installed – remove the bottom roll first, then remove the top roll.
With 8" – 12" and 14" – 16" grooving rolls installed – remove the top roll first, then remove the bottom roll.
1. Using a large slotted
screwdriver and a 3/4"
wrench, loosen the hex
nut located on the top
of the adjustment shaft
protruding from the top
of the groover head.
A. GUIDE ROLL MOUNTING PLATE
tools required
(1) Large Slotted Screwdriver
(1) 3/4" Wrench
(1) 3/16" Allen Wrench
2. Place one hand under
the guide roll mounting
plate and remove the hex
nut from the adjustment
shaft.
Remove the guide roll
mounting plate by
lowering until fully
disengaged.
1. Remove the quick
release pin by grasping
the ring located on
the end of the pin and
pulling straight up.
B. TOP (GROOVE) ROLL
2. Screw the 1/4" - 20
thumb screw (same
one that is used to
secure the depth
gauges to the main
housing) into the
tapped hole in the top
shaft.
4. Remove the top roll from between the front and back plates of
the grooving head. If the bottom roll has been removed, lower
the roll out of the grooving head. If the bottom roll has not been
removed (8" – 12" and 14" – 16" roll removal), raise the roll out of
the grooving head.
1. Loosen and remove the
socket cap screw to
remove the hinged collar
from around the bottom
roll shaft at the back of
the groover base (3/16"
allen wrench).
C. BOTTOM (DRIVE) ROLL
1. Release the Ridgid* 300
chuck jaws from around
the tailpiece on the
bottom roll.
MODEL 3007 ONLY
2. Pull the bottom roll shaft out the front of the Groover.
*“RIDGID” is a registered trade mark of Ridgid Tool of Elyria, Ohio. 1007/3007 RGM-7.09

14
Note: Select the correct mounting plate for either steel pipe,
Advanced Copper Method, or CTS Copper System.
1. Insert the adjustment shaft
from the bottom, into the hole
in the mounting block at the
front of the groover head. Slide
the shaft up to expose threaded
portion above the top of the
mounting block and install the
hex nut.
2. MODEL 1007 ONLY
Align the flats on the triangular
shaft with the motor drive
coupling and insert the shaft
into the coupling.
Note: Push the shaft in from the
front to fully expose the collar
receiving slot at the back end of the Groover.
3. Insert the hinged collar into the shaft slot and tighten the
socket cap screw (3/16" allen wrench).
4. MODEL 3007 ONLY
Align the flats on the triangular
shaft with the Ridgid 300*
chuck jaws. Slide the Groover
back on the mounting arms
to insert the triangular shaft
tailpiece into the chuck jaws.
Securely tighten the Ridgid 300
chuck jaws.
SECTION VII – GROOVING ROLL CHANGE (MODELS 1007 & 3007)
2. ROLL INSTALLATION
Note: With 2" – 6" grooving rolls – Install the top roll first, then install the bottom roll.
With 8" – 12" and 14" – 16" grooving rolls – Install the bottom roll first, then install the top roll.
1. Thoroughly clean and inspect top shaft to ensure that it is free
from all burrs and galling.
2. Position roller between
the front and back
plates of the grooving
head aligning the rollers
bushings to receive the
top shaft as it is inserted
from the front of the
machine.
A. TOP (GROOVE) ROLL
*“RIDGID” is a registered trade mark of Ridgid Tool of Elyria, Ohio.
3. Push the shaft inward, through the top rollers bushings, stopping
when the back of the shaft is flush with the back of the grooving head.
4. Rotate the top shaft
to align the cross
drilled hole with the
corresponding hole
in the groover head.
Remove thumb screw
from top shaft and
return it to its proper
storage position.
5. Insert the quick release
pin. When properly
installed, the spring
loaded locking ball on the
bottom portion of the
pin will extend below the
bottom of the top shaft.
Note: Top rollers for the Advanced Copper Method utilize a
spherical bearing that the top shaft passes through. This bearing
must be aligned such that the top shaft hole is perpendicular to
the face of the roll prior to pin installation. DO NOT FORCE
TOP SHAFT. When properly aligned, the top shaft will slide in
with little effort.
1A. Insert the bottom roll shaft
through the front of the groover
base exposing the triangular
shaped tailpiece at the back of
the Groover.
1B. Lubricate shaft for ease of
installation.
B. BOTTOM (DRIVE) ROLL
C. GUIDE ROLL MOUNTING PLATE
2. Using a large slotted screw-
driver and a 3/4" wrench, lightly
snug the hex nut in place.
1007/3007 RGM-7.09

15
2. Check hydraulic fluid
level. Fully retract
hydraulic ram piston
by turning pump
release valve
counterclockwise.
Remove filler cap
from the rear of the
reservoir body. The
fluid level should
come to the bottom
edge of the filler
hole when the pump is level and resting horizontally on its base.
Mobil DTE 24 hydraulic oil or its ISO 32 equivalent should be used.
SECTION VIII - GROOVER MAINTENANCE
Due to the use of sealed bearings, the 1007 and 3007 Roll Groovers require very little maintenance.
1. Periodically unplug and thoroughly clean your Roll Groover.
2. A protective film of light oil should be applied to all rollers and
guide roll mounting plates. Frequency of application will vary due
to environmental conditions but shall be sufficient to prevent the
formation of surface rust.
A. GENERAL
Please contact your local Gruvlok branch to purchase replacement
parts and accessories for the Roll Groover. To facilitate ordering,
an exploded drawing of each machine along with replacement
parts listings are presented in the next section.
B. REPLACEMENT PARTS
If you are having problems achieving or maintaining hydraulic
pressure, the following user serviceable items should be checked:
C. HYDRAULIC MAINTENANCE
1. Verify that the
release valve knob
on the pump is not
hitting the pump
housing prior to
the valve closing
completely. There
should be a slight
gap between the
stop located on
the knob and the pump body. If there is not, loosen the two set
screws using a 1/8" allen wrench and reposition knob accordingly.
3. Bleeding air from the
system is necessary.
Air can accumulate in
the system through
prolonged use as well
as repeatedly making-
up the quick connect
coupling to the hydraulic
ram.
Bleeding procedure is as follows:
•Disconnectquickconnectcouplingandremovehydraulicramfrom
the top of the Roll Groover.
• Reconnecthydraulicramtopumpandallowhoseandramtohangdown.
•Closereleasevalveonpumpandpumptofullyextendhydraulicram.
Tilt pump to the right (hose side) to eliminate high point in hose and
open release valve allowing the hydraulic ram to return to above its
fully retracted position. Repeat the above procedure fully extending
and retracting the hydraulic ram several times, thereby releasing the
trapped air into the pump reservoir.
•Recheckuidlevelandaddasrequired.
1007/3007 RGM-7.09

16
SECTION IX - REPLACEMENT PARTS
A. 1007 & 3007 GROOVER HEAD
ID No. Part Name............................................... Part No.
1Quick Release Pin .................................................. GL11775
2 Hydraulic Ram Assembly ....................................... GL11095
3 Knurled Stop Assembly.......................................... GL11035
4 Spring .................................................................... GL11065
5 Thumb Screw......................................................... GL11056
6 Hinged Shaft Collar ............................................... GL 11194
7 Cap Screw, 1⁄4"-20, L= 3/8"........................................ GL11767
8 Safety Mesh ........................................................... GL11313
9 Stop Plate Assembly .............................................. GL11467
10 Top Shaft................................................................ GL11039
11 Bottom Roller:
2"-6" Steel .............................................................. GL11114
8"-12" Steel ............................................................ GL11119
14"-16" Steel (optional) .......................................... GL11337
2"-8" CTS Copper System (optional) ...................... GL13801
ID No. Part Name............................................... Part No.
12 Top Roller:
2"-6" Steel .............................................................. GL11110
8"-12" Steel ............................................................ GL11117
14"-16" Steel (optional) .......................................... GL11335
2"-8" CTS Copper System (optional) ...................... GL13799
13 Depth Gauge:
1"-3" Steel .............................................................. GL11115
4"-6" Steel .............................................................. GL11116
8"-12" Steel ............................................................ GL11120
2"-4" CTS Copper System (optional) ...................... GL13850
5"-8" CTS Copper System (optional) ...................... GL13851
3
4
5
6
7
3 Req.
8
911
10
12
2
1
13
1007/3007 RGM-11.13

17
SECTION IX - REPLACEMENT PARTS
B. 1007 BASE ASSEMBLY
11
10
8
9
6
7
4
4 Req.
4 Req.
2 Req.
2 Req.
1
1A
1C
1B
1D
2
4 Req.
12
1E
3
5
13
14
15
16
17
18
4 Req.
4 Req.
ID No. Part Name............................................... Part No.
1Pump Assembly..................................................... GL11081
Pump Assembly Consists of the Following:
1A Hydraulic Pump ..................................................... GL11082
1B Pump Plate ............................................................ GL11090
1C Cap Screw, 1/4"-20, L=1/2"........................................ GL11230
1D Cap Screw, 1/4"-20, L=5/8"........................................ GL11093
1E Hydraulic Pressure Gauge..................................... GL 11084
2 Hex Bolt, 5⁄8"-11, L= 11/2"......................................... GL11091
3 Hex Nut, 5⁄8"-11....................................................... GL11313
4 Leg Weldment........................................................ GL11161
5 Hex Bolt, 3/8"-16, L=1"............................................. GL11150
ID No. Part Name............................................... Part No.
6 Electronic Control Panel......................................... GL11168
7 Hex Bolt, 5/16"-18, L=1/2".......................................... GL11217
8 Motor & Gear Reducer........................................... GL11164
9 Bolt,
1/2"-13, L=21/2"................................................ GL11174
10 Lockwasher,
1/2" ID................................................. GL11197
11 Hex Nut, 1/2"-13 ..................................................... GL11198
12 Shaft Safety Cover ................................................. GL11200
13 Gearbox Key........................................................... GL11175
14 Flexible Coupling Body..........................................STD-0048
15 Spider .................................................................... GL11173
16 Shaft Coupling Assembly....................................... GL11195
17 Lockwasher,
3/8" ID................................................. GL11076
18 Hex Bolt 3/8"-16, L=11/4".......................................... GL11074
1007/3007 RGM-7.09

18
SECTION IX - REPLACEMENT PARTS
C. 3007 BASE ASSEMBLY
ID No. Part Name............................................... Part No.
1Pump Assembly..................................................... GL11081
Pump Assembly Consists of the Following:
1A Hydraulic Pump ..................................................... GL11082
1B Pump Plate ............................................................ GL11090
1C Cap Screw, 1/4"-20, L=1/2"........................................ GL11230
1D Cap Screw, 1/4"-20, L=5/8"........................................ GL11093
1E Hydraulic Pressure Gauge...................................... GL11084
ID No. Part Name............................................... Part No.
2 Hex Bolt, 5⁄8"-11, L= 11/2"......................................... GL11091
3 Hex Nut, 5⁄8"-11....................................................... GL11092
4 Lockwasher,
3/8" ID................................................. GL11076
5 Bolt,
3/8"-16, L=11/4"................................................ GL11074
6 Upper Leg Weldment ............................................. GL11145
7 Foot-Leg Sub-Assembly......................................... GL11147
8 Hex Bolt, 3/8"-16, L=1"............................................. GL11150
1A
1
2
1C
1E
2 Req. 1B
1D
2 Req.
3
4
5
4 Req.
8
7
6
8
2 Req.
2 Req.
2 Req.
2 Req.
1007/3007 RGM-7.09

19
SECTION IX - REPLACEMENT PARTS
D. 1007 & 3007 STEEL AND COPPER GUIDE ROLL ASSEMBLIES
STEEL/CTS DUAL
GUIDE ROLL ASSEMBLY
ID No. Part Name........................................................................Part No.
12"-12" Steel/CTS Dual Guide Roll Assembly ............................................GL11100
Steel Guide Roll Assembly Consists of the Following:
1A Guide Roll ...............................................................................................GL11106
1B Washer,
1/2".............................................................................................GL11109
1C Shoulder Bolt, 1/2"....................................................................................GL11107
1D Guide Roll Guard.....................................................................................GL11304
1E Cap Screw, 1/4"-20, L=1/2"........................................................................GL 11230
1F Flat Head Screw, 1/4"-20, L=3/4"................................................................GL11108
1G Hex Nut, 1/2".............................................................................................GL11198
Options:
14"-16" Steel Guide Roll Assembly..........................................................................GL11333
1007/3007 RGM-11.13
1
1G
Item 1A, 1B, 1C:
2 required for Steel
1 required for CTS Copper
1A
1B
1C
1F
1E
1D

20
SECTION X – GROOVE SPECIFICATIONS
GRUVLOK®ROLL GROOVE SPECIFICATIONS
COLUMN 1 - Nominal IPS Pipe size
COLUMN 2 - IPS outside diameter
COLUMN 3 - Gasket seat must be free from scores, seams, chips, rust or
scale which may interfere with proper sealing of the gasket.
Gasket seat width (Dimension A) is to be measured from the
pipe end to the vertical flank in the groove wall.
COLUMN 4 - Groove width (Dimension B) is to be measured between
vertical flank of the groove size walls.
GruvloK Standard Roll Groove Specifications
for Steel & Other IPS Size Pipe
-1- -2- -3- -4- -5- -6- -7- -8-
Nominal
IPS
Pipe Size
Gasket Seat Groove Width Groove Diameter Groove Depth
Min. Allow.
Wall Thickness
“T”
Max.
Flare
Diameter
Pipe OD “A” “B” “C” “D”
Actual Tolerance ±0.030/ ±0.76 ±0.030/ ±0.76 Actual Tol. +0.000 (Ref. Only)
In./DN(mm) In./mm +In./mm -In./mm In./mm In./mm In./mm -In./mm In./mm In./mm In./mm
2 2.375 +0.024 -0.024 0.625 0.344 2.250 -0.015 0.063 0.065 2.480
50 60.3 +0.61 -0.61 15.88 8.74 57.15 -0.38 1.60 1.7 63.0
21⁄22.875 +0.029 -0.029 0.625 0.344 2.720 -0.018 0.078 0.083 2.980
65 73.0 +0.74 -0.74 15.88 8.74 69.09 -0.46 1.98 2.1 75.7
3 3.500 +0.035 -0.031 0.625 0.344 3.344 -0.018 0.078 0.083 3.600
80 88.9 +0.89 -0.79 15.88 8.74 84.94 -0.46 1.98 2.1 91.4
31⁄24.000 +0.040 -0.031 0.625 0.344 3.834 -0.020 0.083 0.083 4.100
90 101.6 +1.02 -0.79 15.88 8.74 97.38 -0.51 2.11 2.1 104.1
4 4.500 +0.045 -0.031 0.625 0.344 4.334 -0.020 0.083 0.083 4.600
100 114.3 +1.14 -0.79 15.88 8.74 110.08 -0.51 2.11 2.1 116.8
5 5.563 +0.056 -0.031 0.625 0.344 5.395 -0.022 0.084 0.109 5.660
125 141.3 +1.42 -0.79 15.88 8.74 137.03 -0.56 2.13 2.8 143.8
6 6.625 +0.063 -0.031 0.625 0.344 6.455 -0.022 0.085 0.109 6.730
150 168.3 +1.60 -0.79 15.88 8.74 163.96 -0.56 2.16 2.8 170.9
8 8.625 +0.063 -0.031 0.750 0.469 8.441 -0.025 0.092 0.109 8.800
200 219.1 +1.60 -0.79 19.05 11.91 214.40 -0.64 2.34 2.8 223.5
10 10.750 +0.063 -0.031 0.750 0.469 10.562 -0.027 0.094 0.134 10.920
250 273.1 +1.60 -0.79 19.05 11.91 268.27 -0.69 2.39 3.4 277.4
12 12.750 +0.063 -0.031 0.750 0.469 12.531 -0.030 0.109 0.156 12.920
300 323.9 +1.60 -0.79 19.05 11.91 318.29 -0.76 2.77 4.0 328.2
T
B
D
C
OD
Flare
A
Out of roundness: Difference between maximum O.D. and minimum O.D. measured at 90° must not exceed total O.D. tolerance listed (reference column 2).
For IPS pipe, the maximum allowable tolerance from square cut ends is 0.03" for 2" thru 31⁄2"; 0.045" for 4" thru 6"; and 0.060" for sizes 8" and above
measured from a true square line.
Beveled-End Pipe in conformance with ANSI B16.25 (371⁄2°) is acceptable, however square cut is preferred.
COLUMN 5 - The groove must be of uniform depth around the entire pipe
circumference. (See column 6).
COLUMN 6 - Groove depth: for reference only. Groove must conform to
the groove diameter “C” listed in column 5.
COLUMN 7 - Minimum allowable wall thickness which may be roll grooved.
COLUMN 8 - Maximum allowable pipe end flare diameter. Measured at the
most extreme pipe end diameter of the gasket seat area.
1007/3007 RGM-7.09
Other manuals for Gruvlok 1007
1
This manual suits for next models
1
Table of contents
Other Anvil Power Tools manuals