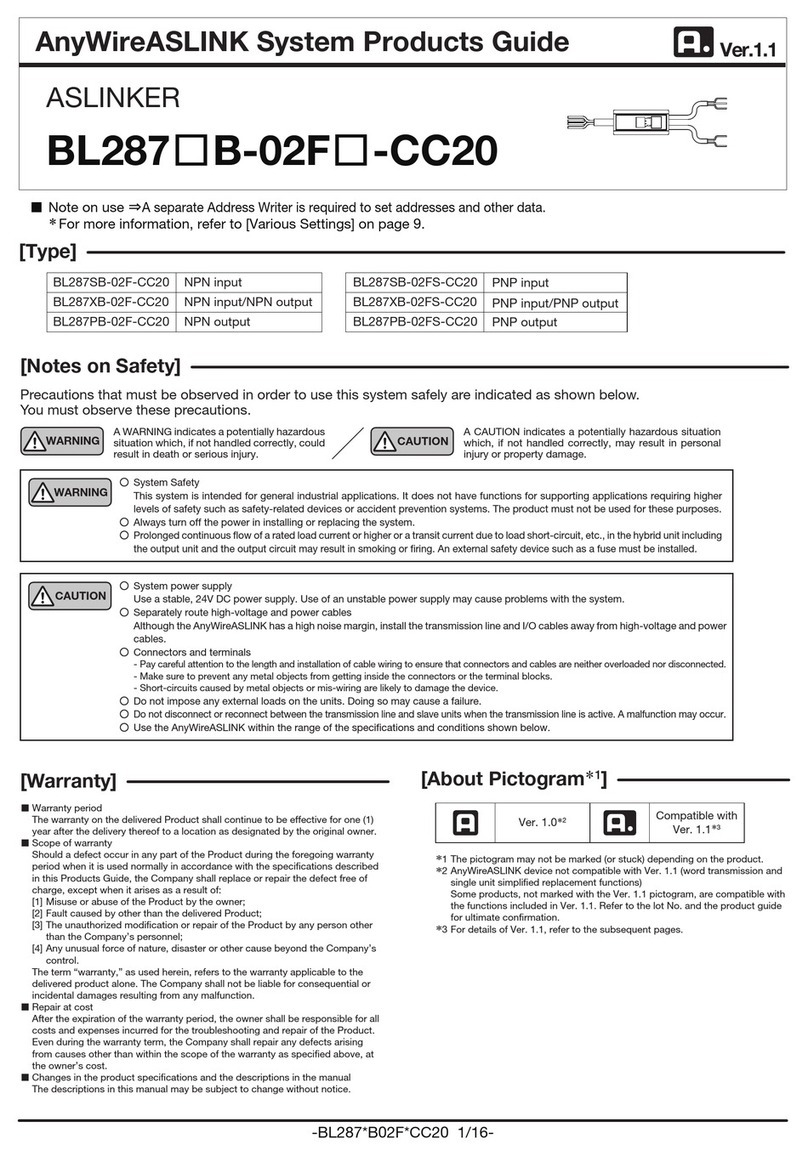
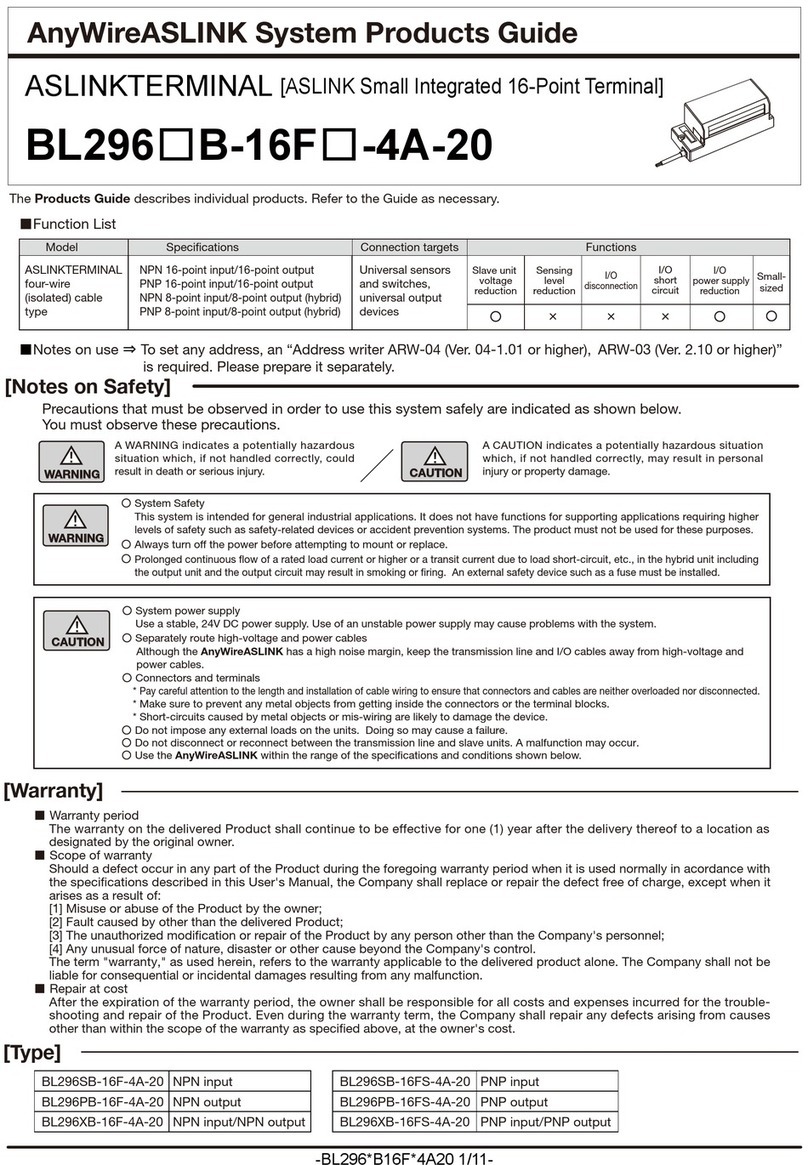
Anywire B281-B-02U-CC20 Series User manual

-B281*B02U*CC20 1/17-
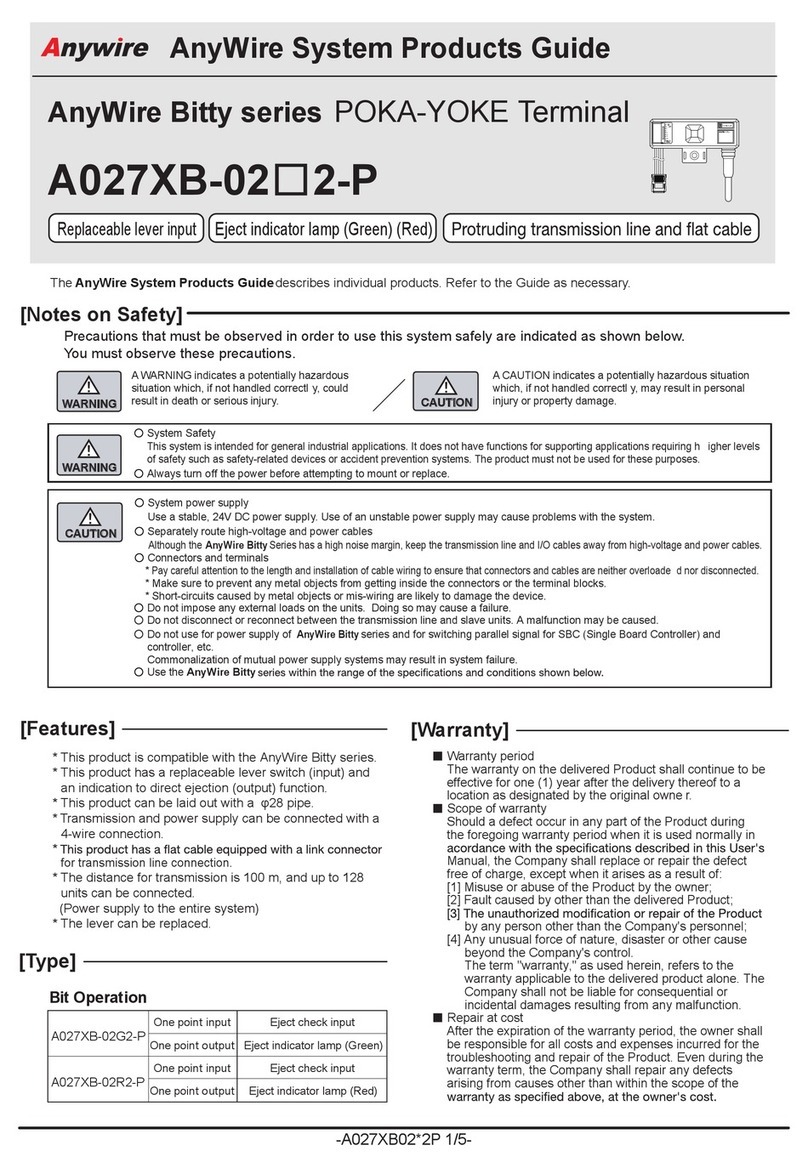
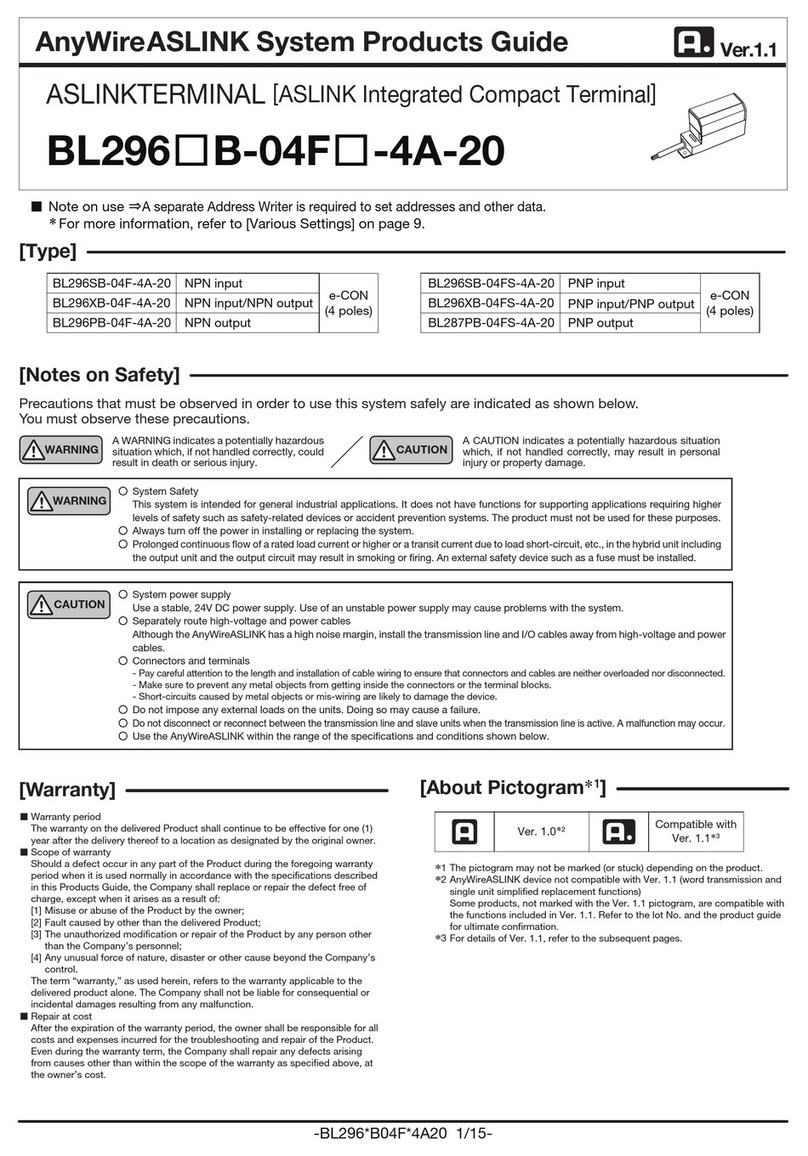
B281□B-02U□-CC20
IN
OUT
IN
ALM
OUT
LINK
B281SB-02U-CC20
B281PB-02U-CC20
B281XB-02U-CC20
B281SB-02US-CC20
B281PB-02US-CC20
B281XB-02US-CC20
ASLINKER
Ver.1.1
[Type]
■Note on use ⇒
A separate Address Writer is required to set addresses and other data.
*
For more information, refer to [Various Settings] on page 9.
AnyWireASLINK System Products Guide
NPN input
NPN output
PNP input
PNP output
NPN input/NPN output PNP input/PNP output
A WARNING indicates a potentially hazardous
situation which, if not handled correctly, could
result in death or serious injury.
[Warranty]
■Warranty period
The warranty on the delivered Product shall continue to be effective for one (1)
year after the delivery thereof to a location as designated by the original owner.
■Scope of warranty
Should a defect occur in any part of the Product during the foregoing warranty
period when it is used normally in accordance with the specications described
in this Products Guide, the Company shall replace or repair the defect free of
charge, except when it arises as a result of:
[1] Misuse or abuse of the Product by the owner;
[2] Fault caused by other than the delivered Product;
[3] The unauthorized modication or repair of the Product by any person other
than the Company’s personnel;
[4] Any unusual force of nature, disaster or other cause beyond the Company’s
control.
The term “warranty,” as used herein, refers to the warranty applicable to the
delivered product alone. The Company shall not be liable for consequential or
incidental damages resulting from any malfunction.
■Repair at cost
After the expiration of the warranty period, the owner shall be responsible for all
costs and expenses incurred for the troubleshooting and repair of the Product.
Even during the warranty term, the Company shall repair any defects arising
from causes other than within the scope of the warranty as specied above, at
the owner’s cost.
■Changes in the product specications and the descriptions in the manual
The descriptions in this manual may be subject to change without notice.
Precautions that must be observed in order to use this system safely are indicated as shown below.
You must observe these precautions.
[Notes on Safety]
A CAUTION indicates a potentially hazardous situation
which, if not handled correctly, may result in personal
injury or property damage.
CAUTION
WARNING
○
System power supply
Use a stable, 24V DC power supply. Use of an unstable power supply may cause problems with the system.
○
Separately route high-voltage and power cables
Although the AnyWireASLINK has a high noise margin, install the transmission line and I/O cables away from high-voltage and power
cables.
○
Connectors and terminals
-
Pay careful attention to the length and installation of cable wiring to ensure that connectors and cables are neither overloaded nor disconnected.
- Make sure to prevent any metal objects from getting inside the connectors or the terminal blocks.
- Short-circuits caused by metal objects or mis-wiring are likely to damage the device.
○
Do not impose any external loads on the units. Doing so may cause a failure.
○
Do not disconnect or reconnect between the transmission line and slave units when the transmission line is active. A malfunction may occur.
○
Use the AnyWireASLINK within the range of the specications and conditions shown below.
○
System Safety
This system is intended for general industrial applications. It does not have functions for supporting applications requiring higher
levels of safety such as safety-related devices or accident prevention systems. The product must not be used for these purposes.
○
Always turn off the power in installing or replacing the system.
○
Prolonged continuous ow of a rated load current or higher or a transit current due to load short-circuit, etc., in the hybrid unit including
the output unit and the output circuit may result in smoking or ring. An external safety device such as a fuse must be installed.
CAUTION
WARNING
[About Pictogram*1]
Ver. 1.0*2Compatible with
Ver. 1.1*3
*1 The pictogram may not be marked (or stuck) depending on the product.
*2 AnyWireASLINK device not compatible with Ver. 1.1 (word transmission and
single unit simplified replacement functions)
Some products, not marked with the Ver. 1.1 pictogram, are compatible with
the functions included in Ver. 1.1. Refer to the lot No. and the product guide
for ultimate confirmation.
*3 For details of Ver. 1.1, refer to the subsequent pages.
-B281*B02U*CC20 2/17-
A
1
B
2
C
3
D
4
E
5
F
6
G
7
H
8
I
9
J
10
K
11
L
12
Lot No. 19ECBNB
As a result of the addition of functions, indication of lot No. has been changed from 3 digits (conventional format:
year and month only) to 6 digits or 7 digits.
The master unit compatible with the word transmission function provides areas for transmission and receiving of word
data (numerical information) such as analog data and sensing level data.
Using this function enables reduction of occupancy of bit information area by word data.
To enable word transmission, it is necessary that the system should be congured only with slave units compatible with
the word transmission function.
A slave unit incompatible with the word transmission function cannot be connected to the AnyWireASLINK system to
conduct word transmission.
For slave units that handle word data, word address settings are required.
[About AnyWireASLINK Ver. 1.1]
[About Lot No.]
[About Word Transmission]
*3 Some products have no indication of function version.
Year: Numbers
(Lower two digits of the Christian era)
Month: Alphabet (as per the table below)
“19E” means May 2019.
Single unit simplied replacement*1
Word transmission*1*2
Functions available with Ver. 1.1
*1 To use these functions, the master unit compatible with each function is required.
For details, refer to this manual together with the manual for the master unit.
*2 You can use this function with the word-transmission AnyWireASLINK unit connected.
To handle word data, word address settings are required for slave units.
It depends on slave units whether word address setting is enabled or not.
New functions have been added to AnyWireASLINK products in May 2019 onward. Also, for the purpose of
differentiation of compatible functions, indication of product lot number (lot No.) has been changed.
Compatible functions vary depending on lot No. Please understand the following description thoroughly to use each
product.
Functions added to Ver. 1.1 are as follows:
Example:
S/W version
Year and month H/W version
Alphabet
Month
Function version*3

-B281*B02U*CC20 3/17-
NEW
Function version:
When an equipment parameter is changed due to functional upgrading, etc., the function
version will be updated (for example: A→B→C).
When a slave unit of a new function version is replaced with that of an old function version,
the single unit simplied replacement function cannot be used.
[About Single Unit Simplified Replacement]
During replacement of a slave unit, this function enables automatic settings of address and parameters of the existing
slave unit into a new slave unit. (After replacement of the slave unit, address and parameter setting procedure using the
address writer is not required.)
■Step 1 Turn OFF the 24V DC power supply for the master unit.
■Step 2 Disconnect a slave unit to be replaced.
■Step 3 Connect a new slave unit.
■Step 4 Turn ON the 24V DC power supply to the master unit.
- It is necessary that both the master unit and slave unit should be compatible with the single unit simplied replacement function.
- Before disconnection and connection of the slave unit, be sure to turn OFF the power supply.
- For compatibility of a slave unit with the single unit simplied replacement function, see the lot No. and the manual for the slave unit.
- When a slave unit of a new function version is replaced with that of an old function version, the single unit simplied replacement
function cannot be used.
- Operation is enabled in the case where the model of the slave unit before replacement is the same as that after replacement.
- If the model of the slave unit before replacement is different from that after replacement, a model mismatching error occurs, disabling
address and parameter settings.
- Operation is enabled in the case where the address of the slave unit for replacement is the factory-set address (bit address 511).
- Several slave units cannot be simultaneously replaced. For replacement of several slave units, conduct the replacement procedure for
each unit one by one.
- For a slave unit incompatible with the single unit simplied replacement function, set an address and parameters by using the address
writer as in the conventional manner.
- For details of the single unit simplied replacement function (limitations, conditions, etc.), refer to the manual for the master unit.
■Identication of function version
Function version information is given on the lot label.
*
The design and contents of the lot label may vary depending on the product model and lot No.
ASLINK
master unit
ASLINK
master unit
CAUTION

-B281*B02U*CC20 4/17-
○○ ×○○
×○ ○ ×
○○ ○○
Connection targetsSpecicationsModel Functions
Functions
Address
*1 It depends on lot No. whether this function is available or not.
*2 This terminal can be used in connection to the AnyWireASLINK unit for word transmission. Note that this terminal cannot handle word data by setting a word address.
*3 To use these functions, a master unit that supports each function is required. For details, refer to the manual for the master unit together with this manual.
[Functions]
Bit
transmission
ASLINKER
2-wire
(non-isolated)
cable type
General-purpose
sensors, switches
General-purpose
output devices
Detection of sensor cable
disconnection
2-wire type
sensor
3-wire type
sensor
Bit
address
setting
Slave unit voltage
drop Sensing level drop I/O disconnection I/O short-circuit I/O power supply
drop
Word
address
setting
■Function list
■Detecting functions (Status details)
NPN input: 2 points,
NPN output: 2 points
NPN input: 1 point/output: 1 point
PNP input: 2 points,
PNP output: 2 points
PNP input: 1 point/output: 1 point
Function
*4 This terminal can be used in connection to the AnyWireASLINK unit for word transmission. Note that this terminal cannot handle word data by setting a word address.
*5 The single unit simplied replacement function works even if the lot No. does not support the LED indication for the single unit simplied replacement function.
(When the master unit executes the single unit simplied replacement function, addresses/parameters will be written, if specied conditions are satised.)
Lot No. is indicated on the lot label. Example:
■How to check
Word transmission*4
Remote address change
Single unit simplied replacement
S/W version
Function version
H/W version
LED indication for single unit
simplied replacement function*5
Lot No.
This unit has undergone addition of functions and change of specications according to version upgrading.
Available functions and specications of the unit vary depending on lot No.
[Function Compatibility by Lot No.]
Lot No. 19ECBNB
Back of this unit
Available with S/W version “B” or later version
(If lot No. is indicated in 3 digits (year and
month only), these functions are not available.)
Available with lot No. that indicates year and
month digits of “15J” or later
Single unit
simplied
replacement
Remote
address
change
*1*2*1*3*1*3
Word
transmission

-B281*B02U*CC20 5/17-
PNP Output
Black:DN
Red:DP
Black:DN
Red:DP
+
-
+
-
+
-
B281PB-02U –
B281PB-02US –
+
-
Output
OUT (Black)
0VL (Blue)
24VL (Brown)
OUT (Black)
NPN Output load
PNP Output load
0VL (Blue)
No connection:
Be careful not to touch.
AnyWireASLINK
master
Black:
DN
Red: DP
Black: DN
Red: DP
Black: DN
Black: DN
Black: DN
Red: DP
Red: DP
Red: DP
Black: DN Red: DP
Black: DN
Red: DP
Black: DN
Red: DP
*Make sure to use a 24V DC
stabilized power supply for
the power supply to be
connected.
*When complying with the
UL Standard, make sure to
use a 24V DC stabilized
power supply of “NEC
Class 2 Output.”
2P link connector is
convenient for
branching.
Dedicated at cable
1.25mm2(4-wire)
[Installation Location]
-
Locations where this product is not directly subject to vibration or shock
- Locations where this product is not directly exposed to dust
- Locations where this product is not directly exposed to conductors,
such as metal chips or spatters
- Locations without condensation
- Locations where the atmosphere is free of corrosive gases, ammable
gases, and sulfur
- Locations far from high-voltage or high-current cables
- Locations far from servos, inverters, and other cables and controllers
that generate high-frequency noise
The AnyWireASLINK can employ a two-wire or four-wire terminal selectively depending on the load current.
If the load current is small, using a two-wire (non-isolated) terminal allows for achieving simplied wiring without local power supply.
In the case of prioritizing the sites of concentrated loads and/or the number of connections, hybridization with a four-wire (isolated)
terminal, which supports local power supply, is also possible.
Make sure to use a four-wire (isolated) terminal in the case of input and load driving using an external power supply.
[How to Connect AnyWireASLINK]
AnyWireASLINK terminator
CAUTION
- Refer to Table 1 so that the size and length of the transmission
line and the allowable supply current lie within an appropriate
range.
- Connect the same symbols (DP, DN) correctly between the
AnyWireASLINK master unit and each device.
- The branching length or branch number has no limitation.
- Include the length of the cable provided with the terminal in the
“total line length.”
-
Connect the terminator (with polarity) to the terminal farthest
from the AnyWireASLINK master unit.
To connect loads (e.g. I/O ports) that are
controlled with a power supply other than the
one used for the AnyWireASLINK system,
always use a 4-wire (isolated) terminal.
Otherwise, malfunction may be caused.
CAUTION
1.25mm2
0.75mm2
MAX 2A
MAX 1.2A
MAX 1A
MAX 0.6A
MAX 0.5A
MAX 0.3A
0.5mm2MAX 0.8A MAX 0.4A MAX 0.2A
■
Relationship between the size and length of
the transmission line and the supply current (Table 1)
Size of
the transmission
line (DP, DN)
Supply current on the transmission line (DP, DN)
Total length:
50m or less
Total length: Over 50m,
no longer than 100m
Total length: Over 100m,
no longer than 200m
[System Configuration Example]
■Connection example of load
The branching
has no limitation.
24V DC*
The sum of the
portions is the total
line length (including
length of the cable
included in the unit).
24VL (Brown)
No connection:
Be careful not to touch.
Black:DN
Red:DP
Black:DN
Red:DP
NPN
2-wire type sensor
Black:DN
Red:DP
NPN
3-wire type sensor
PNP
2-wire type sensor
Black:DN
Red:DP
PNP
3-wire type sensor
B281SB-02U –
B281SB-02US –
B281SB-02U –
B281SB-02US –
3-wire type sensor
2-wire type sensor
Contact
24VL (Brown)
IN (Black)
0VL (Blue)
24VL (Brown)
IN (Black)
0VL (Blue)
IN (Black)
0VL (Blue)
24VL (Brown)
IN (Black)
One terminator should be connected to the DP, DN
terminal farthest from the AnyWireASLINK master unit.
Connect it correctly so as not to set the wrong polarity.

-B281*B02U*CC20 6/17-
DP
DN
24V
0V
POWER IN SLAVE
LG
24V
0V L
N
FG
~
DP
DN
24V
0V
DP
DN
DP
DN
24V
0V
DP
DN
ANF-01
24V
0V L
N
FG
~
24V
0V
24V
0V
PE
ANF-01
ANF-01
DP
DN
24V
0V
LG
DP
DN
24V
0V
DP
DN
DP
DN
24V
0V
DP
DN
DP
DN
DP
DN
24V
0V
DP
DN
24V
0V
24V
0V
L
N
FG
24V
0V
24V
0V
PE 24V
0V
24V
0V
PE
DP
DN
24V
0V
DP
DN
24V
0V
A
B
POWER IN SLAVE
POWER IN SLAVE
~
Terminator
Terminator
24V DC stabilized
power supply
If the total length of the section where all the DP, DN, 24V, and 0V lines run in parallel is more than 50m
AnyWireASLINK master
[Notes on Use of 4-Wire (Isolated) Terminal]
General-purpose power
supply lter
(Use it if necessary.)
24V DC stabilized
power supply
If the total length of the sections where all the DP, DN, 24V, and 0V lines run in parallel in the power supply system is more than 50m, connect an
ASLINK lter (Type ANF-01) or a lter manufactured by COSEL Co., Ltd. (Type EAC-06-472) in series to the 24V and 0V lines at a position where
these four lines start running in parallel.
This will improve noise resistance, suppress the adverse effects of crosstalk caused by transmitted signals, and stabilize signals.
The above lters must be inserted regardless of whether power is supplied to all terminals collectively from the power supply for the master or
power is supplied to each terminal individually from their local power supply.
Insert the “ASLINK lter [Type ANF-01]” regardless of installation method and distance when complying with CE Standard.
ANF-01
Filter of COSEL Co., Ltd. EAC-06-472 MAX 6A/24V DC
MAX 5A/24V DC
Product Type Allowable power current
ASLINK lter
②Local power supply/branching
If the total length of the
section where all the
DP, DN, 24V, and 0V
lines run in parallel is
more than 50m
24V DC
stabilized
power supply General-purpose power
supply lter
(Use it if necessary.)
2-wire
terminal
2-wire
terminal
4-wire
terminal
4-wire
terminal
4-wire
terminal
4-wire
terminal
4-wire
terminal
4-wire
terminal
If the total length of the sections (A + B)
where all the DP, DN, 24V, and 0V lines
run in parallel is more than 50m
■Filter allowable current
■AnyWire Type: ANF-01 Connection example
①Power supply to the entire system
2-wire
terminal
4-wire
terminal
4-wire
terminal
General-purpose power
supply lter
(Use it if necessary.)

-B281*B02U*CC20 7/17-
DP
DN
24V
0V
LINELOAD
LG
24V
0V L
N
FG
~
DP
DN
24V
0V
DP
DN
DP
DN
24V
0V
DP
DN
24V
0V L
N
FG
~
24V
0V
24V
0V
PE
DP
DN
24V
0V
LG
DP
DN
24V
0V
DP
DN
DP
DN
24V
0V
DP
DN
DP
DN
DP
DN
24V
0V
DP
DN
24V
0V
24V
0V
24V
0V
PE 24V
0V
24V
0V
PE
DP
DN
24V
0V
DP
DN
24V
0V
A
B
LINELOAD
LOAD LINE
EAC-06-472
*
EAC-06-472
*
EAC-06-472
*
24V
0V
L
N
FG
~
If the total length of the section where all the DP, DN, 24V, and 0V lines run in parallel is more than 50m
AnyWireASLINK master
24V DC stabilized
power supply
2-wire
terminal
4-wire
terminal
4-wire
terminal
AnyWireASLINK master
If the total length of the
section where all the
DP, DN, 24V, and 0V
lines run in parallel is
more than 50m
24V DC stabilized
power supply
General-purpose power
supply lter
(Use it if necessary.)
2-wire
terminal
2-wire
terminal
4-wire
terminal
24V DC
stabilized
power supply
General-purpose power
supply lter
(Use it if necessary.)
4-wire
terminal
4-wire
terminal
4-wire
terminal
4-wire
terminal
4-wire
terminal
If the total length of the sections (A + B)
where all the DP, DN, 24V, and 0V lines
run in parallel is more than 50m
■COSEL Co., Ltd. Type: EAC-06-472 Connection example
①
Power supply to the entire system
②
Local power supply/branching
*
When using this lter, please be careful of the positions of LOAD and LINE.
*
When using this lter, please be careful of the positions of LOAD and LINE.
Terminator
Terminator
General-purpose power
supply lter
(Use it if necessary.)

-B281*B02U*CC20 8/17-
■Input
(PNP)
Black: OUT0
Blue: 0VL
(NPN)
Brown: 24VL
Black: OUT0
Black: OUT1
Blue: 0VL
Brown: 24VL
Black: OUT1
(PNP)
Black: OUT
Blue: 0VL
(NPN)
Brown: 24VL
Black: OUT
■Output
■Input/output mixed
IN
OUT
IN
ALM
OUT
LINK
OUT0
OUT1
OUT0
ALM
OUT1
LINK
IN0
IN1
IN0
ALM
IN1
LINK
Brown: 24VL
Black: IN0
Blue: 0VL
Transmission line
connection wire
Brown: 24VL
Black: IN1
Blue: 0VL
LED indicators
Setting port
[Name of Each Part]
I/O connection line
I/O connection line
I/O connection line
LINK
IN0
IN1
ALM
: Transmission indicator (Green)
: Input indicator (Orange)
: Alarm indicator (Red)
Transmission line
connection wire
LED indicators
Setting port
LINK
OUT0
OUT1
ALM
: Transmission indicator (Green)
: Output indicator (Orange)
: Alarm indicator (Red)
Transmission line
connection wire
LED indicators
Setting port
LINK
IN
OUT
ALM
: Transmission indicator (Green)
: Input indicator (Orange)
: Output indicator (Orange)
: Alarm indicator (Red)
Brown: 24VL
Black: IN
Blue: 0VL
Lot label
*
The lot label is attached to the back of the unit.

ALM
LINK
Brown: 24VL
Blue: 0VL
B281SB-02U –
Brown: 24VL
Black: OUT
B281PB-02U –
Brown: 24VL
Blue: 0VL
B281SB-02US –
Brown: 24VL
Black: IN
Blue: 0VL
Brown: 24VL
Black: OUT
B281XB-02U –
Brown: 24VL
Black: IN
Blue: 0VL
Black: OUT
Blue: 0VL
B281XB-02US –
Black: OUT
Blue: 0VL
B281PB-02US –
-B281*B02U*CC20 9/17-
Address setting Parameter setting
Address setting
■Common procedure for address writer operation
[Various Settings]
Connect this unit to the AnyWireASLINK master unit.
Perform the setting using the address writer with the
transmission signal (DP, DN) supplied.
An address number is set as a beginning number from which part of the transmission frame is occupied to the terminal.
Set the address number within the range of bit address “0 to 254.”
(For the input/output mixed type, the same address number should be assigned to both input and output.
Make sure that the above wires are not
short-circuited during transmission signal
is connected.
Short-circuit may cause a fault of the
equipment.
Black: DN
Red: DP
* For the power supply to be connected, be sure to use a
24V DC stabilized power supply.
CAUTION
AnyWireASLINK
master
24V DC*
Transmission
signal
Lot No. 19ECBNB
- Set the address number so that the area occupied by the terminal does not exceed the transmission points of the master unit.
- Make sure that the address number setting is not duplicated.
- Also, use the address writer to read an address number that has been written in the terminal.
The factory-set address is “bit address 255” or “bit address 511,” which indicates that an address
has not been set.
The factory-set address varies depending on lot No., as follows:
For S/W version “B” or later version: Bit address 511
For S/W version “A” or 3-digit lot No.: Bit address 255
Input and output operations are disabled with the factory-set address.
S/W version
CAUTION
Example:
Be sure to connect to the AnyWireASLINK master unit to use.
An address writer ARW-04 (Ver. 04-1.01 or later version) or ARW-03 (Ver. 2.10 or later
version) is required for operation.
For the details of the operating method, refer to the product guide of the address writer.

b3b4b5b7 b6 b2 b1 b0b11b12b13b15 b14 b10 b9 b8
B281XB-02U-CC20, B281XB-02US-CC20
OUT0
n
IN0
B281SB-02U-CC20, B281SB-02US-CC20 B281PB-02U-CC20, B281PB-02US-CC20
n+1
OUT1
n
OUT0
n+1
IN1
n
IN0
-B281*B02U*CC20 10/17-
0
1
NPN
B281SB-02U-CC20
B281PB-02U-CC20
B281XB-02U-CC20
○
-
○
○
-
○
-
IN0VL 24VL
PNP
B281SB-02US-CC20
B281PB-02US-CC20
B281XB-02US-CC20
-
-
-
×
×
×
×-
○
○ ○
----
○
-
○
○
-
○
-
IN0VL 24VL
○○
○
○
○
--
-
○
○
- -
○
○
-
-
-
0VL 24VL
○
○
--
-
○
-
○
-
-
○
-
-
-
-
0VL-24VL 0VL-OUT OUT-24VL
○
○
○
○
○
-
-
-
○
○
-
OUT
Parameter setting
I/O disconnection detecting current
■Disconnection monitoring function setting [Equipment parameter 1]
■Operation modes available with each model
Model
Detection of I/O disconnection
2-wire type
sensor
3-wire type
sensor Load Power
supply Load
Short-circuit detection
I/O disconnection detection and short-circuit detection are disabled.
I/O disconnection detection and short-circuit detection are enabled.
Variable Description
Factory setting: 0
This parameter is used to specify whether the I/O cable disconnection detecting function is enabled or disabled.
Input: When sensor’s circuit current is 0.35mA or less, it is judged as disconnection.
Output: When load current in output-ON status is 2mA or less, it is judged as disconnection.
Address
offset
Bit output
Address
offset
Bit input
Address
offset
Bit input
Bit output
[Data Configuration]
*n = Bit address number assigned to this unit
*1
This can be used on the master unit having the status detail area. For details, refer to the manual for the master unit.
Status
details
Status detail area of the master unit
b0: Slave unit voltage drop (DP-DN-side voltage drop)
b2: I/O disconnection
b3: I/O short-circuit
■Status details
The contents of an alarm detected with this unit can be checked with the “status detail area*1”
on the master unit.
A bit corresponding to the status detail area turns ON depending on the contents of the alarm.

-B281*B02U*CC20 11/17-
I/O0
I/O1
I/O0
ALM
I/O1
LINK
LINK (Green)
I/O0 (Orange)
I/O1 (Orange)
ALM (Red)
ALM
LINK
I/O
If an error is indicated, identify a
cause of the error by checking
lit/ashing status with the table on
the left, and eliminate the cause of
the error.
Once the cause of the error is
eliminated, the error indication will
be automatically reset.
LED indicators
Setting port
LED name
*1 This indication appears when the use of the single unit simplied replacement function fails.
(This operation occurs on the S/W version “B” or later version.)
*2 This error is detected by executing automatic address recognition with master unit.
*3 For S/W version “B” or later version: This indication appears when transmission signal and
power supply are normally connected, and the unit is set to the factory-set address.
For S/W version “A” or 3-digit lot No.: This condition is detected when the master unit
executes automatic address recognition.
*4 This unit does not operate with the factory-set address.
LINK
(Green)
ALM
(Red)
Flashing
Lit
Unlit
Flashing
Lit
Lit
Unlit
Unlit
Display status
Alternate ashing
Model mismatching error*1
Description
I/O disconnection, I/O short-circuit
No ALM available
Transmission signal received
Slave unit voltage drop
Model mismatching error*1
Transmission signal error
Model mismatching error*1
ID duplicated*2or ID unregistered*3
No transmission signal (disconnection and
reverse connection of DP and DN lines included)
[Monitor Display]
I/O
(Orange)
LINK
ALM
LINK
ALM
LINK
ALM
ON*4
OFF
LINK
ALM
When I/O flashes in synchronization with LINK
while ALM is lit, it indicates I/O disconnection.

-B281*B02U*CC20 12/17-
<LINK does not ash>
Remedy
Check the connection of this unit.
Check conditions of the master unit
and slave unit.
Disconnect this unit once, and then reconnect it.
[Troubleshooting]
Things to be checked
Remedy
Things to be checked
Remedy
Things to be checked
Remedy
Things to be checked
Remedy
Things to be checked
1) If LINK on the master unit is ashing and LINK on the slave unit is lit, it is possible that the master
unit has a fault or power supply (24V-0V) is directly connected to the DP-DN pins of the slave unit.
*
If LINK is lit while ALM is ashing, it means a failure in single unit simplied replacement.
2) If LINK on the master unit is ashing and LINK on the slave unit is unlit, it is possible that the power
(24V DC) is not supplied to the master unit, there is a disconnection on the transmission line (DP,
DN), or the slave unit has been damaged.
3) If LINK on the master unit is not ashing, check the power supply to the master unit. Also, since there
is a possibility that some system error has occurred, refer to the user’s manual of the master unit.
4) A slave unit incompatible with Ver.1.1 cannot be used in connection to the AnyWireASLINK system
for word transmission. Check the setting of the master unit, and lot No. of the slave unit.
<ALM is lit>
<ALM is ashing>
<LINK and ALM ashes alternately>
<LINK is lit and ALM is ashing: Model mismatching error (Failure in single unit simplied replacement)>
Check the connection of I/O terminals
on the slave unit.
When IN ashes in synchronization with LINK while ALM is lit, the unit has I/O disconnection.
If only ALM is lit, the unit has I/O short-circuit or I/O voltage drop.
1) Make sure that the slave unit I/O line and load are normally connected. Use caution about
disconnection of the wiring and insufcient screw tightening.
2) To connect a mechanical contact (relay, switch, etc.) as load, OFF signal cannot be differentiated
from disconnection. In this case, set the equipment parameter for the disconnection detecting
function to OFF.
3) Check wiring of the slave unit terminals to ensure that the connected load meets the power supply
and output specications of ASLINER, and adjust it as required.
4) Adjust the power supply voltage of an external power source connected to the slave unit I/O line, so
that the power supply voltage does not exceed the rated voltage range (21.6V to 27.6V). Make sure
that wires of the transmission line do not touch each other. Check for incorrect wiring of the terminals.
Adjust the voltage of external power supply to the master unit so that it will be in the range from 21.6 to
27.6V. (Recommended voltage is 26.4V.) Check the total length.
Review the total length and wire diameter of transmission line so that the load will not exceed the current
limit supplied by the transmission line and adjust the connected load. (In the case of the wire size of
1.25mm2and total length of 50m or less, the current supplied by the transmission line is 2A.)
*
If ALM is ashing while LINK is lit, it means a failure in single unit simplied replacement.
Check if the replacement slave unit is of the same type as that of the slave unit before the replacement.
Check if the function version for the replacement slave unit is older than that of the slave unit before the
replacement.
*
If the function version of the replacement slave unit is older, the single unit simplied replacement
function does not work.
The address of the slave unit is either unregistered or duplicated.
Take the following actions.
*
The slave unit cannot be used with the factory-set address.
1) Set a bit address correctly in a range of 0 to 254.
2) Check if there is a slave unit on which the indicator lamps are ashing in the same manner and reset
the addresses so that they are not duplicated.
Check the address of the slave unit.
Check the model of the slave unit.
Check the lot No. of the slave unit.
Check the connection of the slave
unit.
Check the voltage (24V DC) of
external power supply to the master
unit.
Check if the address of the replacement slave unit is the same as the address before shipment (a bit
address of 511).
*
If the address of the replacement slave unit is not the same as the address before shipment, the single
unit simplied replacement function does not work.
Defective connections and the like may have caused single unit simplied replacement to fail.
Remove the slave unit after replacement, and make connections again.
*
When two or more replacement slave units are simultaneously connected, the single unit simplied
replacement function does not work.

-B281*B02U*CC20 13/17-
6.8k
24VL: Brown
DN
DP
IN: Black
0VL: Blue
24VL: Brown
DN
DP
OUT: Black
×
IN: Black
0VL: Blue
24VL: Brown
6.8k
DN
DP
電流検出
電流検出
[Configuration and Electrical Characteristics of the Input and Output Circuits]
<Circuit conditions>
Withstand voltage:
Max. ON current:
30V DC
100mA (per point)
Control
circuit
Current detection
Current detection
Current detection
Switch, sensor, etc.
(2-wire type)
<Circuit conditions>
Rated input voltage:
Max. switching current:
ON current:
OFF current:
ON voltage:
OFF voltage:
Supply current at 24VL:
24V DC
3.5mA
2.2mA or more
1mA or less
16V or more (24VL-IN)
8V or less (24VL-IN)
50mA max. (24VL-0VL)
(per point)
2-wire (non-isolated) NPN input
B281SB-02U-CC20 / B281XB-02U-CC20 (Input)
To connect
inductive load, use
a surge killer.
If output is turned
ON with the 24VL
and OUT terminals
short-circuited,
the output device
will be damaged.
2-wire (non-isolated) NPN output
B281PB-02U-CC20 / B281XB-02U-CC20 (Output)
Internal circuit
Load
Internal circuit
Internal circuit
Transistor output driven
by another power supply
cannot be connected as
ASLINKER’s input.
CAUTION

-B281*B02U*CC20 14/17-
6.8k
24VL: Brown
DN
DP
IN: Black
0VL: Blue
DN
DP
OUT: Black
0VL: Blue
×
IN: Black
24VL: Brown
6.8k
DN
DP
0VL: Blue
<Circuit conditions>
Withstand voltage:
Max. ON current:
30V DC
100mA (per point)
Current detection
Switch, sensor, etc.
(2-wire type)
<Circuit conditions>
Rated input voltage:
Max. switching current:
ON current:
OFF current:
ON voltage:
OFF voltage:
Supply current at 24VL:
24V DC
3.5mA
2.2mA or more
1mA or less
16V or more (IN-0VL)
8V or less (IN-0VL)
50mA max. (24VL-0VL)
(per point)
2-wire (non-isolated) PNP input
B281SB-02US-CC20 / B281XB-02US-CC20 (Input)
To connect
inductive load, use
a surge killer.
If output is turned
ON with the OUT
and 0VL terminals
short-circuited,
the output device
will be damaged.
2-wire (non-isolated) PNP output
B281PB-02US-CC20 / B281XB-02US-CC20 (Output)
Internal circuit
Internal circuit
Control
circuit
Current detection
Internal circuit
Current detection
Load
Transistor output driven
by another power supply
cannot be connected as
ASLINKER’s input.
CAUTION

Variable Description
1
0000
0001
15g
-B281*B02U*CC20 15/17-
①
②
2AWG24 φ1.5mm
2AWG24 φ1.5mm
2
IN(Black), 24VL(Brown),
0VL(Blue)
IN(Black), 24VL(Brown), 0VL(Blue)
OUT(Black), 24VL(Brown)
OUT(Black), 0VL(Blue)
OUT(Black), 24VL(Brown)
AWG26 φ1.0mm
3
2
3
AWG26 φ1.0mm
B281SB-02U-CC20
B281SB-02US-CC20
B281PB-02U-CC20
B281PB-02US-CC20
B281XB-02U-CC20
B281XB-02US-CC20
IN
OUT
IN
ALM
OUT
LINK
IN(Black), 24VL(Brown), 0VL(Blue)
2
3
*
The gure shows an example of B281XB.
IN
OUT
14
38
7.5
200 200
IN
ALM
OUT
LINK
A
B
DP (Red)
DN (Black)
DP (Red)
DN (Black)
■Individual specications
Number of
occupied points
Detection
function
Slave unit voltage drop (DP-DN voltage drop)
I/O disconnection
I/O short-circuit
Weight
Response time*41ms max.
[Specifications]
[Outside Dimensions]
■Transmission specications
*4Indicates the internal processing time of this unit. The maximum transmission delay
time is dened as “this time + bit transmission cycle time × 2.”
*5For input, the above values are assumed when all IN-0VL pins (NPN) or 24VL-IN pins
(PNP) are short-circuited.
To connect a 3-wire type sensor, add a total current consumption of the sensor.
For output, the above values are assumed when all points are turned ON. Add a total
current consumption of load being connected.
②Input side①Transmission side
■Specications of the cable included in ASLINKER
Number of
core wires
Core wire size
Signal name
Core wire sheath
outer diameter
Number of
core wires
Core wire size
Signal name
Core wire sheath
outer diameter
Disconnection
monitoring function
setting I/O disconnection detection and
short-circuit detection enabled
I/O disconnection detection and
short-circuit detection disabled
Used to specify whether the I/O cable
disconnection detecting function is
enabled or disabled.
[Equipment Parameter and Its Setting]
Equipment
parameter Setting item Description
Factory setting: 0000
Operati
ng ambient temperature/humidity
Storing ambient temperature/humidity
Vibration resistance
Shock resistance
Atmosphere
Operating altitude*1
Pollution level*2
■General specications
0 – +55°C, 10 – 90%RH No condensation
-25 – +75°C, 10 – 90%RH No condensation
Based on JIS B 3502 and IEC 61131-2
No corrosive gas
0 – 2000m
2 or less
*1 Do not use or store AnyWireASLINK devices in an environment where the pressure exceeds
the atmospheric pressure at an altitude of 0 meters. Doing so may result in malfunction.
*2“Pollution level” is an index that indicates the degree of occurrence of conductive substances
in the environment where the device is used.
Pollution level 2 means the occurrence of only pollution by non-conductive substances.
In such an environment, however, electrical conduction could occur due to accidental
condensation.
B281SB-02U-CC20
B281XB-02U-CC20
B281PB-02U-CC20
B281SB-02US-CC20
B281XB-02US-CC20
B281PB-02US-CC20
NPN bit input: 2 points
NPN bit input: 1 point/
bit output: 1 point
NPN bit output: 2 points
PNP bit input: 2 points
PNP bit input: 1 point/
bit output: 1 point
PNP bit output: 2 points
B281SB-02U-CC20
B281XB-02U-CC20
B281PB-02U-CC20
B281SB-02US-CC20
B281XB-02US-CC20
B281PB-02US-CC20
15.4mA
10.5mA
5.5mA
13.5mA
10.1mA
6.5mA
Transmission side*5
(DP-DN)
Current
consumption
Service power supply voltage
Transmission method
Synchronization method
Transmission procedure
Connection mode
Number of
connection points
*3
Number of connection units
RAS function
24V DC +15% to -10% (21.6 to 27.6V DC)
with a ripple of 0.5Vp-p or less
DC power supply superimposed
total frame/cyclic method
Frame/bit synchronization method
AnyWireASLINK protocol
Bus type (Multi-drop method, T-branch
method, Tree branch method)
Number of bit points: 512 points max.
(Input: 256 bits, Output: 256 bits)
Number of word points: 1024 words max.
(Input: 512 words, Output: 512 words)
Up to 128 units
Detection of transmission line disconnection,
transmission line short-circuit, transmission
power supply drop, and
duplicated/unregistered ID
*3 The number differs depending on the master unit. Be sure to refer to the manual of the
master unit for the number.
Model
Unit: mm
UL style 2103
2-wire × AWG24 (black) φ4.1
UL style 2844
3-wire × AWG26 (black) φ3.1
UL style 2844
2-wire × AWG26 (black) φ3.1
*
This figure shows an example
of the I/O-mixed type terminal.

7.5
3.5
5 5
1.51.7
R1.2
23
10.4
3.5
2.4
1
1
2.4
40.2
2-φ6
15
2-φ3.5
17.2
10.2
4 4
68.8
17.2 × (n-1)
2.4
-B281*B02U*CC20 16/17-
■ADP-81 (Mounting adaptor)
Connection hook
Connection hook

-B281*B02U*CC20 17/17-
Printed in Japan 2013,2014,2016,2017,2018,2019,2020 UMA-08717AP-EN
Anywire Corporation
Headquarters :1 Babazusho, Nagaokakyo-shi, Kyoto 617-8550 JAPAN
:Contact by website http://www.anywire.jp
[Address]
This manual suits for next models
6
Table of contents
Other Anywire Touch Terminal manuals

Anywire
Anywire Bitty Series User manual

Anywire
Anywire ASLINKAMP L-A1AW Series User manual

Anywire
Anywire ASLINK BL296 B-08F V50 Series User manual

Anywire
Anywire BL296 B-08F-4A-20 Series User manual

Anywire
Anywire AnyWireASLINK BL296PB-16F-4A-20 User manual

Anywire
Anywire ASLINK BL296SB-04F-4A-20 User manual

Anywire
Anywire BL287SB-02F-CC20 User manual

Anywire
Anywire BL296 B-16F Series User manual