Aolait ALB6C User manual

Wireless & IR Up-light Battery LED PAR
6 x 18W (6in1 LED)
User Manual
User Manual
Please read the instruction carefully before use

2
1. Caution!
Do not attempt any repairs yourself. Doing so will void your manufactures warranty. In the
unlike event your unit may require service please contact us
2. Warning
To prevent or reduce the risk of the electrical shock or fire, do not expose this unit to any
moisture. Please read this manual carefully to familiarize yourself with basic operations of this
unit
3. Safety precautions
1. Do not expose this unit to , wet moisture, explosive
2. Before plugging the power be sure local power outlets matches with the required voltage
of the unit
3. Do not remove the cover under the circumstance in case you are not qualified to do so
4. Never connect the power when cover is removed
5. Never use this unit if it becomes damage
6. Never connect this unit to any if dimmer and / or power pack
7. If the unit will not be used for the long time , disconnect it from the power supply
8. Always mount this unit safe and stable and make sure the area will have proper ventilation.
Take care this unit will not mounted in are close to heat sources such as lighting fixtures,
amplifiers heat registers, stoves and radiators
9. Always contact us in case you have any doubts
4. General Instruction
ALB6C is a battery powered and wireless Dmx intelligent RGBAW UV color light. User can
control the light by using wireless Dmx transmitter or run at master and salve mode. Fixture it
has 12 static color, user can set lights at static color mode without using the Dmx controller.
5. Set Up
ALB6C in had used switching voltage power supply, User can use directly plug in any voltage
from 90V-240V when charging or operating at charging mode. Battery it can be fully charged
after 3-4 hours of charging, user can also operate the light while charging the battery. When
User ready to operate the light or use in event or any places first user need to turn on the power
switch. After on the Power switch user can start to set up light at wireless Dmx mode, wire
Dmx mode, master and salve. Sound active mode, static color mode, auto mode, strobe, fade
or test mode. There is 2 thing must be remember by user
1. Operate light at Dmx Mode: Always set the fixture from menu at “Sl1 or Sl2”mode,
process; Press menu then press up/down key until appear “Slnd”press enter at “Slnd”choose
Sl1 or Sl2 and press Enter, after some second light will be stay at “stby”means at standby
mode to catch dmx signal, no matter its cable or wireless Dmx.
Note: when operate light at wireless Mode, make sure that signal switch is on, fixture its not
too far from the wireless DMX
Transmitter, after on the signal switch wireless indicator bulb should show red color, once

3
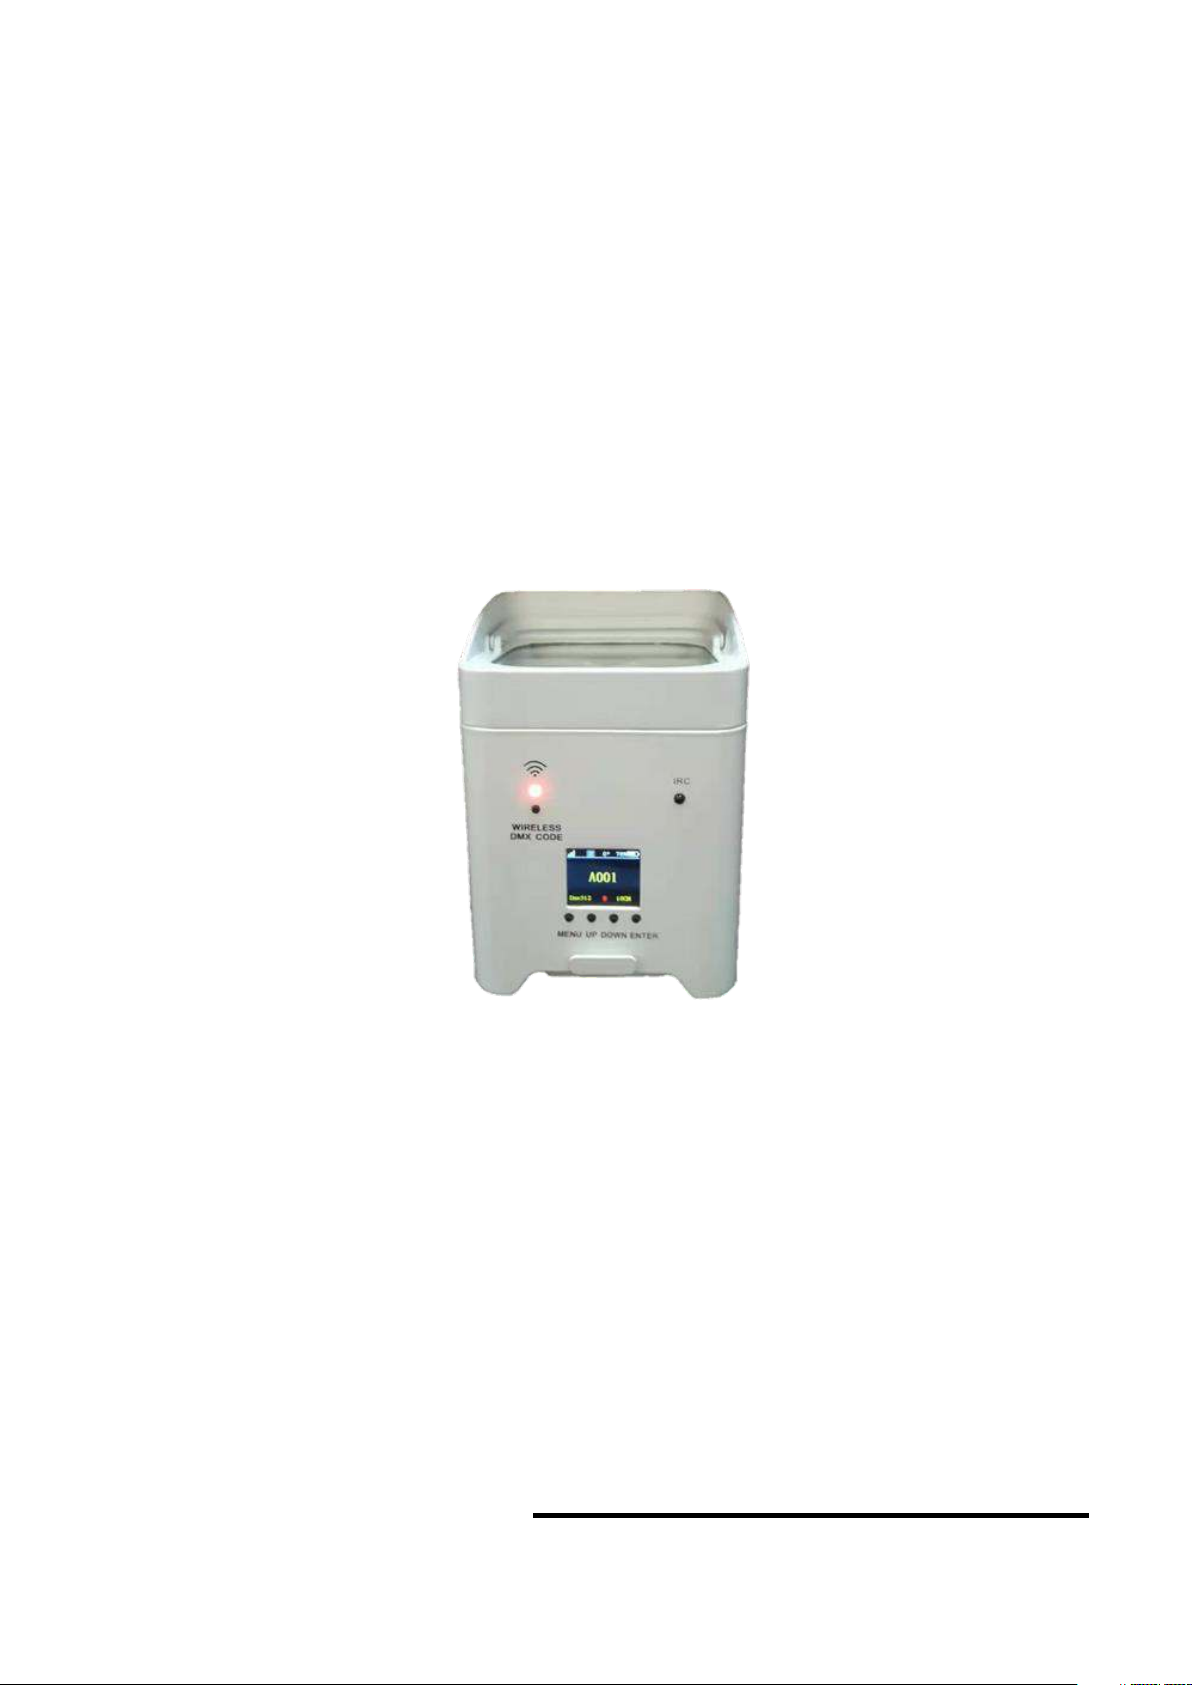
fixture start to receive the signal this indicator bulb it will show blipping green color led, some
time if wireless signal indicator bulb show other color then continually press black button
below the led indicator bulb until it shows red color. Some manufactures wireless transmitter it
has different led bulb color signal, make sure with supplier which is color indicate the
transmitting signal and set same color at fixture’s wireless signal indictor by pressing the black
button(id code selector) of fixture, once both color are same wireless signal led it will start to
blip green color, remember green color means its receiving signal from master unit or dmx
controller.
1. Operate light without using Dmx controller or built in color or effects or strobe or fade or
static color, sound active or master and slave: Always set the fixture from Menu at “Nast”
mode, then user can go inside the “Shnd”and choose any built in effects such as sound active,
static color, strobe, fade, Process;
Press menu then press up/down key until appear “Slnd”press enter at “Slnd”choose “nast”
and press Enter then Press Up button choose “Shnd”then press enter, now user can choose any
type of effect mode, soun for sound active mode, colo for static color mode, StCo for strobe
and Fade for built in effect types.
6. Examples
1. Set light at sound active and stay at sound active mode
Press Menu then press up/down button until appear slnd, press enter at slnd, find nast by
pressing up/down button then press enter, Press up button Shnd will appear at display then
press enter now you can see soun at display then press enter, after some second of pressing
enter light it will start to work at sound active mode.
If you wish connect other light also at same mode without setting or salve mode, then Press
Menu, find slnd and press enter then choose sl1 or sl2 then press enter. Follow same process at
all light you want to work at same mode, after some seconds light it will start to work same
function as first light
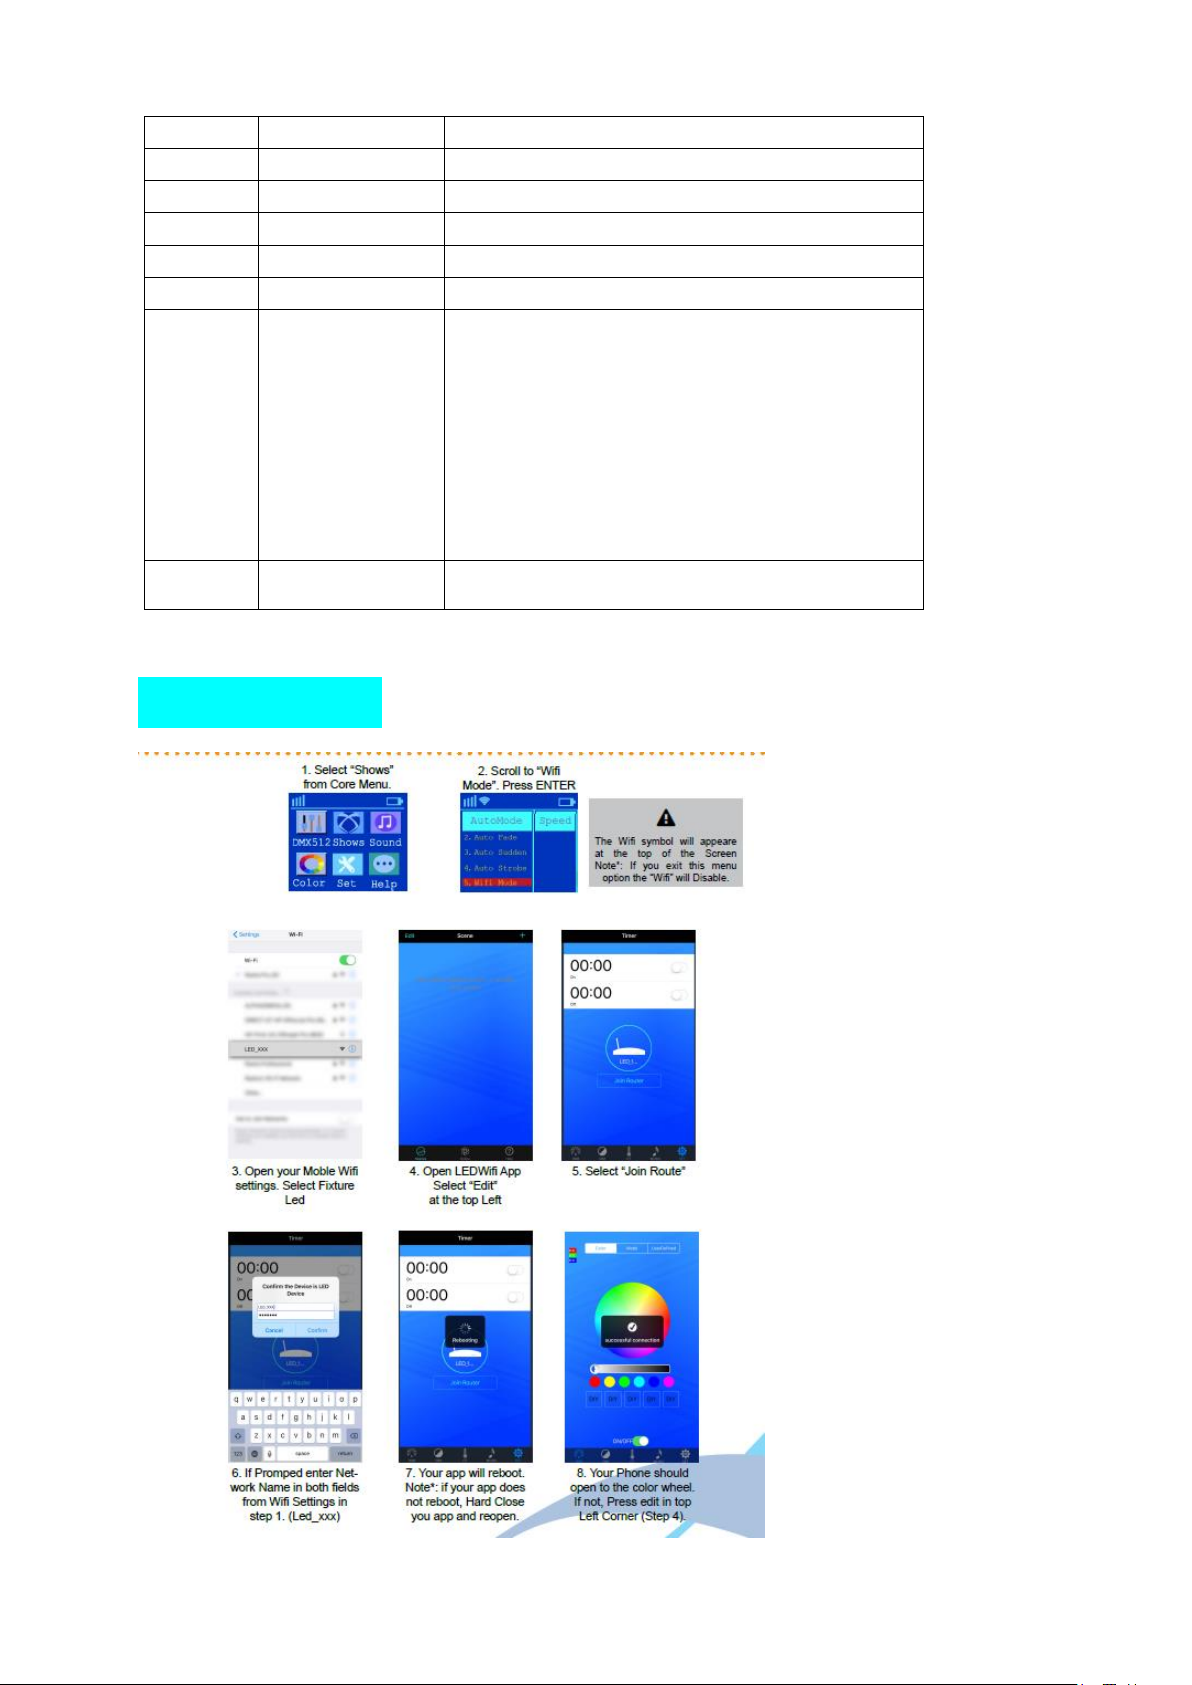
You can connect the lights by Dmx cable or also can connect wirelessly. When connect
wireless make sure signal switch it’s on. This is function of master and salve .(App #. 1)
2. Set and stay at static color: Press Menu- Up/down button Slnd-enter- press up button- Shnd-
Press enter- up button- colo- press enter- choose any color number from 1-12 and press enter
after some seconds your choose color it will start. For link fixtures follow App #. 1.
Make own custom color and display: Press menu, slnd- Press enter choose Nast- enter, press
up button, find nanu put the value 1-255 on RGBAW each color and press up/down button
find- shnd press enter- choose colo press enter and choose Co11 and press enter, after some
second light it will start to project custom made color as per value of color you put.

4
7. Specifications
Voltage: 100-250V AC 50/60Hz
Power consumption: 108 W
Lifespan: 50000 Hours
Light source: 6pcs 18W 6 in 1 RGBWA+UV LED
DMX Channels: 6/10 CH
Control mode: DMX512/2.4G wireless DMX512/WIFI App control(IOS AND Android)/IR
remote control/master-slave/auto/sound
Lens angle: 15°/25°/40°
Battery: imported 18650 lithium battery *12 3 strings 4 and 4*2400=9600 capacity
Charging and discharging can reach more than 500 times
Charging time: full charge in 5 hours
Discharge time: RGBWAUV is fully bright for 3.5 hours and monochrome for 16 hours.
Self-propelled mode 7.5 hours
◆Features
○All aluminum fuselage radiates heat.
○Adjustable base
○Mute
○LCD screen (can display electricity)
○Charging mode of teapot base (safety and no leakage)
○Laser marking (customizable pattern, LOGO)
○UHF (64KHZ) dimming technology, no jitter flicker
Size: 19.5*19*25.5
Net weight: 3.2KG
Gross weight: 3.5KG

5
8. LCD Menu Display Mode
Dmx 512
Shows
Sound
Color
Set
Background
Color
A001
Console
and
slave
mode
1、Auto Color
Color jump
Press Enter to
adjust the speed
(1-99)
1、Sound Mode1
Sound Activated
Mode 1
Press Enter to
adjust the
sensitivity
( 1-100)
1、Custom Color
Manual dimming
R:0-255
G:0-255
B:0-255
W:0-255
Y:0-255
U:0-255
1、DMX channel
Channel mode
6CH/10CH
2、Auto Fade
Color Fade
Change
Press Enter to
adjust the speed
(1-99)
2、Sound Mode2
Sound Activated
Mode 2
Press Enter to
adjust the
sensitivity
( 1-100)
2、Static Color
Select32 static
colors
2、2.4g wireless
Wireless Remote
ON/OFF
3、Auto Sudden
Color Pulse
Press Enter to
adjust the speed
(1-99)
3、Sound Mode3
Sound Activated
Mode 3
Press Enter to
adjust the
sensitivity ( 1-100)
3、Infrared
Infrared remote
control ON/OFF
4、Auto Strobe
Full bright strobe
Press Enter to
adjust the speed
(1-99)
4、Sound Mode4
Sound Activated
Mode 4
Press Enter to
adjust the
sensitivity ( 1-100)
4.Display
backlight
LCD backlight
brightness
adjustment
0-100%
5、Wifi Mode
Via Smart Phone
APP Control
5. LCD Close
time
LCD backlight
display ON/OFF
1、Open
2、5S
3、10S
4、15S
5、30S
6、Fan speed
Fan status selection
1、Auto seed
Fan automatic

6
2、Slow seed
Slow fan speed
3、Middle seed
Medium fan speed
4、Fast seed
Fast fan speed
7、Restore factory
Factory recovery
8888
8、MANUAL
White balance
adjustment
6666
9、Temperature
Temperature
status ON/OFF
10、Battery
Battery status
ON/OFF
11、
BackgroundColor
LCD background
color selection
9. Channel modes
6 channel mode
10 channel mode
Channel
Function
Instruction
CH1
R Dimmer
Red Dimmer- Dark to Bright
CH2
G Dimmer
Green Dimmer- Dark to Bright
CH3
B Dimmer
Blue Dimmer- Dark to Bright
CH4
W Dimmer
White Dimmer- Dark to Bright
CH5
A Dimmer
Amber- Dark to Bright
CH6
UV Dimmer
Ultraviolet- Dark to Bright
Channel
Function
Instruction
CH1
Total Dimmer
RGBW Total Dimmer- Dark to Bright
CH2
R Dimmer
Red Dimmer- Dark to Bright

7
10.APP Guideline
CH3
G Dimmer
Green Dimmer- Dark to Bright
CH4
B Dimmer
Blue Dimmer- Dark to Bright
CH5
W Dimmer
White Dimmer- Dark to Bright
CH6
A Dimmer
Amber- Dark to Bright
CH7
UV Dimmer
Ultraviolet- Dark to Bright
CH8
Total Strobe
RGBW Total Flash Strobe- Slow to Fast
CH9
Function Choice
0~8: No function
9~50: 32 Color Mixing
51~100: Colors Jump Change.
101~150: Colors Pulse Change.
151~200: Colors Gradate.
201~220: Sound-Active 1
221~240: Sound-Active2
241~255: Sound-Active 3
CH10
Function/Speed
Slow to Fast (At the Colors output and sound
choose the color)
Table of contents
Other Aolait Lighting Equipment manuals
Popular Lighting Equipment manuals by other brands

Professional Pool Products
Professional Pool Products RC04 instruction manual

Regent
Regent WZT1500 instruction manual

marinco
marinco 23050A Installation & operation instructions

OWIM
OWIM Melinera 288593 Operation and safety notes

miseno
miseno FL96801 Safety

Enabling Devices
Enabling Devices 3391 user guide