manuals.online logo
Brands
  1. Home
  2. •
  3. Brands
  4. •
  5. Aqualuma
  6. •
  7. Underwater Lighting
  8. •
  9. Aqualuma GEN2 6 Series User manual

Aqualuma GEN2 6 Series User manual

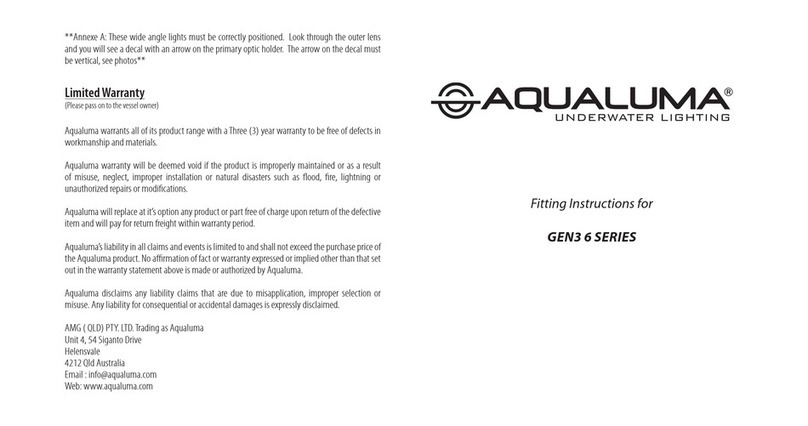
**Annexe A: These wide angle lights must be correctly positioned. Look through the outer lens
and you will see a decal with an arrow on the primary optic holder. The arrow on the decal must
be vertical, see photos**
Limited Warranty
(Please pass on to the vessel owner)
Aqualuma warrants all of its product range with aThree (3) year warranty to be free of defects in
workmanship and materials.
Aqualuma warranty will be deemed void if the product is improperly maintained or as a result
of misuse, neglect, improper installation or natural disasters such as ood, re, lightning or
unauthorized repairs or modications.
Aqualuma will replace at it’s option any product or part free of charge upon return of the defective
item and will pay for return freight within warranty period.
Aqualuma’s liability in all claims and events is limited to and shall not exceed the purchase price of
the Aqualuma product. No armation of fact or warranty expressed or implied other than that set
out in the warranty statement above is made or authorized by Aqualuma.
Aqualuma disclaims any liability claims that are due to misapplication, improper selection or
misuse. Any liability for consequential or accidental damages is expressly disclaimed.
AMG ( QLD) PTY. LTD. Trading as Aqualuma
Unit 4, 54 Siganto Drive
Helensvale
4212 Qld Australia
Email : [email protected]
Web: www.aqualuma.com
Fitting Instructions for
GEN2 6 SERIES
GEN2 TRI SERIES
6 & Tri Series Gen2 Fitting Instructions
All Aqualuma lights have been tested before shipping.
It is recommended that you use a qualied boat builder to work out placement and tting of your new
underwater lights.
You will require the following to install your new Aqualuma lights.
*76mm (3”) hole saw, Wire Connectors *Fuse or Circuit Breaker
Gen 2 series housings can now be installed with any sealant approved for below water
line use.
Step 1
With boat on hardstand or trailer calculate the spacings based on the width of the boat and the
number of lights you want to t. (Recommended spacing is 800mm (32 in”) for transom and
250-300mm (10 in”) below water line. Spacing for side of boat should be approximately 1.5
metres (60 in”). Mark the hole centres with a marker, be careful to check the inside of the boat
for any obstacles in the area you want to drill, with that done you can now drill a small pilot hole
then double check inside the boat again for anything that may obstruct the housing or retaining
nut. Once you are sure you have the correct position you can now drill trhough the hull with the
76mm (3in”) hole saw.
Step 2
Remove the light housing from box, remove the retaining nut from the housing and clean the
inside surface of the ange, clean the surface of the hull removing all antifouling from ange area
and wipe clean.
Step 3
You are now ready to install the complete light tting into the hull (there is no need to disassemble
light tting). NB - Please see Annexe A for correct lens alignment. Apply a generous amount
of sealer to the inside ange of the housing and carefully slide the housing into the hole with
someone inside the boat to attach the nut, hold the housing ush with the outside surface of the
boat and apply a small amount of sealer to inner surface around hole and tighten the nut by hand
until tight. The nut should only be hand tight.
Caution do not t in direct sunlight or extreme temperatures.
Step 4
Clean excess sealant from around the housing and check to make sure you have a seal all the way
around the ange to the outside edge of the housing. Check the face of the housing and lens area
for any sealant.
Step 5
Take the power wire and run to a known 12 or 24 volt DC fused and switchable power source with
5 amp fuse as each light uses only 1 amp @ 12 volts DC do not use higher fuse, connect the red
wire to positive and the black wire to negative.
Tri Series Wiring:
Connect the black wire to ground (this is common ground). Connect the red positive wire to
one switch and the white positive wire to a second switch. Each switch will turn on one colour
independently or both switches on, will turn both colours on together.
Please note Aqualuma lights are polarity sensitive.
Congratulations on purchasing and installing your new Aqualuma Underwater light you are now
ready to light up the water around your boat and be the envy of your friends who have not yet
seenTHE LIGHT!
This manual suits for next models

1

Other Aqualuma Underwater Lighting manuals

Aqualuma GEN2 3 Series User manual

Aqualuma

Aqualuma GEN2 3 Series User manual

Aqualuma GEN3 3 Series User manual

Aqualuma

Aqualuma GEN3 3 Series User manual

Aqualuma AQLBB*******-EU Series User manual

Aqualuma

Aqualuma AQLBB*******-EU Series User manual

Aqualuma TRIM TAB LIGHT User manual

Aqualuma

Aqualuma TRIM TAB LIGHT User manual

Aqualuma Pathway Light User manual

Aqualuma

Aqualuma Pathway Light User manual

Aqualuma GEN3 6 Series User manual

Aqualuma

Aqualuma GEN3 6 Series User manual

Popular Underwater Lighting manuals by other brands

PXM PX 229-H user manual

PXM

PXM PX 229-H user manual

Ros Q-LED II Operating and maintenance manual

Ros

Ros Q-LED II Operating and maintenance manual

Oceanled S3116s installation manual

Oceanled

Oceanled S3116s installation manual

Oase Water Jet Lightning operating instructions

Oase

Oase Water Jet Lightning operating instructions

Unilamp VOLGA/1 - CV Wall Recess Under Water installation manual

Unilamp

Unilamp VOLGA/1 - CV Wall Recess Under Water installation manual

Poolexa Jandy Pro Series installation manual

Poolexa

Poolexa Jandy Pro Series installation manual

emaux P50 Operating instructions & parts manual

emaux

emaux P50 Operating instructions & parts manual

hentech HT001C-P-T instruction manual

hentech

hentech HT001C-P-T instruction manual

UNDERWATER LIGHTS LIMITED UL Ti MATE 130 SA quick start guide

UNDERWATER LIGHTS LIMITED

UNDERWATER LIGHTS LIMITED UL Ti MATE 130 SA quick start guide

Hayward 7016849 user guide

Hayward

Hayward 7016849 user guide

Fisheye FIX NEO Premium 4030 EF II manual

Fisheye

Fisheye FIX NEO Premium 4030 EF II manual

Polarion Abyss U Series manual

Polarion

Polarion Abyss U Series manual

Astral Pool LUMIPLUS PAR56 RGB 1.11 Installation and maintenance manual

Astral Pool

Astral Pool LUMIPLUS PAR56 RGB 1.11 Installation and maintenance manual

LIGMAN BOH-60002 installation manual

LIGMAN

LIGMAN BOH-60002 installation manual

Nexxus Lighting SAVI-NOTE100 installation instructions

Nexxus Lighting

Nexxus Lighting SAVI-NOTE100 installation instructions

ML Accessories WGULED Installation & maintenance manual

ML Accessories

ML Accessories WGULED Installation & maintenance manual

AMP Lighting HydraPro MR11 Installation & maintenance guide

AMP Lighting

AMP Lighting HydraPro MR11 Installation & maintenance guide

Bluefin LED MR48CCTH installation manual

Bluefin LED

Bluefin LED MR48CCTH installation manual

manuals.online logo
manuals.online logoBrands
  • About & Mission
  • Contact us
  • Privacy Policy
  • Terms and Conditions

Copyright 2025 Manuals.Online. All Rights Reserved.