Page 5
CONTROL VALVES
AQT-290 Timer
Start-up Setting Procedures
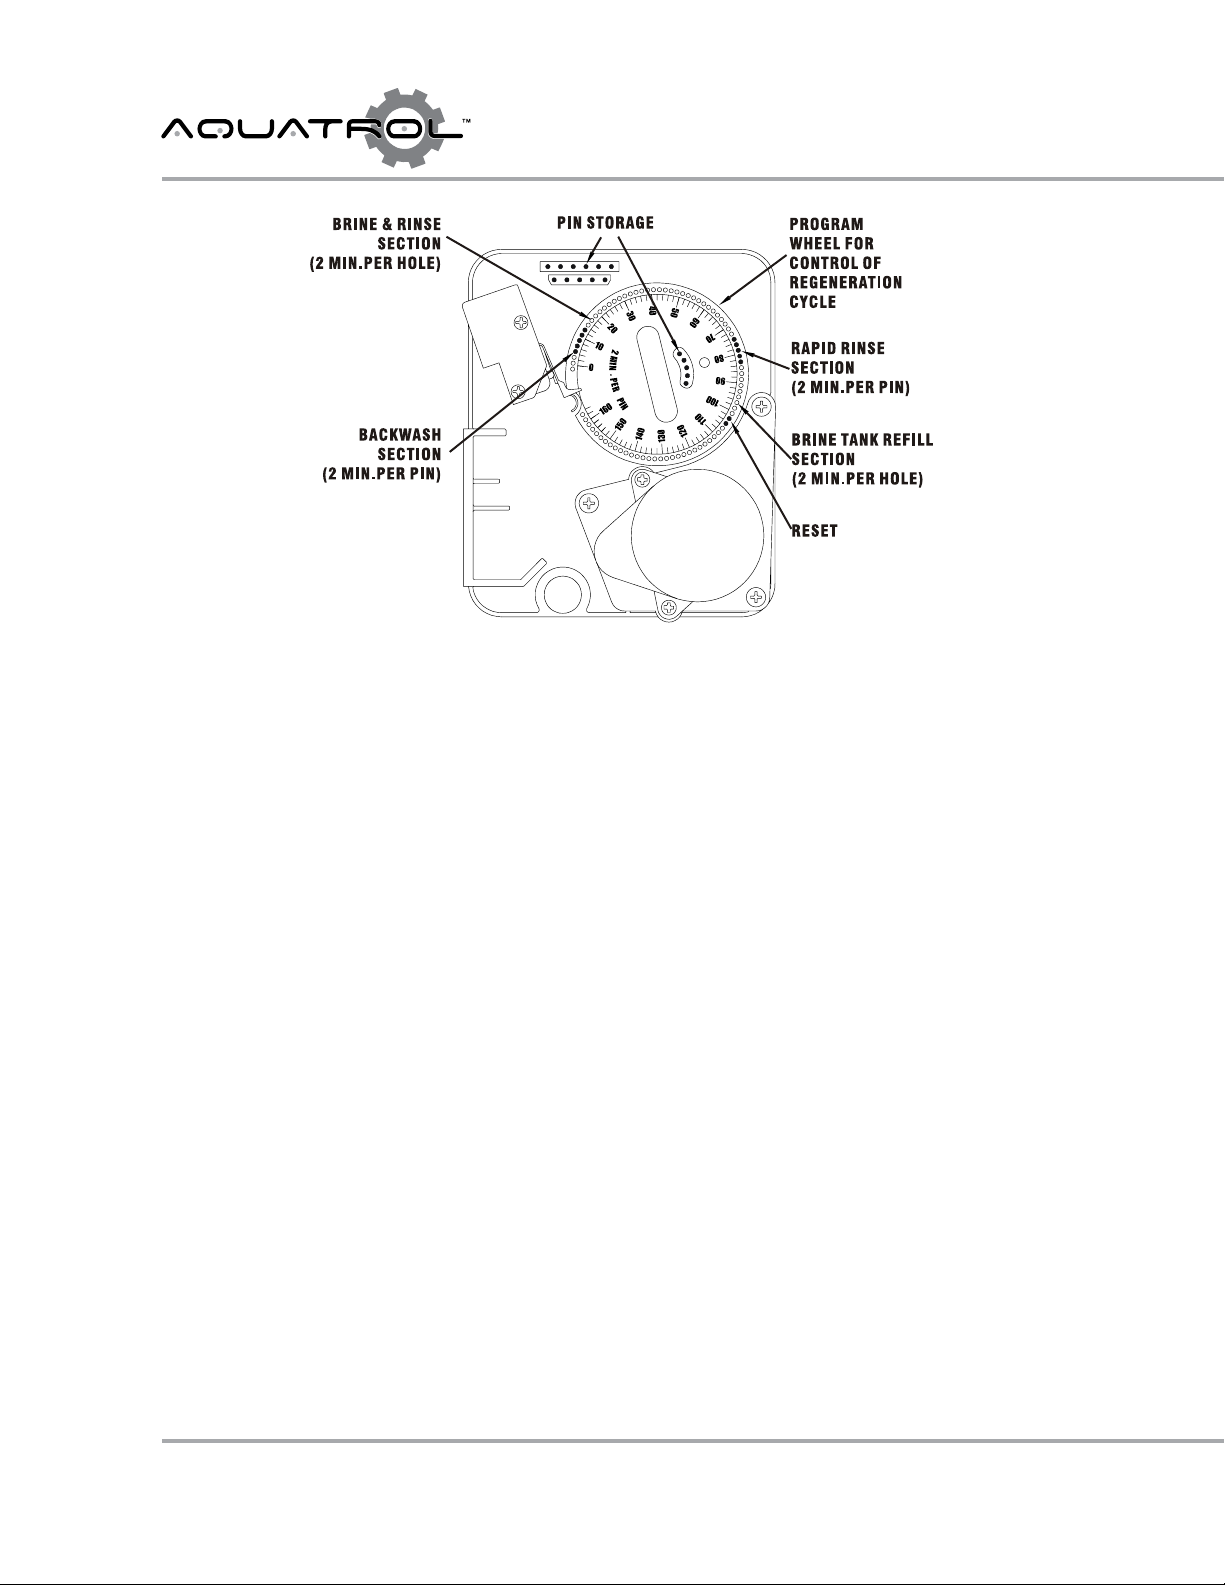
How To Set Days On Which Water Conditioner Is To
Regenerate:
Rotate the skipper wheel until the number "1" is at the red pointer.
Set the days that regeneration is to occur by sliding tabs on the
skipper wheel outward to expose trip ngers.
Each tab is one day. Finger at red pointer is tonight.
Moving clockwise from the red pointer, extend or retract ngers to
obtain the desired regeneration schedule.
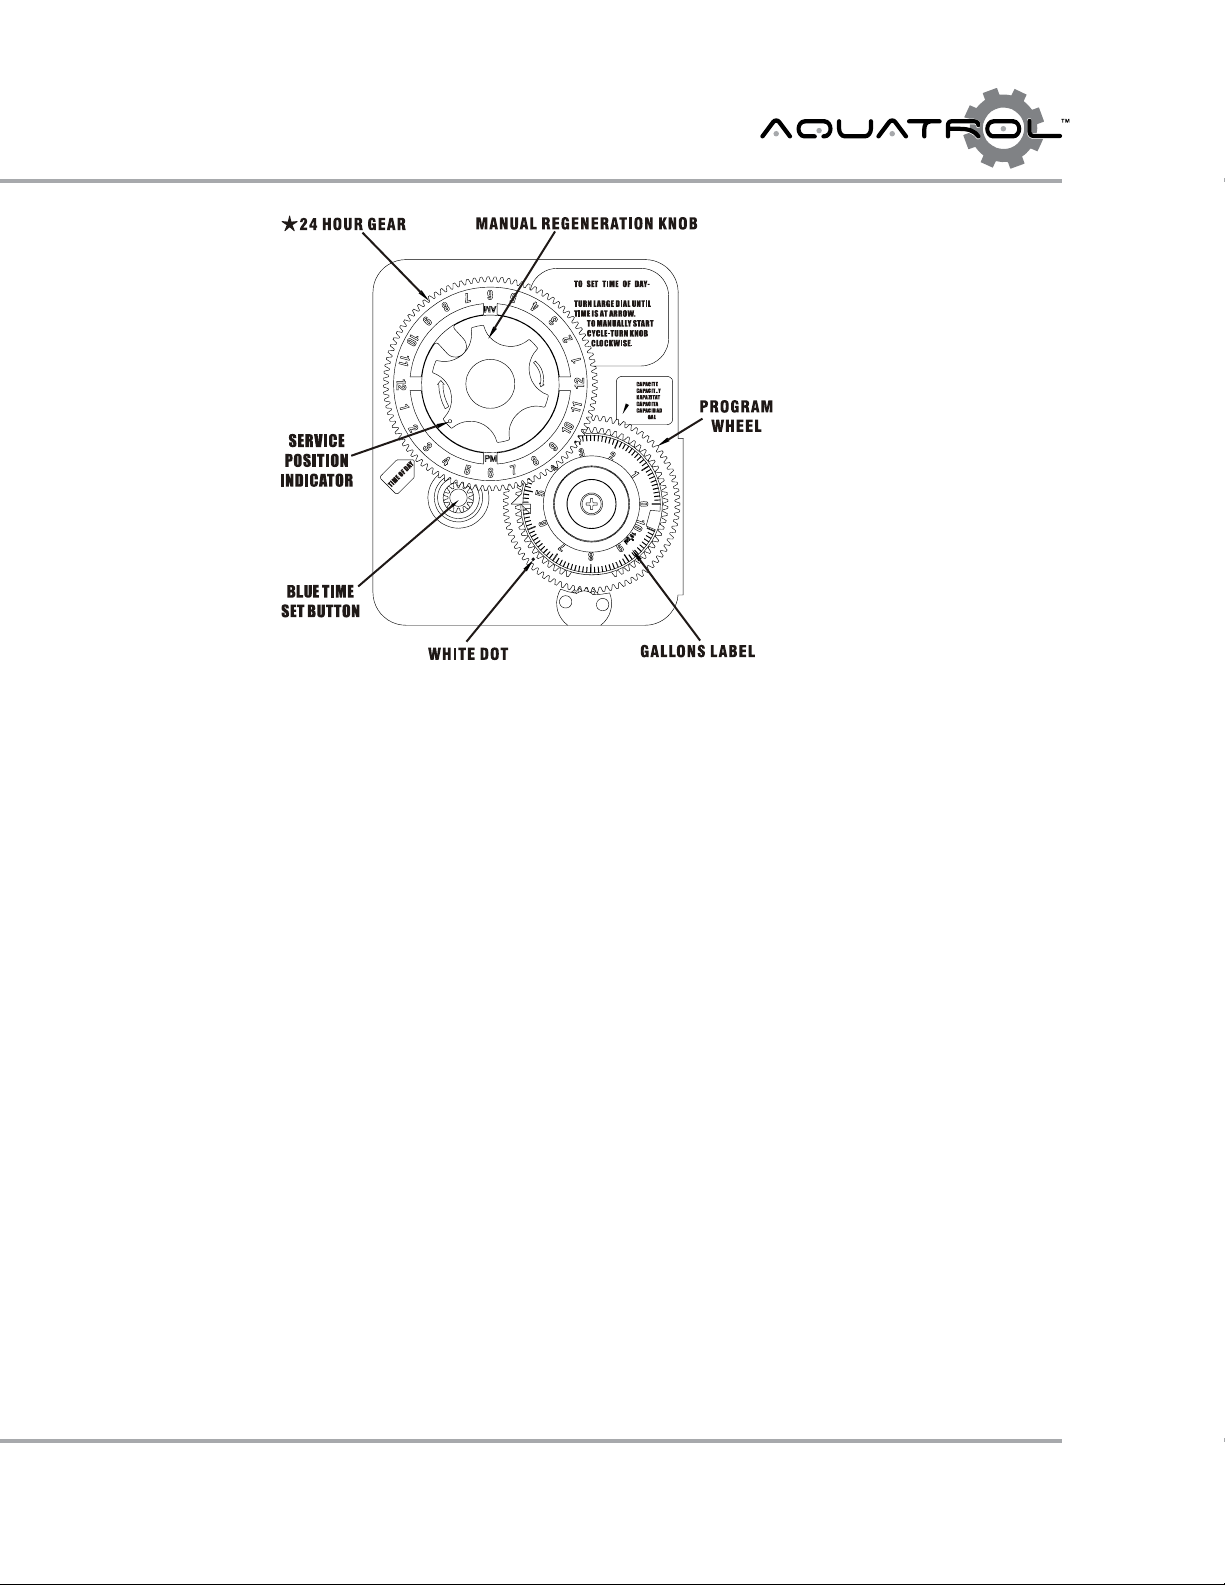
How To Set The Time Of Day:
Press and hold the blue button in to disengage the drive gear.
Turn the large gear until the actual time of day is at the time of day
pointer.
Release the blue button to again engage the drive gear.
How To Manually Regenerate Your Water Condi-
tioner At Any Time:
Turn the manual regeneration knob clockwise.
This slight movement of the manual regeneration knob engages
the program wheel and starts the regeneration program.
The black center knob will make one revolution in the following
approximately three hours and stop in the position shown in the
drawing.
Even though it takes three hours for this center knob to complete
one revolution, the regeneration cycle of your unit might be set
only one half of this time.
In any event, conditioned water may be drawn after rinse water
stops owing from the water conditioner drain line.
How To Adjust Regeneration Time:
1. Disconnect the power source.
2. Locate the three screws behind the manual regeneration knob
by pushing the blue button in and rotating the 24 hour dial
until each screw appears in the cut out portion of the manual
regeneration knob.
3. Loosen each screw slightly to release the pressure on the time
plate from the 24 hour gear.
4. Locate the regeneration time pointer on the inside of the 24
hour dial in the cut out.
5. Turn the plate so the desired regeneration time aligns next to
the raised arrow.
6. Push the blue button in and rotate the 24 hour dial. Tighten
each of the three screws.
7. Push the blue button and locate the pointer one more time to
ensure the desired regeneration time is correct.
8. Reset the time of day and restore power to the unit.