manuals.online logo
Brands
  1. Home
  2. •
  3. Brands
  4. •
  5. Arbiter Systems
  6. •
  7. Clock
  8. •
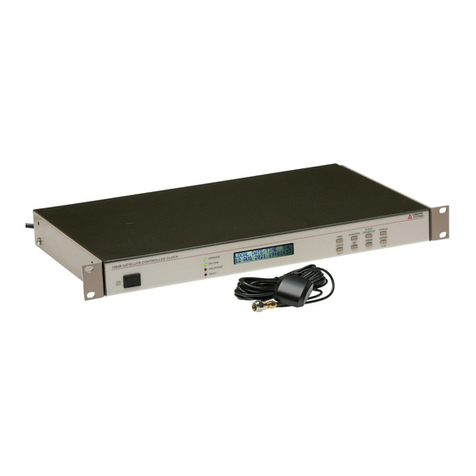
  9. Arbiter Systems 1092A User manual

Arbiter Systems 1092A User manual

Model 1092/1093 Program ROM Update
1 Introduction
This document provides instruction to replace the program ROM (firmware) in the Model 1092A/B/C
and Model 1093A/B/C series GPS Satellite Controlled Clocks. Basic understanding of electrical safety and
static protection is expected.
2 Required Equipment
1. Torx T-25 or large flat-blade screw driver
2. IC Removal Tool, curved tweezers or small blade screwdriver
3 Saving Original Configuration
Updating the firmware will erase the clock’s configuration. Document the existing settings for reference.
1. 1092B and 1093B/C: press SETUP and sequentially scroll through the various menus.
2. Press ENTER on any menu to sequence through that menu’s settings.
3. 1092A and 1093A: unfortunately, many settings cannot be queried. Use the Operation Manual for a
list of serial commands to set local offset, Daylight Saving Time, broadcast modes, IRIG-B time and
control functions, etc.
4 Disassembly
1. Disconnect power.
2. Remove from service.
3. Remove the four screws securing the cover with a T-25 driver (or flat-blade screwdriver).
4. Lift off the cover.
5 Installing the Program ROM
1. The program ROM is located at U2 (see Figure 1 on page 4).
2. Remove the old program ROM using the appropriate IC removal tool.
3. Install the new ROM. Observe the correct IC orientation and make sure the IC pins line up well on
both sides of the socket. If necessary, use a pin-bending tool to line up the pins.
4. Option 28: If present, the Power System Time, Frequency, and Phase Monitor may also require an
update ROM. Follow the separate instructions for the update steps.
6 Reassembly
1. Replace the cover.
2. Install the four screws securing the cover with a T-25 driver (or flat-blade screwdriver).
3. Place into service.
4. Connect the power.
5. Set to factory defaults.
7 Configuration
7.1 Factory Defaults
7.1.1 Front Panel (B and C Models)
1. Press and release SETUP at startup and during the first two splash screens.
If not displayed then start over.
2. Display will show SET FACTORY DEFAULTS?
3. Press ENTER and follow the on-screen prompts.
Arbiter Systems, Inc. ·1324 Vendels Circle, Suite 121 ·Paso Robles, CA 93446 ·USA ·Tel: +1.805.237.3831 PD0030600I
Fax: +1.805.238.5717 ·E-mail: techsupport@arbiter.com ·Internet: http://www.arbiter.com 1
Model 1092/1093 Program ROM Update
7.1.2 Serial
1. Connect a null-modem cable between a computer and the main serial port on the clock.
2. Open a terminal program (e.g. PuTTY) with port settings of 9600, 8, N, 1.
3. Type into terminal: 1092XX
7.2 Model Select
1. Type in the serial command listed below according to your clock model.
Model Serial Command Model Serial Command
1092A 0,1,1092XZ 1093A 3,1,1093XZ
1092B 1,1,1092XZ 1093B 4,1,1093XZ
1092C 2,1,1092XZ 1093C 5,1,1093XZ
2. Verify model configuration by cycling power and watching LCD display. If Model is incorrect then
retype the Model Select command.
7.3 Option Setup
7.3.1 Front Panel
1. Press SETUP to enter the configuration menus.
2. Press UP, DOWN, and ENTER to navigate the menus and configuration selections.
3. Press any top row button to exit the configuration menus.
4. NOTE: Cycle power to make sure the main processor and the option are communicating.
7.3.2 Serial
Command Description
M,N,K,LXI Where:
M = Option Location (0 = Main Board, 1 = Aux Board)
N = Option Number
Option Code (N = ) 0 1 2 3 4 5 6 7 8 9
Main Board Option (M = 0) none 19 – – – – – – – –
Aux. Board Option (M = 1) none 03 20A 27 28 29 32 33 34 35
K = security tree (model number, e.g. 1092 or 1093)
L = (use only if N selects Option 28) L = 0 for 60 Hz; L = 1 for 50 Hz
Example: 1,8,1093XI Model 1093A/B/C with Option 34
Example: 1,4,1093,0XI Model 1093A/B/C with Option 28 and 60 Hz reference
NOTE: Cycle power to make sure the main processor and the option are communicating.
Arbiter Systems, Inc. ·1324 Vendels Circle, Suite 121 ·Paso Robles, CA 93446 ·USA ·Tel: +1.805.237.3831
2 Fax: +1.805.238.5717 ·E-mail: techsupport@arbiter.com ·Internet: http://www.arbiter.com
Model 1092/1093 Program ROM Update
7.4 Typical Configuration List
Function Command Description
Local Offset ±hh:[mm]L Where:
hh = Hour
mm = Minute (15 minute increments)
Example: -8L Pacific Time Zone
Out-of-Lock Delay [-]nK Where:
- = disabled
n = delay in minutes (0 to 99)
Example: -1K Disabled
Example: 10K 10 Minute Delay
IRIG-B Data - Time Offset IL Set to local time code reference.
IU Set to UTC time code reference.
IRIG-B Data - IEEE 1344 I0 Set IEEE 1344 extension Off.
I1 Set IEEE 1344 extension On.
Daylight Saving Time Mode 1,mDT Set how Daylight Saving Time operates.
Where:
m = mode (0 = Off, 1 = On, 2 = Auto)
Example: 1,2DT Automatically adjust for DST per
configuration.
Daylight Saving Time Start 2,w,x,y,zDT Set Daylight Saving Time start time.
Where:
w = month (0 = JAN, 11 = DEC)
x = week of month (0 = First, 1 = Second,
2 = Third, 3 = Last, 4 = Second from Last,
5 = 3rd from Last)
y = day of week (0 = SUN, 6 = SAT)
z = minutes after midnight (0 to 1440)
Example: 2,2,1,0,120DT DST begins at 2:00 am
on the second Sunday of March.
Daylight Saving Time Stop 2,w,x,y,zDT Set Daylight Saving Time stop time.
Where:
w = month (0 = JAN, 11 = DEC)
x = week of month (0 = First, 1 = Second,
2 = Third, 3 = Last, 4 = Second from Last,
5 = 3rd from Last)
y = day of week (0 = SUN, 6 = SAT)
z = minutes after midnight (0 to 1440)
Example: 3,10,0,0,120DT DST ends at 2:00 am
on the first Sunday of November.
Daylight Saving Time Review 0DT Return Daylight Saving Time Configuration.
Arbiter Systems, Inc. ·1324 Vendels Circle, Suite 121 ·Paso Robles, CA 93446 ·USA ·Tel: +1.805.237.3831
Fax: +1.805.238.5717 ·E-mail: techsupport@arbiter.com ·Internet: http://www.arbiter.com 3
Model 1092/1093 Program ROM Update
J4
U13
R17
C43
TP4
CR7
C37
+
+
C33
+
C35
CR6
U17
U9
+
C36
U24
J11
U27
U14
U15
U20
J10
CR10
J7
J9
L3
U8
U28
R19
BT1
JMP5
R21
K1
Q3
R18
R*
J5
Y2
CR4
R13
R14
+
C8
Q2
C5
Q1
R2
C6
R3
R5
R4
R10
R6
R8
C47
L1
R36
U12
U1
U29
R7
R12
U7
U2
R1
U3
U5
U6
Y1
C39
C38
C7
R27
R40
C10
C9
C40
C25 C26 C28
C27
C31
C17
C18 C20C19
C45
C48
C49
R9
R16
U16
C44
C41
TP3
TP2
TP1
CR8
C42
+
C34
+
U26
U25
U19
CR5
CR2
CR9
L2
R20
JMP6 Q4
R15
U11
CR3
CR1
R11
C46
C2
C1
J6
J2
J7B
JMP1JMP2
R41
Q6
U4
Q5
U31
J3
CR11
R22
J7A
JMP4 JMP3
U10
JMP7
U18
1092/1093
DRILL VIA BEFORE
INSTALLING
B B
A A
INSTALLING
INSTALLING
BEFORE
BEFORE
DRILL
VIA
DRILL
VIA
B
A
REV.
PART NUMBER
A
B
SERIAL NUMBER
LB00189
PROCESSOR/CONTROLLER
TAB
OFF
ON
-12V
+12V
GND
+5V
+
+
+
Program ROM
Location
Figure 1: Model 1092/1093 Main Board ROM Location
Arbiter Systems, Inc. ·1324 Vendels Circle, Suite 121 ·Paso Robles, CA 93446 ·USA ·Tel: +1.805.237.3831
4 Fax: +1.805.238.5717 ·E-mail: techsupport@arbiter.com ·Internet: http://www.arbiter.com

Other manuals for 1092A

1

This manual suits for next models

5

Other Arbiter Systems Clock manuals

Arbiter Systems 1095A User manual

Arbiter Systems

Arbiter Systems 1095A User manual

Arbiter Systems 1205D User manual

Arbiter Systems

Arbiter Systems 1205D User manual

Arbiter Systems 1205B User manual

Arbiter Systems

Arbiter Systems 1205B User manual

Arbiter Systems 1205B User manual

Arbiter Systems

Arbiter Systems 1205B User manual

Arbiter Systems 1094B Installation manual
Arbiter Systems

Arbiter Systems 1094B Installation manual

Arbiter Systems 1084A User manual

Arbiter Systems

Arbiter Systems 1084A User manual

Arbiter Systems 1084A Installation manual

Arbiter Systems

Arbiter Systems 1084A Installation manual

Arbiter Systems 1200B User manual

Arbiter Systems

Arbiter Systems 1200B User manual

Arbiter Systems 1205B User manual

Arbiter Systems

Arbiter Systems 1205B User manual
Arbiter Systems 1095A User manual

Arbiter Systems

Arbiter Systems 1095A User manual
Arbiter Systems 120A User manual

Arbiter Systems

Arbiter Systems 120A User manual

Arbiter Systems 1088A User manual

Arbiter Systems

Arbiter Systems 1088A User manual

Arbiter Systems 1200B User manual

Arbiter Systems

Arbiter Systems 1200B User manual

Arbiter Systems 1201B Installation manual

Arbiter Systems

Arbiter Systems 1201B Installation manual

Popular Clock manuals by other brands

L’Epee SHERMAN User instructions

L’Epee

L’Epee SHERMAN User instructions

DGT Projects DGT 2000 user manual

DGT Projects

DGT Projects DGT 2000 user manual

Velleman WC8708 user manual

Velleman

Velleman WC8708 user manual

Ecom Instruments Ex-Time 40 user manual

Ecom Instruments

Ecom Instruments Ex-Time 40 user manual

Evil Mad Scientist Alpha Clock Five User Interface Guide

Evil Mad Scientist

Evil Mad Scientist Alpha Clock Five User Interface Guide

La Crosse Technology 513-1422 Faqs

La Crosse Technology

La Crosse Technology 513-1422 Faqs

La Crosse Technology T82394 quick start guide

La Crosse Technology

La Crosse Technology T82394 quick start guide

Northeast Color ATHLETIC REPUBLIC AR00001-01 Installation & operation guide

Northeast Color

Northeast Color ATHLETIC REPUBLIC AR00001-01 Installation & operation guide

Home & Comfort OP 011742 instruction manual

Home & Comfort

Home & Comfort OP 011742 instruction manual

Al-Awail AL-Muzakkira user guide

Al-Awail

Al-Awail AL-Muzakkira user guide

Grimm Audio CC2 manual

Grimm Audio

Grimm Audio CC2 manual

Pyramid 5000+ user guide

Pyramid

Pyramid 5000+ user guide

Conrad 67 21 58 Operation instructions

Conrad

Conrad 67 21 58 Operation instructions

Bresser 8020310 CM3000 instruction manual

Bresser

Bresser 8020310 CM3000 instruction manual

TFA 98.1036 instruction manual

TFA

TFA 98.1036 instruction manual

La Crosse Technology WT-8112U instruction manual

La Crosse Technology

La Crosse Technology WT-8112U instruction manual

Dugena 4460960 user manual

Dugena

Dugena 4460960 user manual

Dakota Digital ION-16 manual

Dakota Digital

Dakota Digital ION-16 manual

manuals.online logo
manuals.online logoBrands
  • About & Mission
  • Contact us
  • Privacy Policy
  • Terms and Conditions

Copyright 2025 Manuals.Online. All Rights Reserved.