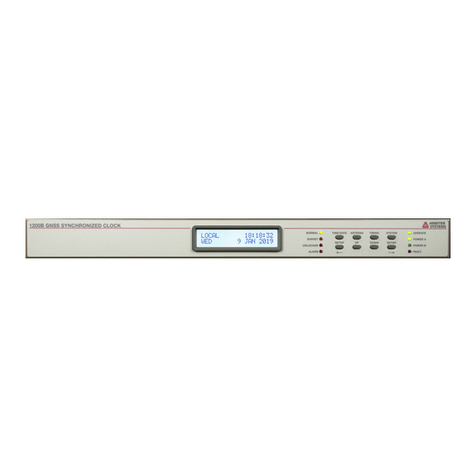
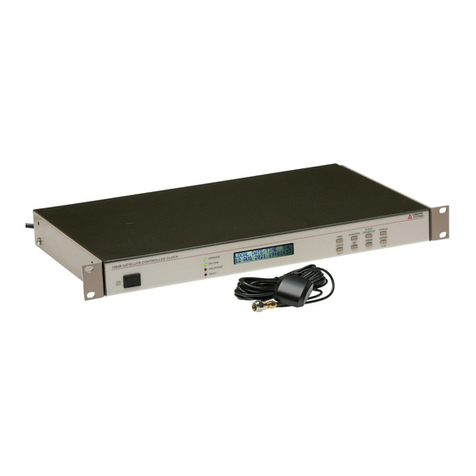
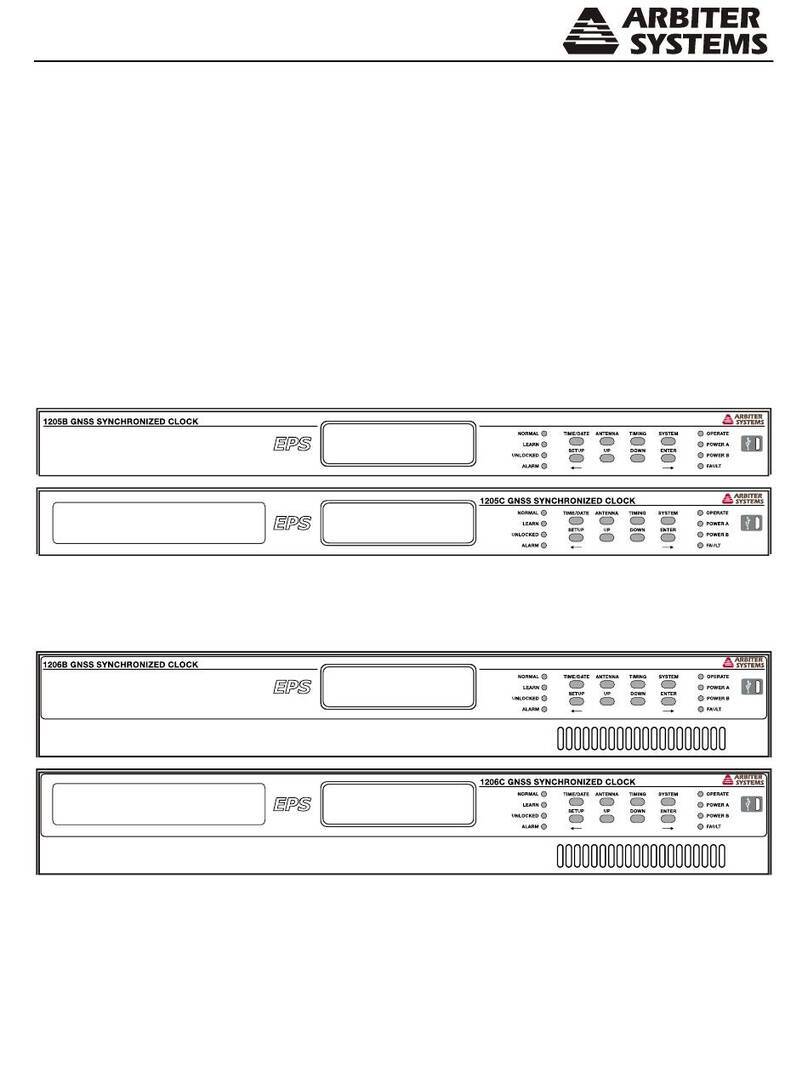
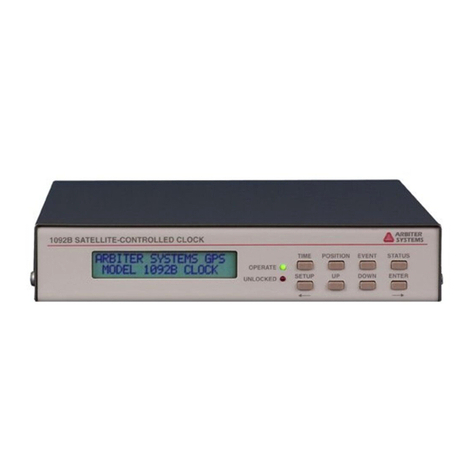
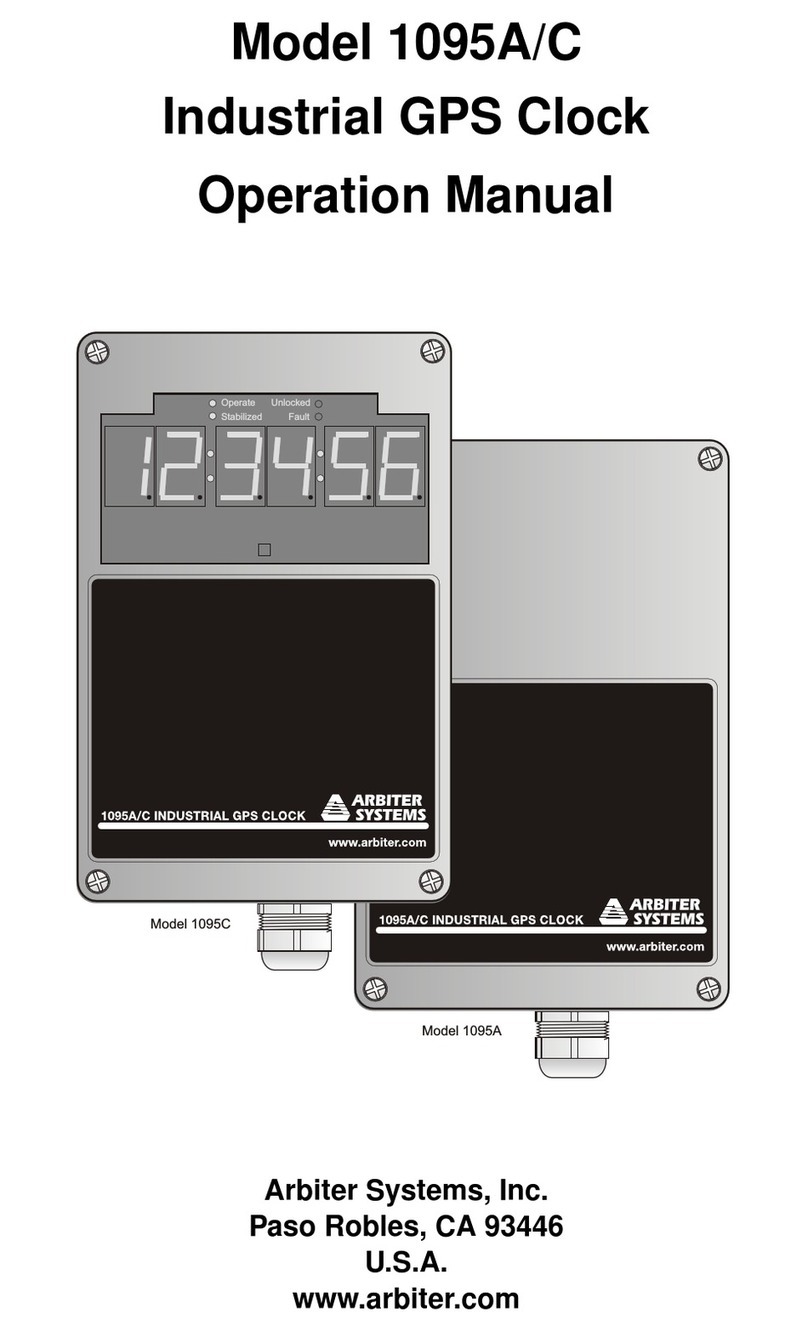
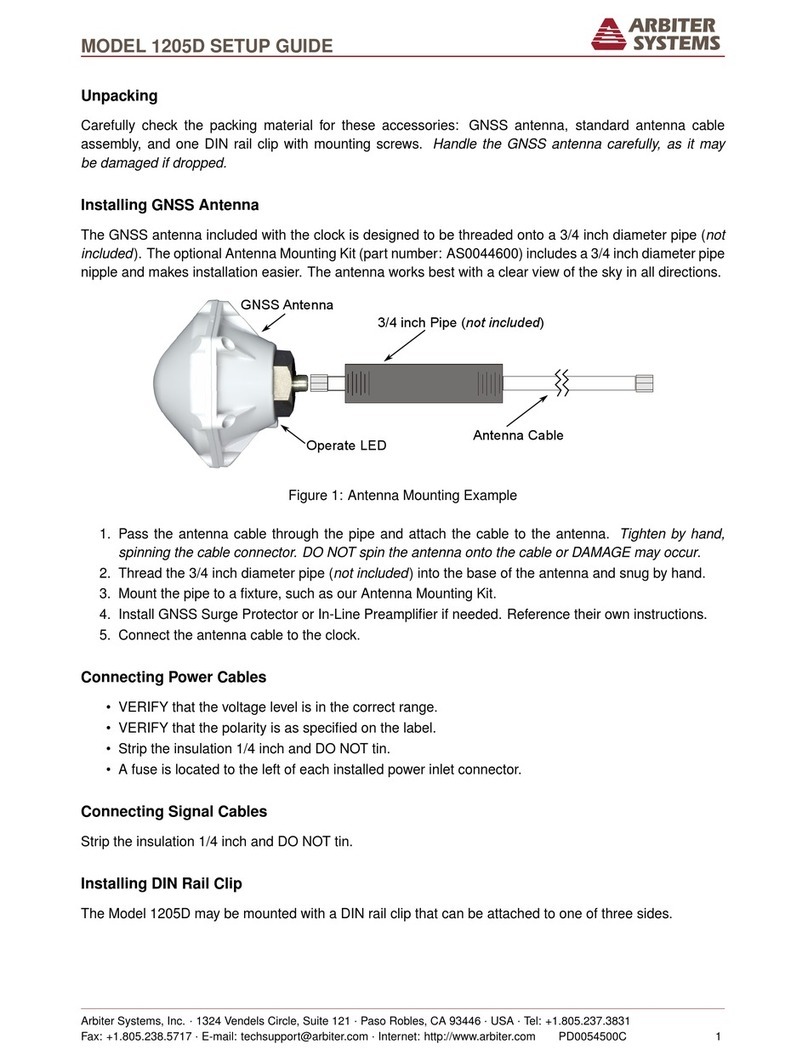
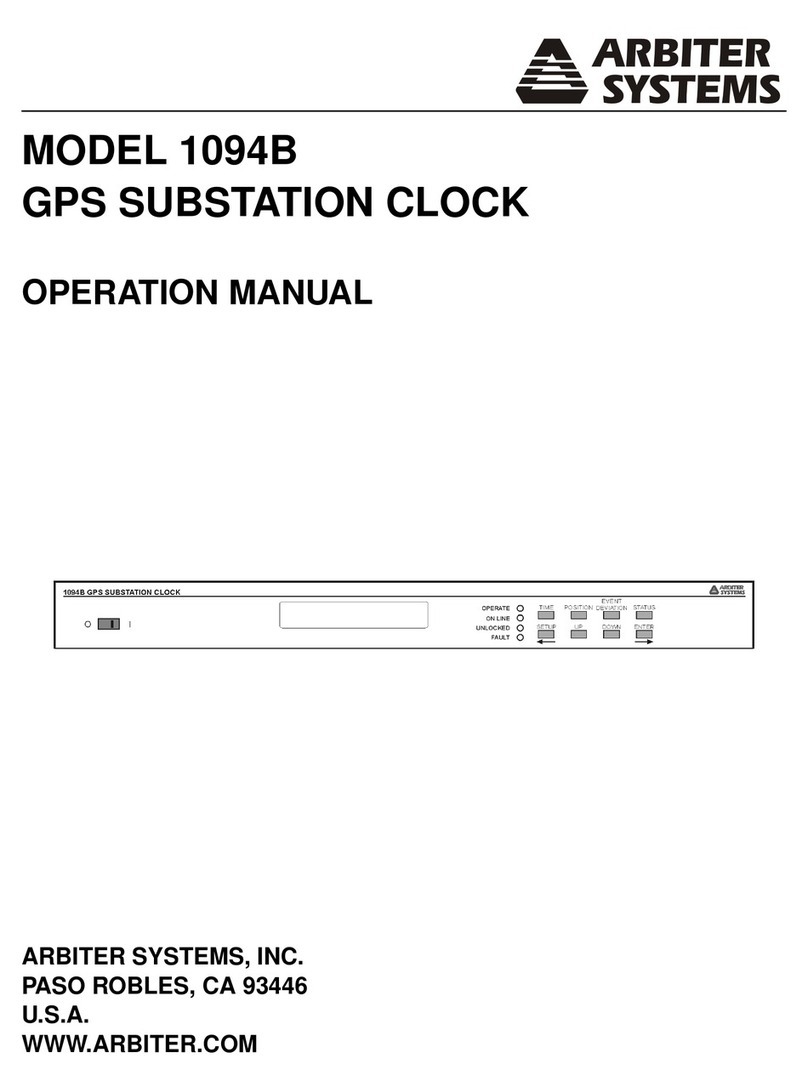
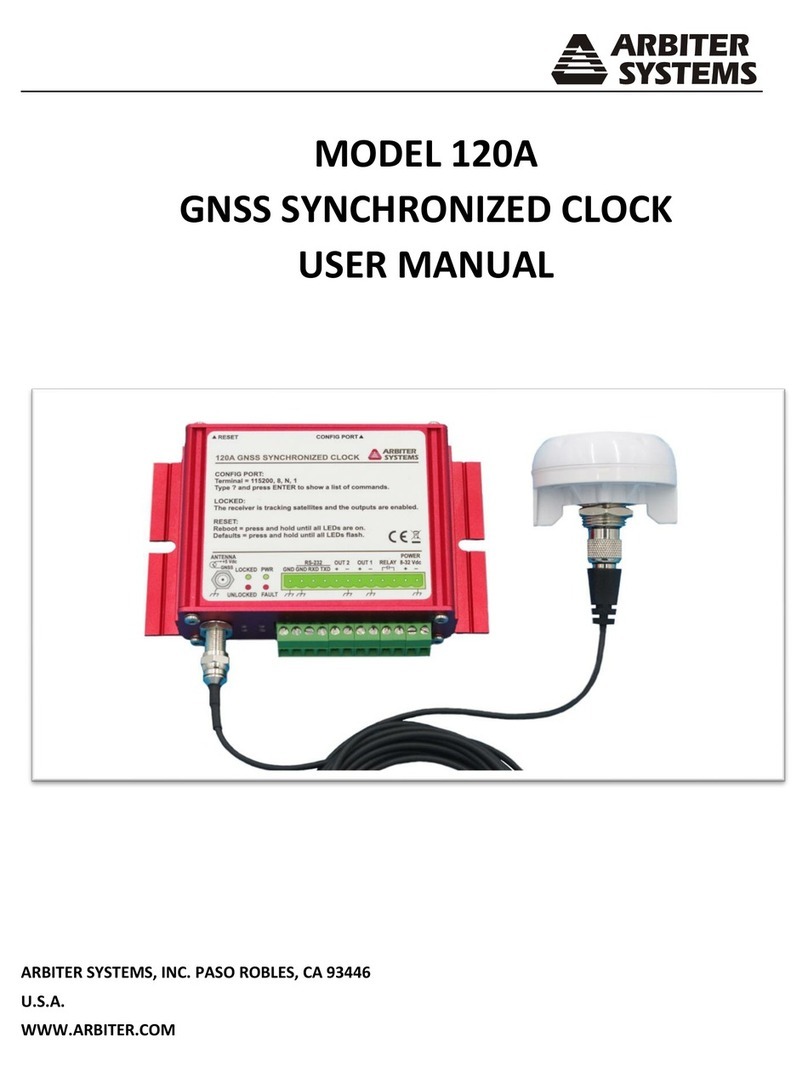
Arbiter Systems 1201B Installation manual

MODEL 1201B/C
GNSS SYNCHRONIZED CLOCK
OPERATION MANUAL
1201B GNSS SYNCHRONIZED CLOCK
1201C GNSS SYNCHRONIZED CLOCK
LEARN
UNLOCKED
NORMAL
ALARM
LEARN
UNLOCKED
NORMAL
ALARM
POWER A
POWER B
OPERATE
FAULT
POWER A
POWER B
OPERATE
FAULT
UP
SETUP DOWN ENTER
TIME/DATE ANTENNA TIMING SYSTEM
UP
SETUP DOWN ENTER
TIME/DATE ANTENNA TIMING SYSTEM
ARBITER SYSTEMS, INC.
PASO ROBLES, CA 93446
U.S.A.
WWW.ARBITER.COM

ii
Description This manual is issued for reference only, at the convenience of Arbiter Systems.
Reasonable effort was made to verify that all contents were accurate as of the time of publication.
Check with Arbiter Systems at the address below for any revisions made since the original date of
publication.
Contact Information
Arbiter Systems, Inc.
1324 Vendels Circle, Suite 121
Paso Robles, CA 93446
(805) 237-3831
Website: www.arbiter.com
mailto: techsupp[email protected]
mailto: [email protected]
What This Manual Covers
This manual describes the set up and operation of the Model 1201B/C series GNSS synchronized
clocks.
How to Determine Firmware Version Date
To display the firmware date for your Model 1201B/C press SYSTEM key until reaching the Serial
Number (S/N) and firmware version screen. To determine the current firmware date for this
product, see the Arbiter website under the specific product model.
Firmware Updates – Main Board
The clock main board requires a flash package to update firmware. Flash file updates are available
for download from the Arbiter website.
Firmware Updates – Network Options
Network options require a separate flash package (from the clock) to update firmware. Flash file
updates are available for download from the Arbiter website.
Firmware Updates – Non-Network Options
Non-network options may require a new ROM to update firmware. For example, Time & Frequency
Monitor requires a program ROM be replaced on the option board.
NOTE: Where applicable, firmware updates may include supplemental documentation, or a new
version of this manual.

iii
LIMITED WARRANTY Arbiter Systems makes no warranty, expressed or implied, on any
product manufactured or sold by Arbiter Systems except for the following limited warranty against
defects in materials and workmanship on products manufactured by Arbiter Systems.
Products manufactured by Arbiter Systems are guaranteed against defective materials and work-
manship under normal use and service from the date of delivery for a period five years. The
responsibility of Arbiter Systems under this warranty is limited to repair or replacement, at Ar-
biter Systems’ option, of any product found to be defective. Arbiter Systems shall have no liability
under this warranty unless it receives written notice of any claimed defect.
For warranty service or repair, products must be returned to a service facility designated by Arbiter
Systems. Buyer shall prepay all shipping charges to Arbiter Systems, and Arbiter Systems shall pay
shipping charges incurred in returning the product to Buyer. However, Buyer shall pay all shipping
charges, duties and taxes for products returned to Buyer in a country other than the United States
of America.
THE WARRANTY SET FORTH HEREIN CONSTITUTES THE ONLY WARRANTY OBLIGA-
TIONS OF ARBITER SYSTEMS, EXPRESSED OR IMPLIED, STATUTORY, BY OPERATION
OF LAW, OR OTHERWISE. ARBITER SYSTEMS DISCLAIMS ANY WARRANTY OF MER-
CHANTABILITY OR FITNESS FOR A PARTICULAR PURPOSE, AND BUYER EXPRESSLY
WAIVES ALL OTHER WARRANTIES.
This limited warranty does not extend to any product, which has been subject to:
1. Improper use or application, abuse, or operation beyond its rated capacity, or contrary to the
instructions in the operation and maintenance manuals (if any);
2. Accident;
3. Repair or maintenance performed by Buyer, except in accordance with the operation and
maintenance manuals, if any, and any special instructions of Arbiter Systems;
4. Modification without the prior written authorization of Arbiter Systems (whether by the
substitution of non-approved parts or otherwise). The remedies provided herein are Buyer’s
sole and exclusive remedies. In no event shall Arbiter Systems be liable for direct, indirect,
incidental or consequential damages (including loss of profits), whether based on contract,
tort, or other legal theory.
FOR THE FASTEST POSSIBLE SERVICE, PLEASE PROCEED AS FOLLOWS:
1. Notify Arbiter Systems, Inc., specifying the instrument model number and serial number and
giving full details of the difficulty. Service data or instrument-return authorization will be
provided upon receipt of this information.
2. If instrument return is authorized, forward prepaid to the manufacturer. If it is determined
that the instrument is not covered by this warranty, an estimate will be made before the
repair work begins, if requested.
See Contact Information on page ii.

iv

v
Model 1201B/C
GNSS Synchronized Clock
Operation Manual
Chapter 1 Unpacking the Clock
Chapter 2 Front and Rear Panels
Chapter 3 Connecting Inlet Power, Input and Output Signals
Chapter 4 Antenna and Cable Information
Chapter 5 Setting Internal Jumpers
Chapter 6 Startup and Operation
Chapter 7 1201 Utility Software
Chapter 8 Front Panel Menu System
Chapter 9 Timing, IRIG-B and Pulses
Chapter 10 Relay Contacts and Event Inputs
Chapter 11 Serial Communications and Command Set
Chapter 12 Specifications and Technical Details
Appendix A Using a Surge Arrester
Appendix B Options List
Appendix C Self-Signed Certificate for HTTPS
Appendix D CE Mark Certification
Appendix E Statement of Compliance
Index
Copyright Arbiter Systems Incorporated July 2017 All rights reserved.
International copyright secured.
Publication number: PD0051300C
Reorder number: AS0096700

Contents
1 Getting Started 1
1.1 Model 1201B/C Security Advantages . . . . . . . . . . . . . . . . . . . . . . . . . . . 1
1.2 1201B/CStandardFeatures................................ 1
1.3 StandardAccessories.................................... 2
1.4 HandlingPrecautions ................................... 2
1.5 Unpacking and Locating Accessories . . . . . . . . . . . . . . . . . . . . . . . . . . . 3
1.6 RemovingRackmountEars ................................ 4
1.6.1 RemovalInstructions................................ 4
2 Front and Rear Panels 5
2.1 Introduction......................................... 5
2.2 Front Panel Controls and Indicators . . . . . . . . . . . . . . . . . . . . . . . . . . . 5
2.2.1 Command Key Definitions . . . . . . . . . . . . . . . . . . . . . . . . . . . . . 6
2.2.2 LEDStatusIndicators............................... 6
2.2.3 LCDDisplay .................................... 7
2.2.4 Large LED Display: Model 1201C . . . . . . . . . . . . . . . . . . . . . . . . 7
2.2.5 Enabling and Disabling the Keypad and Display . . . . . . . . . . . . . . . . 7
2.3 Rear Panel Identification and Connectors . . . . . . . . . . . . . . . . . . . . . . . . 7
2.3.1 PowerInlet ..................................... 8
2.3.2 AntennaInput ................................... 8
2.3.3 Optional Fiber Optic Output . . . . . . . . . . . . . . . . . . . . . . . . . . . 9
2.3.4 EventInput..................................... 9
2.3.5 RS-232 and RS-485 Communication Ports . . . . . . . . . . . . . . . . . . . . 9
2.3.6 SPDTRelayContacts ............................... 9
2.3.7 Standard Inputs/Outputs . . . . . . . . . . . . . . . . . . . . . . . . . . . . . 10
2.3.8 Option Board Interface . . . . . . . . . . . . . . . . . . . . . . . . . . . . . . 10
3 Connecting Inlet Power, Input and Output Signals 11
3.1 Universal, High Voltage Power Supply Inlet . . . . . . . . . . . . . . . . . . . . . . . 11
3.1.1 Universal Supply: Connecting Inlet Power . . . . . . . . . . . . . . . . . . . . 11
3.2 Low DC, Power Supply Inlet . . . . . . . . . . . . . . . . . . . . . . . . . . . . . . . 12
3.2.1 Low DC: Connecting Inlet Power . . . . . . . . . . . . . . . . . . . . . . . . . 12
3.2.2 Surge Withstand Protection . . . . . . . . . . . . . . . . . . . . . . . . . . . . 12
3.3 Power Supply Fuses, Types and Ratings . . . . . . . . . . . . . . . . . . . . . . . . . 12
3.3.1 ReplacingFuses................................... 12
3.4 Connecting Output Signals . . . . . . . . . . . . . . . . . . . . . . . . . . . . . . . . 13

CONTENTS vii
3.5 ConnectingInputSignals ................................. 13
3.6 FiberOpticConnector................................... 13
3.7 OptionBoardSpace .................................... 13
4 GNSS Antenna and Cable Information 14
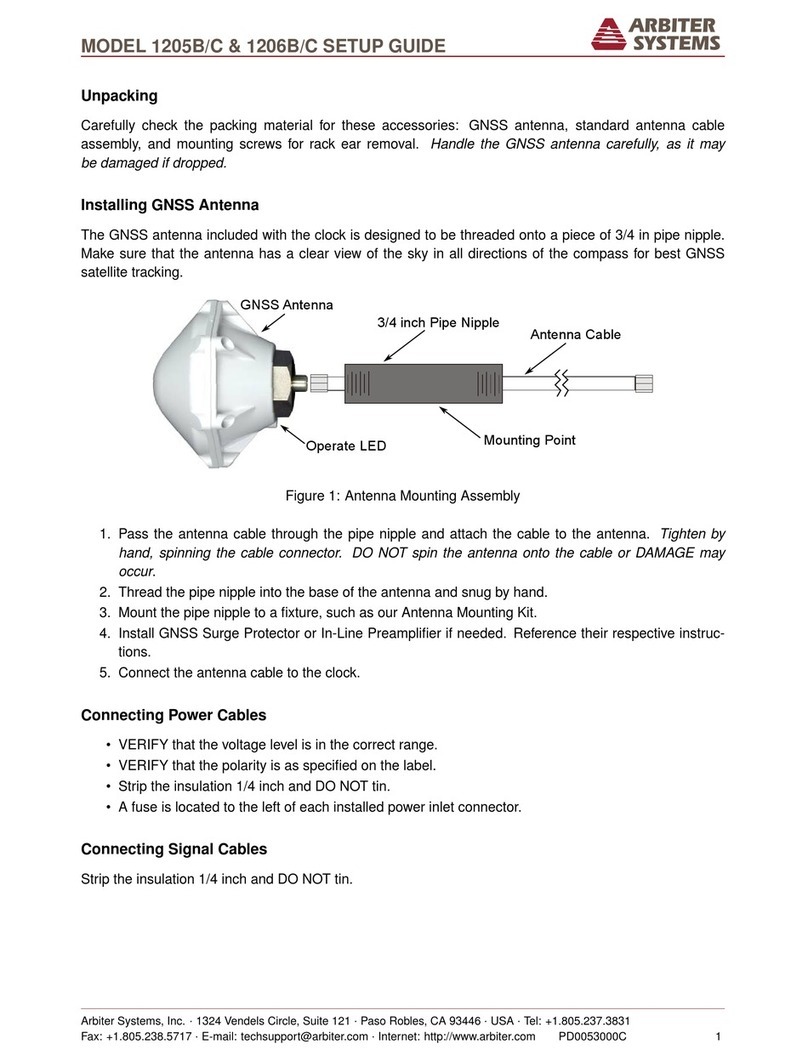
4.1 GNSS Antenna Installation . . . . . . . . . . . . . . . . . . . . . . . . . . . . . . . . 14
4.1.1 MountingtheAntenna............................... 14
4.1.2 Optional Antenna Mounting Bracket, Kit P/N AS0044600 . . . . . . . . . . . 15
4.2 Verifying Antenna and Cable Operation . . . . . . . . . . . . . . . . . . . . . . . . . 17
4.2.1 Checking the Antenna Status . . . . . . . . . . . . . . . . . . . . . . . . . . . 17
4.2.2 Other Antenna/Cable Indications . . . . . . . . . . . . . . . . . . . . . . . . . 17
4.3 GNSSSurgeArrester.................................... 18
4.3.1 Using the GNSS Surge Arrester . . . . . . . . . . . . . . . . . . . . . . . . . . 18
4.4 Technical Details of GNSS Antennas and Cables . . . . . . . . . . . . . . . . . . . . 18
4.4.1 Length and Loss Considerations . . . . . . . . . . . . . . . . . . . . . . . . . 18
5 Setting Internal Jumpers 22
5.1 CoverRemoval ....................................... 22
5.2 Setting Mainboard Jumpers . . . . . . . . . . . . . . . . . . . . . . . . . . . . . . . . 22
5.2.1 Mainboard and Jumper Locations . . . . . . . . . . . . . . . . . . . . . . . . 23
5.2.2 Digital Outputs: Port 1 and Port 3 . . . . . . . . . . . . . . . . . . . . . . . . 24
5.2.3 IRIG-B Unmodulated, 5 V Outputs . . . . . . . . . . . . . . . . . . . . . . . 25
5.2.4 1 PPS and Programmable Pulse, 5 V Outputs . . . . . . . . . . . . . . . . . 25
5.2.5 Analog and Digital Outputs: Port 2 . . . . . . . . . . . . . . . . . . . . . . . 25
5.2.6 EventInput..................................... 26
5.2.7 RelayOperation .................................. 26
5.2.8 Fiber Optic Output: Optional . . . . . . . . . . . . . . . . . . . . . . . . . . 26
5.2.9 Final Setup Instructions . . . . . . . . . . . . . . . . . . . . . . . . . . . . . . 27
6 Startup and Operation 28
6.1 InitialStartupSequence .................................. 28
6.1.1 Display Indication at Startup . . . . . . . . . . . . . . . . . . . . . . . . . . . 28
6.1.2 Clock Time, Startup Mode . . . . . . . . . . . . . . . . . . . . . . . . . . . . 29
6.2 OperatingModes...................................... 29
6.2.1 Learn and Normal Modes . . . . . . . . . . . . . . . . . . . . . . . . . . . . . 29
6.2.2 FaultsandAlarms ................................. 29
6.3 Time/DateKeyDisplays.................................. 30
6.3.1 Time and Date Display, UTC . . . . . . . . . . . . . . . . . . . . . . . . . . . 30
6.3.2 Time of Year Display, UTC . . . . . . . . . . . . . . . . . . . . . . . . . . . . 30
6.3.3 Time and Date Display, Local Time . . . . . . . . . . . . . . . . . . . . . . . 30
6.3.4 Time of Year Display, Local Time . . . . . . . . . . . . . . . . . . . . . . . . 30
6.3.5 Daylight Saving Time/Summer Time (DST) . . . . . . . . . . . . . . . . . . 31
6.4 AntennaKeyDisplays ................................... 31
6.4.1 GNSSTracking................................... 31
6.4.2 GNSS Signal-to-Noise Ratio . . . . . . . . . . . . . . . . . . . . . . . . . . . . 31
6.4.3 GNSSSetting.................................... 31
6.4.4 AntennaStatus................................... 31
viii CONTENTS
6.4.5 Position Display Modes . . . . . . . . . . . . . . . . . . . . . . . . . . . . . . 32
6.5 TimingKeyDisplays.................................... 33
6.5.1 ClockStatus .................................... 33
6.5.2 TimeQuality.................................... 33
6.5.3 Holdover Estimated Uncertainty . . . . . . . . . . . . . . . . . . . . . . . . . 33
6.5.4 Event/Deviation .................................. 33
6.6 SystemKeyDisplays.................................... 34
6.6.1 Serial Number and Firmware Date . . . . . . . . . . . . . . . . . . . . . . . . 34
6.6.2 PowerSupply.................................... 34
6.6.3 EEPROMErrors.................................. 35
6.6.4 FaultIndications.................................. 35
6.7 InputsandOutputs .................................... 36
6.7.1 IRIG-BTimeData................................. 36
7 1201 Utility Software 37
7.1 ClockSecurityNotes.................................... 37
7.2 Configuring with 1201 Utility Software . . . . . . . . . . . . . . . . . . . . . . . . . . 37
7.2.1 Obtaining the Utility Software . . . . . . . . . . . . . . . . . . . . . . . . . . 37
7.2.2 Installing Utility Software . . . . . . . . . . . . . . . . . . . . . . . . . . . . . 37
7.2.3 How the Utility Software Works . . . . . . . . . . . . . . . . . . . . . . . . . 38
7.3 Model1201B/CSecurity.................................. 39
7.3.1 SecurityFeatures.................................. 39
7.4 Establishing a Serial Connection . . . . . . . . . . . . . . . . . . . . . . . . . . . . . 40
7.5 Reading the Clock Configuration . . . . . . . . . . . . . . . . . . . . . . . . . . . . . 41
7.6 StartingtheLearnMode.................................. 42
7.7 TheStatusScreen ..................................... 43
7.7.1 Definitions ..................................... 43
7.8 ThePerformanceScreen.................................. 44
7.9 TheFaultScreen...................................... 45
7.10TheVersionScreen..................................... 46
7.11 COM1 & COM2 – Communication Screens . . . . . . . . . . . . . . . . . . . . . . . 47
7.12TheTimeScreen ...................................... 48
7.13TheOutputsScreen .................................... 49
7.13.1 Standard IRIG-B Section . . . . . . . . . . . . . . . . . . . . . . . . . . . . . 49
7.13.2 AuxiliaryIRIG-BMode .............................. 50
7.13.3 Seconds Per Pulse Mode . . . . . . . . . . . . . . . . . . . . . . . . . . . . . . 51
7.13.4 PulsePerHourMode ............................... 51
7.13.5 PulsePerDayMode................................ 52
7.13.6 SingleTriggerMode ................................ 52
7.13.7 SlowCode...................................... 53
7.13.8 DCF77 and DCF77 Modified . . . . . . . . . . . . . . . . . . . . . . . . . . . 53
7.14MiscellaneousScreen.................................... 54
7.14.1 MiscellaneousItems ................................ 54
7.15OptionScreen........................................ 55
7.16SecurityScreen....................................... 56
7.17UploadingaConfiguration................................. 57

CONTENTS ix
7.18UploadingNewFirmware ................................. 59
7.19 Setting to Factory Defaults . . . . . . . . . . . . . . . . . . . . . . . . . . . . . . . . 60
8 Front Panel Menu System 61
8.1 MenuSystem ........................................ 61
8.1.1 UpperKeys..................................... 61
8.1.2 LowerKeys..................................... 62
8.1.3 Configure Using the Keypad . . . . . . . . . . . . . . . . . . . . . . . . . . . 62
8.1.4 TheSetupMenus.................................. 63
8.1.5 Default Firmware Settings . . . . . . . . . . . . . . . . . . . . . . . . . . . . . 63
8.1.6 Configuration Flow Diagrams . . . . . . . . . . . . . . . . . . . . . . . . . . . 64
8.1.7 Numeric Data Entry Mode . . . . . . . . . . . . . . . . . . . . . . . . . . . . 64
8.2 SerialCOMPortSettings ................................. 65
8.2.1 SerialCOM1.................................... 65
8.2.2 SerialCOM2.................................... 65
8.3 SettingtheLocalTime................................... 66
8.3.1 Set Daylight Saving Time (DST) . . . . . . . . . . . . . . . . . . . . . . . . . 66
8.4 Setting Out of Lock Indication . . . . . . . . . . . . . . . . . . . . . . . . . . . . . . 68
8.5 Set Mulitpurpose Relay Configuration . . . . . . . . . . . . . . . . . . . . . . . . . . 69
8.5.1 Triggering the Relay with a Programmable Pulse . . . . . . . . . . . . . . . . 69
8.6 SettingtheBackLight................................... 70
8.7 SettingSystemDelays ................................... 70
8.8 Setting Programmable Pulse Mode . . . . . . . . . . . . . . . . . . . . . . . . . . . . 71
8.8.1 Entering Numerical Values . . . . . . . . . . . . . . . . . . . . . . . . . . . . 71
8.8.2 Programmable Pulse: Seconds-Per-Pulse Mode . . . . . . . . . . . . . . . . . 72
8.8.3 Programmable Pulse: Pulse-Per-Hour Mode . . . . . . . . . . . . . . . . . . . 73
8.8.4 Programmable Pulse: Pulse-Per-Day Mode . . . . . . . . . . . . . . . . . . . 74
8.8.5 AuxiliaryIRIG-B.................................. 75
8.8.6 Programmable Pulse: Single Trigger . . . . . . . . . . . . . . . . . . . . . . . 76
8.8.7 Programmable Pulse: Slow Code . . . . . . . . . . . . . . . . . . . . . . . . . 77
8.8.8 Programmable Pulse: DCF77 . . . . . . . . . . . . . . . . . . . . . . . . . . . 77
8.9 SettingIRIGTimeData.................................. 78
8.10 Setting the Event or Deviation Modes . . . . . . . . . . . . . . . . . . . . . . . . . . 78
8.11SettingOptionControl................................... 79
8.12 1201C LED Display Date Format . . . . . . . . . . . . . . . . . . . . . . . . . . . . . 79
9 Timing, IRIG-B and Pulses 80
9.1 Introduction......................................... 80
9.2 Timing Output Description . . . . . . . . . . . . . . . . . . . . . . . . . . . . . . . . 80
9.2.1 Inputs and Outputs: Port 1, Port 2, Port 3 . . . . . . . . . . . . . . . . . . . 81
9.2.2 DigitalDrivers ................................... 81
9.2.3 AnalogDriver.................................... 81
9.3 OutputSignalDescription................................. 82
9.3.1 IRIG-BDescription ................................ 82
9.3.2 Modulated and Unmodulated IRIG-B . . . . . . . . . . . . . . . . . . . . . . 82
9.3.3 IRIG-B IEEE C37.118.1 . . . . . . . . . . . . . . . . . . . . . . . . . . . . . . 83

x CONTENTS
9.3.4 1 Pulse-Per-Second (1 PPS) . . . . . . . . . . . . . . . . . . . . . . . . . . . . 83
9.3.5 Programmable Pulse (PROG PULSE) . . . . . . . . . . . . . . . . . . . . . . 84
9.3.6 Programmable Pulse with Open Drain, Setup . . . . . . . . . . . . . . . . . . 84
9.3.7 Protecting the 200 V FET Connection . . . . . . . . . . . . . . . . . . . . . . 84
9.3.8 DCF77TimeSignal ................................ 84
9.4 ConnectingtheOutputs .................................. 85
9.4.1 Attaching Cables to Screw Terminals . . . . . . . . . . . . . . . . . . . . . . . 86
9.4.2 How Far Can I Run IRIG-B Cabling? . . . . . . . . . . . . . . . . . . . . . . 86
9.4.3 Synchronizing Multiple IED’s From One Masterclock Output . . . . . . . . . 86
9.4.4 Connecting Unmodulated IRIG-B . . . . . . . . . . . . . . . . . . . . . . . . 86
9.4.5 Connecting Modulated IRIG-B . . . . . . . . . . . . . . . . . . . . . . . . . . 87
9.4.6 WireLosses..................................... 87
9.4.7 Voltage Matching for Modulated IRIG-B . . . . . . . . . . . . . . . . . . . . 87
9.4.8 CableDelays .................................... 88
9.4.9 Solutions ...................................... 88
10 Relay Contacts and Event Inputs 89
10.1RelayContacts ....................................... 89
10.1.1 Introduction .................................... 89
10.1.2 RelayOperation .................................. 89
10.2 Event and 1 PPS Deviation Recording . . . . . . . . . . . . . . . . . . . . . . . . . . 90
10.2.1 Event Timing and Recording . . . . . . . . . . . . . . . . . . . . . . . . . . . 90
10.2.2 EventTimingLatency............................... 90
10.2.3 1 PPS Deviation Measurement . . . . . . . . . . . . . . . . . . . . . . . . . . 90
10.2.4 1 PPS Deviation Measurement Principle . . . . . . . . . . . . . . . . . . . . . 90
10.2.5 Event Timer Input Channel Configuration . . . . . . . . . . . . . . . . . . . . 91
10.2.6 FirmwareSetup................................... 91
10.2.7 DisplayingData .................................. 91
10.2.8 1PPSDeviation .................................. 91
10.2.9 ClearingRecords.................................. 92
11 RS-232C Command Set 93
11.1Introduction......................................... 93
11.2StandardCommandSet .................................. 93
11.2.1 Installing Custom Broadcast Strings . . . . . . . . . . . . . . . . . . . . . . . 94
11.2.2 Broadcast Mode Commands . . . . . . . . . . . . . . . . . . . . . . . . . . . . 94
11.2.3 EventModeCommands.............................. 98
11.2.4 Status Mode Commands . . . . . . . . . . . . . . . . . . . . . . . . . . . . . . 100
11.2.5 SystemLogMessages ...............................102
11.2.6 Local / Daylight Saving Time Setup Commands . . . . . . . . . . . . . . . . 102
11.2.7 Front Panel Control Commands . . . . . . . . . . . . . . . . . . . . . . . . . 103
11.2.8 IRIG-B Data Output Commands . . . . . . . . . . . . . . . . . . . . . . . . . 104
11.2.9 Date and Time Commands . . . . . . . . . . . . . . . . . . . . . . . . . . . . 105
11.2.10 Programmable Pulse Output Commands . . . . . . . . . . . . . . . . . . . . . 105
11.2.11 Antenna System Delay Commands . . . . . . . . . . . . . . . . . . . . . . . . 107
11.2.12 Out-of-Lock Commands . . . . . . . . . . . . . . . . . . . . . . . . . . . . . . 107

CONTENTS xi
11.2.13 Miscellaneous Commands . . . . . . . . . . . . . . . . . . . . . . . . . . . . . 107
11.3 Communication Port Information . . . . . . . . . . . . . . . . . . . . . . . . . . . . . 109
11.4 Custom Broadcast String Reference . . . . . . . . . . . . . . . . . . . . . . . . . . . 109
11.4.1 Installing a Custom String . . . . . . . . . . . . . . . . . . . . . . . . . . . . . 109
11.4.2 Start Custom Broadcast . . . . . . . . . . . . . . . . . . . . . . . . . . . . . . 109
11.4.3 Return Custom String . . . . . . . . . . . . . . . . . . . . . . . . . . . . . . . 109
11.4.4 Constructing a Custom String . . . . . . . . . . . . . . . . . . . . . . . . . . 110
11.4.5 String Setup Examples and Tutorial . . . . . . . . . . . . . . . . . . . . . . . 112
12 Technical Specifications and Operating Parameters 115
12.1FunctionalDescription...................................115
12.1.1 Front Panel Interface . . . . . . . . . . . . . . . . . . . . . . . . . . . . . . . . 115
12.1.2 Processing......................................115
12.1.3 PowerSupply....................................116
12.1.4 NetworkSection ..................................116
12.1.5 LegacySection ...................................116
12.1.6 OptionConnectors.................................116
12.2 GNSS Receiver Characteristics . . . . . . . . . . . . . . . . . . . . . . . . . . . . . . 116
12.2.1 InputSignal.....................................116
12.2.2 TimingAccuracy..................................116
12.2.3 Position Accuracy (rms) . . . . . . . . . . . . . . . . . . . . . . . . . . . . . . 117
12.2.4 SatelliteTracking..................................117
12.2.5 GNSS Acquisition Time . . . . . . . . . . . . . . . . . . . . . . . . . . . . . . 117
12.3I/OConfiguration .....................................117
12.3.1 I/O Connectors: Main Board . . . . . . . . . . . . . . . . . . . . . . . . . . . 117
12.3.2 Standard Output Signals . . . . . . . . . . . . . . . . . . . . . . . . . . . . . 117
12.3.3 Event Input/1 PPS Deviation . . . . . . . . . . . . . . . . . . . . . . . . . . . 117
12.3.4 MultifunctionRelay ................................118
12.4SystemInterface ......................................118
12.4.1 Broadcast Data Formats . . . . . . . . . . . . . . . . . . . . . . . . . . . . . . 119
12.4.2 Synchronization ..................................119
12.5AntennaSystem ......................................119
12.5.1 AntennaCable ...................................119
12.6OperatorInterface .....................................119
12.6.1 SetupMethods ...................................119
12.6.2 SetupFunctions ..................................119
12.6.3 Display .......................................120
12.6.4 DisplayFunctions .................................120
12.6.5 Annunciators ....................................120
12.7PhysicalSpecifications...................................120
12.7.1 Dimensions .....................................120
12.7.2 Weight........................................121
12.8 Temperature and Humidity . . . . . . . . . . . . . . . . . . . . . . . . . . . . . . . . 121
12.9 Power Inlet Specifications . . . . . . . . . . . . . . . . . . . . . . . . . . . . . . . . . 122
12.9.1 Power Inlet Connector . . . . . . . . . . . . . . . . . . . . . . . . . . . . . . . 122
12.9.2 Electro-Magnetic Interference (EMI) . . . . . . . . . . . . . . . . . . . . . . . 122

xii CONTENTS
A Using a Surge Arrester 123
A.1 Description .........................................123
A.2 Installation .........................................124
A.2.1 MountingLocation.................................124
A.2.2 GroundConnection ................................124
A.2.3 Antenna and Clock Connections . . . . . . . . . . . . . . . . . . . . . . . . . 124
A.2.4 Weather Sealing the Connections . . . . . . . . . . . . . . . . . . . . . . . . . 124
A.3 PhysicalDimensions ....................................124
A.3.1 SuggestedMounting ................................124
B Options List 126
B.1 Introduction.........................................126
B.2 Universal Inlet Power Supply . . . . . . . . . . . . . . . . . . . . . . . . . . . . . . . 127
B.2.1 High Range Universal Supply with Terminal Power Strip, SWC . . . . . . . . 127
B.2.2 Specifications....................................127
B.3 LowDCInletPowerSupply................................128
B.3.1 22 Vdc to 67 Vdc ONLY, Terminal Power Strip, SWC . . . . . . . . . . . . . 128
B.3.2 Specifications....................................128
B.4 HoldoverOscillator.....................................129
B.5 OneFiberOpticOutput..................................129
B.6 Four Configurable Outputs . . . . . . . . . . . . . . . . . . . . . . . . . . . . . . . . 130
B.6.1 GeneralDescription ................................130
B.6.2 Specifications....................................130
B.6.3 GeneralInformation ................................130
B.7 FourFiberOpticOutputs.................................133
B.7.1 Specifications....................................133
B.7.2 Output Jumper Enable (JMP2 – JMP5) . . . . . . . . . . . . . . . . . . . . . 133
B.8 8-Channel High Drive IRIG-B Amplifier . . . . . . . . . . . . . . . . . . . . . . . . . 136
B.8.1 GeneralDescription ................................136
B.8.2 Specifications....................................136
B.8.3 OptionSetup....................................136
B.8.4 Output Load and Loop Example: Unmodulated IRIG-B . . . . . . . . . . . . 138
B.8.5 Connecting Load(s) to Output Bus . . . . . . . . . . . . . . . . . . . . . . . . 139
B.8.6 Output Loading (Modulated IRIG-B) . . . . . . . . . . . . . . . . . . . . . . 140
B.9 Power System Time, Frequency and Phase Monitor . . . . . . . . . . . . . . . . . . . 141
B.9.1 GeneralDescription ................................141
B.9.2 Discussion......................................141
B.9.3 System Reference Connection . . . . . . . . . . . . . . . . . . . . . . . . . . . 141
B.9.4 Firmware Configuration . . . . . . . . . . . . . . . . . . . . . . . . . . . . . . 141
B.9.5 Calibration .....................................142
B.9.6 PhaseCalibration .................................142
B.9.7 Amplitude Calibration . . . . . . . . . . . . . . . . . . . . . . . . . . . . . . . 143
B.9.8 Option: Specific RS-232 Commands . . . . . . . . . . . . . . . . . . . . . . . 143
B.9.9 OptionCommands.................................143
B.10 Four Additional Outputs and Dry Contacts; +25/50 Vdc . . . . . . . . . . . . . . . 149
B.10.1GeneralDescription ................................149

CONTENTS xiii
B.10.2Specifications....................................149
B.10.3 Firmware Configuration . . . . . . . . . . . . . . . . . . . . . . . . . . . . . . 151
B.10.4 Output Jumper Setting Changes . . . . . . . . . . . . . . . . . . . . . . . . . 152
B.11NTP/PTPServer......................................154
B.11.1GeneralDescription ................................154
B.11.2 NTP/PTP Server Setup . . . . . . . . . . . . . . . . . . . . . . . . . . . . . . 155
B.11.3WebInterface....................................158
B.11.4 SSH Console Interface . . . . . . . . . . . . . . . . . . . . . . . . . . . . . . . 174
B.11.5SNMPSupport...................................185
B.11.6 NTP/PTP Server Specifications . . . . . . . . . . . . . . . . . . . . . . . . . 196
B.11.7 Time Zone Format Strings . . . . . . . . . . . . . . . . . . . . . . . . . . . . . 197
B.12FourBNCConnectors ...................................198
B.12.1GeneralDescription ................................198
C Creating a Self-Signed Certificate 199
C.1 HTTPS/SSLCertificate ..................................199
C.1.1 Step 1 - Generate a Private Key . . . . . . . . . . . . . . . . . . . . . . . . . 199
C.1.2 Step 2 - Generate a Certificate Signing Request (CSR) . . . . . . . . . . . . . 199
C.1.3 Step 3A - Purchase a Certificate . . . . . . . . . . . . . . . . . . . . . . . . . 200
C.1.4 Step 3B - Generate a Self Signed Certificate . . . . . . . . . . . . . . . . . . . 200
C.1.5 Step 4 - Create the PEM File . . . . . . . . . . . . . . . . . . . . . . . . . . . 201
D CE Mark Certification 202
E Statement of Compliance 204

List of Figures
1.1 PackagingofAccessories.................................. 3
1.2 AttachingRackmountEars ................................ 4
2.1 Model 1201B/C Front Panel Description . . . . . . . . . . . . . . . . . . . . . . . . . 5
2.2 Keypad and Annunciator LEDs . . . . . . . . . . . . . . . . . . . . . . . . . . . . . . 6
2.3 Model 1201B/C Rear Panel Description . . . . . . . . . . . . . . . . . . . . . . . . . 8
2.4 Universal Power Supply Inlet Connector . . . . . . . . . . . . . . . . . . . . . . . . . 8
2.5 Low DC Power Supply Inlet Connector . . . . . . . . . . . . . . . . . . . . . . . . . . 8
2.6 GNSSAntennaConnector................................. 8
2.7 Communication Ports, COM1 and COM2 . . . . . . . . . . . . . . . . . . . . . . . . 9
2.8 RelayContactsConnector................................. 9
2.9 Standard Input/Output Connectors . . . . . . . . . . . . . . . . . . . . . . . . . . . 10
2.10OptionBoardInterface................................... 10
3.1 Universal Power Supply Inlet Description . . . . . . . . . . . . . . . . . . . . . . . . 11
3.2 Low DC Power Supply Inlet Description . . . . . . . . . . . . . . . . . . . . . . . . . 12
4.1 Antenna Assembly for Mounting . . . . . . . . . . . . . . . . . . . . . . . . . . . . . 15
4.2 AntennaMountingBracket ................................ 16
4.3 Antenna Mounting with AS0044600 . . . . . . . . . . . . . . . . . . . . . . . . . . . 16
4.4 GNSSSurgeArrester.................................... 18
5.1 Main board and Jumper Locations . . . . . . . . . . . . . . . . . . . . . . . . . . . . 23
7.1 Utility Software, Opening Window . . . . . . . . . . . . . . . . . . . . . . . . . . . . 38
7.2 Connecting with the 1201B/C . . . . . . . . . . . . . . . . . . . . . . . . . . . . . . . 40
7.3 Reading the 1201B/C Configuration . . . . . . . . . . . . . . . . . . . . . . . . . . . 41
7.4 InitiatingtheLearnMode................................. 42
7.5 Reading the 1201B/C, Status Screen . . . . . . . . . . . . . . . . . . . . . . . . . . . 43
7.6 1201B/C Performance Display Screen . . . . . . . . . . . . . . . . . . . . . . . . . . 44
7.7 1201B/C Fault Display Screen . . . . . . . . . . . . . . . . . . . . . . . . . . . . . . 45
7.8 1201B/C Version Display Screen . . . . . . . . . . . . . . . . . . . . . . . . . . . . . 46
7.9 Communication Settings Screen . . . . . . . . . . . . . . . . . . . . . . . . . . . . . . 47
7.10TimeAdjustmentScreen.................................. 48
7.11 IRIG-B Adjustment Screen . . . . . . . . . . . . . . . . . . . . . . . . . . . . . . . . 49
7.12 Programmable Pulse Setup Screen . . . . . . . . . . . . . . . . . . . . . . . . . . . . 50
7.13 Programmable Pulse Seconds Per Pulse Screen . . . . . . . . . . . . . . . . . . . . . 51

LIST OF FIGURES xv
7.14 Programmable Pulse, Pulse Per Hour Screen . . . . . . . . . . . . . . . . . . . . . . 51
7.15 Programmable Pulse, Pulse Per Day Screen . . . . . . . . . . . . . . . . . . . . . . . 52
7.16 Programmable Pulse, Single Trigger Screen . . . . . . . . . . . . . . . . . . . . . . . 52
7.17MiscellaneousScreen.................................... 54
7.18 Option Board Configuration Screen . . . . . . . . . . . . . . . . . . . . . . . . . . . . 55
7.19 Security Configuration Screen . . . . . . . . . . . . . . . . . . . . . . . . . . . . . . . 56
7.20 Uploading a Configuration File to another 1201B/C . . . . . . . . . . . . . . . . . . 57
7.21 Clearing Events in the 1201B/C . . . . . . . . . . . . . . . . . . . . . . . . . . . . . 58
7.22 Starting the Upload Process . . . . . . . . . . . . . . . . . . . . . . . . . . . . . . . . 59
7.23 Uploading Firmware in the 1201B/C . . . . . . . . . . . . . . . . . . . . . . . . . . . 59
8.1 Model1201B/CKeypad.................................. 62
8.2 MainRS-232Setup..................................... 65
8.3 LocalHourSetup...................................... 66
8.4 Auto Daylight Saving Setup . . . . . . . . . . . . . . . . . . . . . . . . . . . . . . . . 67
8.5 Out-of-LockSetup ..................................... 68
8.6 RelaySetup......................................... 69
8.7 BackLightSetup...................................... 70
8.8 SystemDelaySetup .................................... 70
8.9 ProgrammablePulseSetup ................................ 71
8.10Seconds-Per-PulseSetup.................................. 72
8.11Pulse-Per-HourSetup ................................... 73
8.12Pulse-Per-DaySetup.................................... 74
8.13Seconds–Per–PulseSetup ................................. 75
8.14SingleTriggerSetup .................................... 76
8.15SlowCodeSetup ...................................... 77
8.16DCF77Setup........................................ 77
8.17IRIG-BTimeDataSetup ................................. 78
8.18 Event/Deviation Mode Setup . . . . . . . . . . . . . . . . . . . . . . . . . . . . . . . 78
8.19OptionControlSetup ................................... 79
8.20OptionControlSetup ................................... 79
9.1 Rear Panel Descriptions, optional outputs may be shown . . . . . . . . . . . . . . . . 81
9.2 IRIG-BWaveforms..................................... 83
9.3 DCF77TimingDiagram.................................. 85
10.1RelayContactConnector ................................. 90
A.1 GNSSSurgeArrester....................................123
A.2 Suggested Mounting of the AS0094500 Surge Arrester . . . . . . . . . . . . . . . . . 125
B.1 Universal Power Supply Inlet . . . . . . . . . . . . . . . . . . . . . . . . . . . . . . . 127
B.2 Low DC: Power Supply Inlet . . . . . . . . . . . . . . . . . . . . . . . . . . . . . . . 128
B.3 JumperConfiguration ...................................131
B.4 JumperLocations .....................................135
B.5 8 High Drive Outputs Jumper Locations . . . . . . . . . . . . . . . . . . . . . . . . . 137
B.6 OptionJumperLocations .................................152

xvi LIST OF FIGURES
B.7 Option Connector −SignalLocations ..........................153
B.8 StartupPage ........................................159
B.9 SystemConfigurePage...................................160
B.10ConfigureHTTPS .....................................161
B.11 Configure System Password . . . . . . . . . . . . . . . . . . . . . . . . . . . . . . . . 162
B.12 Update System Firmware Package . . . . . . . . . . . . . . . . . . . . . . . . . . . . 162
B.13RebootingtheSystem ...................................162
B.14CheckingNetworkStatus .................................163
B.15 Configure Network Settings . . . . . . . . . . . . . . . . . . . . . . . . . . . . . . . . 164
B.16 Configure VLAN Network Settings . . . . . . . . . . . . . . . . . . . . . . . . . . . . 164
B.17ViewOperation.......................................165
B.18ViewSNMPOperation...................................165
B.19SNMPConfigurationPage.................................166
B.20PTPStatusPage......................................167
B.21PTPConfigurationPage..................................168
B.22NTPStatusPage......................................170
B.23NTPConfigurePage....................................171
B.24NTPAuthenticationPage.................................172
B.25 Contact and Version Information Pages . . . . . . . . . . . . . . . . . . . . . . . . . 173
B.26 SSH Console Interface: Startup Screen . . . . . . . . . . . . . . . . . . . . . . . . . . 174
B.27 System Configure Page Using SSH . . . . . . . . . . . . . . . . . . . . . . . . . . . . 175
B.28 Configure System Password Using SSH . . . . . . . . . . . . . . . . . . . . . . . . . . 176
B.29 Update Operating System Using SSH . . . . . . . . . . . . . . . . . . . . . . . . . . 177
B.30 Checking Network Status Using SSH . . . . . . . . . . . . . . . . . . . . . . . . . . . 178
B.31 Configure Network Settings Using SSH . . . . . . . . . . . . . . . . . . . . . . . . . . 179
B.32 View Operation Using SSH . . . . . . . . . . . . . . . . . . . . . . . . . . . . . . . . 180
B.33 View SNMP Operation Using SSH . . . . . . . . . . . . . . . . . . . . . . . . . . . . 180
B.34 PTP Status Page Using SSH . . . . . . . . . . . . . . . . . . . . . . . . . . . . . . . 181
B.35 NTP Status Page Using SSH . . . . . . . . . . . . . . . . . . . . . . . . . . . . . . . 181
B.36 NTP Configure Page Using SSH . . . . . . . . . . . . . . . . . . . . . . . . . . . . . 182
B.37 NTP Authentication Page Using SSH . . . . . . . . . . . . . . . . . . . . . . . . . . 183
B.38 Contact and Version Information Pages Using SSH . . . . . . . . . . . . . . . . . . . 184
B.39 Four BNC Connectors, Rear-Panel Layout . . . . . . . . . . . . . . . . . . . . . . . . 198

List of Tables
2.1 Option Boards, Descriptions and Locations . . . . . . . . . . . . . . . . . . . . . . . 10
3.1 FuseChart ......................................... 12
4.1 Antenna Mounting Bracket Parts List . . . . . . . . . . . . . . . . . . . . . . . . . . 15
4.2 GNSS Cable Data and Accessory Information . . . . . . . . . . . . . . . . . . . . . . 19
5.1 MainboardJumperTable................................. 24
5.2 Unmodulated IRIG-B Jumper Table . . . . . . . . . . . . . . . . . . . . . . . . . . . 25
5.3 1 PPS and Programmable Pulse Jumper Table . . . . . . . . . . . . . . . . . . . . . 25
5.4 Analog Signal Jumper Table . . . . . . . . . . . . . . . . . . . . . . . . . . . . . . . . 25
5.5 EventInputJumperTable................................. 26
5.6 SPDTRelayJumperTable ................................ 26
5.7 Unmodulated IRIG-B Jumper Table . . . . . . . . . . . . . . . . . . . . . . . . . . . 26
6.1 ListofFaultsandAlarms ................................. 30
7.1 Security Levels and Features . . . . . . . . . . . . . . . . . . . . . . . . . . . . . . . 39
7.2 Option Board Descriptions . . . . . . . . . . . . . . . . . . . . . . . . . . . . . . . . 55
8.1 Model 1201B/C Menu Structure – Upper Keys . . . . . . . . . . . . . . . . . . . . . 61
8.2 Front-Panel Setup Menu Definitions . . . . . . . . . . . . . . . . . . . . . . . . . . . 63
8.3 DefaultClockSettings................................... 63
9.1 DriveCurrentvs.Voltage ................................. 81
9.2 IRIG-B Time Code Types Available . . . . . . . . . . . . . . . . . . . . . . . . . . . 82
10.1RelaySpecifications .................................... 89
11.1 Status Indications and Definitions . . . . . . . . . . . . . . . . . . . . . . . . . . . . 95
11.2 Fault Indications and Definitions . . . . . . . . . . . . . . . . . . . . . . . . . . . . . 95
11.3 Holdover Oscillator (HO) Faults and Definitions . . . . . . . . . . . . . . . . . . . . 96
11.4UnlockedTimeQuality ..................................101
11.5OptionControlSettings ..................................108
11.6 Main RS-232 Port Pin Definitions . . . . . . . . . . . . . . . . . . . . . . . . . . . . 109
11.7 Characters used with Custom Strings . . . . . . . . . . . . . . . . . . . . . . . . . . . 110
11.8 List of Possible Time Quality Levels, Ordinal 01 . . . . . . . . . . . . . . . . . . . . 111
11.9 List of True Time Quality Levels, Ordinal 02 . . . . . . . . . . . . . . . . . . . . . . 111

xviii LIST OF TABLES
11.10Short Table of ASCII Characters . . . . . . . . . . . . . . . . . . . . . . . . . . . . . 114
12.1RelaySpecifications ....................................118
12.2 COM1, RS-232 Port Pin Definitions . . . . . . . . . . . . . . . . . . . . . . . . . . . 118
12.3 COM2, RS-232 Port Pin Definitions . . . . . . . . . . . . . . . . . . . . . . . . . . . 118
12.4AnnunciatorLEDs .....................................120
12.5 Clock and Antenna Dimensions . . . . . . . . . . . . . . . . . . . . . . . . . . . . . . 120
12.6 Clock and Shipping Weights . . . . . . . . . . . . . . . . . . . . . . . . . . . . . . . . 121
B.1 Four Configurable Outputs – Signal Choices . . . . . . . . . . . . . . . . . . . . . . . 132
B.2 Four Fiber Optic Output Configuration . . . . . . . . . . . . . . . . . . . . . . . . . 134
B.3 Example, Output Load and Loop Distance Matrix . . . . . . . . . . . . . . . . . . . 138
B.4 B2 Broadcast, Time Deviation Values . . . . . . . . . . . . . . . . . . . . . . . . . . 145
B.5 Output Connectors and Setup Jumpers . . . . . . . . . . . . . . . . . . . . . . . . . 151
B.6 Null-Modem Cable Connections . . . . . . . . . . . . . . . . . . . . . . . . . . . . . . 155
B.7 NTP/PTP Server LED Indications . . . . . . . . . . . . . . . . . . . . . . . . . . . . 157
B.8 Partial List of POSIX Time Zone Strings . . . . . . . . . . . . . . . . . . . . . . . . 197

Chapter 1
Getting Started
1.1 Model 1201B/C Security Advantages
The Arbiter Systems Model 1201B/C provides the utmost in timing stability, protection from
communication attacks and false GNSS signals. First in a new series of synchronized secure clocks
by Arbiter Systems, the Model 1201B/C offers two levels of ultra-stable, crystal holdover oscillator.
With either oscillator available to stabilize clock timing, the Model 1201B/C can provide the highest
level of timing stability in the presence of a false GNSS signal, or from losing the GNSS reception.
Using “EPS” technology, for Enhanced Performance and Security, three components used pro-
vide for secure clock operation include: (1) encryption protection for secure connections, (2) GNSS
anti-spoof shielding and (3) intelligent holdover capability. Additionally, the Model 1201B/C can
synchronize to multiple satellite receiver systems.
A strategic component providing the highest level of anti-spoofing of the GNSS is a new mul-
tiphase detection GNSS antenna. With this antenna the clock will be able to accurately track the
active satellites and detect false GNSS (spoofed) signals.
1.2 1201B/C Standard Features
With three standard output connectors able to provide unmodulated IRIG-B, 1 PPS and Pro-
grammable Pulse, the 1201B/C has substantial drive capability to supply timing to multiple loads
in parallel. The Model 1201B/C can use two current Global Network Satellite System (GNSS) re-
ceivers, which include US GPS and Russian GLONASS. Future updates to include Chinese Beidou
and European Galileo are planned when they become available.
Available options include redundant power supplies and auxiliary option boards such as eight-
channel, high-drive outputs, a time-phase-frequency monitor, and NTP/PTP network time server.
Any of the standard I/O connectors may be configured for event capture, or the COM1 RS-232
port may be used for timing the arrival of data. The event timing has 100 nanosecond resolution,
and the clock sequentially records up to fifty events internally.
The Model 1201B/C includes exceptional accuracy and stability across the board, due to ultra-
stable oscillators with guaranteed holdover capability. The 1201B/C has two available holdover
oscillators. The standard holdover oscillator has a drift of less than 1 ms/day, and an optional
holdover oscillator has a drift of less than 10 µs/day.

2 Getting Started
1.3 Standard Accessories
This chapter will also assist you with unpacking the clock from its shipping container; components
and accessories shipped with the clock are listed below. A pdf version of the operation manual may
be downloaded from the Arbiter website.
•1201B/C GNSS Secure Clock
•Choice of internal power supply
•Antenna Cable, 50 feet with connectors
•GNSS Antenna
•Rack-mount ears with hardware, 2 ea.
•Quick Setup Guide
•1201 Utility software – free download from www.arbiter.com
1.4 Handling Precautions
Mechanical Shock Note that the GNSS antenna is small and smooth, and can be damaged if
dropped. Use care when handling. Remember to store the antenna in a safe place before the final
installation.
Static Discharge Note that the Model 1201B and the 1201C are electronic devices and use
static-sensitive components in their operation. Therefore, use care when handling against static
discharges. Generally, these components are protected in their normal situation, however some of
these are accessible when the cover is removed.
Caution Connect only the antenna cable coming from the antenna into the antenna input con-
nector. The antenna input connector on the clock itself leads to the GNSS receiver, which could
be damaged from high voltage or a static discharge. To protect the GNSS clock from electrical
discharges during operation, consider the optional surge suppressor (Part no. AS0094500). For
more information see Section 4.3.
This manual suits for next models
1
Table of contents
Other Arbiter Systems Clock manuals

Arbiter Systems
Arbiter Systems 1088A User manual

Arbiter Systems
Arbiter Systems 120A User manual

Arbiter Systems
Arbiter Systems 1084A Installation manual

Arbiter Systems
Arbiter Systems 1205B User manual

Arbiter Systems
Arbiter Systems 1092A User manual

Arbiter Systems
Arbiter Systems 1200B User manual

Arbiter Systems
Arbiter Systems 1205B User manual

Arbiter Systems
Arbiter Systems 1200B User manual

Arbiter Systems
Arbiter Systems 1205B User manual

Arbiter Systems
Arbiter Systems 1095A User manual