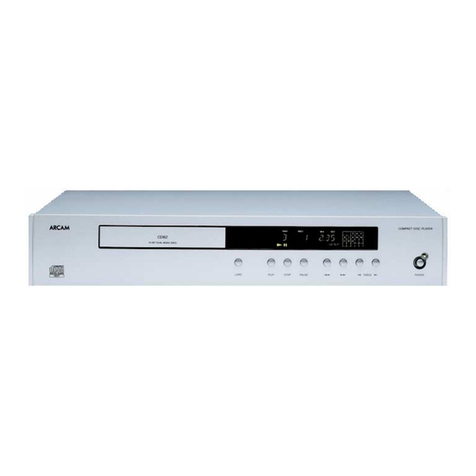
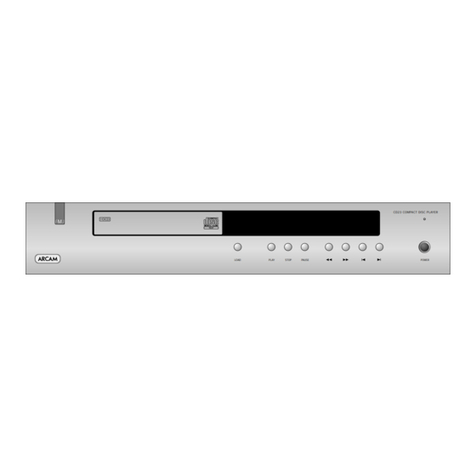
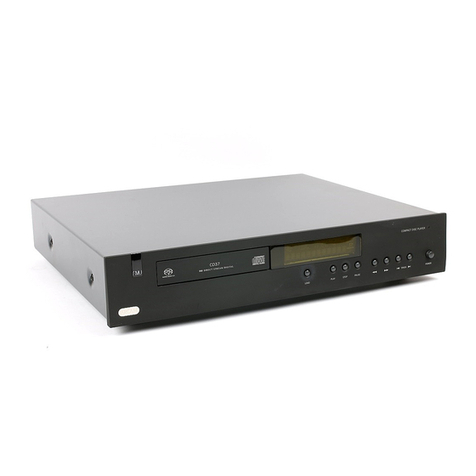
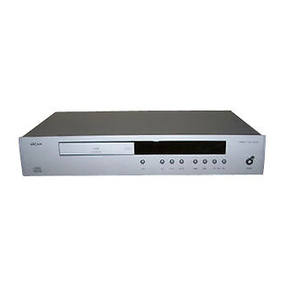
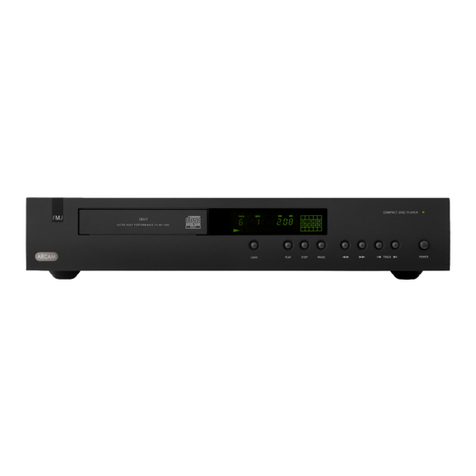
Arcam CD37 User manual

CD37
HANDBOOK Compact Disc player
MANUEL Lecteur de Disque Compact
HANDBUCH Compact Disc-Spieler
HANDLEIDING CD-speler
�


CD37
HANDBOOK Compact Disc player
English
�

E-2
safety
guidelines
Important safety instructions
is product is designed and manufactured to meet
strict quality and safety standards. However, you should
be aware of the following installation and operation
precautions.
1. Take heed of warnings and instructions
You should read all the safety and operating instructions
before operating this equipment. Retain this handbook
for future reference and adhere to all warnings in the
handbook or on the equipment.
2. Water and moisture
e presence of electricity near water can be dangerous.
Do not use the equipment near water – for example next
to a bathtub, washbowl, kitchen sink, in a wet basement
or near a swimming pool, etc.
3. Object or liquid entry
Take care that objects do not fall and liquids are not
spilled into the enclosure through any openings. Liquid-
lled objects such as vases should not be placed on the
equipment.
4. Placing the equipment
Only use a rack or shelf that is stable and strong enough
to support the weight of this equipment.
5. Ventilation
Do not place the equipment on a bed, sofa, rug or
similar so surface, or in an enclosed bookcase or
cabinet, since ventilation may be impeded.
6. Heat
Locate the equipment away from naked ames or heat-
producing appliances such as radiators, stoves or other
appliances that produce heat.
7. Climate
e equipment has been designed for use in moderate
climates and in domestic situations.
8. Cleaning
Unplug the unit from the mains supply before cleaning.
e case should normally only require a wipe with a
so, lint-free cloth. Do not use chemical solvents for
cleaning.
We do not advise the use of furniture cleaning sprays or
polishes as they can cause permanent white marks.
9. Power sources
Only connect the equipment to a power supply of
the type described in the operating instructions or as
marked on the equipment.
e primary method of isolating the equipment from
the mains supply is to remove the mains plug. e
equipment must be installed in a manner that makes
disconnection possible.
10. Power-cord protection
Power supply cords should be routed so that they are not
likely to be walked on or pinched by items placed upon
or against them. Pay particular attention to the point
where they exit from the equipment.
11. Non-use periods
If the equipment is not being used for an extended
period, we recommend that you unplug the power cord
of the equipment from the outlet, to save power.
12. Abnormal smell
If an abnormal smell or smoke is detected from the
equipment, turn the power o immediately and unplug
the equipment from the wall outlet. Contact your dealer
and do not reconnect the equipment.
13. Servicing
You should not attempt to service the equipment.
Contact your dealer to arrange servicing.
14. Batteries
Batteries should not be exposed to excessive heat
(heating systems, sunshine, etc.) or incinerated.
15. Damage requiring service
e equipment should be serviced by qualied service
personnel when:
A. the power-supply cord or the plug has been
damaged, or
B. objects have fallen, or liquid has spilled into the
equipment, or
C. the equipment has been exposed to rain, or
D. the equipment does not appear to operate
normally or exhibits a marked change in
performance, or
E. the equipment has been dropped or the enclosure
damaged.
Safety compliance
is equipment has been designed to meet the IEC/EN
60065 international electrical safety standard.
is device complies with Part 15 of the FCC Rules.
Operation is subject to the following two conditions:
(1) is device may not cause harmful interference, and
(2) this device must accept any interference received,
including interference that may cause undesired
operation.
MANY OF THESE ITEMS ARE COMMON SENSE PRECAUTIONS BUT, FOR YOUR OWN SAFETY AND TO ENSURE THAT YOU DO NOT DAMAGE THE UNIT, WE RECOMMEND THAT YOU READ THEM.
CAUTION: To reduce the risk of electric shock, do not remove cover (or back). No user serviceable parts inside. Refer
servicing to qualied service personnel.
WARNING: To reduce the risk of re or electric shock, do not expose this apparatus to rain or moisture.
e lightning ash with an arrowhead symbol within an equilateral triangle is intended to alert the user to the
presence of uninsulated ‘dangerous voltage’ within the product’s enclosure that may be of sucient magnitude to
constitute a risk of electric shock to persons.
e exclamation point within an equilateral triangle is intended to alert the user to the presence of important
operating and maintenance (servicing) instructions in the literature accompanying the product.
CAUTION: In Canada and the USA, to prevent electric shock, match the wide blade of the plug to the wide slot in the
socket and insert the plug fully into the socket.
Warning
Mains plug/appliance coupler is used to disconnect
device and it shall remain readily operable.
Class I product
is equipment is a Class I electrical appliance.
It requires safety connection to electrical earth
(‘ground’ in the U.S.).

E-3
English
welcome
ank you and congratulations for purchasing your Arcam FMJ CD player.
Arcam has been producing specialist audio products of remarkable quality for over three
decades and the CD37 – which plays both conventional audio CDs and Super Audio CDs – is
the latest in a long line of award winning HiFi equipment. e design of the FMJ range draws
upon all of Arcam’s experience as one of the UK’s most respected audio companies and is built to
give you years of trouble-free listening enjoyment.
is handbook has been designed to give you all the information you need to install, connect
and use the Arcam CD37 compact disc player. e CR90 remote control handset supplied with
this equipment is also described. Use the contents list shown on this page to guide you to the
section of interest.
We hope that your FMJ compact disc player will give you years of trouble-free operation. In the
unlikely event of any fault, or if you simply require further information about Arcam products,
our network of dealers will be happy to help you. Further information can also be found on the
Arcam website at www.arcam.co.uk.
e FMJ development team
Contents
safety guidelines.......................................E-2
Important safety instructions........................... E-2
Safety compliance ................................................ E-2
welcome......................................................E-3
installation .................................................E-4
Placing the unit ..................................................... E-4
Power......................................................................... E-4
Interconnect cables.............................................. E-4
operation....................................................E-6
Front panel operation ......................................... E-6
Advanced operation............................................ E-7
A note on Super Audio CD................................ E-7
remote control...........................................E-8
The CR90 Universal remote controller.......... E-8
CD player commands.......................................... E-9
CD player panel – IR commands..................... E-9
specications.......................................... E-10
Radio interference..............................................E-10
Laser radiation......................................................E-10
product guarantee ................................ E-11
av-ph 20

E-4
installation
Arcam’s CD37 provides class-leading sound quality from compact discs.
e CD37 has a Delta-Sigma DAC (Digital-to-Analogue Converter)
with DSD (Direct Stream Digital) ltering, allowing ne details to be
reproduced with startling clarity from conventional CDs or Super Audio
CDs. e CR90 ‘universal’ remote control supplied with the CD37 is
simple to use and can control up to eight audio devices – such as an
amplifer, television or Personal Video Recorder.
e high performance CD37 audio disc player is designed to truly bring
your music to life.
Placing the unit
<Place the CD player on a level, rm surface,
avoiding direct sunlight and sources of heat or
damp.
<Do not place the CD player on top of an amplier
or other source of heat.
<Do not place the CD player in an enclosed space
such as a bookcase or closed cabinet unless there
is good provision for ventilation. e CD player is
designed to run warm during normal operation.
<Do not place any other component or item on
top of the CD player as this may obstruct airow
around the unit, causing the CD player to run hot.
<Make sure the remote-control receiver
(behind the FMJ badge on the front panel) is
unobstructed, or remote control will be impaired.
<Do not place your record deck on top of this
unit. Record decks are very sensitive to the noise
generated by mains power supplies which will be
heard as a background ‘hum’ if the record deck is
too close.
Power
e CD player is supplied with a moulded mains plug
already tted to the lead. Check that the plug supplied
ts your supply – should you require a new mains lead,
please contact your Arcam dealer.
If your mains supply voltage or mains plug is dierent,
please contact your Arcam dealer immediately
Push the IEC plug end of the power cable into the socket
on the back of the CD player, making sure that it is
pushed in rmly. Plug the other end of the cable into
your mains socket and, if necessary, switch the socket
on.
The remote control and trigger
inputs
e REMOTE IN input can be used to pass RC5 codes
(see page 9) to the CD37 if it is installed in a position,
or a system, where infrared cannot be used. If this
is required, please contact your dealer for further
information.
e TRIGGER IN input can be used to switch the CD37 in
and out of stand-by. Connecting the trigger output of
your Arcam amplier (or other compatible device), will
cause the CD37 to come out of stand-by automatically
when the amplier is switched on, returning to stand-by
when the amplier is switched o. Please see your
amplier handbook for further information.
In normal use there is no need to make any connections
to these inputs.
Interconnect cables
We recommend the use of high-quality screened cables
that are designed for the particular application. Other
cables will have dierent impedance characteristics
that will degrade the performance of your system (for
example, do not use cabling intended for video use to
carry audio signals). All cables should be kept as short as
is practically possible.
It is good practice when connecting your equipment to
make sure that the mains power-supply cabling is kept
as far away as possible from your audio cables. Failure to
do so may result in unwanted noise in the audio signals.
e remote control input requires a mono 3.5mm
jack, with the tip active and the sleeve grounded.
e remote control signals must be in modulated
RC5 format (at 36kHz), with a voltage level of
between 5V and 12V.

E-5
English
Coaxial digital output
Use this socket if you are using a separate digital
to analogue converter (DAC) or digital recorder.
Connect to the DAC or recorder’s digital input
using a suitable 75Ωscreened cable.
CAUTION: Never connect the digital output
socket to a conventional audio input.
Analogue audio outputs
Connect these to your amplier’s CD (or other
line-level) input using suitable high quality
interconnect cables. Ensure that the le and
right audio outputs from the CD player are
connected to the same le and right inputs on
your amplier.
e second set of sockets can be used to connect
to a second amplier set up for multi-room use.
Power inlet
Connect the correct
mains cable here.
Voltage select
Ensure the voltage selected matches
the local power supply.
Optical digital output
Use this socket if you are using a
separate DAC or digital recorder with
an optical connection. Connect using a
suitable optical cable.
Remote in
is allows remote-control signals
to be received by the CD37 if
the remote sensor is covered
(or otherwise not ‘visible’ to the
remote-control).
See page 4 for more information.
12V trigger input
is socket allows the CD37 to be switched
in and out of stand-by mode by an amplier
(or another item of AV equipment) with a
12V TRIG OUT function.

E-6
operation
Front panel operation
ese functions can also be controlled by the CR90
remote control. (See pages 8–9.)
Power
Press the front panel POWER button to switch the CD
player on and o. e 2button on the remote toggles
the unit between normal mode and standby mode.
e CD37 initializes and (with no CD installed)
displays:
Load
To install a CD, press LOAD or 1on the remote). e CD
tray opens – it accepts 12cm and 8cm discs. Place the CD
in the tray with the label facing uppermost.
Press LOAD again (or or 1on the remote, or gently push
the tray in 5mm) to close the tray. e total number of
tracks and total playing time for the disc are displayed.
e disc is now ready to play.
Play
Press the front panel PLAY button (or 4on the remote)
to play the CD. To restart from track 1, press STOP and
then PLAY.
Make sure your amplier’s input source selector is set
to ‘CD’.
Stop
Press the front panel STOP button (or <on the remote)
to stop the CD playing. e display shows the number of
tracks and the total playing time for the disc.
Pause
Press PAUSE (or ;on the remote) to pause the disc
(interrupt play). Press PLAY or PAUSE to resume play
from the same point.
av-ph 20
Search (7 8)
Press and hold 7to search backwards, or press and
hold 8to search forwards, for a particular passage
within the currently playing track. If the player is in
‘PAUSE’ mode the search is made at high speed.
Skip Track (0 /)
To start a CD with a track other than the rst, press B
or Con the remote to locate the desired track, then
press OK to play.
To select another track during play, press 0or /on the
front panel or remote. e track is played automatically
aer selection.

E-7
English
Advanced operation
MODE (Display Mode)
Press MODE on the remote control to cycle through
information about a currently playing disc.
Press MODE once to display the number and elapsed
time of the currently playing track. Press again to display
the number and remaining time of the currently playing
track. Press again to turn the scrolling text display on
and press again to return to displaying track number
and elapsed time.
For CDs with text (all SA-CDs are of this type), pressing
MODE while the disc is loaded but not playing toggles
between a scrolling text display and displaying the total
number of tracks and the total playing time.
RPT (Repeat)
To repeat the entire disc or a pre-programmed selection
of tracks press RPT on the remote control.
To repeat a particular track, select that track and then
press RPT twice.
To cancel the repeat function press RPT a third time.
Shue play
Press SHUFF on the remote to play tracks in random
order. e display briey shows ‘Shuffle On’, replaced
by the letter ‘S’ on the le-hand side of the display to
show that Shue play is active.
Press SHUFF again to restore sequential playing order
(‘Shuffle Off’ is briey displayed).
Programming playback (CD Only)
is function, only available when a CD is loaded,
allows up to 100 tracks from an audio disc to be
programmed to play in any order.
ADDING TRACKS
In ‘Normal play’ mode (i.e. the display does not show
the letter ‘P’), select the track you want to add to the
program list using the Band Cnavigation keys
on the remote. When the desired track is shown, press
MENU to store the track at the end of the program list.
e display briey shows ‘Stored’.
Select further tracks followed by MENU to add each new
track to the programme list. e same track can be
added to the list more than once if desired.
PLAYING PROGRAMMED TRACKS
To play the programmed tracks, press SETUP: ‘Program
play’ is briey displayed. Press PLAY (or OK on the
remote) to start playback.
When in ‘Program play’ mode, the letter ‘P’ is displayed
on the le-hand side of the display, followed by the
number of tracks that have been programmed. When
playing a programmed sequence of tracks, the program
sequence number is displayed, not the disc track
number.
When in ‘Program play’ mode, you can review the
programme using the Band Ckeys on the
remote. e SETUP key toggles between ‘Program play’
mode and ‘Normal play’ mode, without deleting the
programme.
DELETING TRACKS FROM A PROGRAMME
In ‘Program play’ mode, tracks can be removed from
the programme when playback is stopped.
Use the Band Cnavigation keys on the remote to
select the unwanted track and press MENU to remove
the track. e display briey shows ‘Deleted’. If the last
track of the programme is deleted (i.e. the programme
list is empty) ‘All Deleted’ is briey displayed, and the
unit returns to ‘Normal play’ mode.
e whole programme can be deleted in one step by
stopping playback and then pressing STOP/<again, or
by ejecting the disc.
A note on Super Audio CD
SA-CD are discs which share the 12cm format of
audio compact discs but they encode the audio
data in a dierent way from CD or DVD-Audio
discs. A carefully mastered SA-CD recording allows
an extended dynamic range and can avoid the
amplitude compression or digital clipping that is
present in some full-scale PCM signals.
SA-CD uses Direct Stream Digital (DSD) – a 1-bit
delta-sigma modulation at the very high sampling
rate of 2.8224 MHz. is is 64 times the sampling
rate used in Compact Disc Digital Audio (CDDA),
which species 44.1 kHz at a resolution of 16-bit
in Pulse Code Modulation (PCM) format. Because
the resolution of SA-CD is 1-bit, the bitrate for each
channel is only 4 times as large.
e three types of SACDs – Hybrid, Single-layer
and Dual-layer – are all playable on Arcam’s CD37.
Of course, the CD37 also plays conventional audio
CDs (CDDA) impeccably.
For further information, see:
www.sa-cd.net – this includes an expanding list
of available material on SACD and a useful FAQ
section.
http://en.wikipedia.org/wiki/SA-CD – a useful
technical overview, including explanations of
DSD (Direct Stream Digital) and PSP (Pit Signal
Processing).
AUDIO (Repeat A-B)
is button on the remote control enables you to repeat
any section of music within a track.
While a disc is playing, press the AUDIO button at the
start of the section you wish to repeat. ‘Repeat A&’ is
shown on the display with the symbol ‘A’.
Press the button a second time when you reach the end
of the section you wish to repeat. ‘Repeat A-B’ is shown
on the display with the symbol ‘AB’.
e selected loop repeats until you press <or /or 0
to terminate. e forward search button (8) moves
forward only within the selected loop. Pressing AUDIO
again cancels the Repeat A-B function and ‘Repeat Off’
is displayed in conrmation.
SUBT (Changing layers in an SA-CD)
Hybrid SA-CDs contain a conventional ‘CD layer’ and
a 4.7GB SA-CD layer – the ‘HD layer’. e much less
common Dual-layer SA-CDs contain two ‘HD layers’
but are not compatible with legacy CD players.
To switch layers, press SUBT on the remote. ‘Layer
Change’ is briey displayed and the disc is reloaded in
the new mode.
E-8
remote
control
Inserting batteries into the
remote control
1. Open the battery compartment by pressing
the button on the back of the handset.
2. Insert four ‘AAA’ batteries into the battery
compartment – two facing the top of the unit,
and two facing the end, as in the diagram.
3. Lower the end cap onto the plastic locating
plate in the handset. is acts as a hinge, and
you can now push the end cap rmly into its
locked position with a click.
The CR90 Universal remote
controller
e CR90 is a sophisticated ‘universal’ remote control
that can control up to eight devices – including the
CD37. As it’s a ‘learning’ remote, it can copy almost
any function from an existing single-device remote.
You can also program the CR90 to issue a sequence of
commands (‘macros’) from a single button press – see
the CR90 Handbook for details.
Select the source key rst
Remember to select a source key before pressing
command buttons – commands vary depending on the
source selected.
To operate the CD37 from the remote, rst press the CD
source button.
TUN
AV
DVD SAT
CD
PVR
AMP AUX

E-9
English
CD player panel – IR commands
ese are the IR commands generated from the CD
player ‘page’ on the CR90 remote control, and accepted
by the CD37. e codes are useful if you wish to
programme another remote handset to control the
CD37.
Key name Decimal
020-0
120-1
220-2
320-3
420-4
520-5
620-6
720-7
820-8
920-9
MODE 20-11
DISP 20-18
SHUFF 20-28
RPT 20-29
/20-32
020-33
PROG 20-41
LOAD 20-45
PAUSE 20-48
720-50
820-52
PLAY 20-53
STOP 20-54
AB 20-59
'PROG’ 20-64
SUBT 20-65
STORE 20-67
MUTE 16-13
VOL+ 16-16
VOL 16-17
CD player commands
2Toggles between standby and normal mode
0 to 9 e numeric keys allow direct access to
individual tracks on the disc. To select
a track, press the corresponding keypad
button. For tracks greater than 9, enter the
digits in sequence. For example, to play
track 15, press 1, then press 5.
SHUFF Toggles random (‘shue’) track selection
on and o
RPT Repeat playback of the disc or a pre-
programmed selection of tracks. To repeat
a particular track, select that track and
press RPT twice. To cancel, press RPT a third
time.
Source
keys
Selects the amplier input:
DVD DVD input
SAT Satellite decoder input
AV AV (television sound) input
TUN DAB/FM/AM tuner input
AMP Amplier input
AUX Auxiliary line input
PVR Personal Video Recorder input
CD CD input
B, CNavigator keys used to select a track for
playback or programming
OK Conrms a selection
MODE Cycles through the available display modes
(see page 7).
MENU Used to enter a track number in a
programmed track list (see page 7).
-Toggles the mute function of a compatible
amplier.
DISP Cycles through the front panel display’s
brightness options (o, dim, bright).
Decreases () or increases (+) volume of a
compatible amplier
0Press and release to skip back to the
beginning of the current/previous track.
/Press and release to skip forwards to the
beginning of the next track.
7Fast search backwards
4PLAY Play
;PAUSE Pause playback
8Fast search forwards
1LOAD – Open/close the disc tray
<STOP Stop playback
SETUP Toggles between Program and Normal play
AUDIO A-B repeat function (see page 7).
SUBT Toggles between selecting the HD- and
CD-layer of SACD disc.

E-10
Continual improvement policy
Arcam has a policy of continual improvement for its
products. is means that designs and specications
are subject to change without notice.
specications
Digital to Analogue conversion Delta-Sigma DAC with DSD (Direct Stream Digital) ltering
Laser pick-up 3 beam
Laser wavelength 780nm
Numerical aperture 0.45
Signal to noise ratio 109dB (20Hz–20kHz bandwidth)
Harmonic distortion (1kHz) 0.002%
Frequency response (±0.5dB) 0.3Hz–20kHz
Output level (0dB) 2.3Vrms
Output impedance 47Ω
Minimum recommended load 5kΩ
Physical
Dimensions W430 x D355 x H85mm
Weight 6.2kg nett/8.0kg packed
Power consumption 32VA maximum
Digital output connection 75Ωco-axial
optical TOSLINK
Supplied accessories
Mains lead
CR90 remote control
4 x AAA batteries
E&OE
NOTE: All specication values are typical unless otherwise stated
Radio interference
e CD37 compact disc player is a digital audio device
which has been designed to very high standards of
electromagnetic compatibility.
All CD players generate, and can radiate RF (radio
frequency) energy. In some cases this can cause
interference with FM and AM radio reception. If this is
the case, keep the CD player and its connecting cables as
far from the tuner and its aerials as possible. Connecting
the CD player and the tuner to dierent mains sockets
can also help to reduce interference.
EC COUNTRIES – is products have been designed to
comply with EMC Directive 2004/108/EC.
USA – ese products comply with FCC Part 15
Class B.
Laser radiation
If the CD37 compact disc player
is operated whilst the outer
casing is removed, invisible
laser radiation could cause eye
damage.

E-11
English
product
guarantee
Worldwide Guarantee
is entitles you to have the unit repaired free of charge, during the rst two years
aer purchase, at any authorised Arcam distributor provided that it was originally
purchased from an authorised Arcam dealer or distributor. e manufacturer can take
no responsibility for defects arising from accident, misuse, abuse, wear and tear, neglect
or through unauthorized adjustment and/or repair, neither can they accept responsibility
for damage or loss occurring during transit to or from the person claiming under the
guarantee.
The warranty covers:
Parts and labour costs for two years from the purchase date. Aer two years you must pay
for both parts and labour costs. e warranty does not cover transportation costs at any
time.
Claims under guarantee
is equipment should be packed in the original packing and returned to the dealer from
whom it was purchased, or failing this, directly to the Arcam distributor in the country of
residence.
It should be sent carriage prepaid by a reputable carrier – not by post. No responsibility
can be accepted for the unit whilst in transit to the dealer or distributor and customers are
therefore advised to insure the unit against loss or damage whilst in transit.
For further details contact Arcam at:
Arcam Customer Support Department,
Pembroke Avenue, Waterbeach, CAMBRIDGE, CB25 9QR, England
or via www.arcam.co.uk.
Problems?
If your Arcam dealer is unable to answer any query regarding this or any other Arcam
product please contact Arcam Customer Support at the above address and we will do our
best to help you.
On-line registration
You can register your product on-line at www.arcam.co.uk.
Correct disposal of this product
is marking indicates that this
product should not be disposed with
other household waste throughout
the EU.
To prevent possible harm to the
environment or human health from
uncontrolled waste disposal and to
conserve material resources, this
product should be recycled responsibly.
To dispose of your product, please use your local
return and collection systems or contact the retailer
where the product was purchased.

E-12

CD37
MANUEL Lecteur de Disque Compact
Français
�

F-2
consignes de
sécurité
Instructions de sécurité
importantes
Cet appareil a été conçu et fabriqué conformément aux
normes de qualité et de sécurité les plus strictes. Vous
devez cependant observer les précautions qui suivent
lors de son installation et de son utilisation.
1. Avertissements et consignes
Il est impératif de lire les consignes de sécurité et
d’utilisation avant de mettre cet appareil en marche.
Conservez ce manuel pour vous y référer par la suite et
respectez scrupuleusement les avertissements gurant
dans ce manuel ou sur l’appareil lui-même.
2. Eau et humidité
L’installation d’un appareil électrique à proximité d’une
source d’eau présente de sérieux risques. Il ne faut donc
pas installer l’appareil près d’une baignoire, d’un lavabo,
d’un évier, dans un sous-sol humide, près d’une piscine,
etc.
3. Chute d’objets ou inltration de liquides
Veillez à ne pas laisser tomber d’objets ni couler de
liquides à travers les ouvertures de l’appareil et ne placez
pas sur l’appareil d’objet contenant du liquide, tel qu’un
vase par exemple.
4. Ventilation
Évitez de placer l’appareil sur un lit, un canapé, un tapis ou
une surface similaire instable ou dans une bibliothèque ou
un meuble fermé. Ceci risquerait de nuire à la ventilation
du système.
5. Exposition à la chaleur
Ne placez pas l’appareil à proximité d’une amme nue
ou de tout dispositif produisant de la chaleur : radiateur,
poêle ou autre, y compris d’autres amplicateurs.
6. Conditions climatiques
L’appareil est conçu pour fonctionner dans des climats
modérés.
7. Étagères et supports
Utilisez uniquement des étagères ou des supports pour
appareils audio. Si l’appareil est monté sur un système
portatif, déplacez-le avec précaution an d’éviter tout
risque de chute.
8. Nettoyage
Mettez l’appareil hors-tension avant de le nettoyer.
Pour l’entretien du boîtier, utilisez uniquement un chion
doux, humide et non pelucheux. N’utilisez pas de diluant
pour peinture ni de solvant chimique.
L’emploi d’aérosols ou de produits de nettoyage pour
meubles est déconseillé, car le passage d’un chion humide
risquerait de laisser des traces blanches et indélébiles.
9. Alimentation secteur
Branchez l’appareil uniquement sur une alimentation
secteur du type mentionné dans le manuel d’utilisation
ou indiqué sur l’appareil lui-même.
Le principal moyen d’isoler l’appareil du secteur est
d’utiliser l’interrupteur situé à l’arrière de l’appareil.
L’appareil doit être installé de façon à pouvoir être
débranché si nécessaire.
10. Protection des câbles d’alimentation secteur
Veillez à ce que les câbles d’alimentation ne se trouvent
pas dans un lieu de passage ou bloqués par d’autres
objets. Cette règle s’applique plus particulièrement aux
prises et câbles d’alimentation et à leurs points de sortie
de l’appareil.
11. Périodes de non-utilisation
Si l’appareil possède une fonction de mise en veille, un
courant faible continuera de circuler lorsqu’il sera réglé
sur ce mode. Débrancher le cordon secteur de la prise
murale si l’appareil doit rester inutilisé pendant une
période prolongée.
12. Odeur suspecte
Arrêtez et débranchez immédiatement l’appareil en cas
d’émission de fumée ou d’odeur anormale. Contactez
immédiatement votre revendeur.
13. Service
N’essayez jamais d’eectuer d’autres opérations que celles
mentionnées dans ce manuel. Toute autre intervention
doit être eectuée par un personnel qualié.
14. Les Piles
Les piles ne doivent pas être placées dans un endroit
trop chaud (chauage, soleil, etc.) ni jetées au feu.
15. Entretien par des techniciens qualiés
L’appareil doit être entretenu par du personnel qualié
lorsque :
A. la prise ou le câble d’alimentation a été
endommagé,
B. des objets sont tombés ou du liquide a coulé dans
l’appareil,
C. l’appareil a été exposé à la pluie,
D. l’appareil présente des dysfonctionnements,
E. l’appareil est tombé ou le boîtier a été endommagé.
Respect des consignes de
sécurité
Cet appareil a été conçu pour répondre à la norme
internationale de sécurité électrique EN60065.
Cet appareil est conforme à la Section 15 des règles
de la FCC. Son fonctionnement est soumis aux deux
conditions suivantes :
(1) ce produit ne risque pas de causer d’interférences
nuisibles et (2) ce produit doit accepter toutes les
interférences reçues, y compris celles qui risquent
d’entraîner un fonctionnement indésirable.
BON NOMBRE DES CONSIGNES CIDESSOUS SONT DE SIMPLES PRÉCAUTIONS DE BON SENS. NOUS VOUS RECOMMANDONS TOUTEFOIS DE LES LIRE POUR VOTRE PROPRE SÉCURITÉ ET POUR CELLE DE L’APPAREIL.
ATTENTION : an de réduire les risques de choc électrique, n’ouvrez pas le boîtier de l’appareil. Les pièces internes ne sont pas
réparables par l’utilisateur. Pour tout problème matériel, contactez des techniciens qualiés.
ATTENTION : an de réduire les risques de choc électrique et d’incendie, veillez à ne pas exposer cet appareil à la pluie ou
à l’humidité.
Le triangle dans lequel gure le symbole d’un éclair alerte l’utilisateur de la présence, dans le boîtier de l’appareil,
d’une tension dangereuse, non isolée et susamment importante pour représenter un risque de choc électrique.
Le triangle dans lequel gure un point d’exclamation alerte l’utilisateur de la présence d’instructions de
fonctionnement et de maintenance (réparation) importantes dans la documentation accompagnant le produit.
ATTENTION : au Canada et aux États-Unis, an de prévenir tout choc électrique, aligner la plus grosse broche de la prise à
la fente la plus large de la che et insérez entièrement la prise dans la che.
Avertissement
Un coupleur secteur permet de débrancher l’appareil
et il doit rester aisément accessible.
Produit de classe I
Cet équipement est un appareil électrique de classe
I. Il nécessite un branchement à la terre.

Français
F-3
bienvenue
Merci et félicitations pour votre achat du lecteur CD FMJ Arcam.
Cela fait aujourd’hui plus de trois décennies qu’Arcam conçoit des produits audio spécialisés
d’une qualité remarquable. La nouvelle platine CD/SACD CD37 est le dernier-né d’une
longue lignée de produits hi- maintes fois primée. La gamme FMJ capitalise sur l’expérience
considérable d’Arcam, l’un des plus grands spécialistes britanniques en matière d’audio, et ses
produits sont conçus et fabriqués pour vous assurer des années de plaisir audiophile.
Ce manuel contient toutes les informations nécessaires pour installer, brancher et utiliser la
platine Arcam CD37. Il contient également une description de la télécommande CR90 (livrée
avec l’appareil). Utilisez le sommaire ci-contre pour localiser les sections que vous souhaitez
consulter.
Nous espérons que votre lecteur CD FMJ vous orira de nombreuses années d’écoute sans
soucis. En cas de défaut peu probable ou si vous avez tout simplement besoin de renseignements
complémentaires sur les produits Arcam, notre groupe de distributeurs se fera un plaisir de vous
aider. Vous trouverez également des informations complémentaires sur le site web d’Arcam :
www.arcam.co.uk.
L’équipe de développement FMJ
consignes de sécurité...............................F-2
Instructions de sécurité importantes............ F-2
Respect des consignes de sécurité ................ F-2
bienvenue...................................................F-3
installation .................................................F-4
Mise en place de l’appareil ............................... F-4
Alimentation électrique ..................................... F-4
Câbles de branchement..................................... F-4
utilisation de l’CD37 ................................F-6
Utilisation Panneau avant ................................. F-6
Fonctions avancées.............................................. F-7
Remarque sur les disques SACD .................... F-7
télé-commande.........................................F-8
Télécommande universelle CR90 .................. F-8
Commande du lecteur CD................................. F-9
Panneau amplicateur – modes IR ................ F-9
specications.......................................... F-10
spécications.......................................... F-10
Interférences radio ............................................. F-10
Rayonnement laser ............................................F-10
garantie du produit............................... F-11
av-ph 20
Table des matières

F-4
installation
La platine CD37 d’Arcam vous garantit une qualité de son inégalée dans
sa catégorie.
La platine CD37 utilise un convertisseur numérique/analogique Delta
Sigma et un ltre DSD (Direct Stream Digital), permettant ainsi de
reproduire les détails les plus ns avec une clarté époustouante, que cela
soit à partir de CD conventionnels ou de SACD (Super Audio CD). La
télécommande universelle CR90, livrée avec l’appareil, est très simple à
utiliser et permet de contrôler jusqu’à huit appareils audio (amplicateur,
télévision, magnétoscope numérique, etc.).
La platine de lecture de disques audio CD37 est conçue pour produire un
niveau de performance qui donnera littéralement vie à vos musiques.
Mise en place de l’appareil
<Posez le CD37 sur une surface plane et ferme, en
évitant de l’exposer directement aux rayons du
soleil ou à une source de chaleur ou d’humidité.
<Ne posez pas le au-dessus d’un amplicateur de
puissance ou toute autre source de chaleur.
<Ne placez pas le CD37 dans un espace clos, tel
qu’une bibliothèque ou un placard fermé, sauf si la
ventilation est susante. Lors du fonctionnement
de l’appareil, sa température augmente.
<Ne posez aucun autre composant ou objet
au-dessus du CD37 car vous risqueriez d’obstruer
les fentes de ventilation et d’entraîner la surchaue
de cet appareil. (et par conséquent de ce
composant ou de cet objet).
<Veillez à ce que le capteur infrarouge (situé sur
le badge FMJ du panneau avant de l’appareil) ne
soit pas obstrué, sinon le fonctionnement de la
télécommande sera perturbé.
<Ne posez pas votre platine sur cet appareil. Les
platines sont très sensibles aux bruits générés par
l’alimentation secteur. Ces derniers risquent d’être
audibles en tant que bruits de fond si la platine est
trop près de l’appareil.
Alimentation électrique
L’amplicateur est livré avec une prise de courant
moulée intégrée au câble. Vériez que la prise livrée
correspond bien à votre alimentation électrique (si
vous avez besoin d’un nouveau câble d’alimentation,
contactez votre revendeur Arcam).
Si la tension de votre alimentation électrique est
diérente, contactez immédiatement votre revendeur
Arcam.
Insérez la prise IEC du câble d’alimentation dans la
che située à l’arrière de l’amplicateur, en poussant
fermement pour assurer un branchement correct.
Branchez l’autre extrémité du câble dans votre prise de
courant, elle-même allumée si nécessaire.
Entrées de télécommande et du
déclencheur
L’entrée REMOTE IN permet de transmettre des signaux
RC5 (cf. page 9) au lecteur CD37 lorsque son mode
d’installation, ou le système auquel il est intégré, rend
le capteur à infrarouges inutilisable. En cas de besoin,
veuillez contacter votre revendeur pour de plus amples
informations à ce sujet.
L’entrée du déclencheur (TRIGGER IN) permet la mise en
veille ou la sortie de veille du CD37. Si vous branchez
la sortie déclencheur d’un amplicateur Arcam (ou
tout autre dispositif compatible) à cette entrée, le CD37
basculera automatiquement en veille ou sortira de veille
à la mise hors/sous tension de l’amplicateur. Pour
plus d’informations, veuillez consulter le manuel de
l’amplicateur.
Lors d’une utilisation normale, ces connexions ne sont
pas nécessaires.
Câbles de branchement
Il est recommandé d’utiliser des câbles blindés de haute
qualité, conçus pour ce genre d’application. L’utilisation
d’autres câbles, ayant des caractéristiques d’impédance
diérentes, risque d’aecter les performances de votre
système (par exemple, n’utilisez pas de câble destinés à
un usage vidéo pour transmettre des signaux audio). Les
câbles doivent être aussi courts que possible.
Lors de la connexion du matériel, il convient en outre
de vérier que les câbles d’alimentation secteur sont
maintenus aussi loin que possible des câbles audio. Vous
éviterez ainsi les bruits indésirables dans les signaux audio.
L’entrée de la télé-commande nécessite une che
jack mono de 3,5 mm, avec pointe active et mise à la
terre de la douille.
Les signaux de la télécommande doivent être au
format RC5 modulé (à 36kHz) avec une tension
comprise entre 5 V et 12 V.

Français
F-5
Sortie numérique coaxiale
Utilisez cette prise si vous avez besoin d’un convertisseur analogique-
numérique supplémentaire ou d’un enregistreur numérique.
Branchez-la sur l’entrée du CAN ou de l’enregistreur numérique grâce à
un câble blindé de 75 Ωapproprié.
AVERTISSEMENT : Ne branchez jamais la prise de sortie numérique
sur une entrée audio traditionnelle
Sorties analogiques
Branchez-les sur l’entrée de votre amplicateur
CD ou une autre entrée du même niveau avec
les câbles d’interconnexion de qualité élevée
appropriée. Vériez que les sorties audio droite
et gauche du lecteur CD sont branchées sur
les mêmes entrées gauche et droite de votre
amplicateur.
Vous pouvez utiliser les autres prises pour
brancher un second amplicateur conguré pour
une utilisation dans plusieurs pièces.
Power inlet (prise secteur)
Branchez ici le cordon
d’alimentation secteur.
Sélection de la tension
Veillez à ce que la tension sélectionnée
corresponde bien à celle de votre réseau
d’alimentation.
Sortie numérique optique
Utilisez cette prise si vous avez besoin
d’un convertisseur analogique-
numérique supplémentaire ou d’un
enregistreur numérique avec une
connexion optique.
Eectuez le branchement grâce à un
câble optique approprié.
Entrée de télécommande
Cette prise permet à la platine
CD37 de recevoir les signaux de la
télécommande même si le capteur
infrarouge est obstrué d’une
manière ou d’une autre.
Veuillez vous reporter à la page 4
pour plus d’informations.
Entrée de déclenchement 12 V
Cette entrée permet de mettre en marche à
distance la platine CD37, depuis la sortie de
déclenchement (sortie 12V TRIG OUT) d’un
amplicateur (ou d’un autre appareil AV).

F-6
utilisation
de l’ CD37
Utilisation Panneau avant
Ces fonctions peuvent être contrôlées depuis la
télécommande CR90. (cf. pages 8–9.)
Power (mise en marche)
Appuyez sur la touche POWER du panneau avant pour
allumer et éteindre la platine CD. Vous pouvez activer
et désactiver le mode veille en appuyant sur la touche 2
de la télécommande
La platine CD37 s’initialise et ache (si aucun CD ne se
trouve dans l’appareil) :
Load (chargement)
Pour charger un CD, appuyez sur LOAD (ou sur la touche
1de la télécommande). Le plateau CD s’ouvre ; il peut
accommoder les disques de 12 et 8 cm. Placez le CD sur
le plateau, face imprimée vers le haut.
Appuyez à nouveau sur LOAD (vous pouvez également
appuyer sur la touche 1de la télécommande ou
enfoncer délicatement le plateau de 5 mm) pour fermer
le plateau. Le nombre total de pistes et la durée totale du
disque apparaissent.
Le disque est désormais prêt à être lu.
Play (lecture)
Appuyez sur la touche PLAY du panneau avant (ou la
touche 4de la télécommande) pour lire le CD. Pour
recommencer depuis la piste 1, appuyez sur STOP, puis
sur PLAY.
Veillez à ce que le que le sélecteur de source d’entrée de
votre amplicateur soit bien réglé sur « CD ».
Stop
Appuyez sur la touche STOP du panneau avant (ou la
touche <de la télécommande) pour arrêter la lecture
du CD. Le nombre total de pistes et la durée totale du
disque s’achent.
Pause
Appuyez sur PAUSE (ou sur la touche ;de la
télécommande) pour mettre le disque en pause (pour
interrompre la lecture). Appuyez sur PLAY ou PAUSE pour
reprendre la lecture à partir du même point.
av-ph 20
Search (7 8) (recherche)
Appuyez longuement sur la touche 7pour rechercher
en arrière, ou sur la touche 8pour rechercher en avant,
un passage particulier de la piste en cours de lecture. Si
la platine est en mode « PAUSE », la recherche se fait à
grande vitesse.
Sélection des pistes (0 /)
Pour lancer un CD à partir d’une piste autre que la
première, appuyez sur les touches Bou Cde la
télécommande pour rechercher la piste souhaitée, puis
appuyez sur OK.
Pour sélectionner une autre piste pendant la lecture,
appuyez sur la touche 0ou /du panneau avant ou de la
télécommande. La piste est lue automatiquement après
votre sélection.
Other manuals for CD37
1
This manual suits for next models
1
Table of contents
Languages:
Other Arcam CD Player manuals

Arcam
Arcam CD23 User manual

Arcam
Arcam DiVA CD92 User manual

Arcam
Arcam DiVA CD72 User manual

Arcam
Arcam Delta 70.2 User manual

Arcam
Arcam CD36 User manual

Arcam
Arcam DiVA CD73 User manual

Arcam
Arcam CDS27 User manual

Arcam
Arcam Alpha 7 User manual

Arcam
Arcam Alpha 9 User manual

Arcam
Arcam FMJ CD17 User manual

Arcam
Arcam Alpha 9 User manual

Arcam
Arcam DiVA CD73 User manual

Arcam
Arcam DiVA CD72 User manual

Arcam
Arcam DiVA CD62 User manual

Arcam
Arcam DiVA CD72 User manual

Arcam
Arcam DiVA CD72 User manual

Arcam
Arcam CD33 User manual

Arcam
Arcam CD192 User manual

Arcam
Arcam Alpha 7 User manual

Arcam
Arcam DiVA CD73 User manual