8 / 9 EN Steam Cleaner / Instruction for use
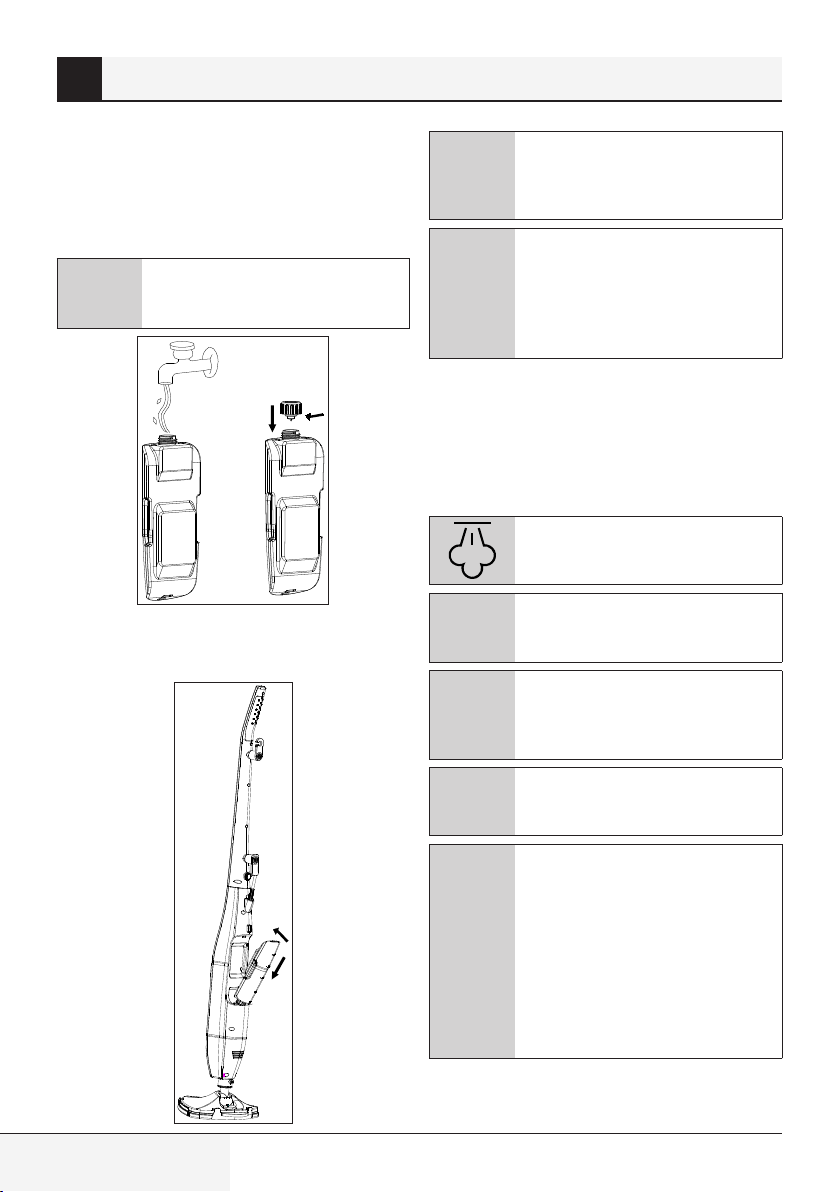
3.5 Refilling the water reservoir
1. Press the water reservoir release button (11)
and take out the water reservoir (10).
2. Open the lid of the water reservoir and fill it with
water up to 400 ml level.
AWARNING: Fill the water reservoir
solely with water. Do not use chemi-
cals.
3. Attach the water reservoir (10) to its slot on the
body (4) in the direction shown below. Push the
water reservoir until you hear a click.
3 Operation
AWARNING: The power indicator light
(3) will flash if the water reservoir
(10) is not completely seated or if
water is depleted.
A
WARNING: After filling and install-
ing the water reservoir (10), you
can press the on/off button (2) twice
to continue cleaning. This way, the
power indicator will stop flashing
and remain on.
3.6 Operation
1. Plug in the appliance to the socket.
2. Press the on/off button (2). Power indicator light
(3) will become on.
3. The appliance will start ejecting steam in 15-20
seconds.
There will be hot steam coming out.
CYou will hear the operating noise of
the pump when the product is oper-
ating or needs refilling.
AWARNING: If you are going to use
the cleaning base (8) to clean the
floor, do not use the appliance before
attaching the cleaning mop (7).
AWARNING: Operating the appliance
on the same area for a long time
may damage the floor.
A
WARNING: Do not use the steam
function on wooden or laminated
floors that do not have a water-
proof covering or whose water-proof
covering has been damaged. Steam
may tarnish polished wooden floors.
Test the appliance on an invisible
area of the floor to make sure it is
suitable for cleaning with hot steam.
4. When the steam-cleaning process is done,
turn off and unplug the appliance and let it cool
down for 60 minutes.