Mounting your new mailbox
2
1
Thank you for purchasing this premium locking mailbox. If you have any questions about how
to mount or use this product, or if you need replacement parts, please call us directly at (800)
464-7491 or contact us at www.architecturalmailboxes.com.
Geneva Mailbox (Model 6700)
Mounting and Use Instructions
Your new mailbox comes completely assembled. To begin using your mailbox, it must be properly mounted. If you are
using your mailbox at the curb or street, you are required to mount it in accordance with USPS requirements to facilitate
carrier access, as described below. Your mounting options are:
1) Use any one of our compatible posts, including the Basic 3” Round In-ground Post (7505), Decorative 3” Round
In-ground Post (7507), Standard 4” Square In-Ground Post (5105), or Standard 4” Square Surface Mount Post (5106).
Refer to the instructions that come with these posts for proper post installation.
2) Use a 4x4 wood post and our 4x4 Post Adapter (7540).
CUSTOMERS ARE REQUIRED TO CONTACT THE LOCAL POST OFFICE BEFORE INSTALLING THE MAILBOX TO
ENSURE ITS CORRECT PLACEMENT AND HEIGHT AT THE STREET. GENERALLY, MAILBOXES ARE INSTALLED AT
A HEIGHT OF 41-45 INCHES FROM THE ROAD SURFACE TO INSIDE FLOOR OF THE MAILBOX OR POINT OF MAIL
ENTRY (LOCKED DESIGNS) AND ARE SET BACK 6-8 INCHES FROM THE FRONT FACE OF CURB OR ROAD EDGE
TO THE MAILBOX DOOR.
www.architecturalmailboxes.com (800) 464-7491
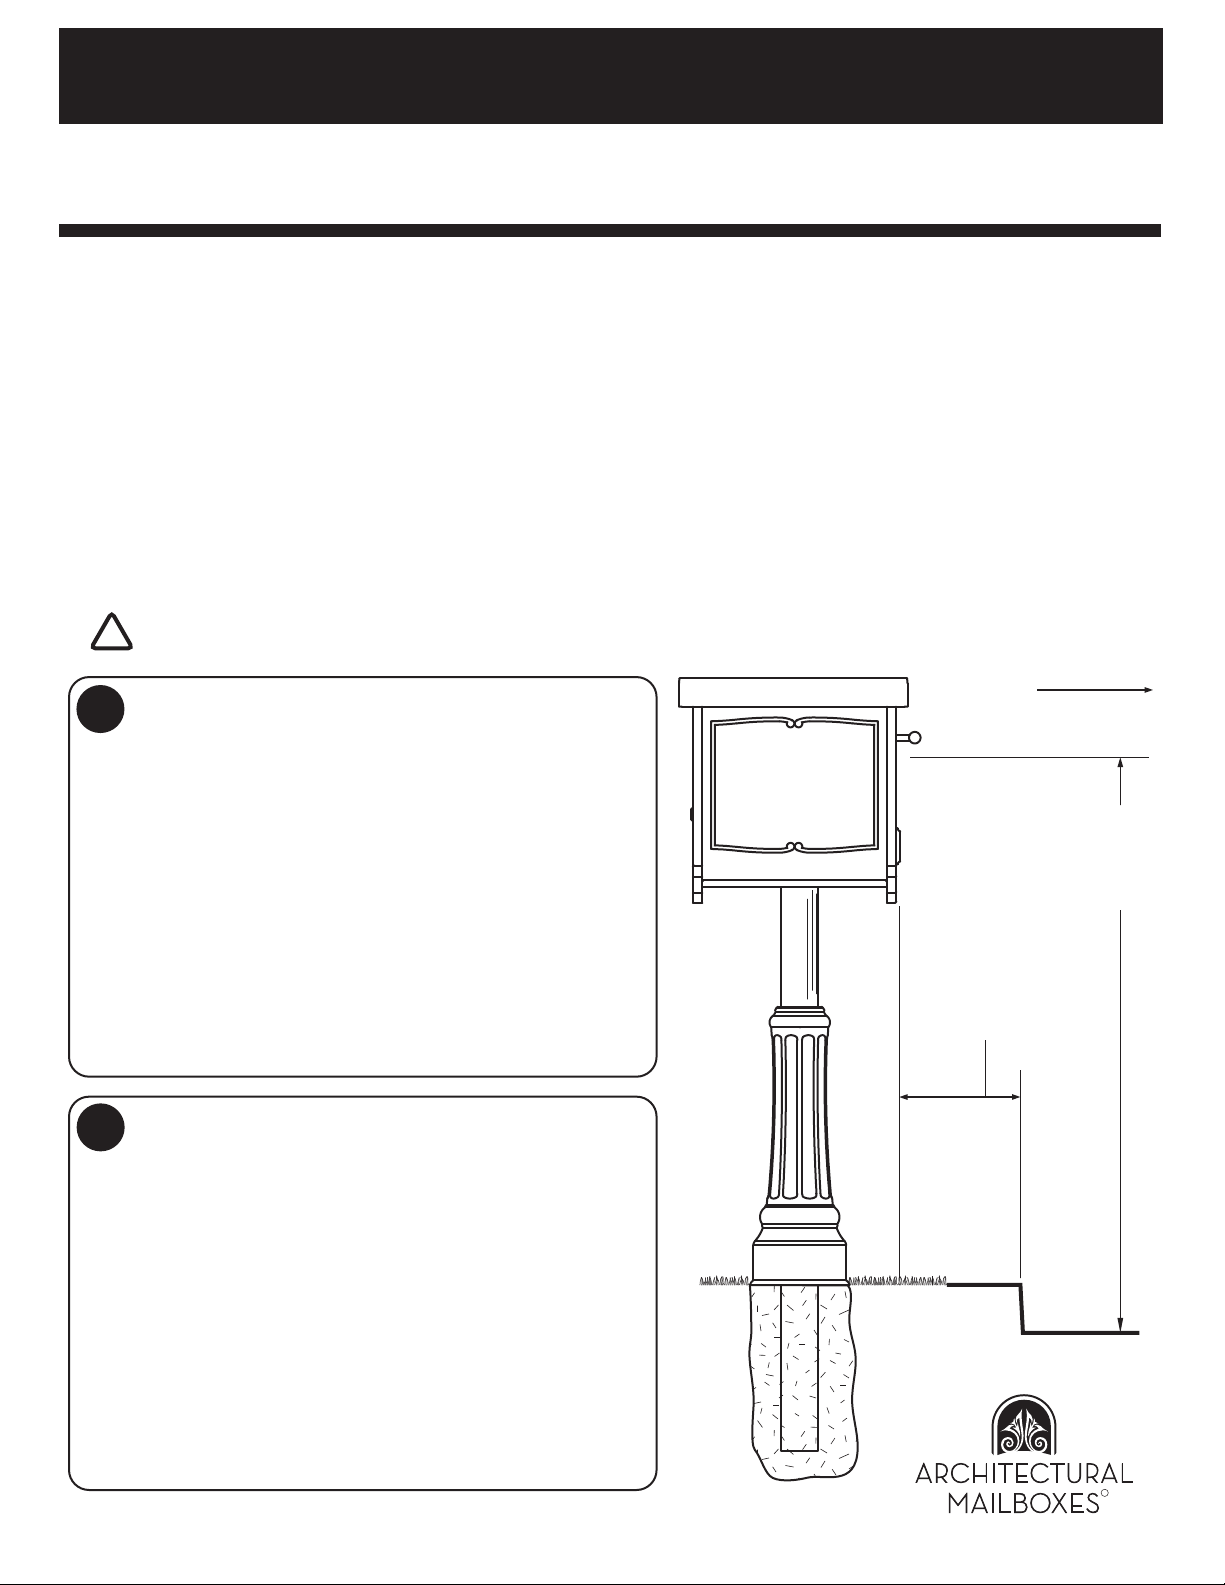
R
Height per local
post office,
typically between
41 and 45 inches
to mail entry point
Set back per
local post
office, typically
between 6 and
8 inches
For In-ground Posts
Dig a hole deep enough to allow the mailbox to sit at the specified height, as
required by your local post office and generally as indicated at right.
For Surface Mount Posts
J-bolts (not included) placed into wet concrete:
Dig a hole deep and large enough to create a concrete pad to support the
mailbox and post. The size will depend on the type of soil and location. Make
sure the mailbox will sit at the specified height and distance from the curb, as
required by your local post office and generally as indicated at right.
Anchors (not included) in preexisting dry concrete:
Make sure the anchor positions will allow for the specified set back and that the
mailbox will sit at the correct height, as required by your local post office and
generally as indicated at right.
For In-ground Posts:
Place the post in the hole and secure with concrete (at least 1 cubic foot
recommended) completely around the post. NOTE - MAKE SURE THE HEIGHT
AND LOCATION ARE CORRECT BEFORE THE CONCRETE IS SET.
For Surface Mount Posts:
J-bolts (not included) placed into wet concrete:
Pour the concrete pad around the j-bolts held in the correct pattern. Attach the
post to the j-bolts using the hardware included with the j-bolts. NOTE - MAKE
SURE THE PAD IS PROPERLY LOCATED AND AT THE RIGHT HEIGHT
BEFORE THE J-BOLTS ARE SET IN THE CONCRETE.
Anchors (not included) in preexisting dry concrete:
Install the anchors into the concrete and attach the post base to the ground
using the hardware supplied with the anchors.
Handle Side Toward Street
NOTE: The mounting hardware to attach this mailbox to your post is not included with this mailbox. Compatible
mounting hardware is included with our posts.
!


