manuals.online logo
Brands
  1. Home
  2. •
  3. Brands
  4. •
  5. Ariston
  6. •
  7. Water Heater
  8. •
  9. Ariston VELIS LUX PW ABSE WIFI 80 User manual

Ariston VELIS LUX PW ABSE WIFI 80 User manual

Other manuals for VELIS LUX PW ABSE WIFI 80

1

This manual suits for next models

9

Other Ariston Water Heater manuals

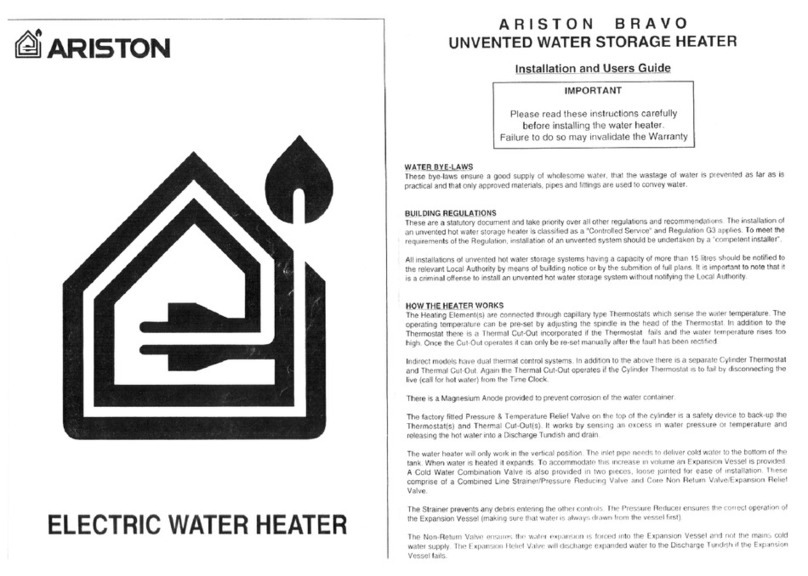
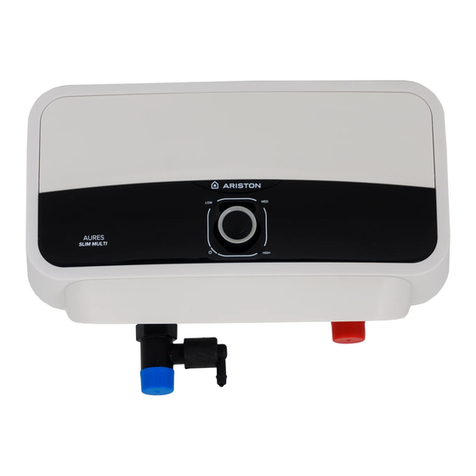
Ariston AURES SF 5.5 COM User manual

Ariston

Ariston AURES SF 5.5 COM User manual

Ariston NEXT EVO X SFT Series User manual

Ariston

Ariston NEXT EVO X SFT Series User manual

Ariston SI 150 M 3KW User manual

Ariston

Ariston SI 150 M 3KW User manual

Ariston 80 L User manual

Ariston

Ariston 80 L User manual

Ariston ARIER040C2X045N User manual

Ariston

Ariston ARIER040C2X045N User manual

Ariston VELIS DRY User manual

Ariston

Ariston VELIS DRY User manual

Ariston EP 30 R 3 KW User manual

Ariston

Ariston EP 30 R 3 KW User manual

Ariston ARK 18 User manual

Ariston

Ariston ARK 18 User manual

Ariston Superlux NTS 50V User manual

Ariston

Ariston Superlux NTS 50V User manual

Ariston VELIS TECH PW ABSE 80 Parts list manual

Ariston

Ariston VELIS TECH PW ABSE 80 Parts list manual

Ariston Super Bravo 125 User manual

Ariston

Ariston Super Bravo 125 User manual

Ariston IHUB 4 User manual

Ariston

Ariston IHUB 4 User manual

Ariston JOVIS 100 Parts list manual

Ariston

Ariston JOVIS 100 Parts list manual

Ariston AURES Series User manual

Ariston

Ariston AURES Series User manual

Ariston BCH CD1 80 ARI-EU Instruction Manual

Ariston

Ariston BCH CD1 80 ARI-EU Instruction Manual

Ariston SGA CA 120 Technical specifications

Ariston

Ariston SGA CA 120 Technical specifications

Ariston DUNE1 User manual

Ariston

Ariston DUNE1 User manual

Ariston WIFI 80 V User manual

Ariston

Ariston WIFI 80 V User manual

Ariston 30 SLIM User manual

Ariston

Ariston 30 SLIM User manual

Ariston VELIS 30 PW Parts list manual

Ariston

Ariston VELIS 30 PW Parts list manual

Ariston CONTRACT ST 50 Guide

Ariston

Ariston CONTRACT ST 50 Guide

Ariston WITH PUMP User manual

Ariston

Ariston WITH PUMP User manual

Ariston Ti Shape Small Guide

Ariston

Ariston Ti Shape Small Guide

Ariston FAST EVO ONT C 11 User manual

Ariston

Ariston FAST EVO ONT C 11 User manual

Popular Water Heater manuals by other brands

clage German pool CEX13 operating instructions

clage

clage German pool CEX13 operating instructions

Noritz proTough NR98SV installation manual

Noritz

Noritz proTough NR98SV installation manual

DeDietrich KALIKO TWH 200 EV Installation and service manual

DeDietrich

DeDietrich KALIKO TWH 200 EV Installation and service manual

veito FLOW Installation and operating instructions

veito

veito FLOW Installation and operating instructions

ICI Caldaie COSMOGAS AGUATANK 150 Instructions for installation, use and maintenance manual

ICI Caldaie

ICI Caldaie COSMOGAS AGUATANK 150 Instructions for installation, use and maintenance manual

Savio Laser 11 A Instruction manual for installation and use

Savio

Savio Laser 11 A Instruction manual for installation and use

Kenmore 153.582400 Use & care guide

Kenmore

Kenmore 153.582400 Use & care guide

STIEBEL ELTRON Eltronom SHU 5 S Operating and installation instructions

STIEBEL ELTRON

STIEBEL ELTRON Eltronom SHU 5 S Operating and installation instructions

clage E-Mini Series Operating and installation instructions

clage

clage E-Mini Series Operating and installation instructions

Solar SunX 317365-002 instruction manual

Solar

Solar SunX 317365-002 instruction manual

Bradford White EF Series Service manual

Bradford White

Bradford White EF Series Service manual

Dimplex ECSd125-580 Installation and user instructions

Dimplex

Dimplex ECSd125-580 Installation and user instructions

Dux 32FCR6N installation manual

Dux

Dux 32FCR6N installation manual

Noritz N-132M Owner's guide and installation manual

Noritz

Noritz N-132M Owner's guide and installation manual

TESY GCV7/4S 10047 Instructions for use and maintenance

TESY

TESY GCV7/4S 10047 Instructions for use and maintenance

A.O. Smith Gphe 50 instruction manual

A.O. Smith

A.O. Smith Gphe 50 instruction manual

Rinnai REP199i Installation and operation manual

Rinnai

Rinnai REP199i Installation and operation manual

Toyotomi Oil Miser OM-148 (Type D) Operation and maintenance instructions

Toyotomi

Toyotomi Oil Miser OM-148 (Type D) Operation and maintenance instructions

manuals.online logo
manuals.online logoBrands
  • About & Mission
  • Contact us
  • Privacy Policy
  • Terms and Conditions

Copyright 2025 Manuals.Online. All Rights Reserved.

Create account
1
QUICK START GUIDE
A
FREE DOWNLOAD
B
1 | СТВОРЕННЯ ОБЛІКОВОГО ЗАПИСУ
AЗавантажте безкоштовний додаток "Aqua Ariston NET" в Apple
App Store або Google Play.
BУ додатку натисніть кнопку " ЗАРЕЄСТРУВАТИСЯ " і заповніть
всі необхідні поля. На вашу поштову скриньку прийде
посилання для підтвердження аккаунта. Необхідно перейти за
цим посиланням.
Примітка: після активації облікового запису перейдіть до
кроку 2 на наступній сторінці, щоб активувати Wi-Fi на
продукті перед входом в додаток.
1 | СОЗДАНИЕ АККАУНТА
AСкачайте бесплатное приложение "Aqua Ariston NET" в Apple
App Store или Google Play.
BВ приложении нажмите кнопку "ЗАРЕГИСТРИРОВАТЬСЯ" и
заполните все необходимые поля. На Ваш почтовый ящик
придет ссылка для подтверждения аккаунта. Необходимо
перейти по этой ссылке.
Примечание: после активации учетной записи перейдите к
Шагу 2 на следующей странице, чтобы активировать Wi-Fi
на продукте перед входом в приложение.
1 | ACCOUNT CREATION
ADownload the Aqua Ariston NET App from the Apple App Store or
Google Play for free.
BClick on the SIGN UP button in the App and fill in the fields.
Check your mailbox and click on the link to activate your account.
Note: After activating the account, move to step 2 in the next page to
activate Wi-fi on the product before logging in to the app.
RU
ВАЖНОЕ ЗАМЕЧАНИЕ
EN IMPORTANT NOTICE
1. The connection is only successful when following the steps in the
order of instructions below.
2. It is necessary to enable position and provide access to location
information.
3. Make sure the Wi-Fi internet connection works stably during
installation.
4. WARNING: The product can only be connected to 2.4GHzWi-Fi band.
5GHz bands are not supported. If it is a dual band router, please
select the appropriate 2.4GHz option.
Tutorial Video
1. Подключение будет успешным только в случае, если будет
выполнена последовательность шагов, которые описаны в
инструкции.
2. Приложение может запросить доступ к информации о
местоположении устройства, производитель рекомендует
разрешить доступ.
3. Убедитесь, что во время установки подключение к интернету по
Wi-Fi работает стабильно.
4. ПРЕДУПРЕЖДЕНИЕ. Устройство можно подключить только к сети
Wi-Fi 2,4 ГГц . Диапазон 5 ГГц не поддерживаются. Если у вас
двухдиапазонный роутер, выберите соответствующий параметр в
2,4 ГГц.
Техническая поддержка: 8-800-500-59-95
Обучающее видео
UA
ВАЖЛИВЕ ЗАУВАЖЕННЯ
1. Підключення буде успішним тільки в разі, якщо буде виконана
послідовність кроків, які описані в інструкції.
2. Додаток може запросити доступ до інформації про
місцезнаходження пристрою, виробник рекомендує дозволити
доступ.
3. Переконайтеся, що під час установки підключення до інтернету
поWi-Fi працює стабільно.
4. ПОПЕРЕДЖЕННЯ: Виріб можна підключати лише до діапазонуWi-Fi
2,4 ГГц. Діапазони 5 ГГц – ні підтримується. Якщо це двосмуговий
маршрутизатор, виберіть відповідний варіант 2,4 ГГц.
Гаряча лінія: +380 44 496 25 15
UARUEN
AQUA ARISTON NET
for
VELIS LUX Wi-Fi
Wi-Fi button
Tutorial Video
info[email protected]
Procedure completed4
4 |ПРОЦЕДУРА РЕЄСТРАЦІЇ ЗАВЕРШЕНА
AРеєстрація пройшла успішно, якщо:
а) Постійно горить світловий індикатор кнопки "Wi-Fi ".
б) У додатку з'явилося повідомлення про успішну реєстрацію
вашого обладнання.
4 |ПРОЦЕДУРА РЕГИСТРАЦИИ ЗАВЕРШЕНА
AРегистрация прошла успешно, если:
а) Постоянно горит световой индикатор кнопки "Wi-Fi".
б) В приложении появилось сообщение об успешной
регистрации Вашего оборудования.
4 | PROCEDURE COMPLETED
AThe procedure is successful when:
a) Wi-Fi button on the product remains on.
b) The App shows the successful registration message.
3 |ЗВ'ЯЗОК З ОБЛІКОВИМ ЗАПИСОМ
AУвійдіть у додаток за допомогою облікового запису,
створеного раніше, а потім:
IOS: зайдіть в додаток, натисніть на кнопку Налаштування
Wi-Fi додатку, потім перейдіть в налаштуванняWi-Fi вашого
телефону, дочекайтеся появи імені Wi-Fi "Remote GwThermo" і
виберіть його, а потім поверніться в додаток.
Android: зайдіть в додаток, підключення до "Remote Gw
Thermo" відбувається автоматично. У вас може бути
запитаний доступ до інформації про місцезнаходження
приладу, рекомендується дозволити доступ.
B
Виберіть домашню мережуWi-Fi і введіть пароль.
Переконайтеся, що пристрій під'єднано до потрібної мережі,
заповніть інформацію, пов'язану з місцем розташування, і
виберіть ім'я для ідентифікації Вашого продукту.
3 |СВЯЗЬ С АККАУНТОМ
AВойдите в приложение с помощью учетной записи, созданной
ранее, а затем:
IOS: зайдите в приложение, нажмите на кнопку Настройки
Wi-Fi приложения , затем перейдите в НастройкиWi-Fi вашего
телефона, дождитесь появления имениWi-Fi "Remote Gw
Thermo" и выберите его, а затем вернитесь в приложение.
Android: зайдите в приложение, подключение к "Remote Gw
Thermo" происходит автоматически. У вас может быть
запрошен доступ к информации о местоположении прибора,
рекомендуется разрешить доступ.
B
выберите внутреннюю сетьWi-Fi и введите соответствующий
пароль. Убедитесь, что продукт подключен к нужной сети,
заполните информацию, связанную с местоположением, и
выберите имя для идентификации Вашего продукта.
3 | CONFIGURE WI-FI AND ACCOUNT
BINDING
ALog in to the application using the account you created earlier,
then:
IOS: entering into the app, click on the app'sWi-Fi settings button,
then go to your phone'sWi-Fi settings, wait until theWi-Fi name
"Remote GwThermo" appears and select it, then return to the
application.
Android: entering into the app, the connection to“Remote Gw
Thermo”is automatic.You may be asked to share the location,
consent is recommended for a better experience.
BSelect the domesticWi-Fi network and enter the corresponding
password. Check that the product is connected to the right user,
fill in the information related to the location and choose a name to
idenfity your product.
UARUEN
UARUEN
Start Wi-Fi2
Configure Wi-Fi and account binding3
AB
A B
EN | Images refer to main steps.
RU | Изображения относятся к основным шагам инструкции. Приложение может потребовать получить доступ к Вашей геолокации.
UA | Зображення відносяться до основних кроків інструкції. Додаток може запросити отримати доступ до вашої геолокації.
2 | АКТИВАЦІЯ WI-FI
AНатисніть кнопку "Wi-Fi" на панелі управління, для активації
функціїWi-Fi.
BНатисніть і утримуйте кнопку "Wi-Fi " на панелі керування
протягом 5 секунд, для створення точки доступу.
CУвійдіть в додаток Aqua Ariston NET і дотримуйтесь інструкцій по
підключенню і реєстрації вашого продукту.
2 | АКТИВАЦИЯ WI-FI
AНажмите кнопку "Wi-Fi" на панели управления, для
активации функцииWi-Fi.
BНажмите и удерживайте кнопку "Wi-Fi" на панели управления в
течение 5 секунд, для создания точки доступа.
Cвойдите в приложение Aqua Ariston NET и следуйте инструкциям по
подключению и регистрации вашего продукта.
2 | START WI-FI
APress theWi-Fi Button on the product' control panel to activate
theWi-Fi (Wi-Fi button slow blinking).
BPress theWi-Fi Button again for 5 seconds on the product' control
panel to create the Access Point (Wi-Fi button fast blinking).
CLog in to Aqua Ariston NET App and follow the wizard to connect
and register your product.
UARUEN
IOS Android Step 2 Step 3