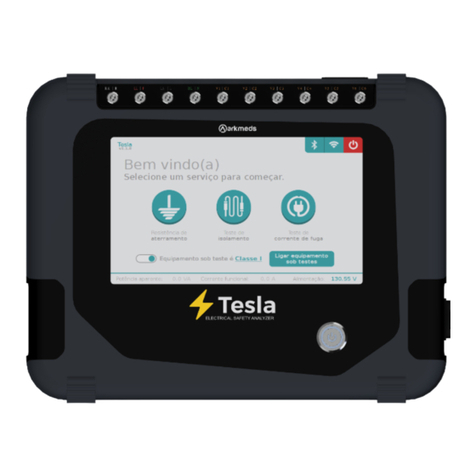
arkmeds Luft User manual

VENTILATOR ANALYZER
User Guide.

2

3
Table of Contents
INTRODUCTION ----------------------------------------------------- 4
SAFETY INFORMATION ------------------------------------------- 4
ACRONYMS AND DEFINITIONS --------------------------------- 5
PACKAGING ---------------------------------------------------------- 6
CONCEPTS --------------------------------------------------------- 7
UNDERSTANDING THE DEVICE ------------------------------ 10
TURNING ON THE DEVICE ------------------------------------- 14
TEST----------------------------------------------------------------- 24
BIDIRECTIONAL ------------------------ 25
UNIDIRETCIONAL ---------------------- 26
O2 CELL REPLACEMENT -------------------------------------- 27
SOFTWARE AND APPLICATION ------------------------------ 28
PROBLEMS AND SOLUTIONS -------------------------------- 29
MAINTENANCE ------------------------------------------------- 30
TECHNICAL SPECIFICATIONS ---------------------------- 30
FAQ --------------------------------------------------------------- 31

4
INTRODUCTION
SAFETY INFORMATION
LUFT Mechanical Ventilation Analyzer allows the verification of
Anesthesia Devices, Lung Ventilators, Oxygen Concentrators,
Flowmeters, Pressure Manometers of Medical Gas Networks, among
other applications. Luft measures bidirectional, unidirectional, high-
and low-pressure airflow, barometric pressure, oxygen concentration,
and ambient temperature and humidity.
It is integrated with the management system, enabling real-time integration
and reading of the values tested, registering them in the device’s repair
and maintenance records. Luft operates on a rechargeable lithium-ion
battery, capable of lasting three to five hours of uninterrupted testing.
For better conservation of your device and to prolong its useful life,
please consider the following:
1. Do not expose the device to high humidity.
2. Do not expose the device to temperatures above 50º C.
3. Respect the device’s battery life.
4. Insert the connectors only into the spots intended for operation.
5. Do not connect this device to the patient.
6. Replace the power cord if any damage is identified.
7. Replace accessories if any damage is identified.

5
8. Do not open the device without the expertise and the
manufacturer’s qualification.
9. Always examine the device before and after each use.
If you notice any irregularity with the device, do not put it into operation.
Depending on the problem, the device may suffer irreversible damage,
which will lead to costly maintenance or discontinuity. Whenever the
device fails, set it aside and contact the Arkmeds Support Team
through the channel:
https://www.arkmeds.us/support
ACRONYMS AND DEFINITIONS
• O2 - Oxygen
• l - liter
• ml - milliliter
• lpm - liters per minute
• lps - liters per second
• mlpm - milliliter per minute
• mlps - milliliter per second
• mbar - millibar = 0.001 bar
• cmHg - centimeter of mercury
• cmH20 - centimeter of water
• atm - atmosphere
• kPa - kilopascal
• ATPD - Ambient Temperature and Pressure, Dry (0% humidity)
• ATPS - Ambient Temperature and Pressure, Saturated (100% humidity)
• STPD - Standard Temperature 0 °C, Standard Pressure 760 mmHg, dry
(0 % humidity)
• BTPS - Body Temperature 37 °C, Ambient Pressure, Saturated (100% humidity)

6
PACKAGE CONTENT
The Luft Mechanical Ventilation Analyzer package comes with the
following items:
1 x Luft (PN 42000001)
1 x User Manual (PN 12000036)
1 x Calibration Certificate
Accessories:
1 x Y-connector with hole (PN 11000064)
1 x Bacteriological filter (PN 11000074)
1 x 22x15 mm Blue T Adapter (PN 11000159)
1 x 22x22 mm straight connector (PN 11000173)
1 x 22x15 mm straight connector (PN 11000060)
1 x 3 mm straight proximal connector (PN 11000057)
1 x 50 cm silicone hose (PN 11000087)
1 x O2 Galvanic Cell (PN 11000028)
1 x O2 Galvanic Cell Cable (PN 31000018)
1 x Transport Bag (PN 12000040)
1 x Power Cord*
Brazil (PN 11000015)
USA (PN 11000236)
Europe (PN 11000237)
* The customer chooses the power cord standard.
Notes: After unpacking the device, connect it to the power grid to
charge the internal battery.

7
CONCEITOS
Mechanical Ventilation is a method adopted to support patients with
respiratory failure, according to each clinical pathology present in this
individual. There are some basic concepts present in this method, which
need to be known by the technical professionals who will perform the
calibration procedure, as follows:
Calibration: a set of operations that establishes, under specied
conditions, the relationship between the values indicated by an instrument
and the corresponding values of the quantities specied by standards.
Adjustment: operation performed in a corrective manner designed to make
a measuring instrument behave as recommended by the manufacturer. It
is performed in three ways: automatic, semi-automatic, and manual.
Gas condition corrections: The volume of a gas varies depending
on its temperature, pressure, and water vapor content, although the
absolute value of the number of gas molecules remains constant. Thus,
it is necessary to carry out the correction for each type of test situation,
conguring between:
VCV: controlled volume, ventilation performed with volume control as
the main parameter. The terminology may change depending on the
manufacturer.
• ATPD - Ambient Temperature and Pressure, Dry (0% humidity)
• ATPS - Ambient Temperature and Pressure, Saturated (100% humidity)
• STPD - Standard Temperature 0 °C, Standard Pressure 760 mmHg, dry
(0 % humidity)
• BTPS - Body Temperature 37 °C, Ambient Pressure, Saturated (100% humidity)

8
PCV: controlled pressure, ventilation performed with pressure control as the
main parameter. The terminology may change depending on the manufacturer.
Current Flow: airow that passes through the ow sensor in the inspiratory
and expiratory phases, according to the assembly adopted.
Peak Flow: maximum ow value recorded at each cycle.
Frequency: is the frequency of mandatory inspirations.
I:E Ratio: is the ratio between Inspiration and Expiration during ventilation.
Inspiratory Time: time elapsed within a cycle to perform the inspiratory phase.
Expiratory Time: time elapsed within a cycle to complete the expiratory phase.
Current Volume: volume delivered to each airow passage.
Tidal Volume: volume delivered during the inspiratory and expiratory phases.
Minute Volume: the relation between tidal volume and frequency, resulting in
the total volume delivered each minute.
Current Pressure: pressure delivered in real-time.
Peak Pressure: maximum pressure value reached.
Peep Pressure: Pressure value remaining at the end of each ventilation cycle.
High Pressure: pressure of the medical gas networks to supply the fans.
Oxygen Concentration: value of the oxygen concentration present in the
tested system.
Environmental conditions:
Temperature: Indicates the temperature of the test site.
Humidity: Indicates the relative humidity of the air at the test site.
Barometric Pressure: Indicates the barometric pressure reading at
the test site.
Altitude: Indicates the altitude reading of the test site in relation to
barometric pressure.

9
Oxygen Cell: electrochemical cell responsible for reading the oxygen
concentration.
Note: The electrochemical oxygen cell must be compatible with a MAX-16
R114P70 type cell that has a voltage output of 9 to 16mV for a linear range
of 0 to 100% oxygen concentration.
(-) (+)
O 1.26 MAX
O 1.64 MAX
M16x1

10
UNDERSTANDING THE DEVICE
Next, the device will be shown with the identification of its connectors
and controls.
FRONT VIEW:
Touch Screen.
On/Off Button.
1
2

11
UPPER VIEW
1
4
Power cord with fuse holder.
Scalpel Input - Active
Internal charge connector
(default 200ohm).
Scalpel Input - Passive
External charge connector.
2
5
3

12
LEFT SIDE
RIGHT SIDE
1
1
Flow gateway.
Flow gateway.
1
Flow gateway.

13
BACK VIEW
1 Serial number identi cation tag.

14
TURNING ON THE DEVICE
Press the “on/off” button to turn on the device.
The device will perform internal communication tests and will display
a screen with the Arkmeds logo and will show the following screen:
On the main screen, we will have the following access options:
• Charts Tab
• Measures Tab
• Settings tab
• Freeze Screen
• Battery Charge Level
• Turn off the System
SCREEN

15
The charts tab displays the graphical reading of Flow, Volume, and
Low Pressure.
The chart shown on the screen can be configured by checking or
unchecking the desired option in the lower right corner of the screen:
Flow, Volume, or Pressure. Selecting the screen will auto-adjust the
scales, zooming in on each curve.
“Charts” Tab

16
The measures tab displays the numerical reading of the following parameters:
On this screen, it is possible to perform the numerical reading of the
following parameters:
“Measures” Tab

17
To change the desired unit of each measurement, click on the unit, and
the change between the available options will be made, as indicated
in the previous table.
On this screen, you can change the volume correction between the
ATPS, ATPS, BTPS, and STPD options, cycling on the option on the
side of the Volume and Flow field and selecting the type of gas used
during the test (Air or O2), on the side of the Flow Field.
Parâmetros Unidades Faixa Precisão
Flow L/min, ml/min, L/s, ml/s -200 slpm to +- 1.5%
Tidal Volume mL, L 0 to 100L +- 2%
Minute Volume L*rpm 0 to 1200Lpm +- 2%
Low Pressure cmH2O, kPa, cmHg 0 to 1000 +- 2.5%
High Pressure kPa, PSI, bar 0 to 700 kPa +- 2.5%
Atmospheric
Pressure kPa 50 to 110 kPa +- 0.1kPa
Peep cmH2O, kPa, cmHg 0 to 1000 1%
Frequency rpm 1 to 150 rpm +- 1%
I:E Ratio s 1:200 to 200:1 1%
Oxygen % 0 to 100% +- 3%
Altitude m 0 to 9000m +- 5%
Temperature ºC -40 to 80ºC +- 1 ºC
Humidity % 0 to 100% +- 6%

18
The settings tab presents the analyzer settings options, O2 cell calibration,
connectivity, and language.
It’s possible to adjust the trigger by selecting the settings tab andclicking on
the Measurements option. This adjustment can be made in two ways:
- Manual - Automatic
To enable the automatic trigger mode, just uncheck the box next to Manual
Trigger. With the “Manual Trigger” option checked, the screen to congure
between ow trigger and pressure is enabled.
In addition, a Trigger Delay adjustment can be made, which helps in the
number of ow samples to be analyzed for the manual trigger. The lower the
value, the more samples the analyzer will consider, improving performance,
especially at lower ows.
“Settings” Tab

19
Understanding the Trigger
The trigger indicates the start and endpoints of each inspiration and expiration
to the analyzer software. It is possible to integrate the ow curve to obtain the
volume reading and other parameters from this point.
Trigger adjustment can be made by ow and pressure, always observing the
dynamics for each of them.
Flow Trigger
When choosing the ow adjustment, connect the analyzer to the test circuit,
turn on the device, start mechanical ventilation, select the graphics screen,
and observe the ow curve and any noise from the connections at the end of
each cycle. Check the maximum oscillation value of these noises and adjust
the ow trigger to 1.5 to 2 lpm above the value found in the settings screen
and apply.
Example: If the noise found between cycles is 3 lpm, set the trigger at 4.5
to 5 lpm.
Pressure Trigger
If you use the pressure trigger, the analysis will be in relation to the Peep
value. If the Peep is changed during the device validation, follow the
change by adding 1 to 1.5 cmH2O.
Exemple: If a Peep of 5 cmH2O is set on the ventilator and the reading
on the analyzer is of the same value, adjust the trigger pressure to 6 to
6.5 cmH2O. Changing the Peep to 10 cmH2O, set the trigger to 11 to
11.5 cmH2O.

20
Pressure Sensors
On the Settings tab, the High- and Low-Pressure sensors zero-set can be
adjusted before taking measurements. To perform this procedure, just leave
the desired line open to the environment and click on the Set Zero option.
Moving Average
Luft has an option to congure the use of a moving average. The system
will perform some measurements according to the selected quantity and
present the average of these values after the elapsed time. To perform this
procedure, enable the Use Moving Average option and adjust the number
of measurements considered for the average.
Save Settings
After concluding all the settings, they can be saved. To do that, select the
Save Settings option. The next time the device starts up, the saved settings
will be kept on the screen.
In the connectivity subtab, the user can connect the device to a Wi-Fi
network, allowing remote access to the device under failure analysis
conditions and for updates.
Language
In the upper right corner, the user can change the language.
This manual suits for next models
1
Table of contents
Other arkmeds Measuring Instrument manuals